Good afternoon,
Do you have a set of gauges to check the high and low side to check the pressures?
https://www.2carpros.com/articles/car-air-conditioner-not-working-or-is-weak
Also, yes, there is an actuator for the dash vents.
https://www.2carpros.com/articles/low-or-no-air-flow-from-vents
Roy
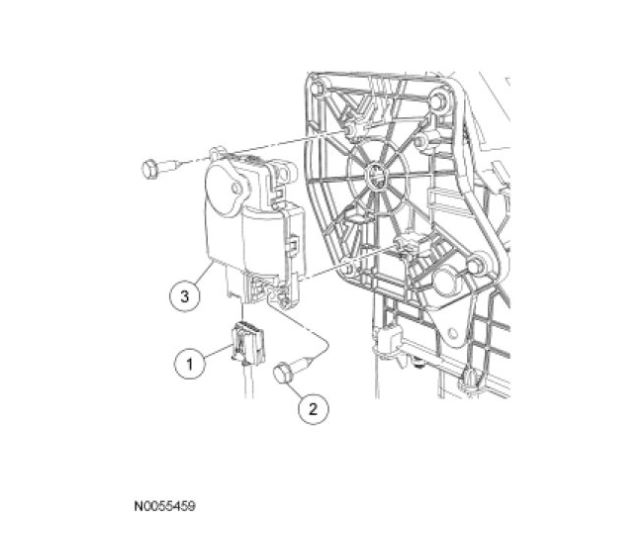
Removal and Installation
NOTE: The defrost/panel/floor mode door actuator can be accessed from underneath the LH side of the instrument panel.
1. Disconnect the defrost/panel/floor door mode door actuator electrical connector.
2. Remove the 2 defrost/panel/floor door mode door actuator screws.
3. Remove the defrost/panel/floor door mode door actuator.
4. NOTICE: The ignition key must be off when replacing the actuator. Energizing the actuator before installation will cause the part to become positioned incorrectly and proper orientation will be lost. Incorrect actuator operation will result.
To install, reverse the removal procedure.
5. NOTE: The purpose of the module actuator position calibration is to allow the HVAC module to reinitialize and calibrate the actuator stop points. To carry out calibration, carry out the following steps.
Remove Smart Junction Box (SJB) fuse 15 for at least one minute.
6. NOTE: When the ignition switch is switched to the ON position, the HVAC module will initialize and calibrate the actuators. Calibration of the actuators will take approximately 30 seconds.
Reinstall SJB fuse 15. Turn the ignition switch to the ON position and wait 30 seconds before verifying correct mode door actuator operation.
Image (Click to make bigger)
Monday, July 1st, 2019 AT 1:25 PM