Here is a guide to help you step by step with instructions in the diagrams below to show you how on your car.
https://www.2carpros.com/articles/how-to-replace-an-electric-fuel-pump
1. DISCONNECT BATTERY NEGATIVE TERMINAL
2. REMOVE REAR SEAT CUSHION ASSEMBLY
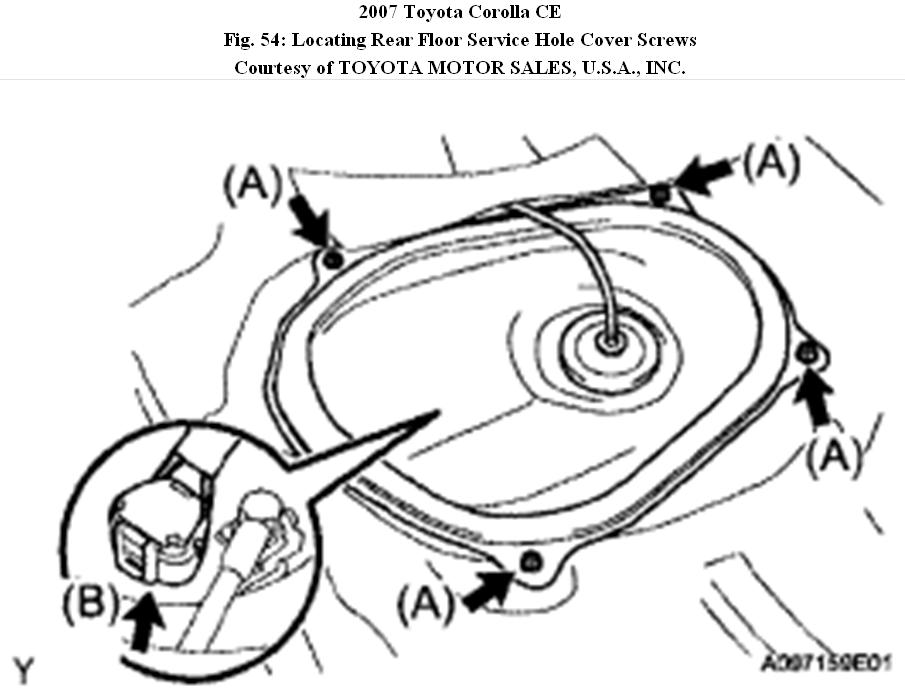
3. REMOVE REAR FLOOR SERVICE HOLE COVER
a) Remove the 4 screws, then remove the rear floor service hole cover (A).
b) Disconnect the fuel pump connector (B).
Fig. 54: Locating Rear Floor Service Hole Cover Screws
c) Discharge the fuel system pressure (C).
1. Connect the battery negative terminal.
Torque: 5.4 N*m (55 kgf*cm, 48 in.*lbf)
2. Start the engine.
3. Turn the ignition switch off after the engine stops.
HINT: DTC P0171 (system to lean) may be present.
4. Crank the engine again, and check that the engine does not start.
5. Remove the fuel tank cap, and discharge the pressure remaining in the fuel tank completely.
6. Disconnect the battery negative terminal.
4. REMOVE FUEL SUCTION WITH PUMP AND GAUGE TUBE ASSEMBLY
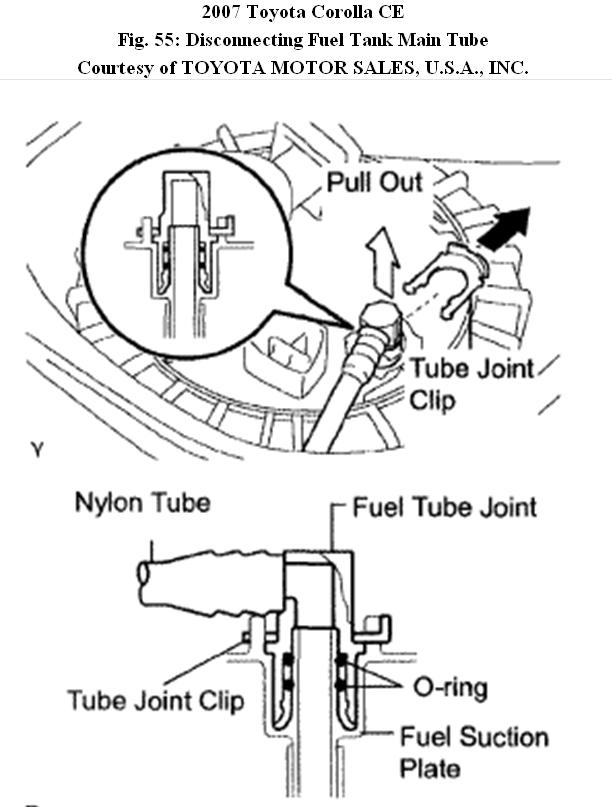
a. Disconnect the fuel tank main tube.
1. Remove the tube joint clip, then pull the fuel tube joint out of the plug of the fuel suction plate.
NOTE:
� Check that there is no dirt or other foreign objects around the fuel tube joint before disconnecting it. Clean the joint if necessary.
� It is necessary to prevent mud or dirt from entering the joint. If mud or dirt gets in the joint, the O-rings may not seal properly.
� Only disconnect the joint by hand.
� Do not bend, kink or twist the nylon tubes.
� Protect the joint by covering it with a plastic
bag.
Fig. 55: Disconnecting Fuel Tank Main Tube
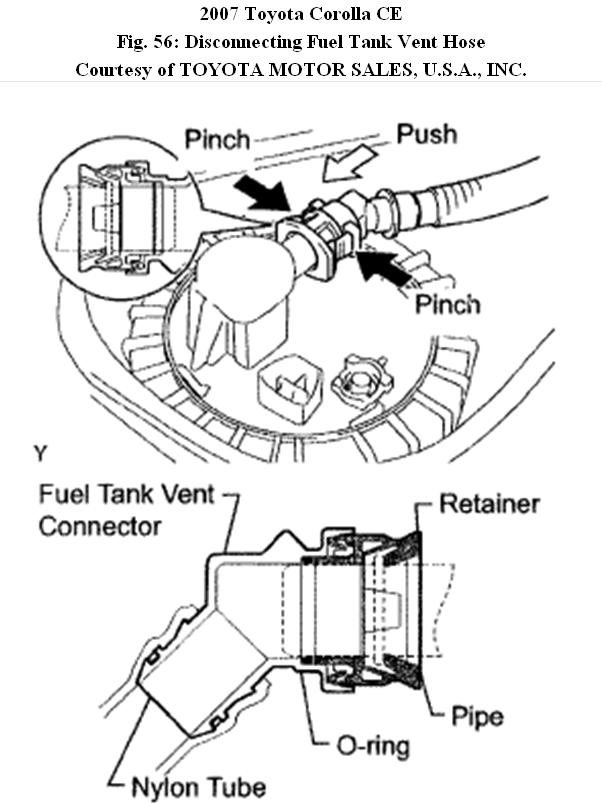
b. Disconnect the fuel tank vent hose.
1. Pinch the retainer and pull the fuel tank vent connector out of the fuel tank to disconnect the fuel tank vent hose from the fuel suction plate.
NOTE:
� Check that there is no dirt or other foreign objects around the connector before disconnecting it. Clean the connector if necessary.
� It is necessary to prevent mud or dirt from entering the connector. If mud or dirt gets in the connector, the O-rings may not seal properly.
� Only disconnect the quick connector by hand.
� Do not bend, kink or twist the nylon tubes.
� Protect the connector by covering it with a plastic bag.
� If the pipe and connector are stuck, carefully try wiggling or pushing and pulling on the connector to release it. Pull the connector off the pipe carefully.
Fig. 56: Disconnecting Fuel Tank Vent Hose
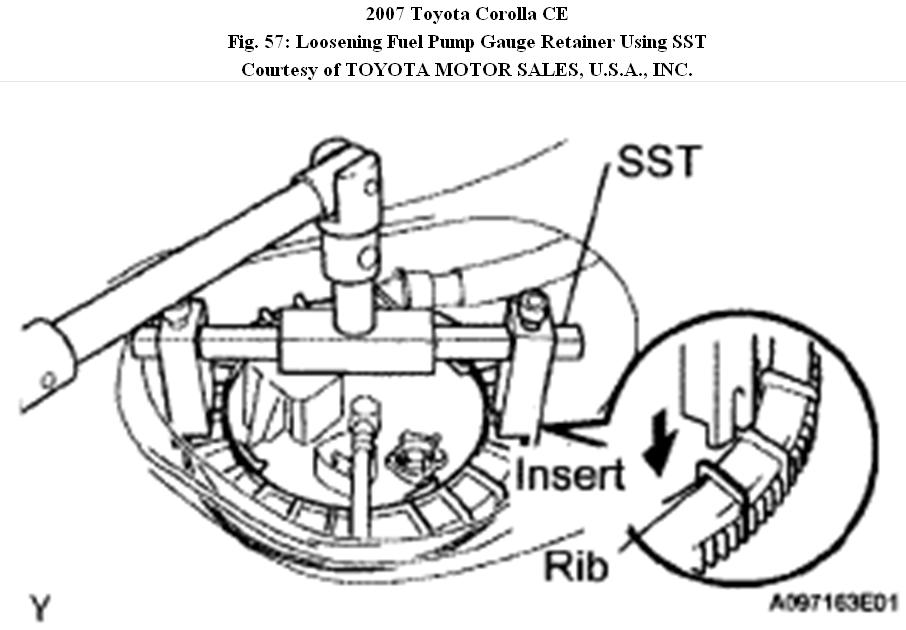
c. Using SST, loosen the fuel pump gauge retainer.
SST 09808-14020 (09808-01410, 09808-01420, 09808-01430)
NOTE:
Using SST. Do not use any other tools such as a screwdriver.
HINT: Insert the notch of SST into the rib of the fuel pump gauge retainer.
Fig. 57: Loosening Fuel Pump Gauge Retainer Using SST
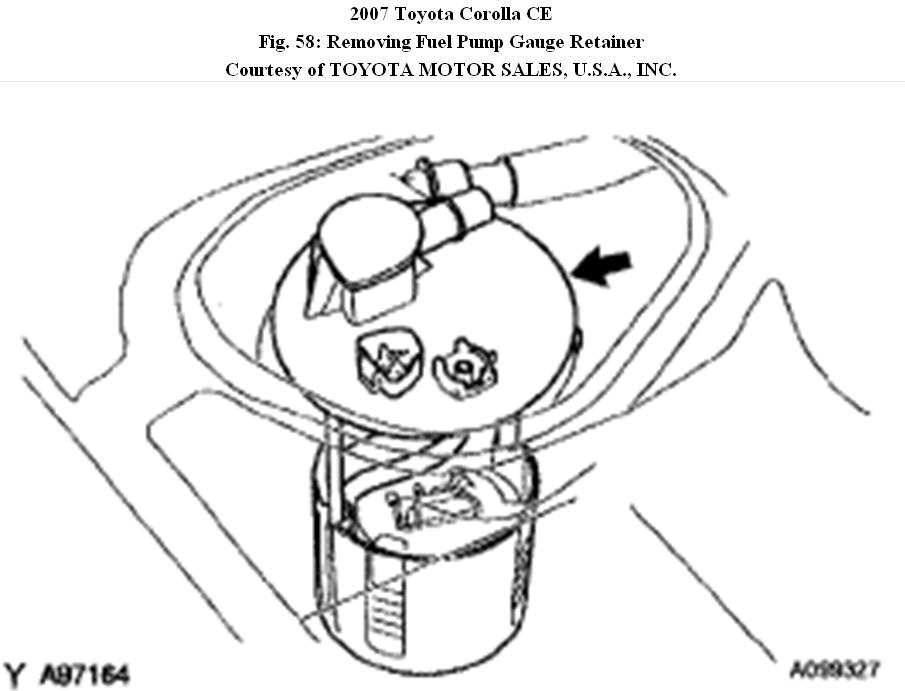
d. Remove the fuel pump gauge retainer while holding the fuel suction tube by hand.
e. Remove the fuel suction tube from the fuel tank.
NOTE: Make sure that the fuel sender gauge arm does not bend.
Fig. 58: Removing Fuel Pump Gauge Retainer
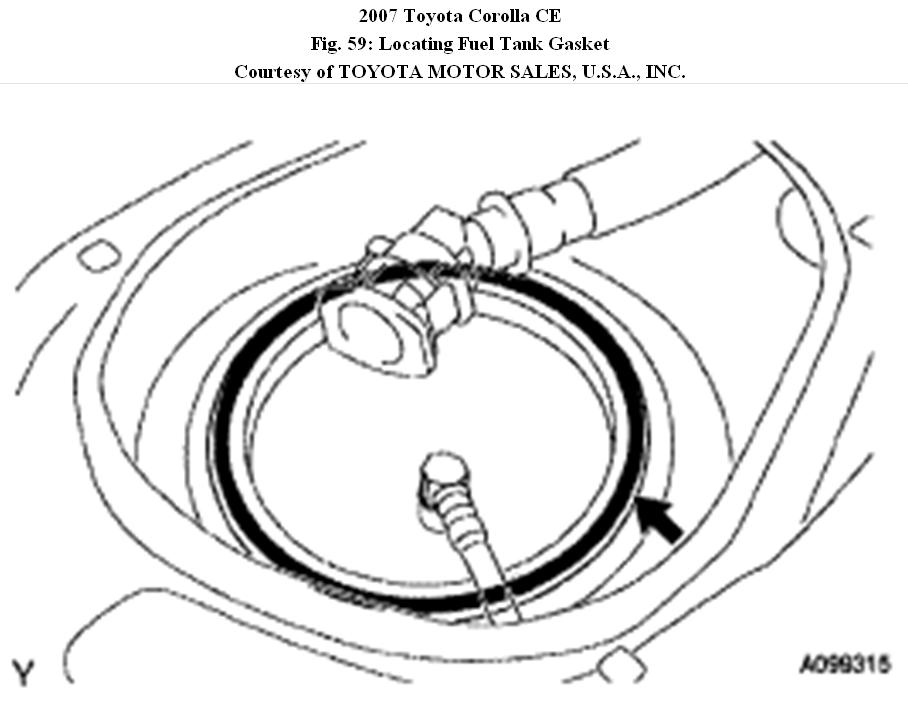
f. Remove the gasket from the fuel tank.
Fig. 59: Locating Fuel Tank Gasket
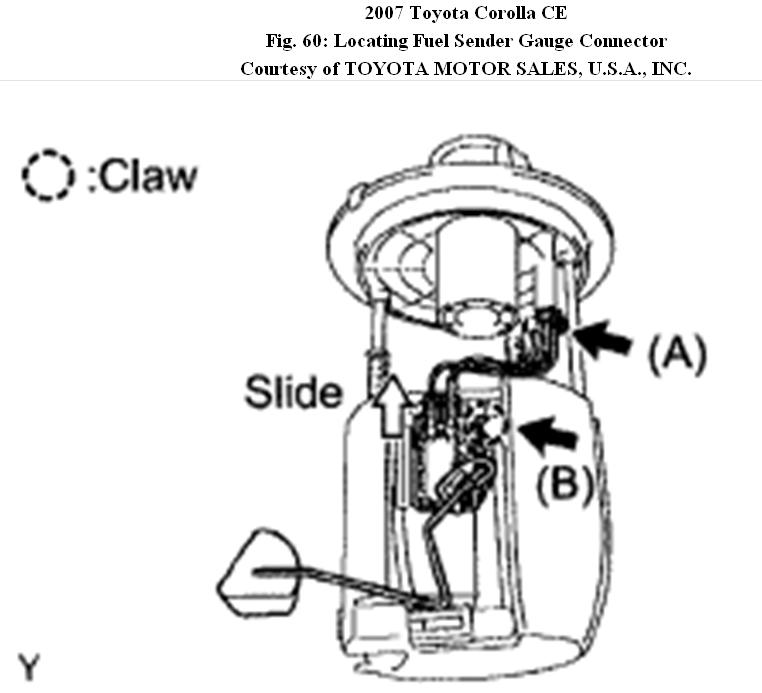
5. REMOVE FUEL SENDER GAUGE ASSEMBLY
a. Disconnect the fuel sender gauge connector (A).
b. Release the claw. Then slide the fuel sender gauge to remove it from the fuel filter (B).
Fig. 60: Locating Fuel Sender Gauge Connector
6. REMOVE FUEL SUCTION PLATE SUB-ASSEMBLY
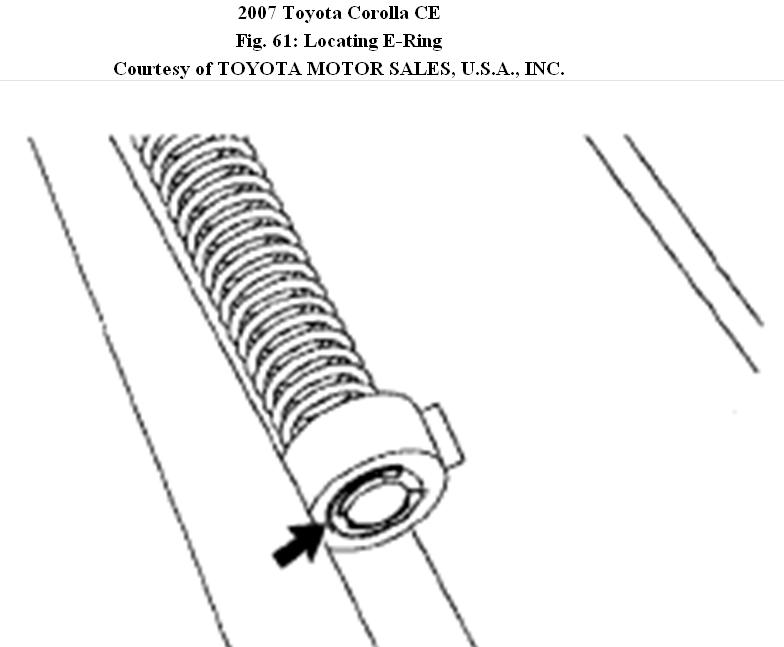
a. Remove the E-ring.
Fig. 61: Locating E-Ring
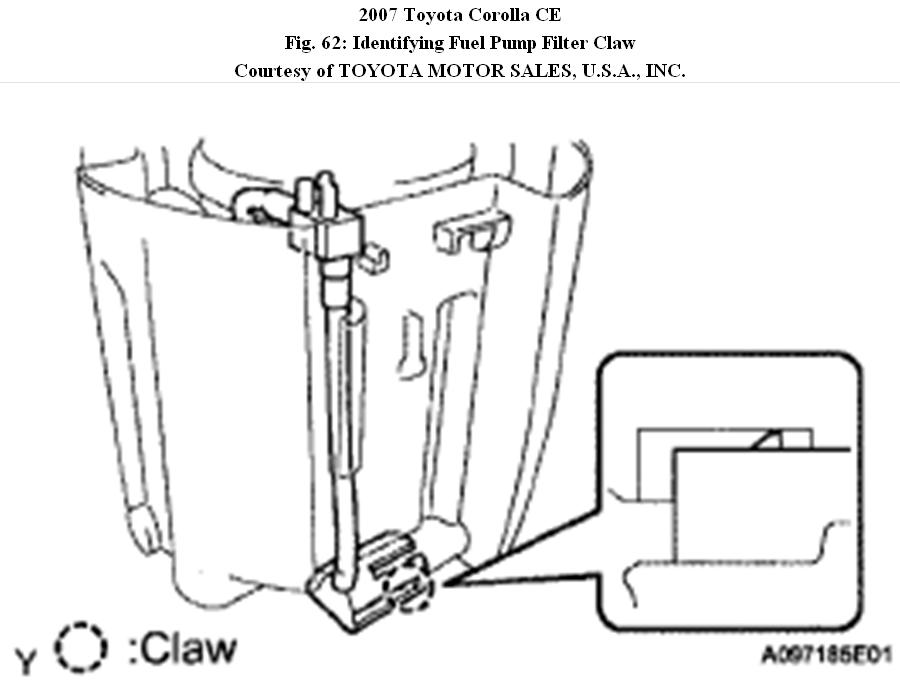
b. Release the claw, then remove the fuel pump filter.
Fig. 62: Identifying Fuel Pump Filter Claw
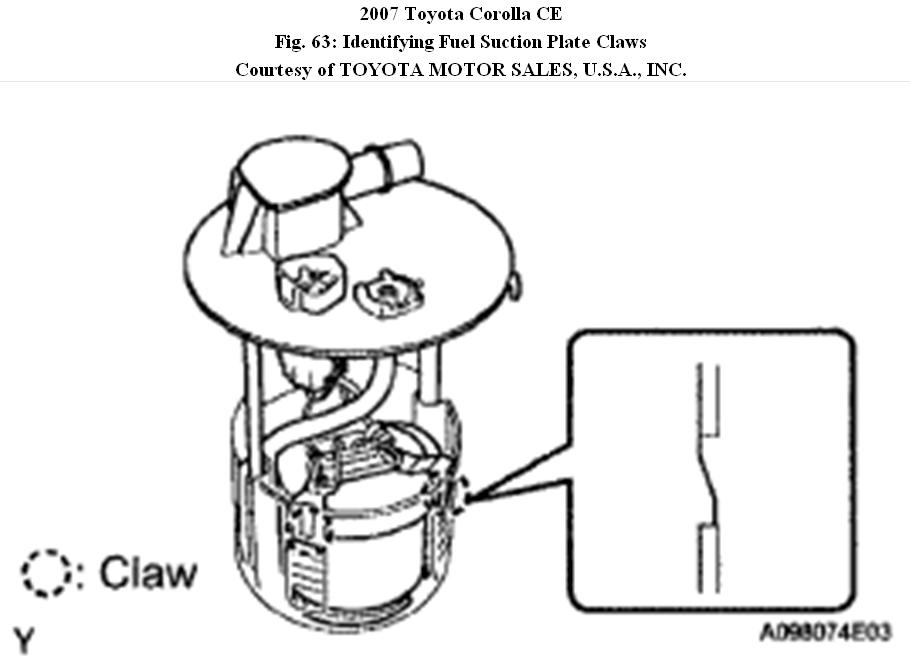
c. Release the 2 claws, then remove the fuel suction plate and spring.
Fig. 63: Identifying Fuel Suction Plate Claws
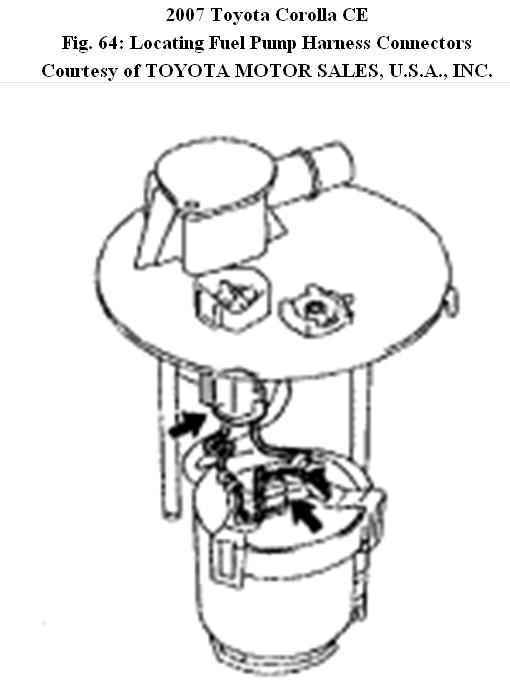
7. REMOVE FUEL PUMP HARNESS
a. Disconnect the 2 fuel pump harness connectors.
Fig. 64: Locating Fuel Pump Harness Connectors
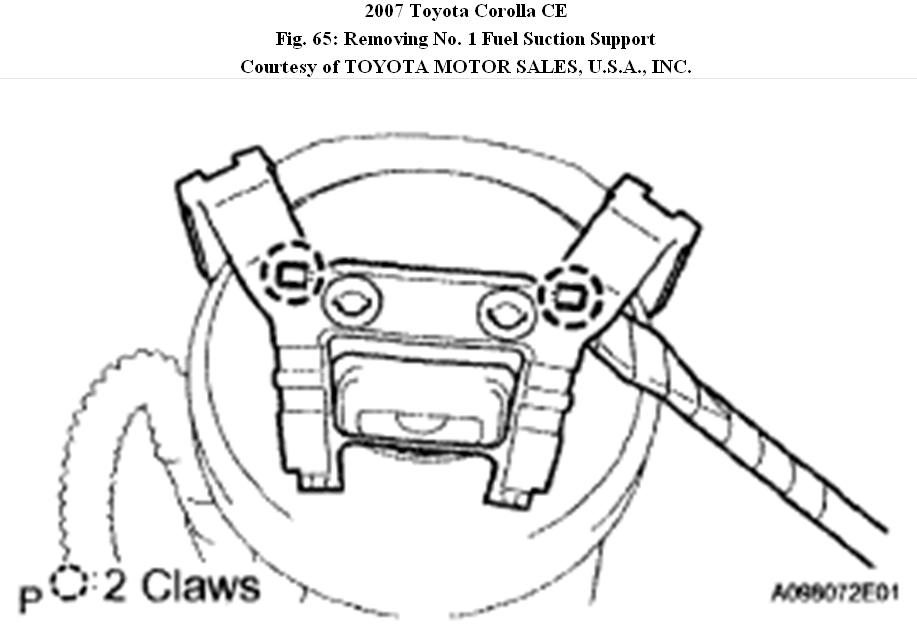
8. REMOVE NO. 1 FUEL SUCTION SUPPORT
a. Using a screwdriver with its tip wrapped with tape, release the 2 claws. Then remove the No. 1 fuel suction support.
Fig. 65: Removing No. 1 Fuel Suction Support
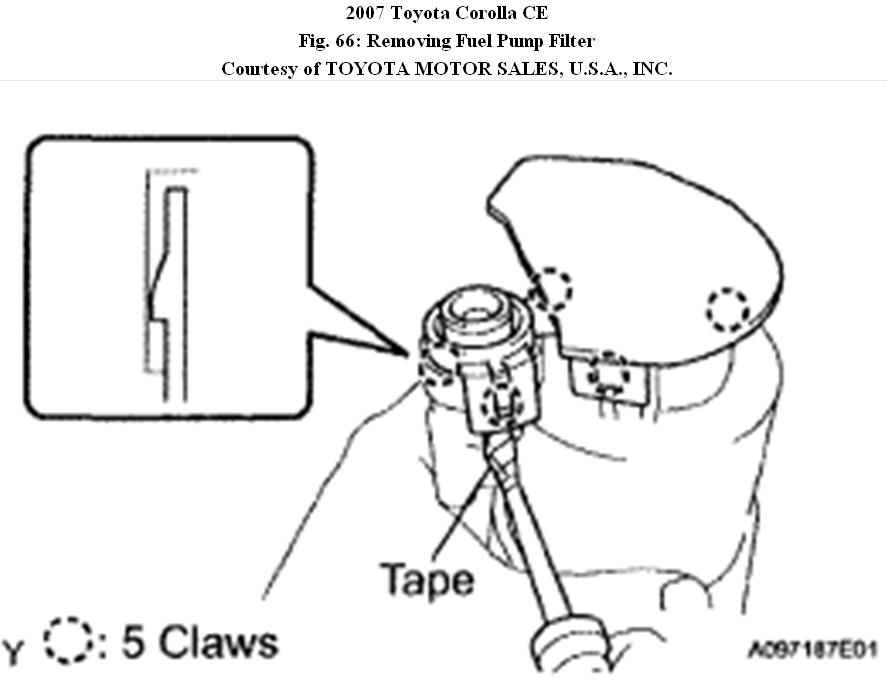
9. REMOVE FUEL PUMP FILTER
a. Using a screwdriver with its tip wrapped with tape, release the 5 claws. Then remove the fuel pump filter.
NOTE: Do not damage the fuel pump filter or fuel filter.
Fig. 66: Removing Fuel Pump Filter
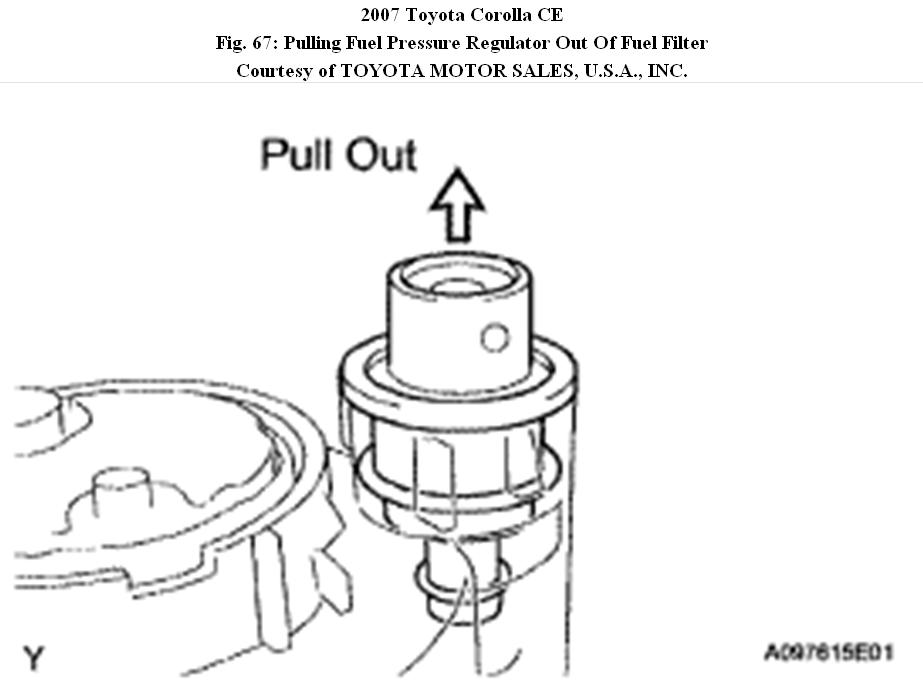
10. REMOVE FUEL PRESSURE REGULATOR ASSEMBLY
a. Pull the fuel pressure regulator out of the fuel filter.
Fig. 67: Pulling Fuel Pressure Regulator Out Of Fuel Filter
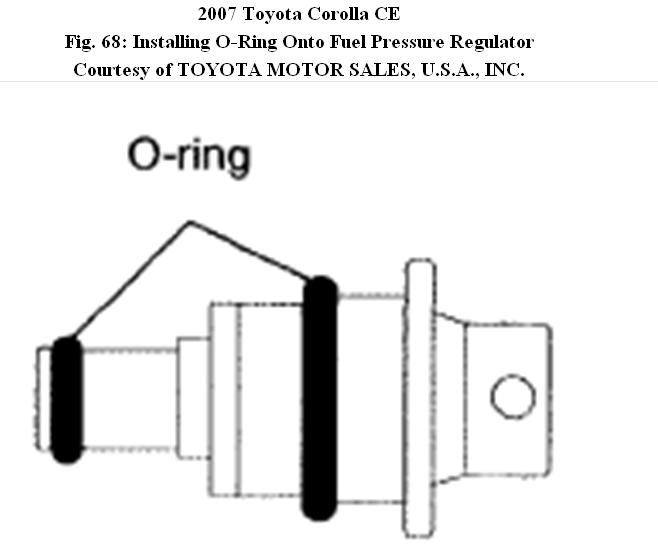
b. Remove the 2 O-rings from the fuel pressure regulator.
Fig. 68: Installing O-Ring Onto Fuel Pressure Regulator
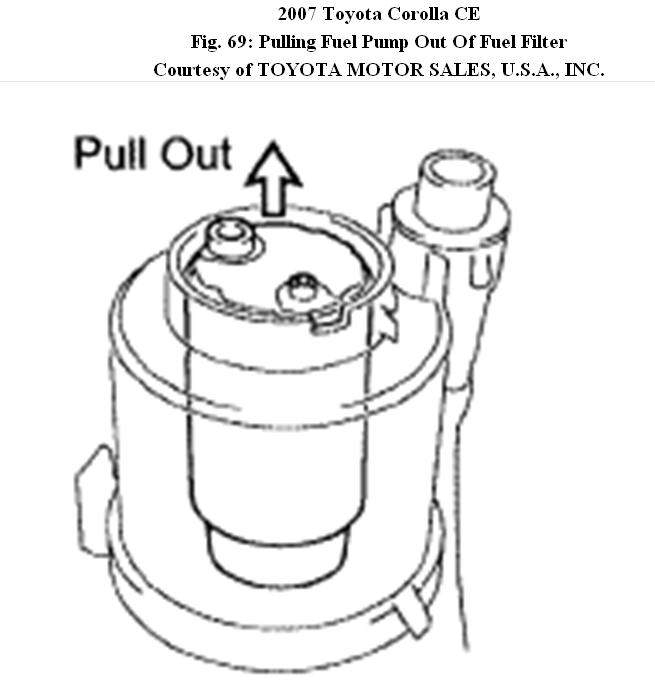
11. REMOVE FUEL PUMP
a. Pull the fuel pump out of the fuel filter.
Fig. 69: Pulling Fuel Pump Out Of Fuel Filter
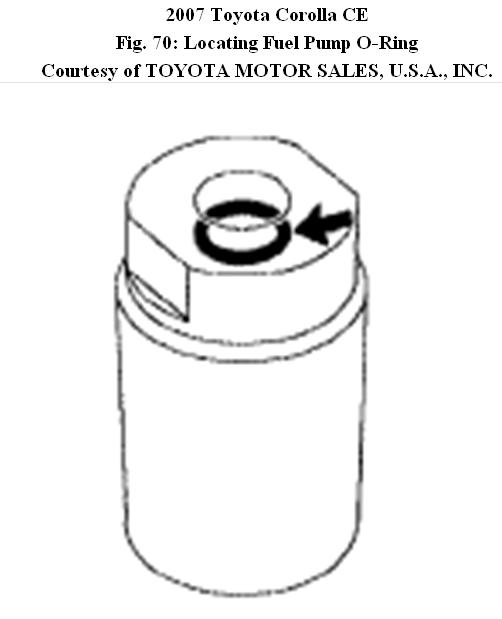
b. Remove the O-ring from the fuel pump.
Fig. 70: Locating Fuel Pump O-Ring
Installation is bty reversal of removal.
Check out the diagrams (Below). Please let us know if you need anything else to get the problem fixed.
Images (Click to make bigger)
Thursday, December 9th, 2010 AT 1:52 PM