It is beyond the scope of the basic DIY guy and I would rate it as 6 out of 10.
Removal
1. Disconnect negative battery cable.
2. Remove the air duct.
3. Remove the air cleaner and air flow hose assembly.
4. Disconnect the backup light switch connector.
5. Disconnect the clutch tube and clip.
6. Remove the release lever.
A. Loosen the release lever nut and washer.
B. Remove the clevis pin and snap ring from the release cylinder.
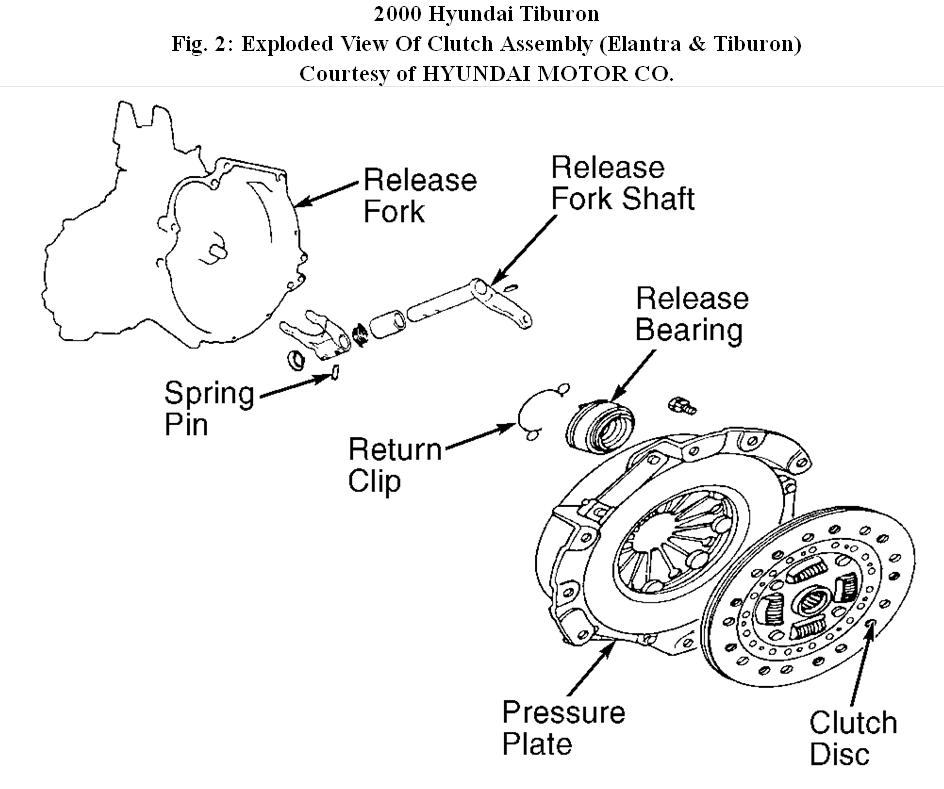
C. Remove the release lever. It is impossible to remove the transaxle assembly without doing this step because the clutch cover, release bearing and release fork are combined.
7. Loosen the bolts attached to the release cylinder and remove the release cylinder.
8. Remove the speedometer cable.
9. Remove the select cable and shift cable.
10. Remove the starter motor mounting bolts. Remove the transaxle assembly upper connecting bolts.
11. Attach an engine hoist to the engine hooks.
12. Remove the transaxle mounting bracket and insulator.
13. Lift up the vehicle.
14. Remove the front tire.
15. Remove the under cover.
16. Remove the drain plug and drain the transaxle gear oil.
17. Disconnect the tie rod end, lower arm ball joint and drive shaft.
18. Remove the center member.
19. Remove the transaxle stay.
20. Remove the transaxle rear mounting bracket.
21. Remove the bell housing cover. When supporting the transaxle assembly, make sure that the lifting force is applied to a wide area, not to a small localized area.
22. Remove the transaxle assembly lower mounting bolts with the transaxle assembly supported by a jack.
23. Remove the transaxle assembly.
24. In the state that the clutch cover is attached to the flywheel remove the release bearing using snap ring pliers.
A. Rotate the release bearing in the easy direction in order to examine the snap ring.
B. Insert the tool under the wave washer and locate in the center of snap ring.
C. Widen the space of snap ring by pushing the bearing.
D. In the snap ring-widen state pull out the release bearing and remove it.
25. Insert the special tool (09411-11000) in the clutch disc to prevent the disc from falling.
26. Loosen the bolts which attach the clutch cover to the flywheel in a star pattern. Loosen the bolts in succession, one or two turns at a time, to avoid bending the cover flange. Do not clean the clutch disc or release bearing with cleaning solvent.
27. Remove the release fork shaft and bushing.
Thursday, May 12th, 2011 AT 9:12 PM