Here are the procedures.
Removal
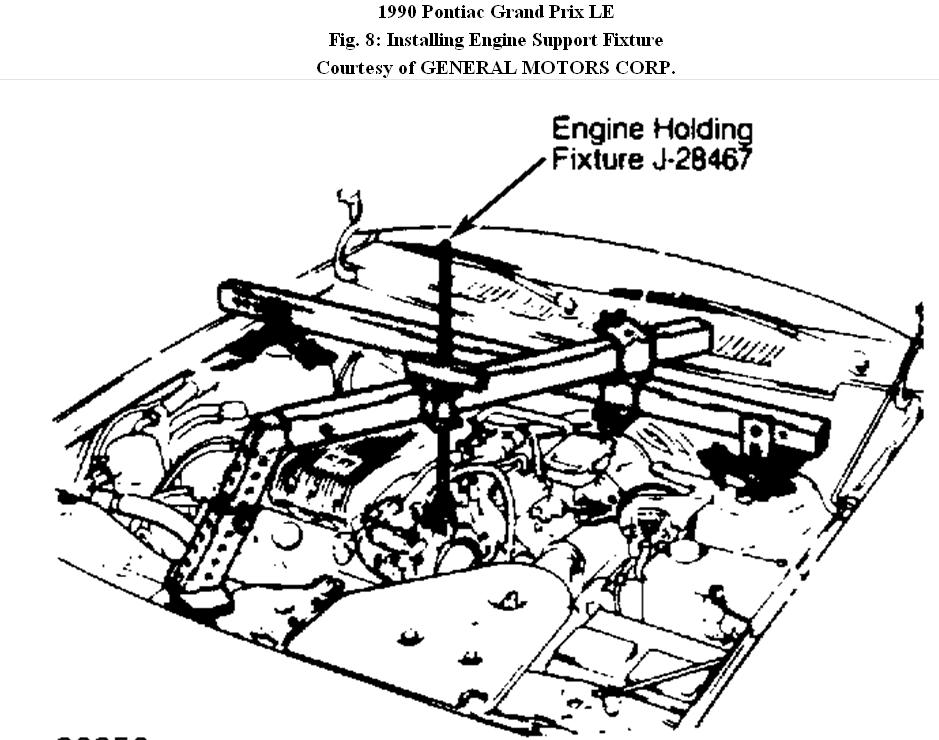
1. Disconnect negative battery cable. Install Engine Holding Fixture (J-28467-A) and Support (J-36462). See Fig. 8 . Remove air cleaner housing and intake tube. Remove slave cylinder from transaxle.
2. Disconnect electrical connector at speedometer signal assembly. Remove nut and retaining clamp securing shift cables-to-transaxle. Remove nuts from shift cable ball studs and transaxle levers.
3. Disconnect exhaust crossover pipe at left exhaust manifold. Remove EGR tube from crossover pipe. Remove crossover-to-exhaust pipe bolts. Loosen crossover-to-right exhaust manifold clamp.
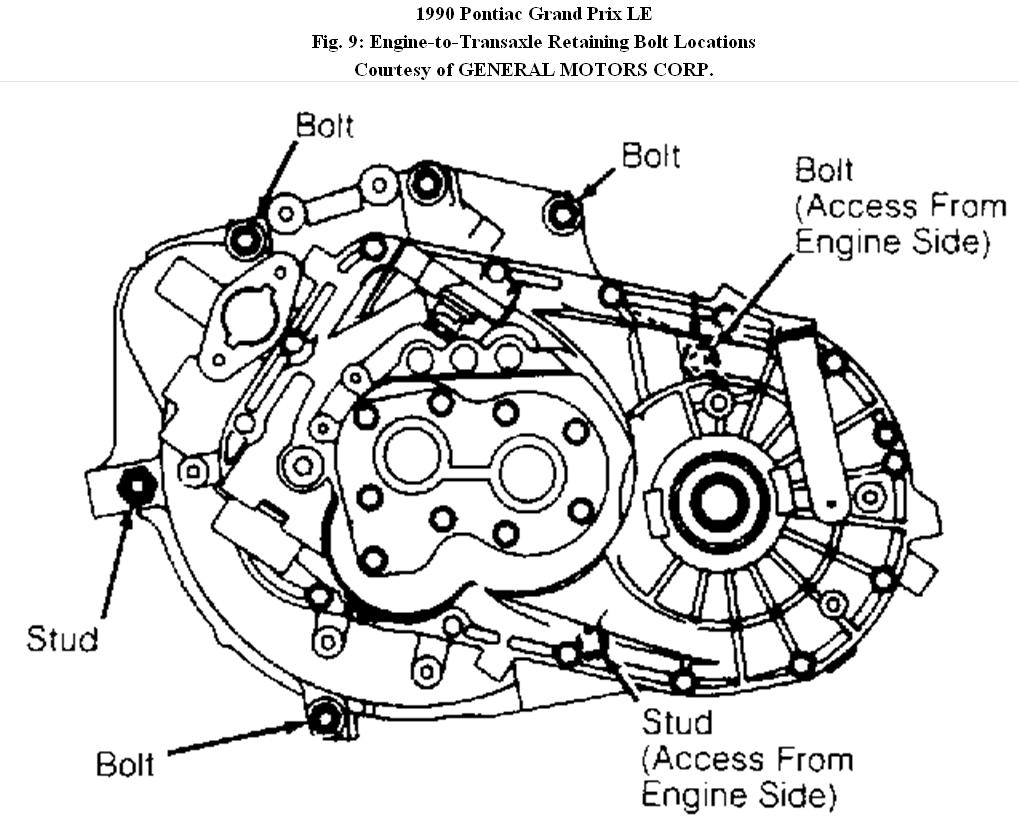
4. Swing crossover pipe upward to gain clearance for top transaxle bolts. Remove upper transaxle mounting bolts and upper transaxle mounting studs. See Fig. 9 . Leave one lower engine-to-transaxle mounting stud and one lower engine-to-transaxle mounting bolt
attached.
5. Disconnect connection at back-up light switch. Raise vehicle. Drain transaxle. Remove 4 clutch housing cover retaining screws. Remove front wheel and tire assemblies. Remove right and left wheelwell splash shields.
6. Remove power steering cooler lines from frame. Remove power steering rack and pinion heat shield. Remove power steering rack and pinion from frame. Remove right and left ball joints at steering knuckle.
7. Remove transaxle mount upper retaining bolts. Remove engine mount lower retaining nuts. Remove frame retaining bolts. Remove crossmember from body frame. Remove right and left drive axles from transaxle and support to vehicle body.
8. Remove starter assembly and support to body. Securely attach transaxle case to transmission jack. Remove remaining engine-to-transaxle mounting bolt and stud. Remove transaxle assembly.
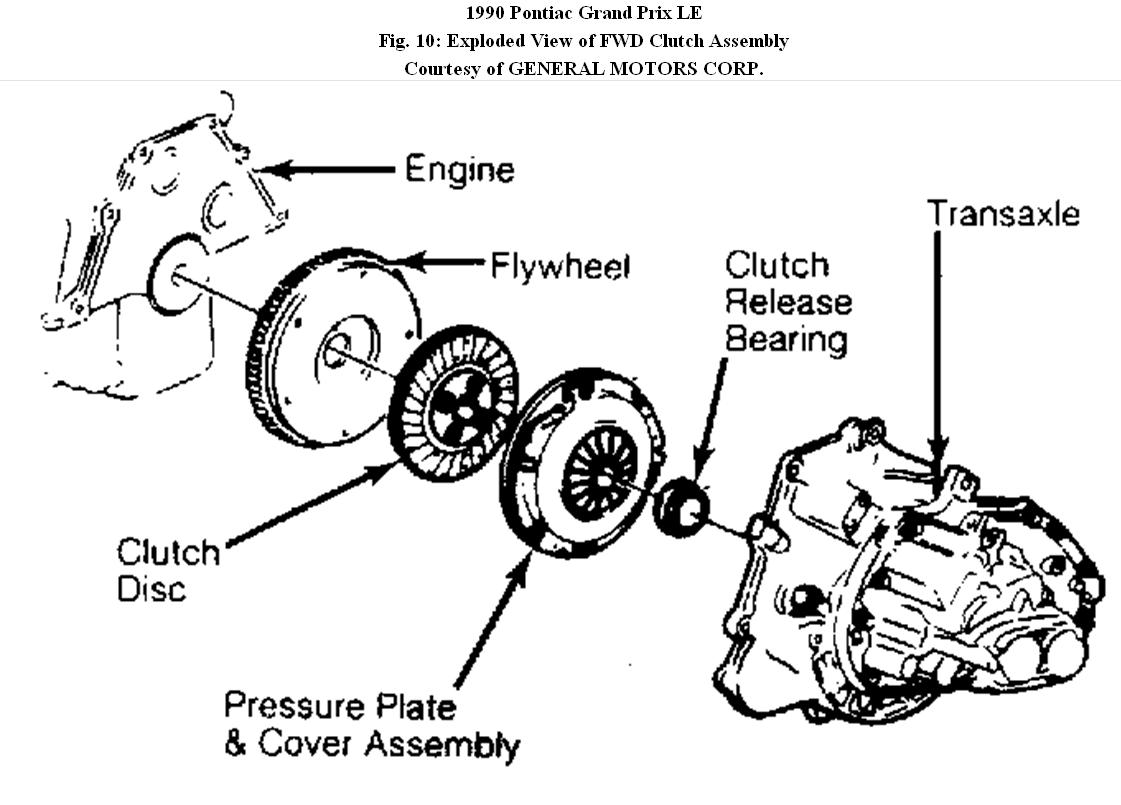
9. Index mark pressure plate to flywheel for reassembly reference. Using a crisscross sequence. Loosen attaching bolts one turn at a time until pressure plate spring tension is relieved. Remove clutch disc and pressure plate. See Fig. 10 .
© 2008 Mitchell Repair Information Co., LLC.
Images (Click to enlarge)
Nov 19, 2010 at 12:42 PM