Welcome to 2CarPros.
Based on your description, it sounds like either the fuel gauge sender is bad or when they reinstalled the fuel pump, something got wedged.
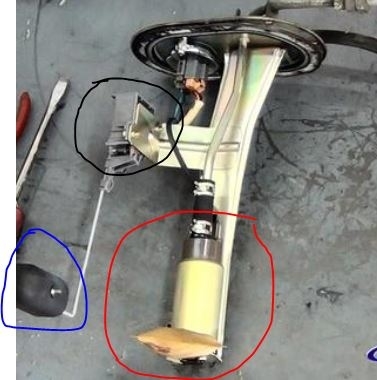
First, take a look at picture 1. I circled three things. In blue is the float that rides on the fuel level in the tank, the black circle shows what is called a rheostat. That is what determines how much power to send to the gauge. They can go bad. And in red, is a pump. Now, if they only replaced the pump and not the entire assembly, the sending unit wasn't touched which leads me to think it is stuck and not moving off 1/4 tank.
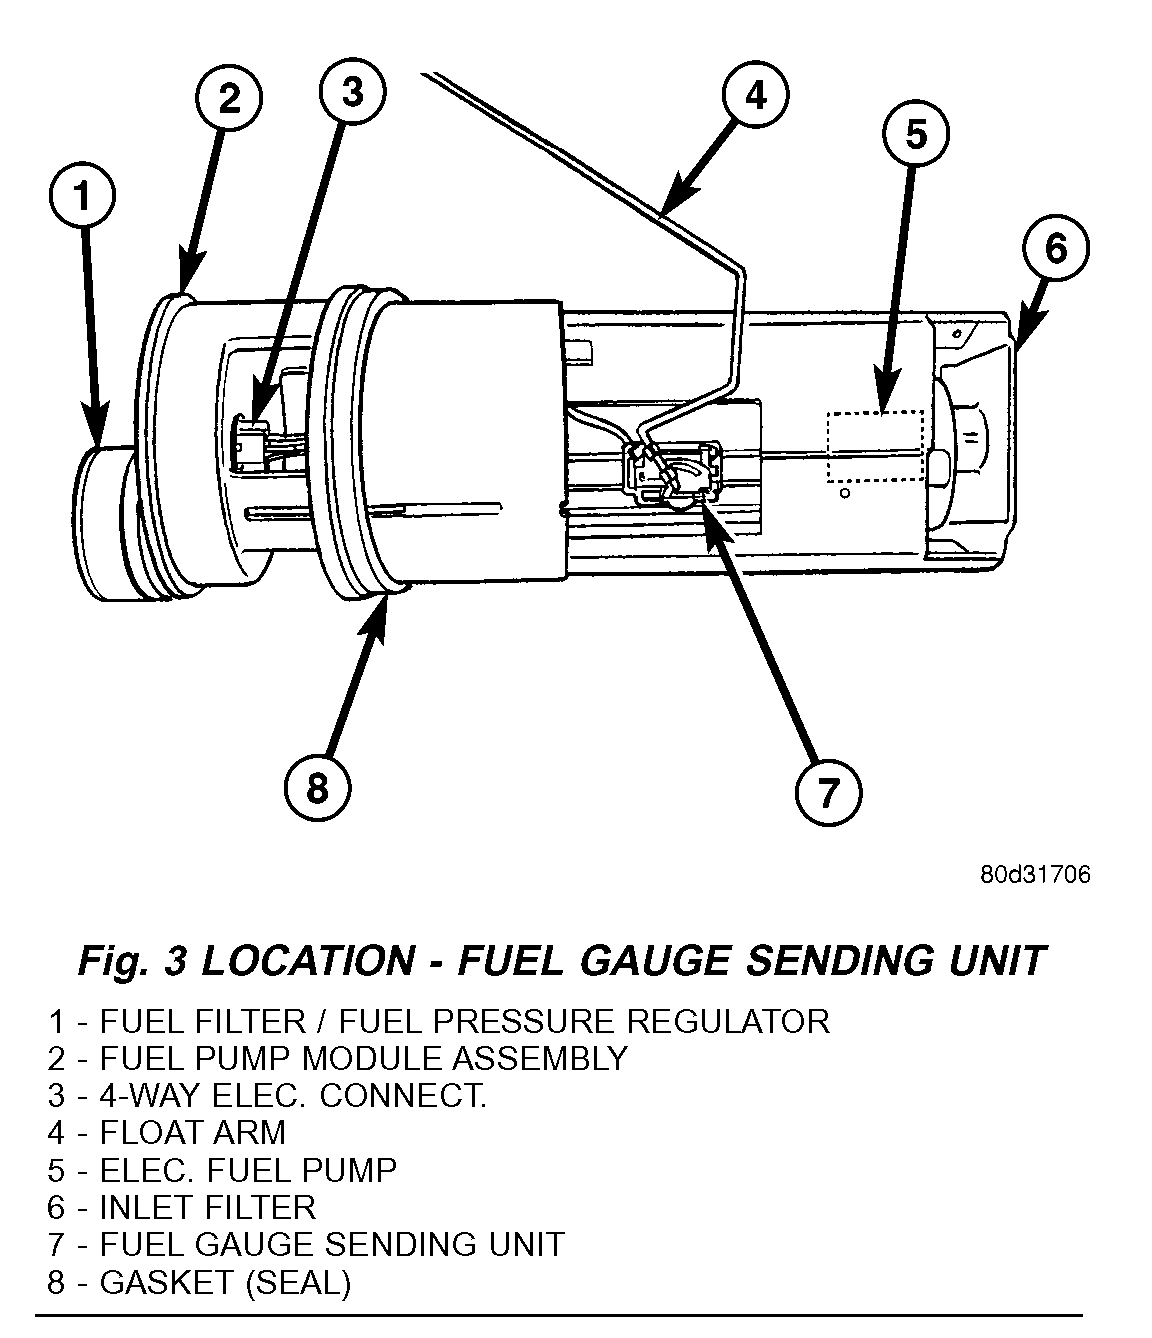
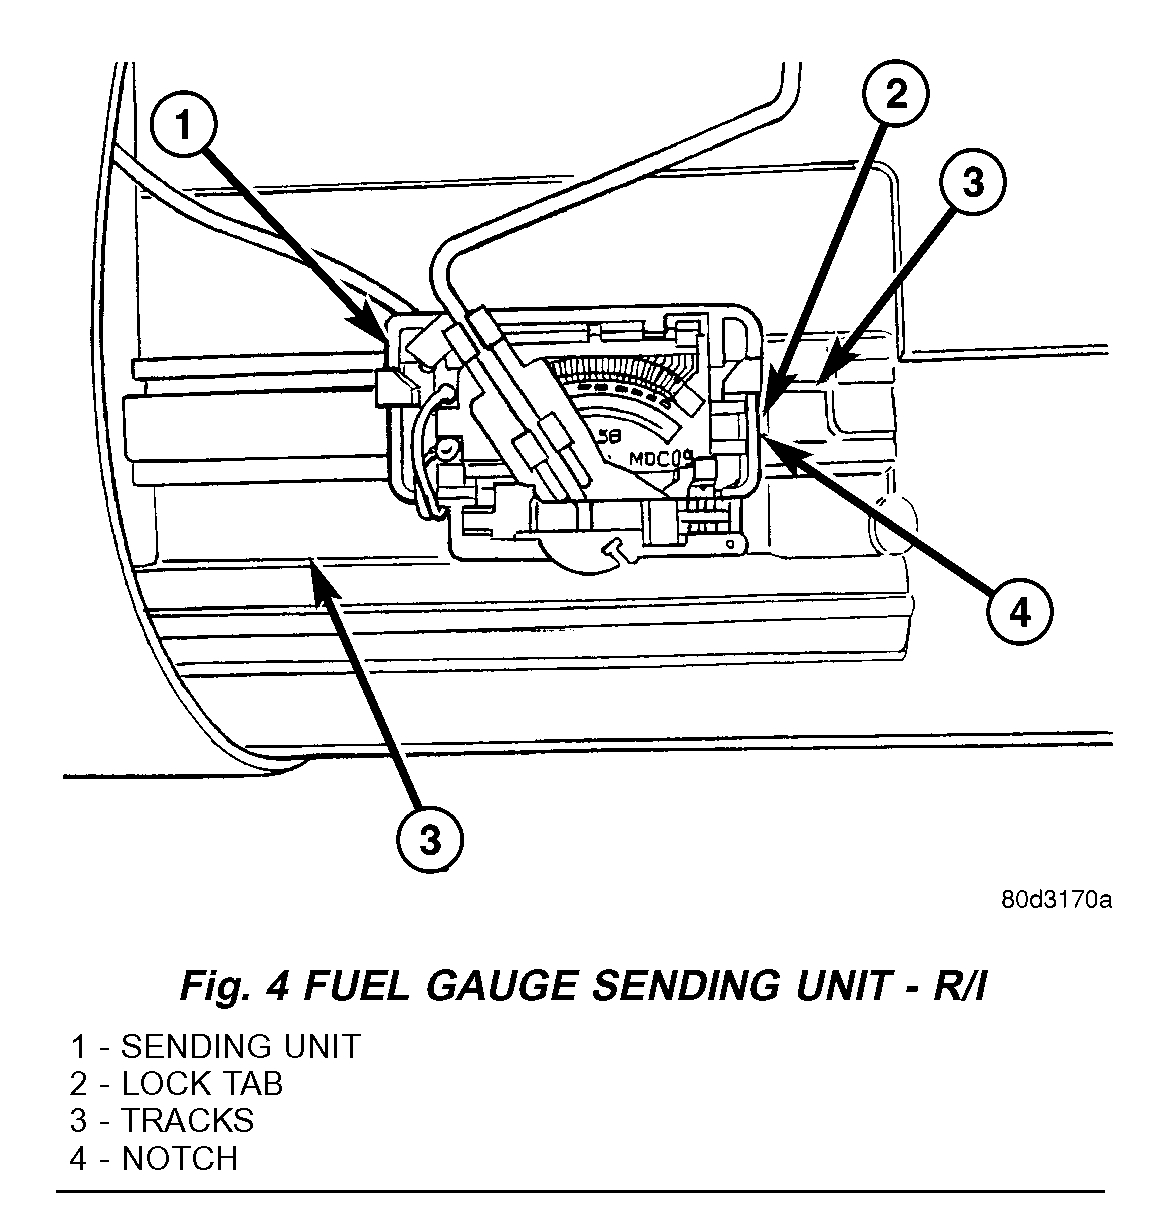
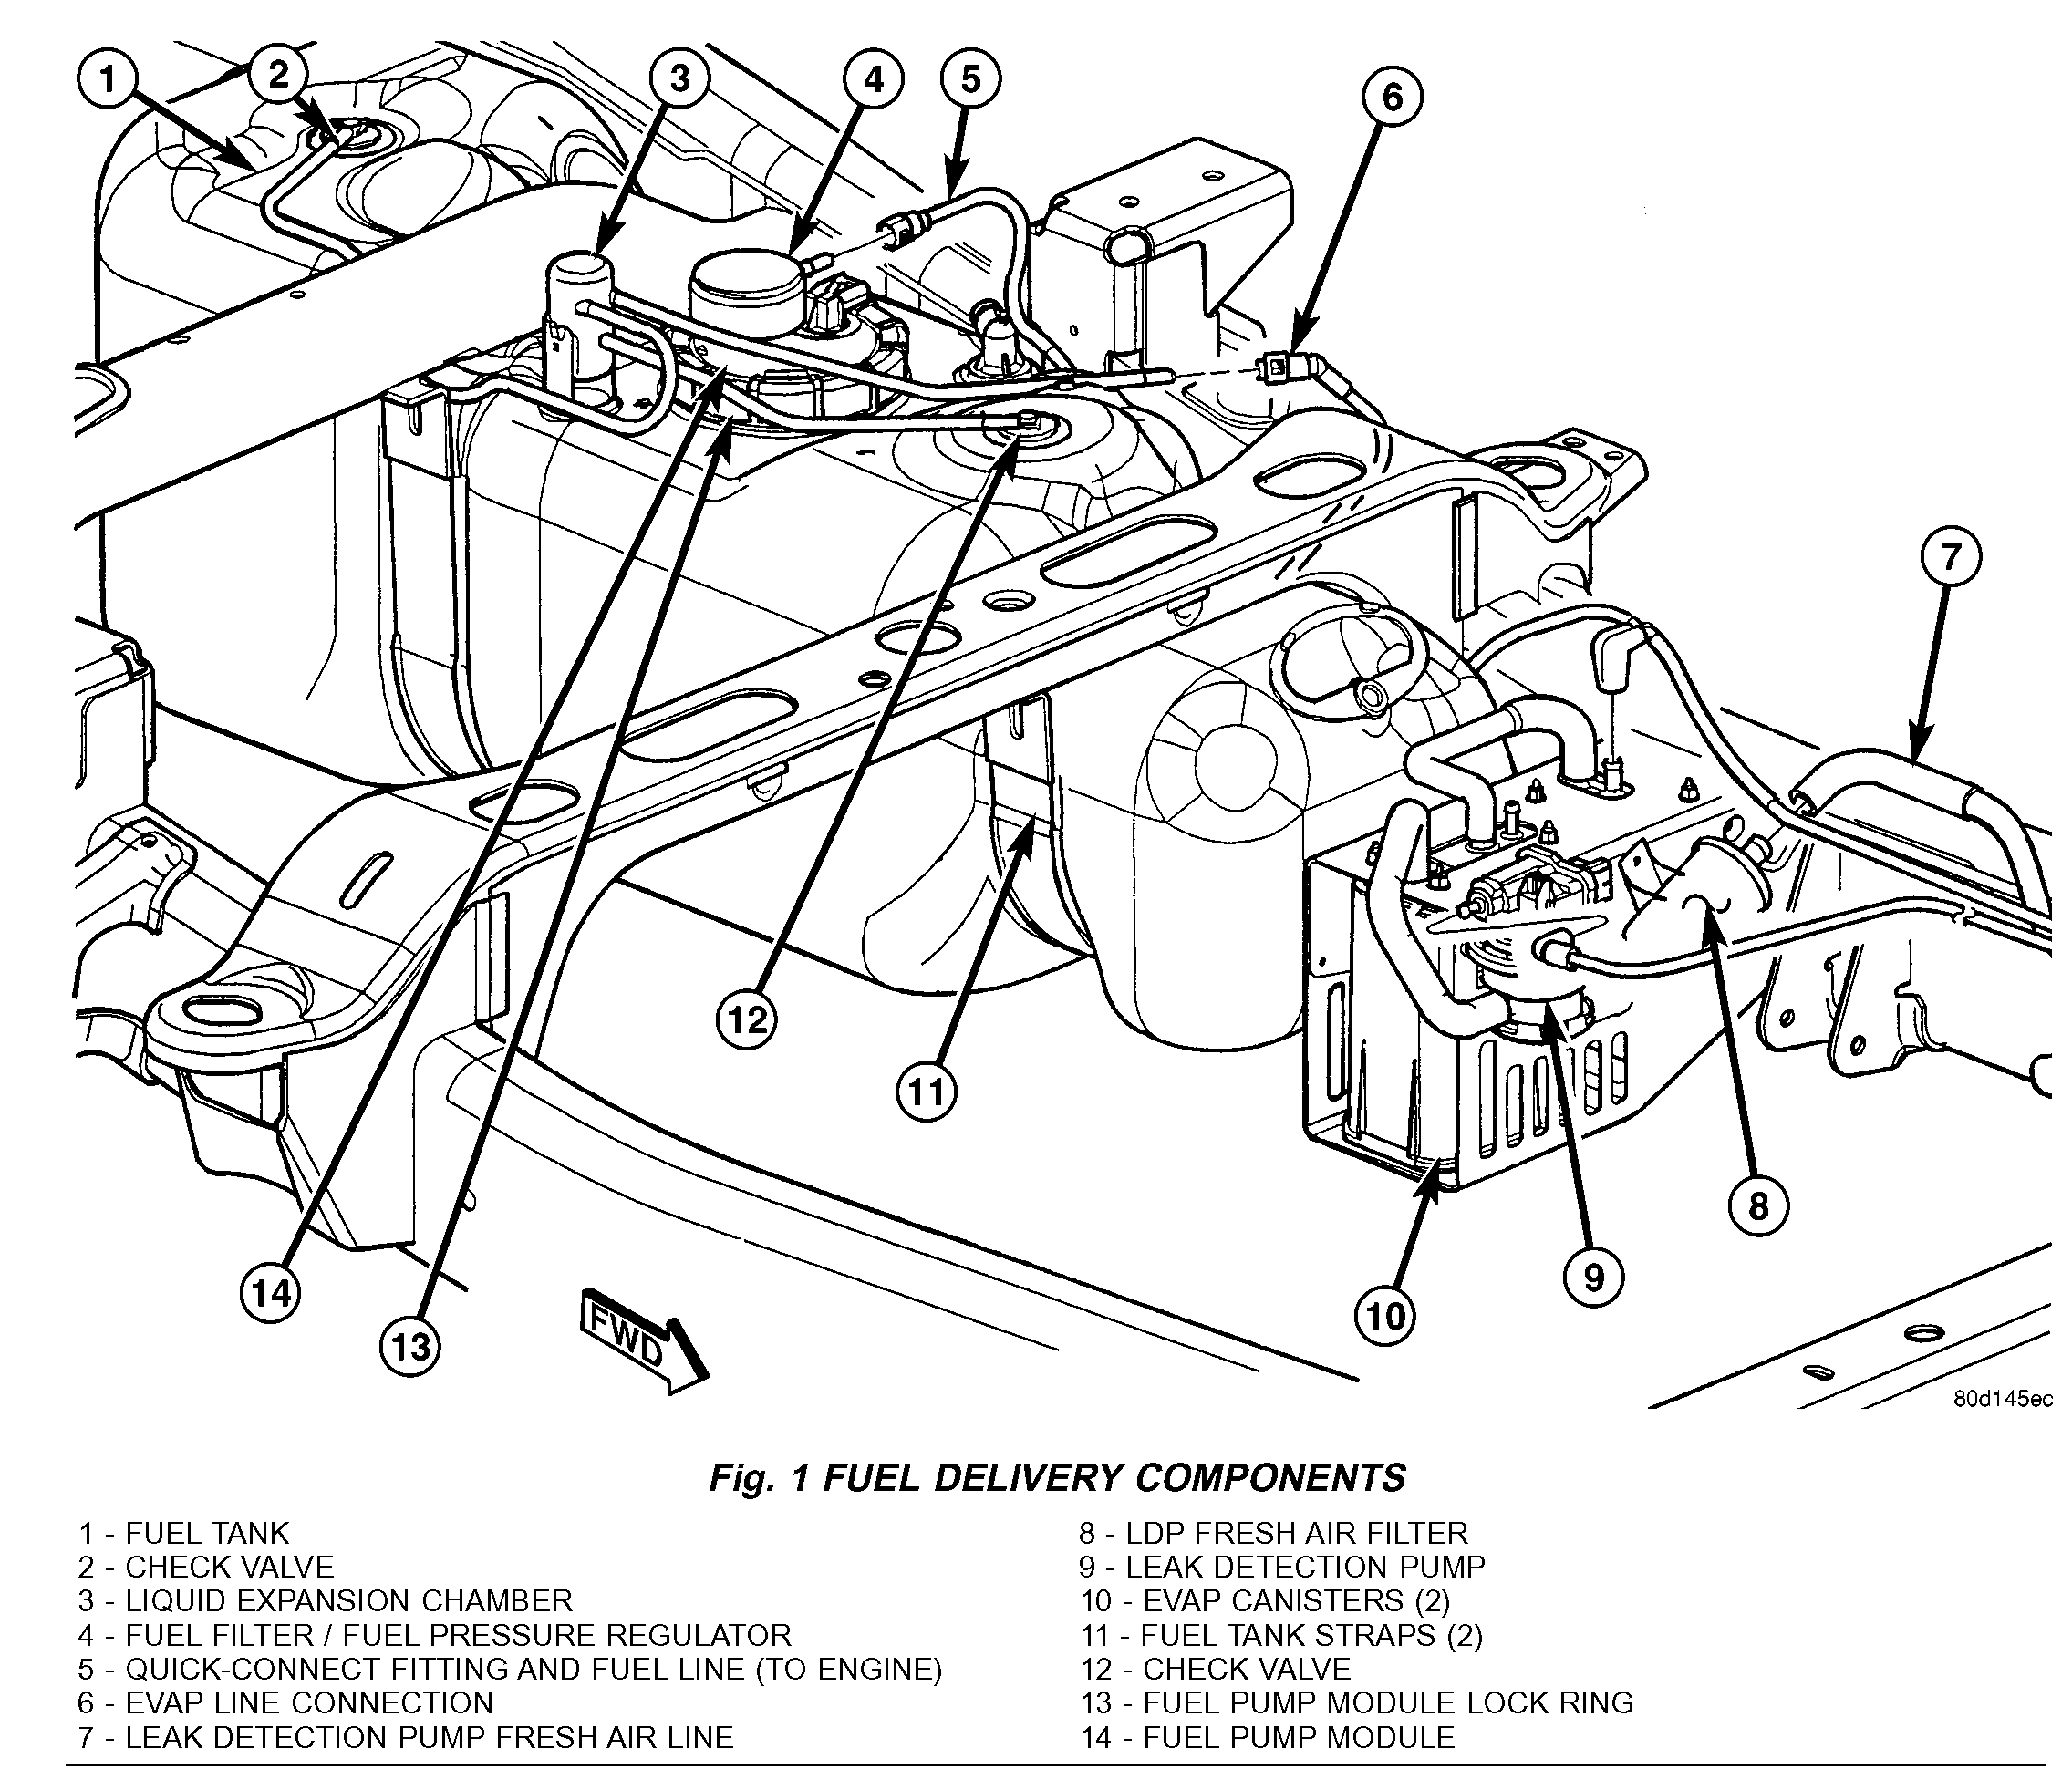
If you look at pictures 2 and 3, they show all the components and identifies them. These pics are specific to your vehicle.
Now, here is a link that explains in general how to replace a fuel pump. Take a look through it.
https://www.2carpros.com/articles/how-to-replace-an-electric-fuel-pump
Now for the bad news, if I am correct and it is stuck, the only way to check is to remove the fuel tank and then the fuel pump to inspect it. Regardless, I feel the tank should be removed so you can inspect the wiring.
_________________________________________
First, I will give you the directions for removing the fuel tank.
FUEL TANK REMOVAL AND INSTALLATION
Fuel Tank - REMOVAL
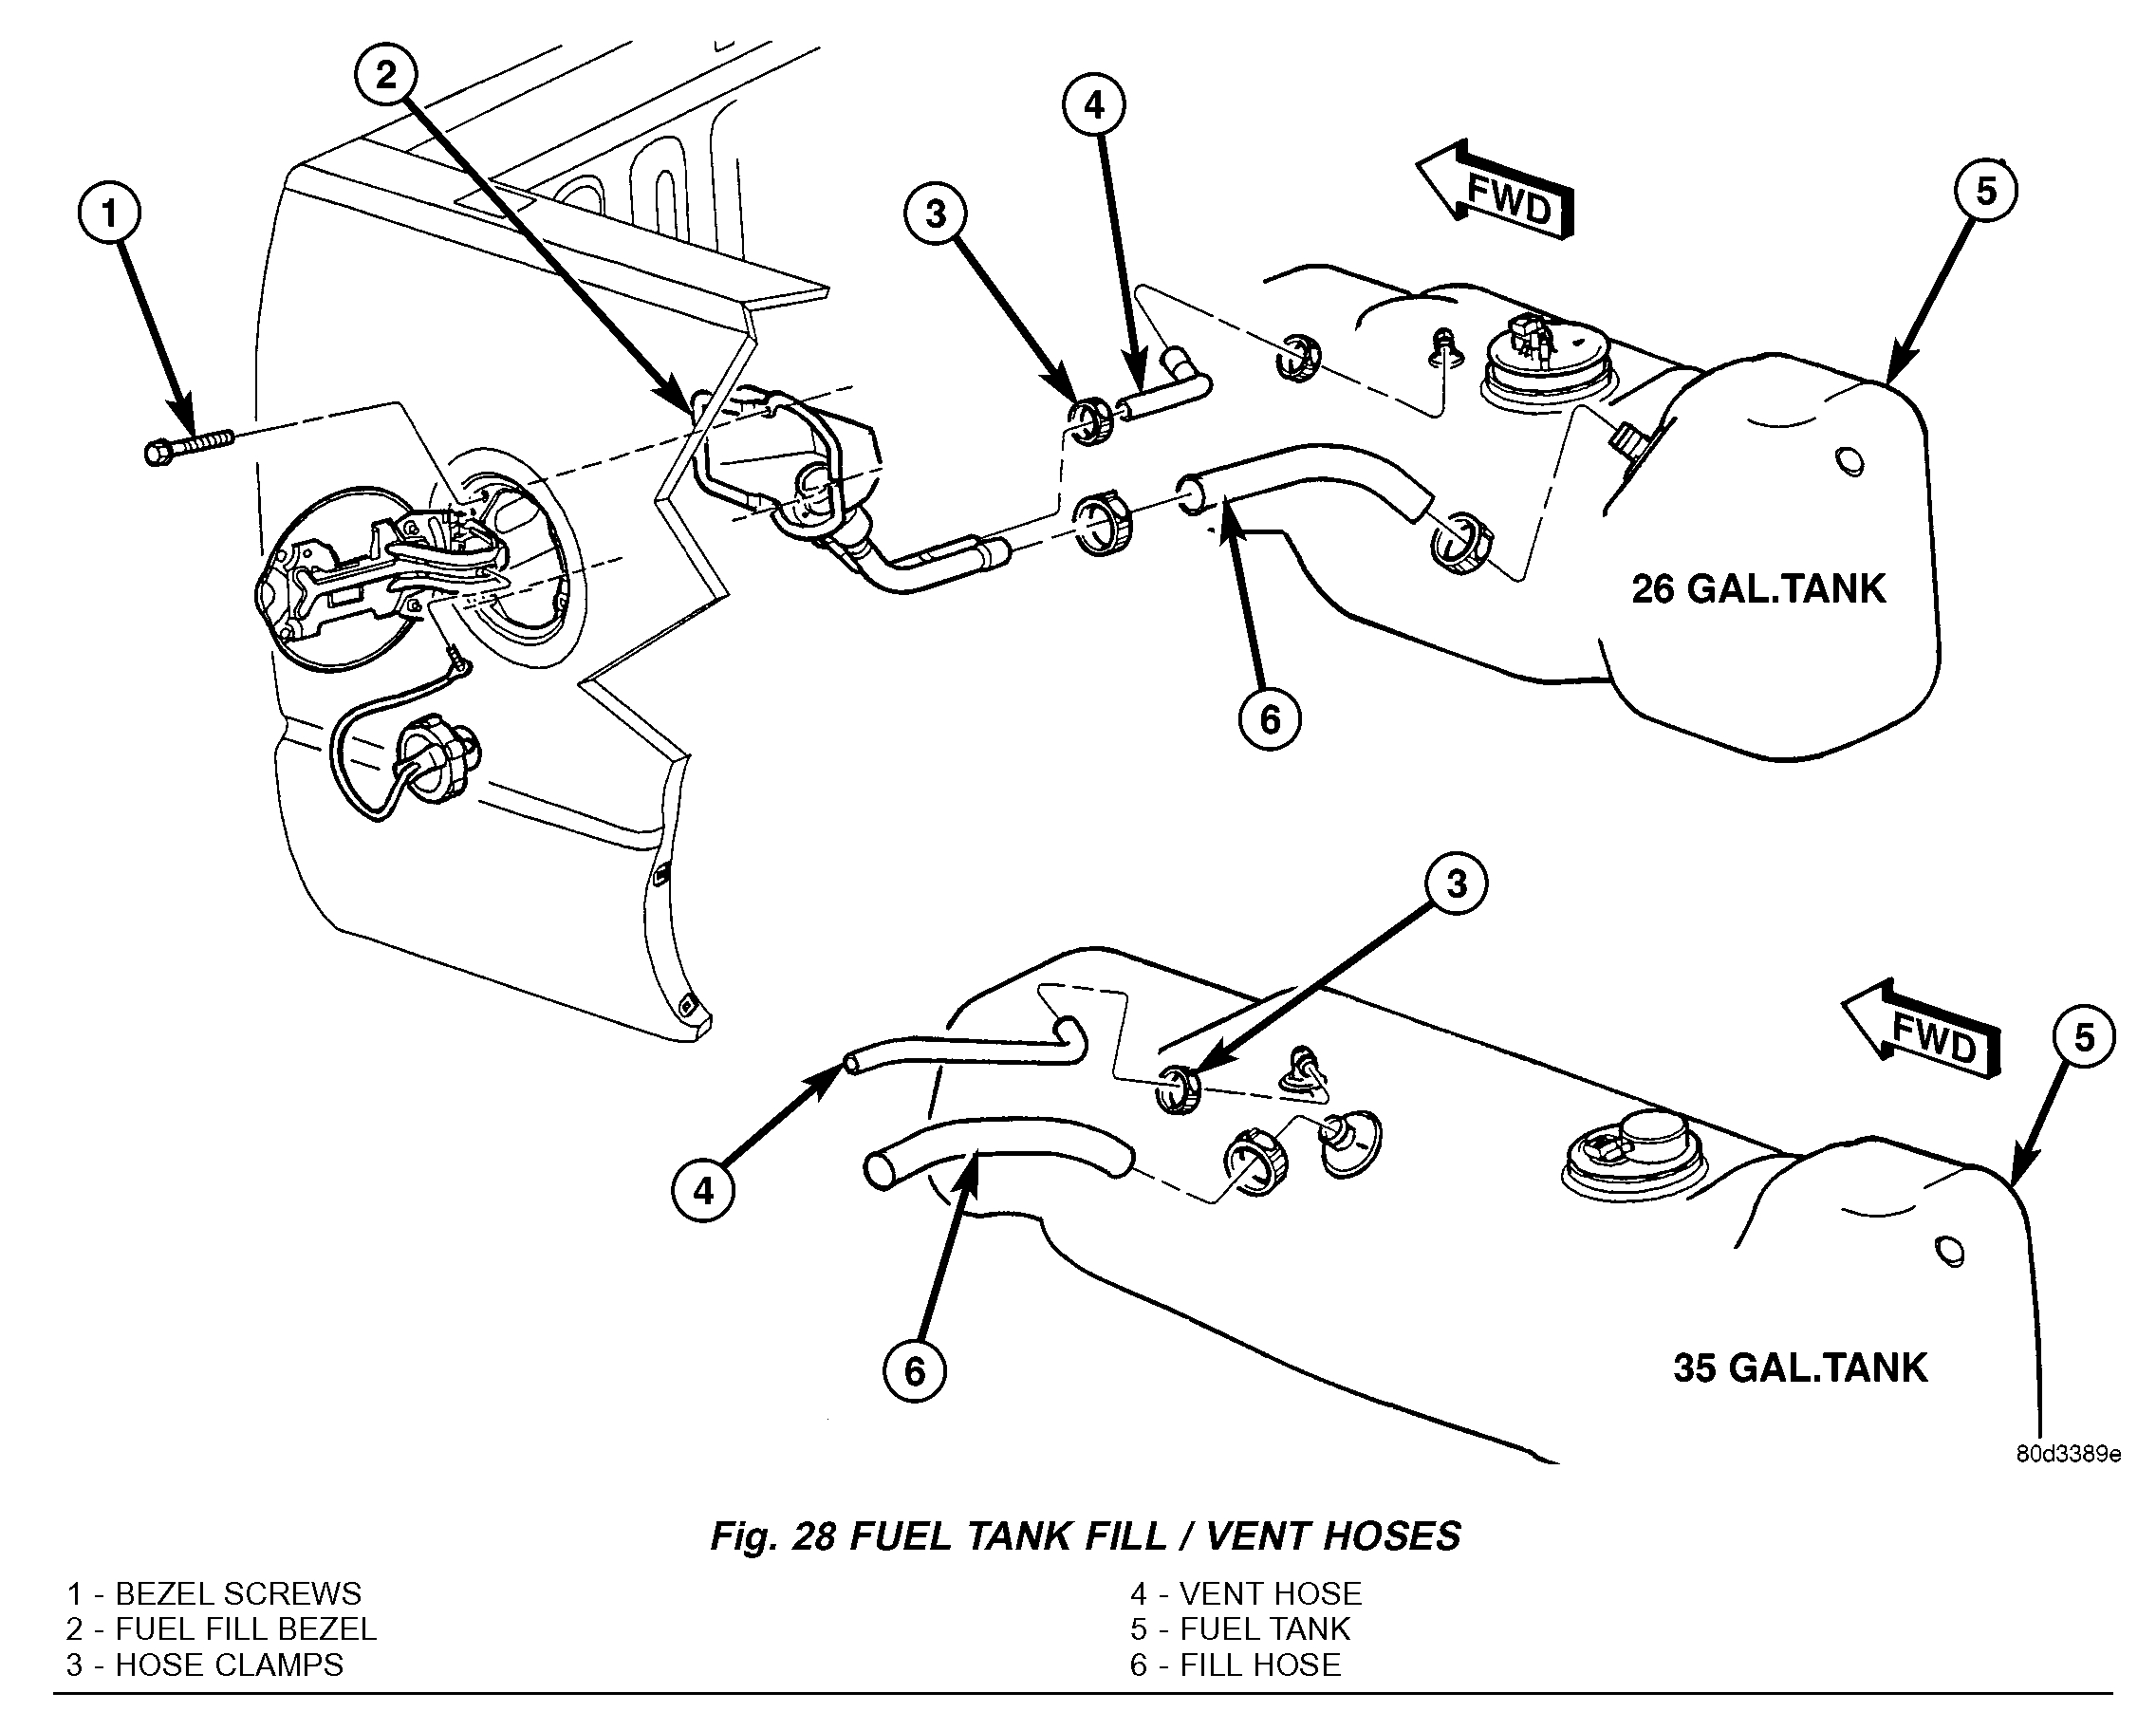
Fig.28 Fuel Tank Fill/Vent Hoses
pic 4
1. Loosen clamp and disconnect rubber fuel vent hose (Fig. 28) at tank fitting.
2. Support tank with a hydraulic jack.
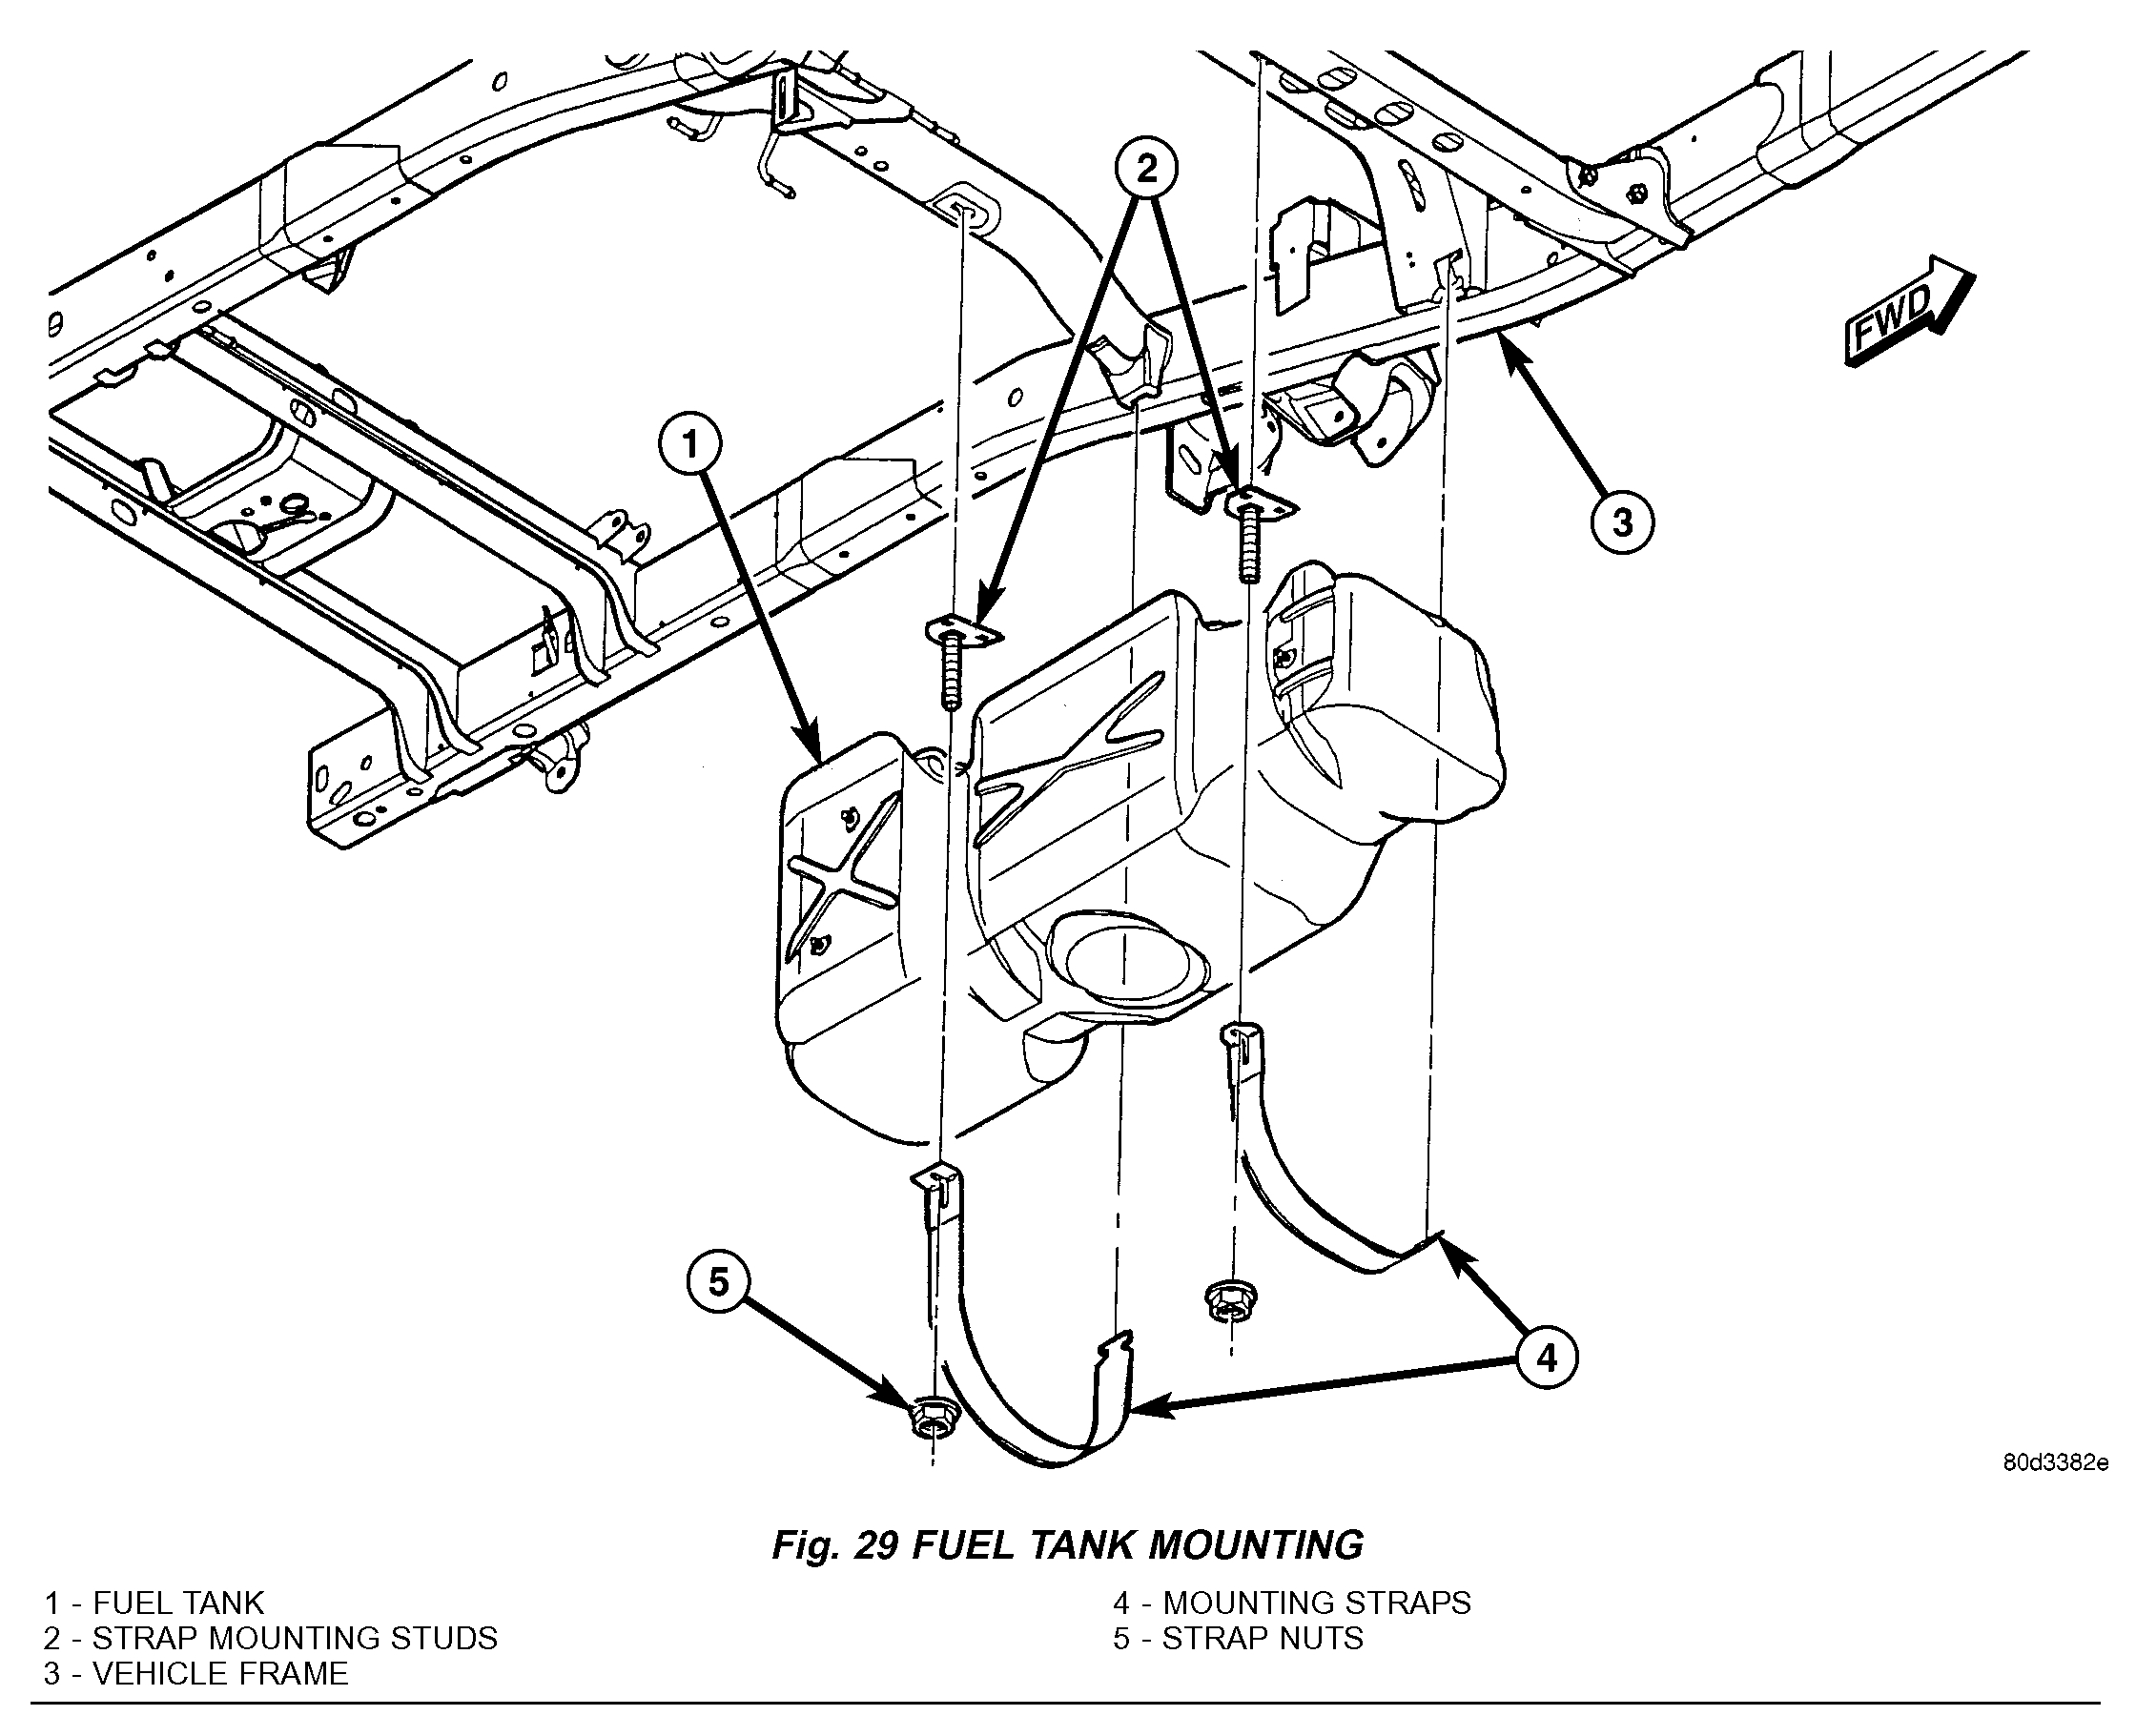
Fig.29 Fuel Tank Mounting
pic 5
3. Remove 2 fuel tank strap nuts (Fig. 29) and remove both tank support straps.
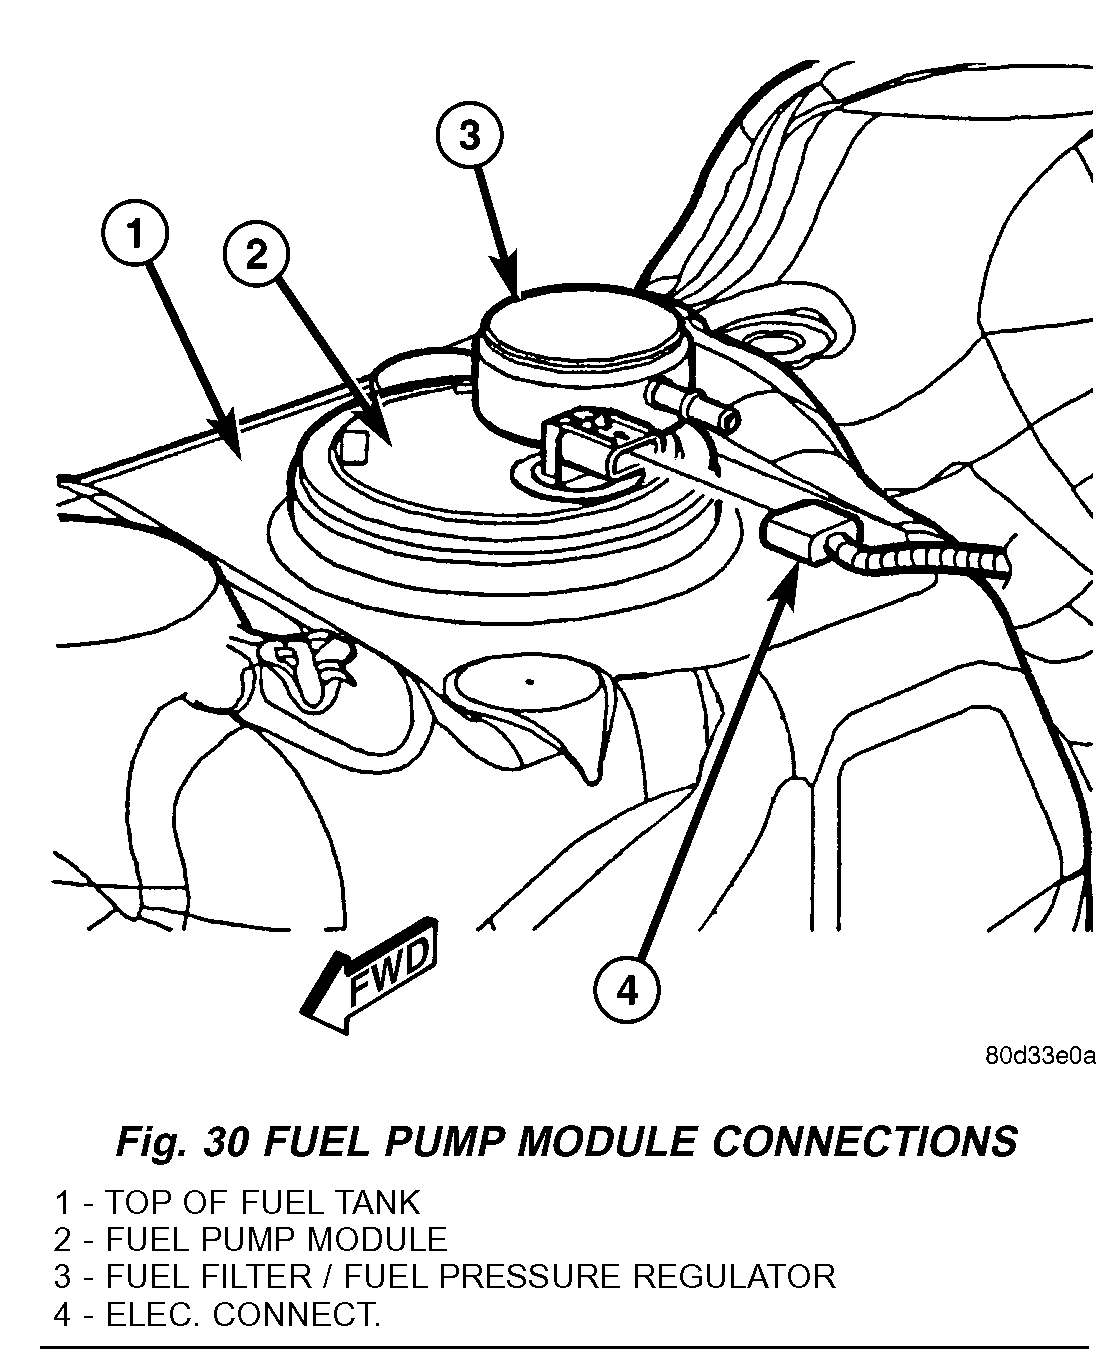
Fig.30 Fuel Pump Module Connections
pic 6
4. Carefully lower tank a few inches and disconnect fuel pump module electrical connector (Fig. 30) at top of tank. To disconnect electrical connector: Push upward on red colored tab to unlock. Push on black colored tab while removing connector.
5. Disconnect fuel line at fuel filter I fuel pressure regulator (Fig. 30) by pressing on tabs at side of quick-connect fitting.
Fig.1 Fuel Delivery Components
pic 7
6. Disconnect EVAP line at top of tank (Fig. 1).
7. Continue to lower tank for removal.
8. If fuel tank is to be replaced, remove fuel pump module from tank. Refer to Fuel Pump Module Removal/Installation procedures.
INSTALLATION
1. If fuel tank is to be replaced, install fuel pump module into tank. Refer to Fuel Pump Module Removal/Installation procedures.
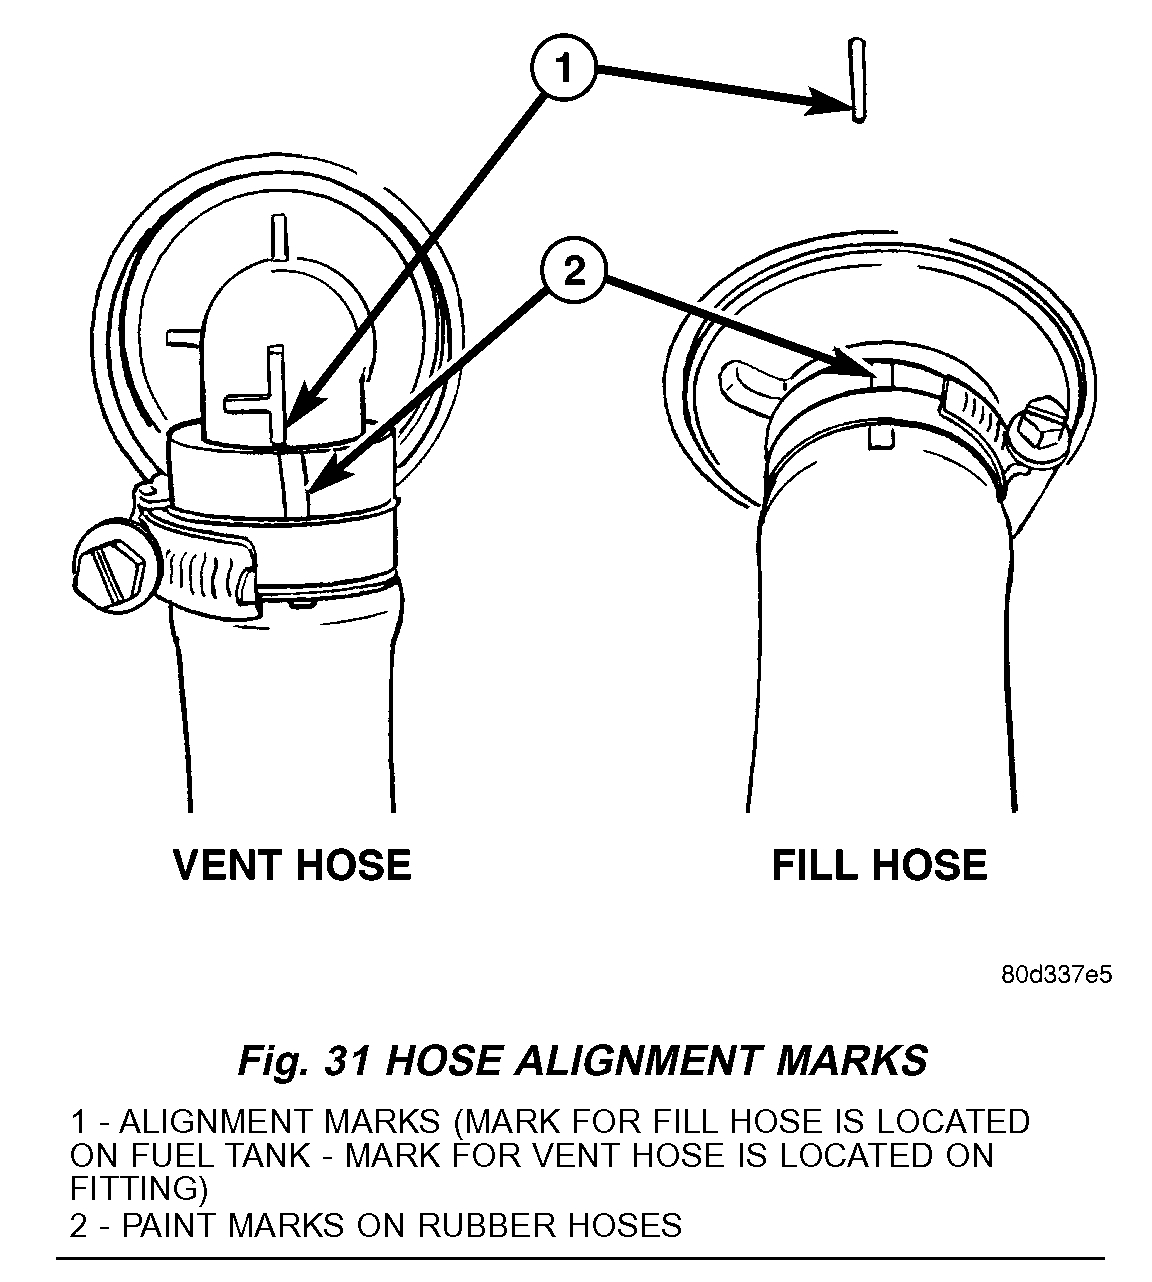
Fig.31 Hose Alignment Marks
pic 8
2. Disconnect clamps and remove rubber fuel fill hose and fuel vent hose at fuel fill tube. Install these 2 hoses to 2 fuel tank fittings. Rotate hoses until paint marks on hoses line up with alignment marks (Fig. 31). Tighten both clamps.
3. Position fuel tank to hydraulic jack.
4. Raise tank until positioned near body.
5. Connect EVAP line at tank (Fig. 1).
6. Connect fuel pump module electrical connector (Fig. 30) at top of tank.
7. Connect fuel line quick-connect fitting to fuel filter / fuel pressure regulator (Fig. 1) or (Fig. 30).
8. Continue raising tank until positioned snug to body
9. Install and position both tank support straps. Install 2 fuel tank strap nuts (Fig. 29) and tighten.Tighten rear strap nut first. Refer to Torque Specifications.
10. Connect rubber fill and vent hoses to fuel fill tube and tighten clamps.
11. Lower vehicle.
12. Fill fuel tank with fuel.
13. Start engine and check for fuel leaks near top of module.
______________________________________
Once the tank is out, then follow the directions in the link to remove the pump. When taking it out, inspect the float and level arm to confirm nothing is bent or wedged.
I know it's a lot of work. Let me know if I can help or if you have other questions.
Take care,
Joe
Images (Click to enlarge)
May 27, 2019 at 8:52 PM