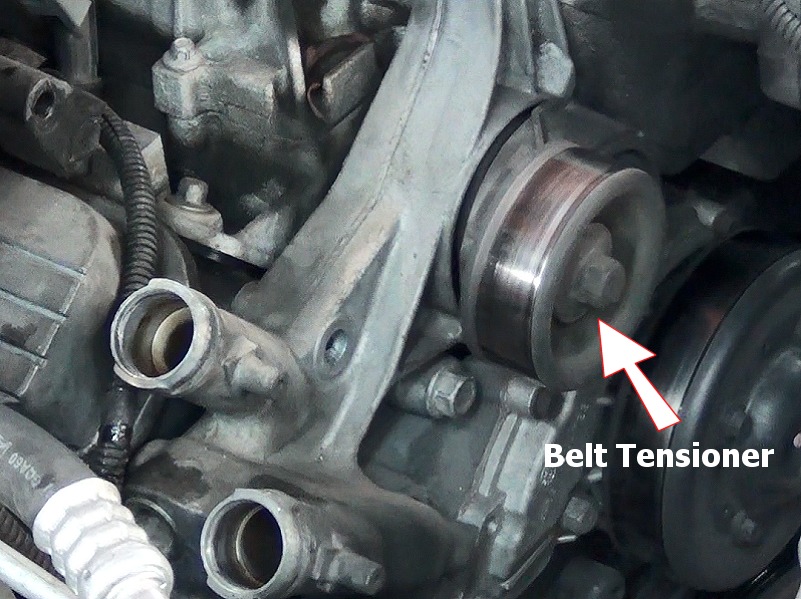
There are many configurations of serpentine belt tensioners, but all follow the same principle which is to keep constant pressure or tension on the engine's serpentine belt. This spring loaded device is mounted to the front of the engine and in most cases is fairly easy to replace.
How Does it Work?
Fitted with an internal spring, a serpentine belt tensioner consists of a main housing, pivot point, a tension spring, a smooth pulley with a roller bearing. These units are non-adjustable and require no maintenance except for replacement.
What Goes Wrong?
In time a serpentine belt tensioner can wear out allowing the serpentine belt to roll off the main drive and accessory pulleys such as the water pump or alternator. Also, the pulley that is attached to the tensioner has a roller bearing which can go bad creating a squealing noise, especially under acceleration, and if the bearing seized up completely it will throw the belt off entirely. A belt tensioner is a normal wear item and should be inspected regularly.
Cost?
Typically replacement parts will cost between $30.00 and $80.00 on Amazon (US) or the parts store and will require the removal of the serpentine belt. Labor time can be between .5 and 2.0 hours at a shop or dealer. If exact times or procedures are needed you can one of ask our experts to supply you with the information (free), or consult an online resource such as AllData DIY (pay), but this guide and video will be sufficient in most cases. Some tensioners feature a replacement pulley separate from the housing and spring assembly which can save money.
Let's Jump In!
Step 1 - You may need to disconnect the battery
before you start the job if electrical wiring is involved, and in some cases you
will need to drain the cooling
system as in the example below. Also, the serpentine belt, heater hoses and
alternator have already been removed. Most cars will not have heater hoses running
through the tensioner.
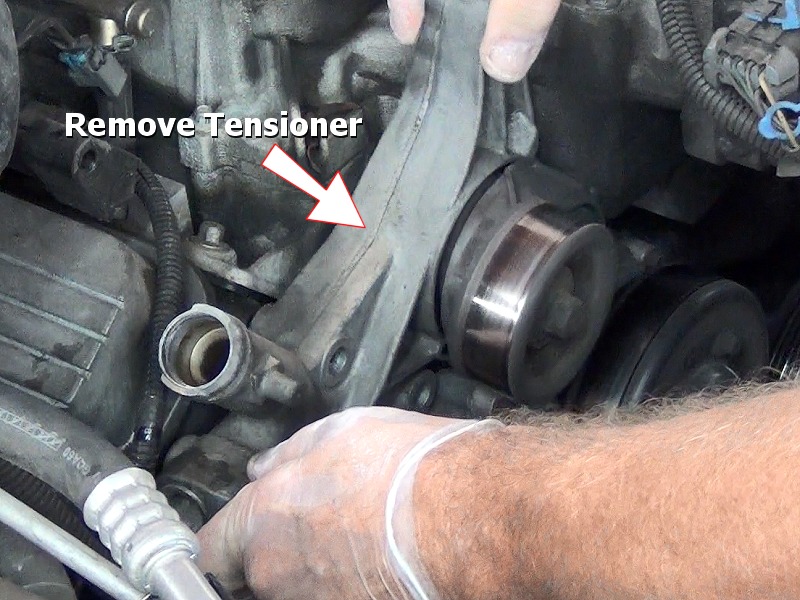
Step 2 - Locate and remove the belt tensioner
mounting bolts, in this case there are two bolts which are 13mm and 15mm, most tensioners
will have one to three mounting bolts.

Step 3 - Here, our mechanic is removing the tensioner
so it can be matched up to the new unit.
Watch the Video!
Please watch this video of the job being done, then continue down the guide to glean additional helpful information.
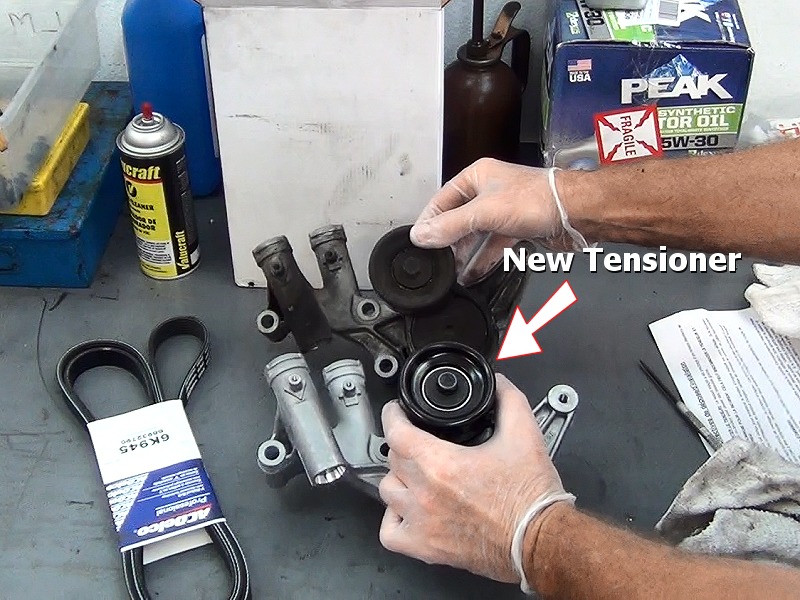
Step 4 - The old unit and new tensioner need to
match identically to ensure a proper installation. You can also see we are
installing a new serpentine belt
which is highly recommended when doing the job.
Step 5 - Lower the new part down into the engine
bay and onto the engine, line up the mounting bolt holes.
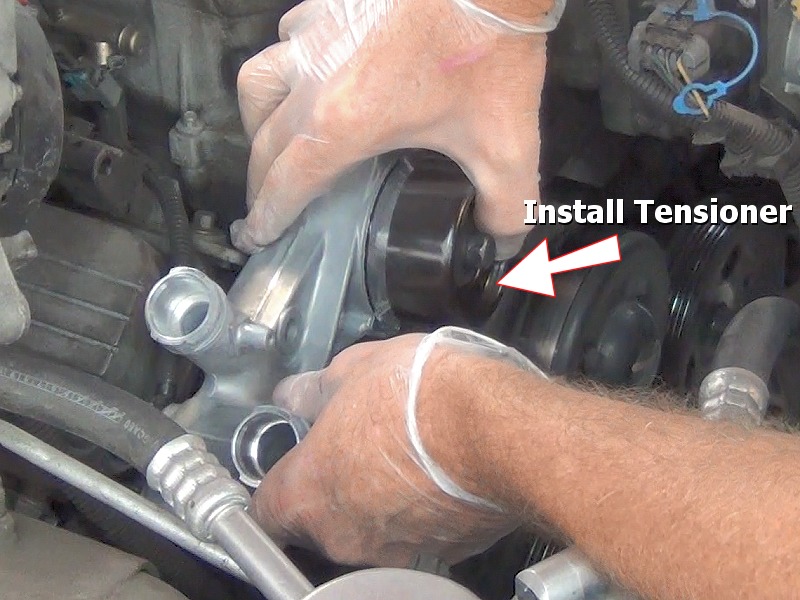
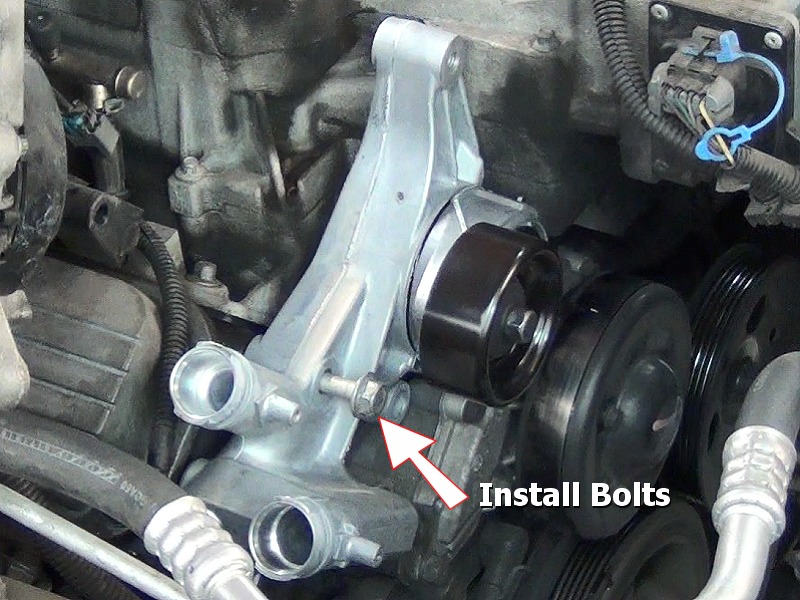
Step 6 - Reinstall the belt tension mounting bolts
and tighten to specification which in this case was 23 foot pounds of torque, then
continue with the reassemble and you are all set.
Additional Serpentine Belt Tensioner Replacement Videos
Questions?
Our certified technicians are ready to answer serpentine belt tensioner questions for free. We hope you saved money and learned from this guide. We are creating a full set of car repair guides. Please subscribe to our 2CarPros YouTube channel and check back often for new videos which are uploaded regularly.