A valve cover gasket is located between the engine block and cylinder head and is used to stop engine oil from leaking from the valve cover.
What Goes Wrong?
With any gasket over time it can become hard and brittle while losing its ability to seal correctly. When this happens oil will drip out and onto the engine or exhaust manifold which produces an undesirable odor not to mention to mention the mess it makes when parked. Spark plugs are sometimes accessed through the middle of the valve cover. When the valve cover gasket fails it can allow engine oil to gather and fill around the spark plug well. Sometimes this can be confused with the engine cylinder having an issue when in reality the valve cover gasket needs to be replaced.
What Does it Cost?
A valve cover gasket set is relatively inexpensive, between $12.00 and $35.00 (US) in most cases. Labor time will vary depending on engine configuration but in most cases will be between 1.4 and 4.4 hours. If exact labor times or procedures are needed you can ask our experts to supply you with the information (free), or consult an online resource such as AllData DIY (pay) but this guide and video will be sufficient in most cases.
Let's Jump In!
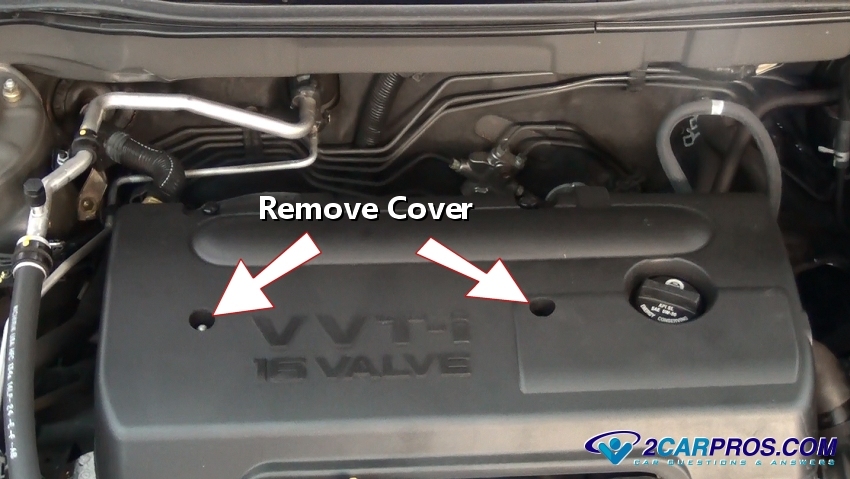
Some engines have a decorative plastic cover over the engine that must be removed,
start by removing the mounting nuts or bolts then remove the engine cover to gain
access to the valve cover.
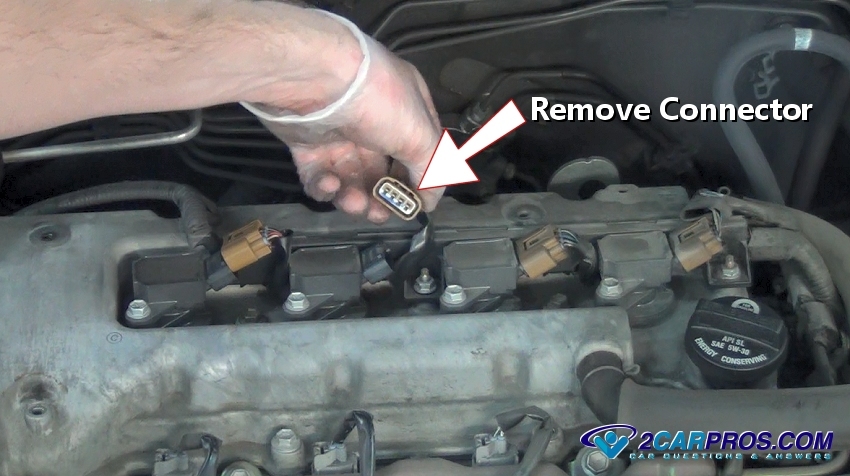
A valve cover may or may not have ignition coils mounted to it, in this case
it does, start by disconnecting the electrical connector from the ignition coils.
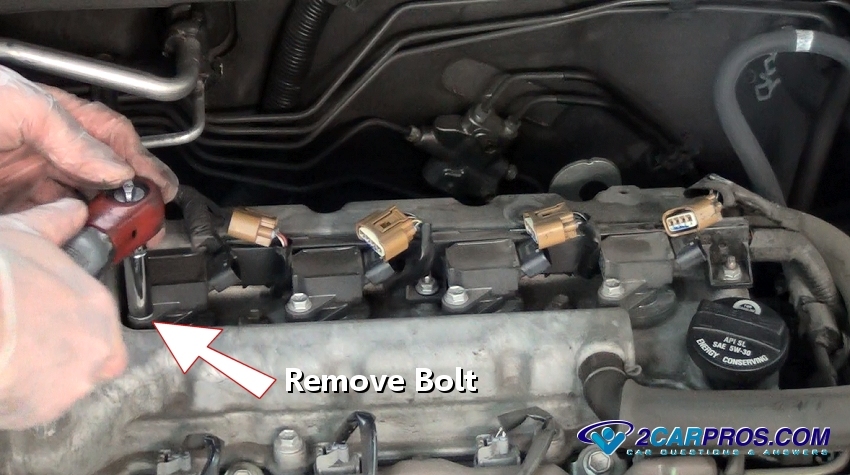
Remove the mounting bolts from the ignitions coils (4), in this case they are
10mm.
Lift and remove the ignition coils and inspect for oil or burn marks. If oil
is present it means the valve cover gasket is leaking into the spark plug well.

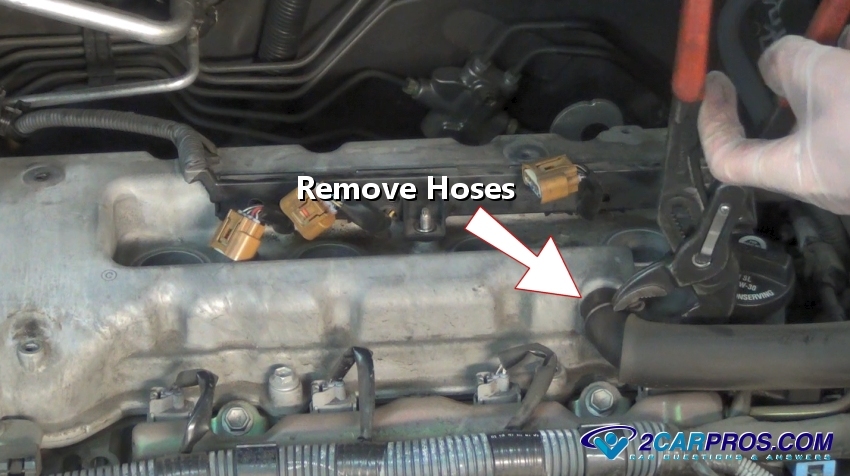
Look around the valve cover and remove any breather hoses or plastic clips that
are attached by releasing the clamps using pliers.
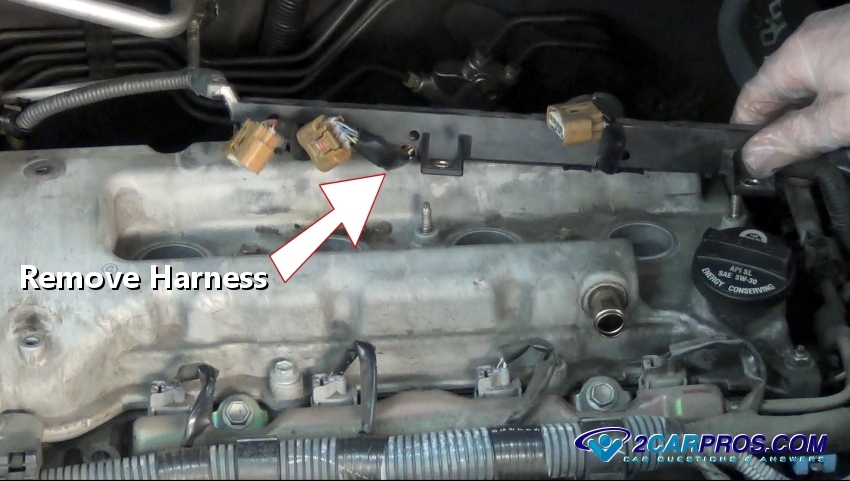
Clean the valve cover before removal to avoid dirt contamination then remove
the wiring harness mounting bolts (10mm), remove the harness from the valve cover.
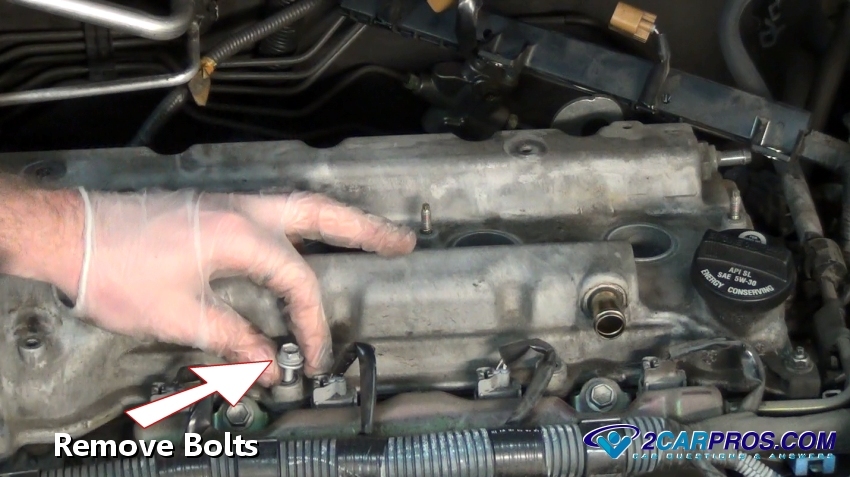
Locate and remove all valve cover mounting bolts (10mm), these will be located
around the outside lip of the cover.
Watch The Video!
This video shows a valve cover gasket job being done, after watching continue down the guide to glean additional information.
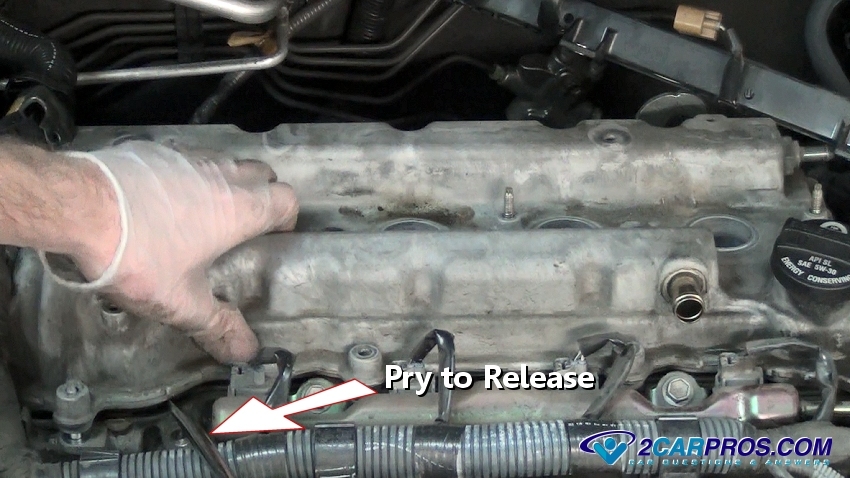
Double check to make sure all of the valve cover mounting bolts have been removed,
use a screwdriver or small pry bar and wedge in-between the cover and cylinder head
to pop the cover loose.
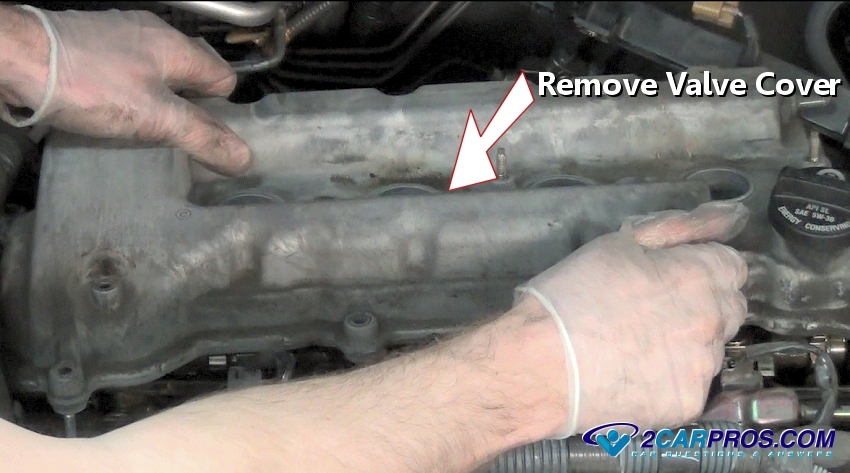
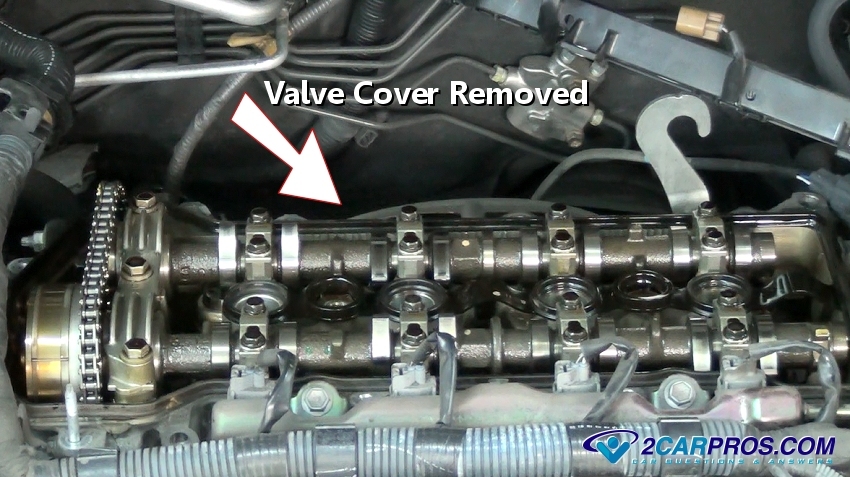
Firmly grasp the valve cover and lift it from the engine bay, a small amount
of oil will be present, avoid gasket material and dirt from getting into the engine.
Once the valve cover has been removed, the valve train will be exposed, be sure
to keep dirt and debris from this area, check the area for excessive sludge build
up and clean if needed.
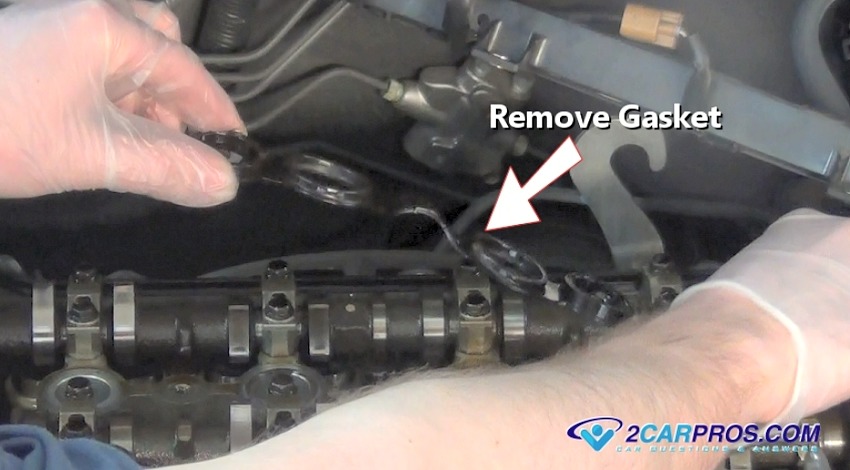
The cover gasket will either be stuck on the cylinder head, or the valve cover
itself, remove the old gasket.
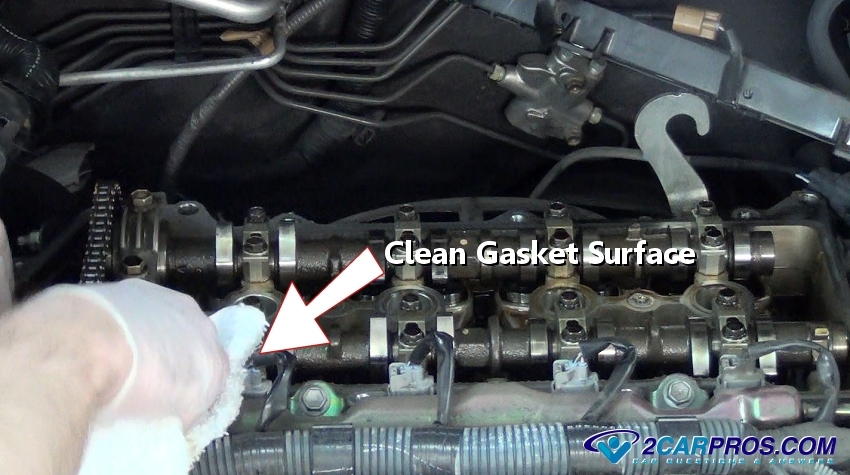
Use a shop towel and carburetor cleaner to wipe the gasket surface clean, this
will ensure a proper reseal of the new gasket, a gasket scraper may be needed.
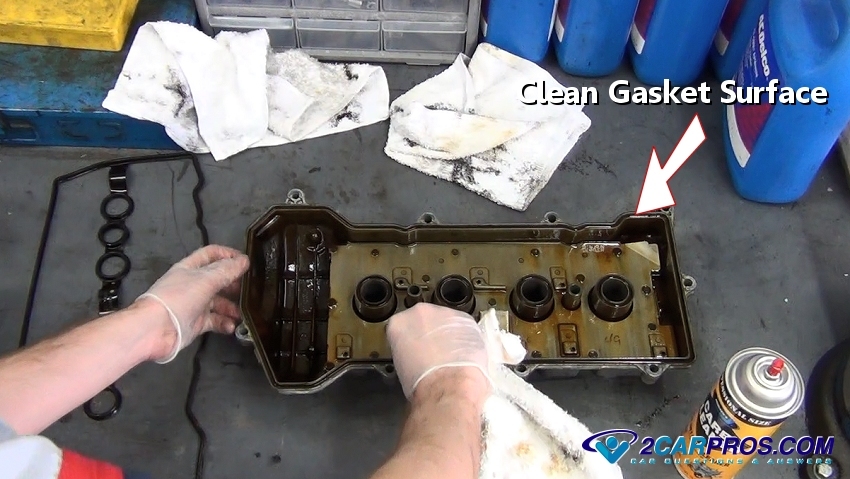
Again, use carburetor cleaner and a shop towel to clean the gasket surface of
the valve cover.
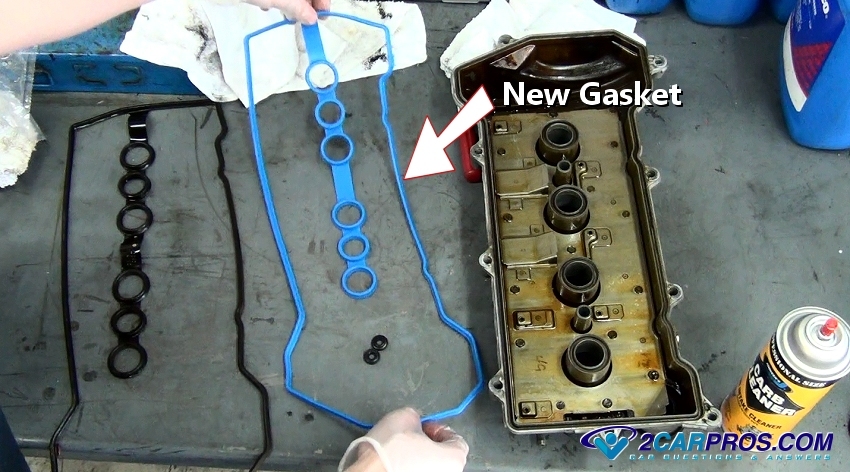
Remove the new valve cover gasket from its packaging, match the old gasket to
the new unit to ensure a proper installation.
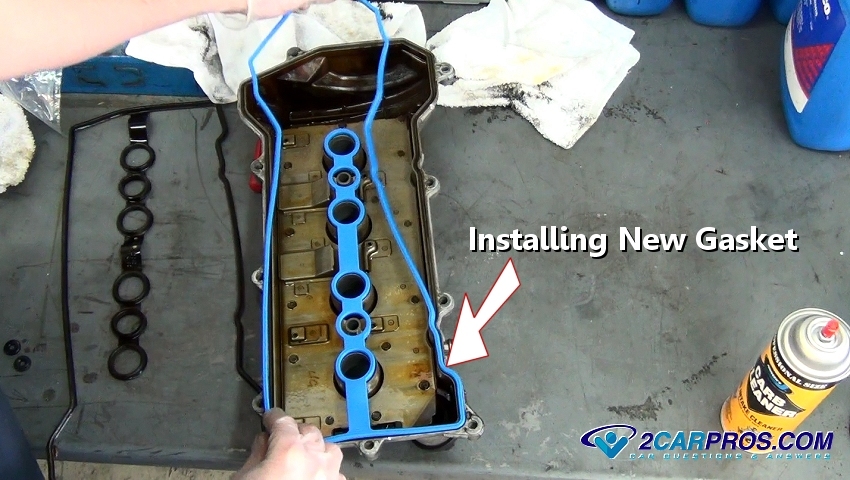
Gently install the new gasket avoiding bends or folds to preserve its integrity,
push into place, some applications require spray contact cement to hold the gasket
while installing which keeps the gasket from coming loose from the cover.
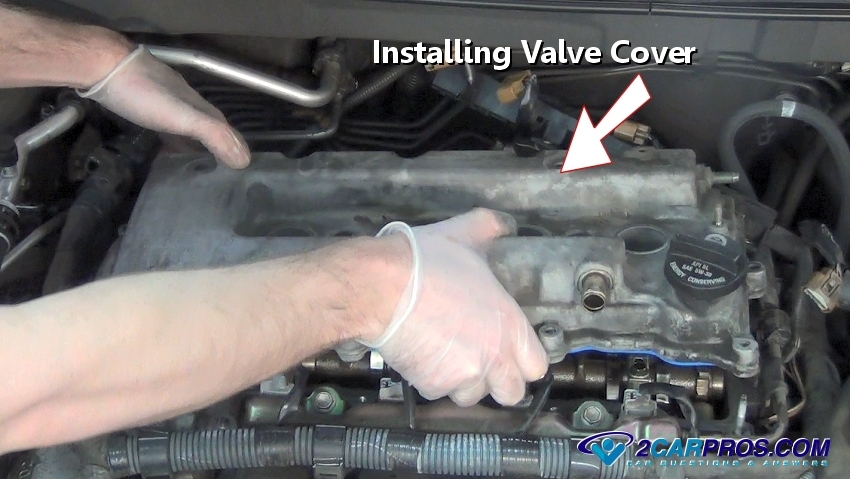
Gently lower the valve cover into place while ensuring nothing is caught under
the gasket during installation.
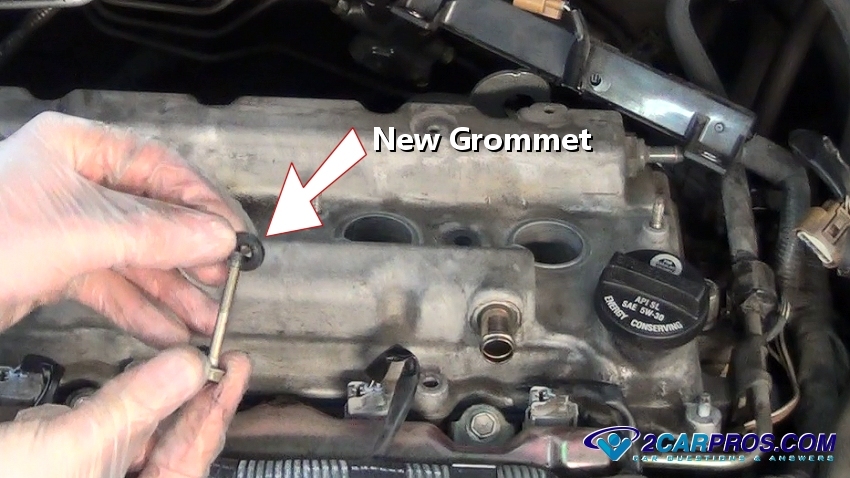
Some valve cover bolts may require a new grommet or gasket which should be included
in the new gasket kit.
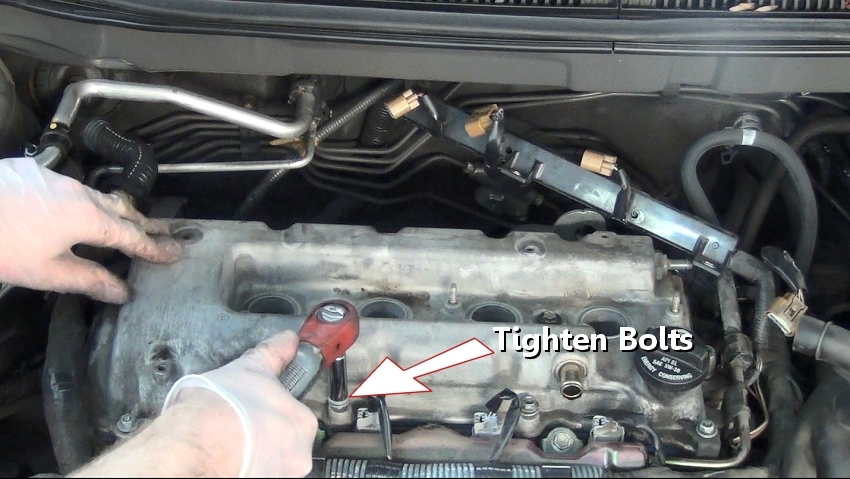
Install all valve cover mounting bolts by hand, do not tighten until all bolts
have been installed. Gently tighten the bolts down evenly, in small increments,
using a star pattern, bolts should be snug but not super tight. Look up the torque
setting if needed, in this case it is 5 foot pounds, do not over tighten valve cover,
this can damage the gasket.
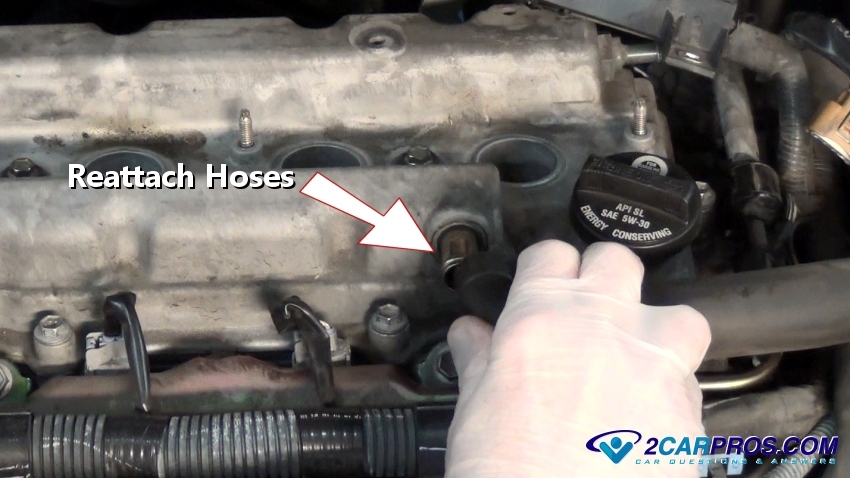
Reattach all hoses and plastic clips which were removed earlier.
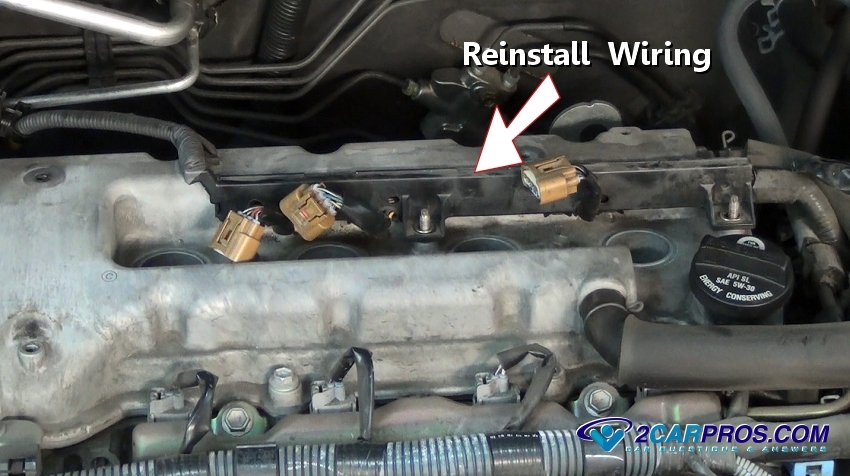
Reinstall ignition coil wiring harness mounting nuts and tighten.
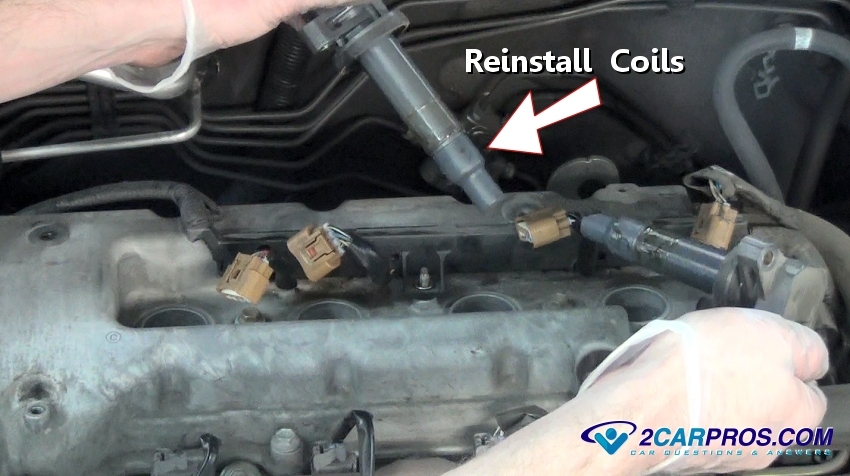
Reinstall ignition coils and mounting bolts, tighten and reattach wiring harness
connectors. Position the plastic cover back into place and install the hold down
nuts and tighten, recheck valve cover bolt tightness after a short time.
Questions?
Our certified technicians are ready to answer car repair questions for free. We hope you saved money and learned from this guide. We are creating a full set of car repair guides. Please subscribe to our 2CarPros YouTube channel and check back often for new videos which are uploaded regularly.