We are a team of certified mechanics that have created this guide to help you save money while doing the job yourself, or at least see what you are paying for when having the job done at a shop. A brake light switch is used to activate the brake lights when the driver depresses the brake pedal while attempting to stop the vehicle. This switch is located under the dash near the top of the brake pedal arm.
What Goes Wrong?
The brake light system pulls a fair amount of amperage due to the number of bulbs on the circuit, two main bulbs along with the high mount bulb arrangement. This can cause the contacts inside the switch to go bad causing the brake lights not to work. Fortunately, the switch is easily changed out in most cases.
What Does It Cost?
When replacing a brake light switch it will cost between $9.00 and $24.00 on Amazon (US) and will require the removal of the lower dash panel. Labor time can be between .8 and 1.2 hours at a shop or dealer. If exact times or procedures are needed you can ask the 2CarPros community to supply you with the information (free), or consult an online resource such as AllData DIY (pay) but this guide and video should be sufficient in most cases.
Let's Get Started!
A stop light switch is designed in the opposite way of a normal switch because when the switch has contact by the pedal it is off, and when pedal is depressed the switch is on.
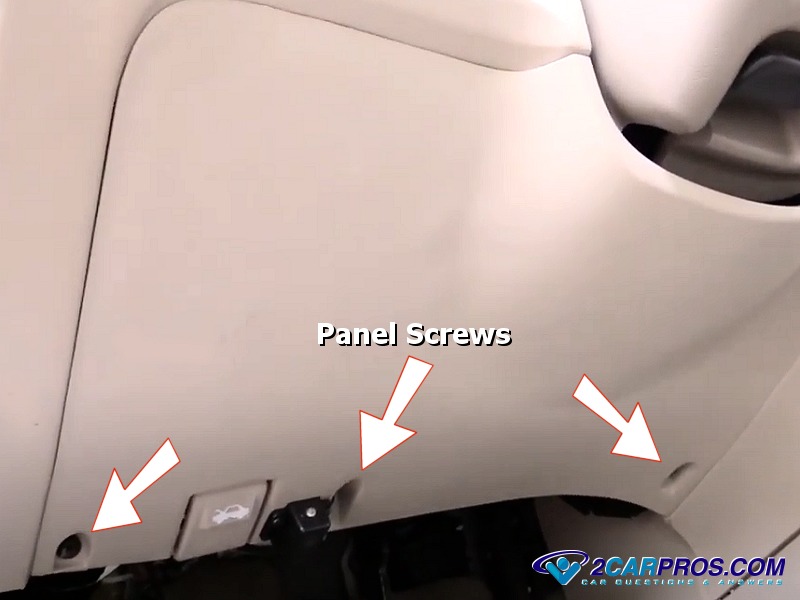
1. To access the brake light switch you will need to remove the lower dash cover which is held in place by two or three screws near the bottom, and snap clips at the top. Remove the screws and gently pop the panel loose to remove, and set it to the side.
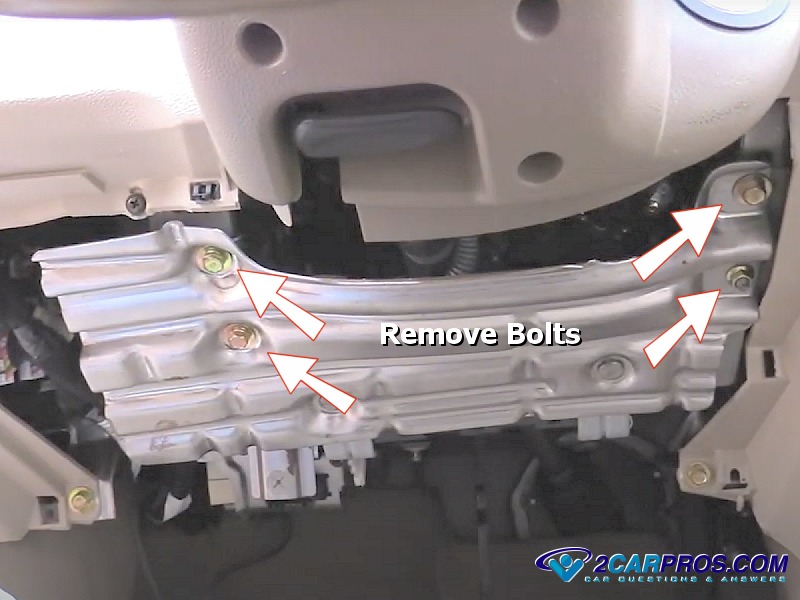
2. In this case there is a metal plate which needs to be removed as well, it is held on by 10mm and 12mm bolts. Not all cars have this plate.
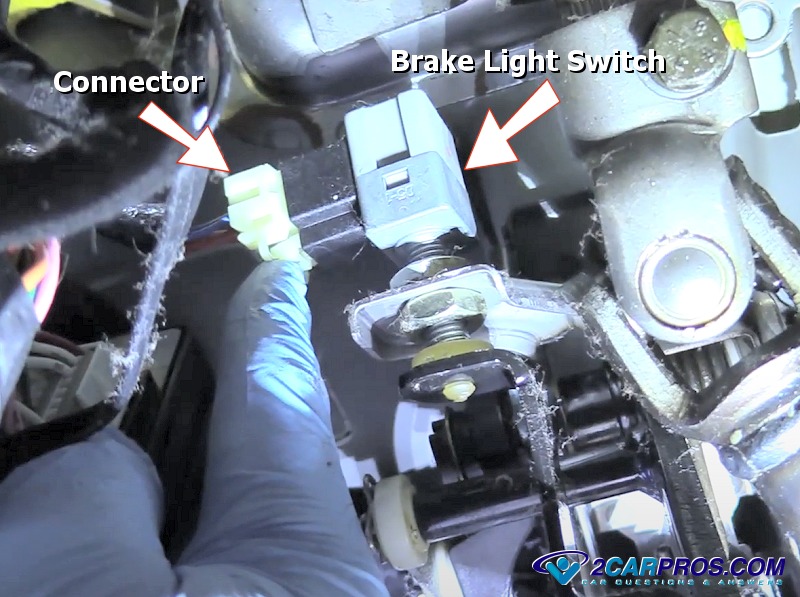
3. Here is what the brake light switch looks like, in this image we are releasing the electrical connector safety clip to remove the connector from the switch.
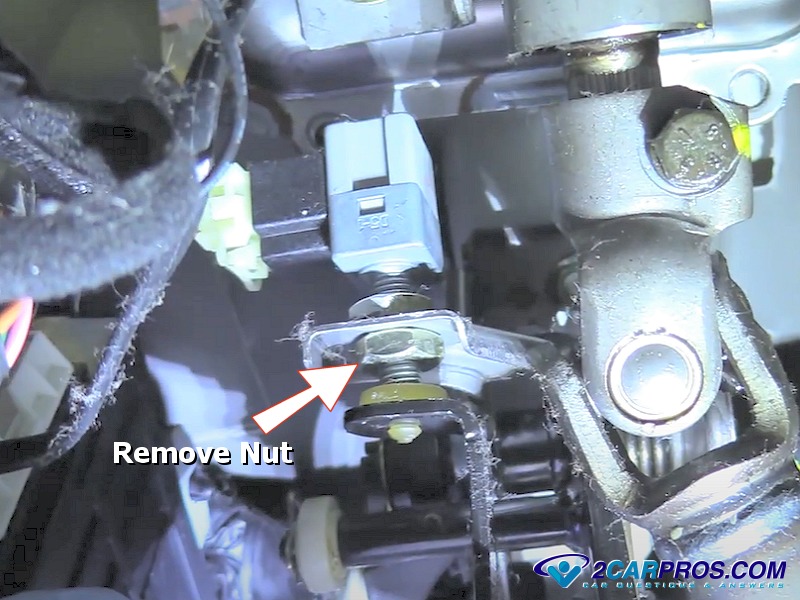
4. Depress the brake pedal to gain clearance and remove the jam nut which in this case was 19mm. The switch can now be removed from the pedal bracket.
5. Match the new switch to the old unit to ensure a proper installation, also you can see the adjusting thread on the switch, this will be explained in the next step.
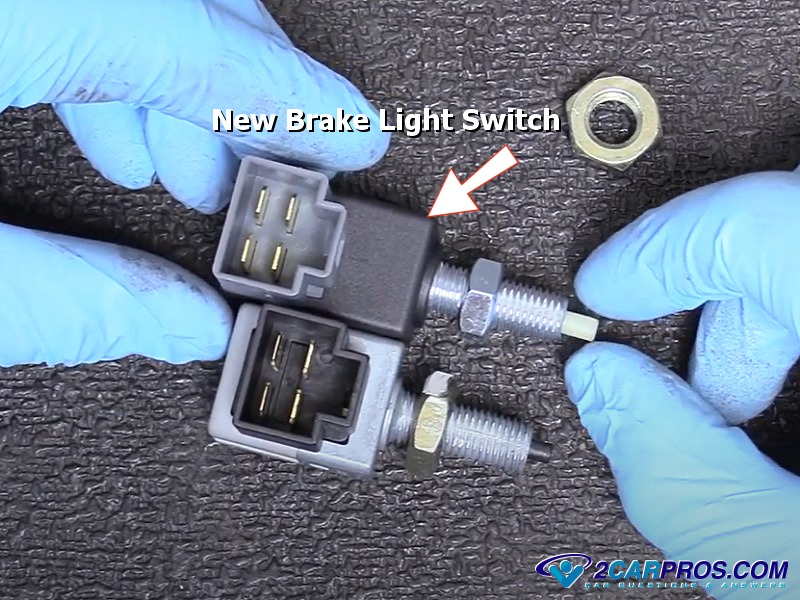
6. Here you can see the new brake light switch in position, the adjuster and jam nut, also the brake pedal stopper. The idea is to move the adjuster nut to open the switch, without holding up the brake pedal travel.

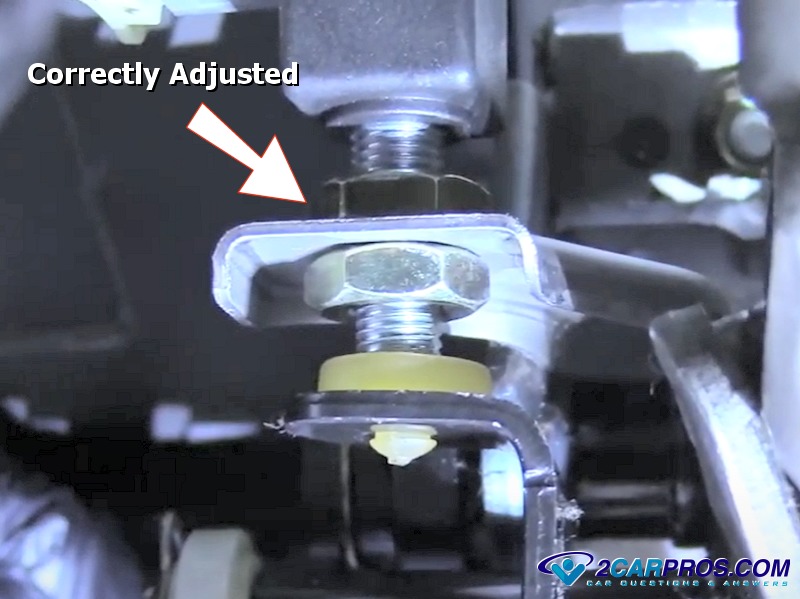
7. In the image below, you can see how the brake light switch is correctly adjusted, with the switch plunger depressed. If the plunger is allowed to protrude from the switch with the brake pedal in its neutral position the brake lights will stay on.
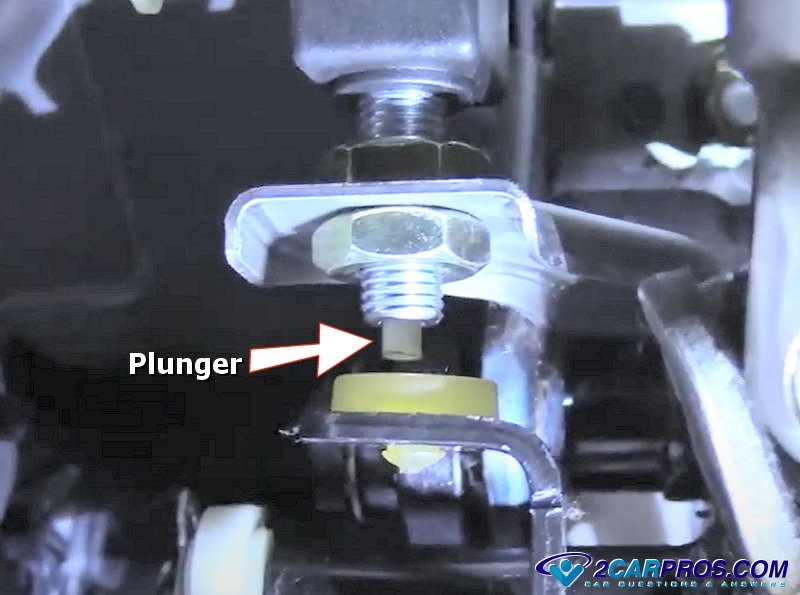
8. This is what the brake light switch plunger looks like when the brake pedal is depressed. Make sure to plug the electrical connector in and you are all set. You can now reassemble the plates and panels. Be sure to check the brake light operation once you have completed the job. If your brake lights don't work please click the link to troubleshoot the system, or ask one of the 2CarPros community to help you for free.
Watch the Video!
Please watch this video of the job being done, then continue with the guide to glean additional helpful information.
Credits
This guide knowledge base was created by the 2CarPros Team. If you have a car repair question, you can ask the 2CarPros community for help. Please visit our 2CarPros YouTube Channel for more helpful repair videos.