No spark

Tiny
OZZIE62G
  • MEMBER
  • 30 POSTS
My year is a 1976, and yes the wiring kit is for that year it's the painless 10150. When I order the coil, plug wires, cap and rotor, plug wire were for that year 1976.
Was this
answer
helpful?
Yes
No
Saturday, July 13th, 2019 AT 11:45 AM (Merged)
Tiny
TONY KOLB
  • MEMBER
  • 5 POSTS
It is all original replacement parts.
Was this
answer
helpful?
Yes
No
Saturday, July 13th, 2019 AT 11:45 AM (Merged)
Tiny
JAYBOT
  • MEMBER
  • 19 POSTS
Coil and distributor
Was this
answer
helpful?
Yes
No
Saturday, July 13th, 2019 AT 11:45 AM (Merged)
Tiny
OZZIE62G
  • MEMBER
  • 30 POSTS
This exactly what I have
Was this
answer
helpful?
Yes
No
Saturday, July 13th, 2019 AT 11:45 AM (Merged)
Tiny
CJ MEDEVAC
  • MECHANIC
  • 11,004 POSTS
Positive the distributor is in right?
Correct coil?
Tested the new module at the auto parts store?
Under the hood looks well taken care of!
Let’s have a picture of the Jeep too!
The Medic
Was this
answer
helpful?
Yes
No
+1
Saturday, July 13th, 2019 AT 11:45 AM (Merged)
Tiny
JAYBOT
  • MEMBER
  • 19 POSTS
The problem was prior to that mess of wires coming from the distributor. Those happened while trying to fix this firing problem. Broke the connector to the distributor and broke a wire of of the coil connecter. Replaced the connector to the coil with s factory one
Was this
answer
helpful?
Yes
No
Saturday, July 13th, 2019 AT 11:45 AM (Merged)
Tiny
CJ MEDEVAC
  • MECHANIC
  • 11,004 POSTS
Maybe a this is a review but these are good!

Class 1

Http://www.youtube.com/watch?v=5a2x9msslqy

Class 2

Http://www.youtube.com/watch?nr=1&v=fhx1yxvyimg&feature=endscreen

Now

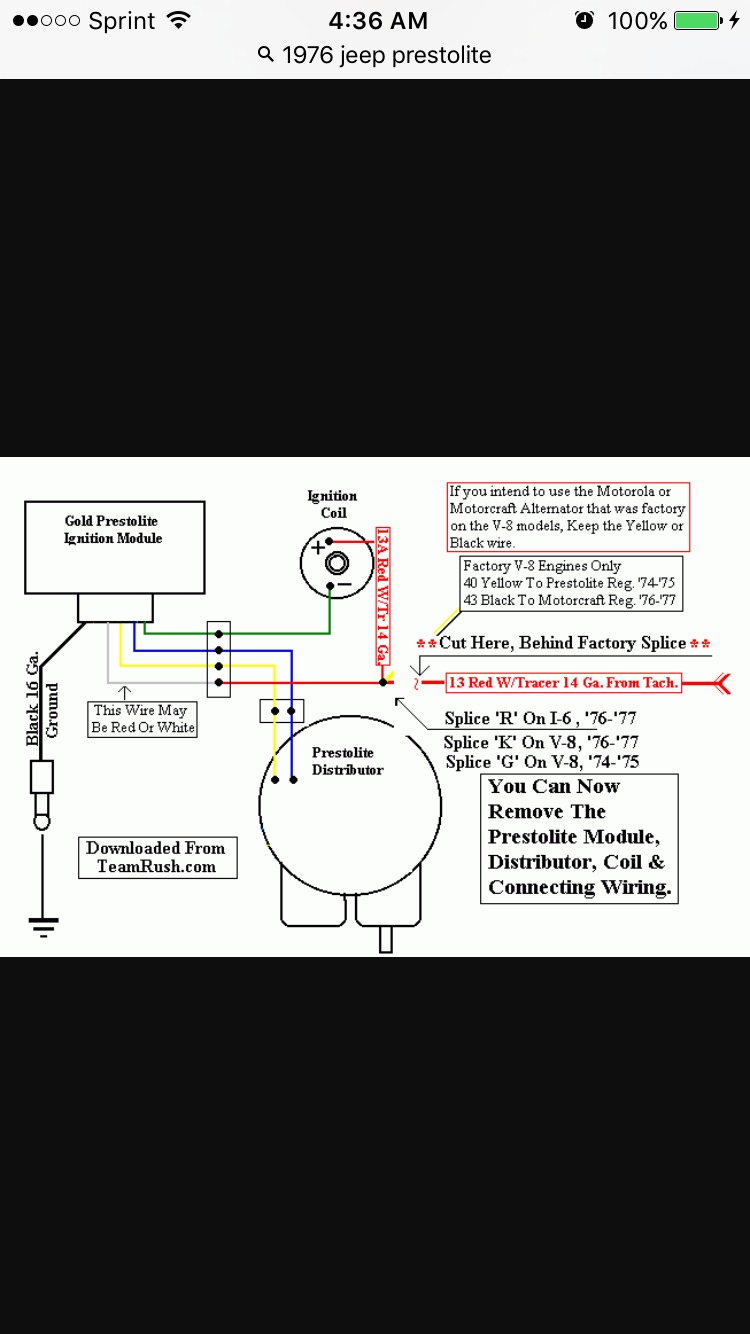
If we got carried away bumping the starter - this way (below) will cut out possible "going too far with the timing marks

Now that david and chad told you how

Let's do it to slow motion

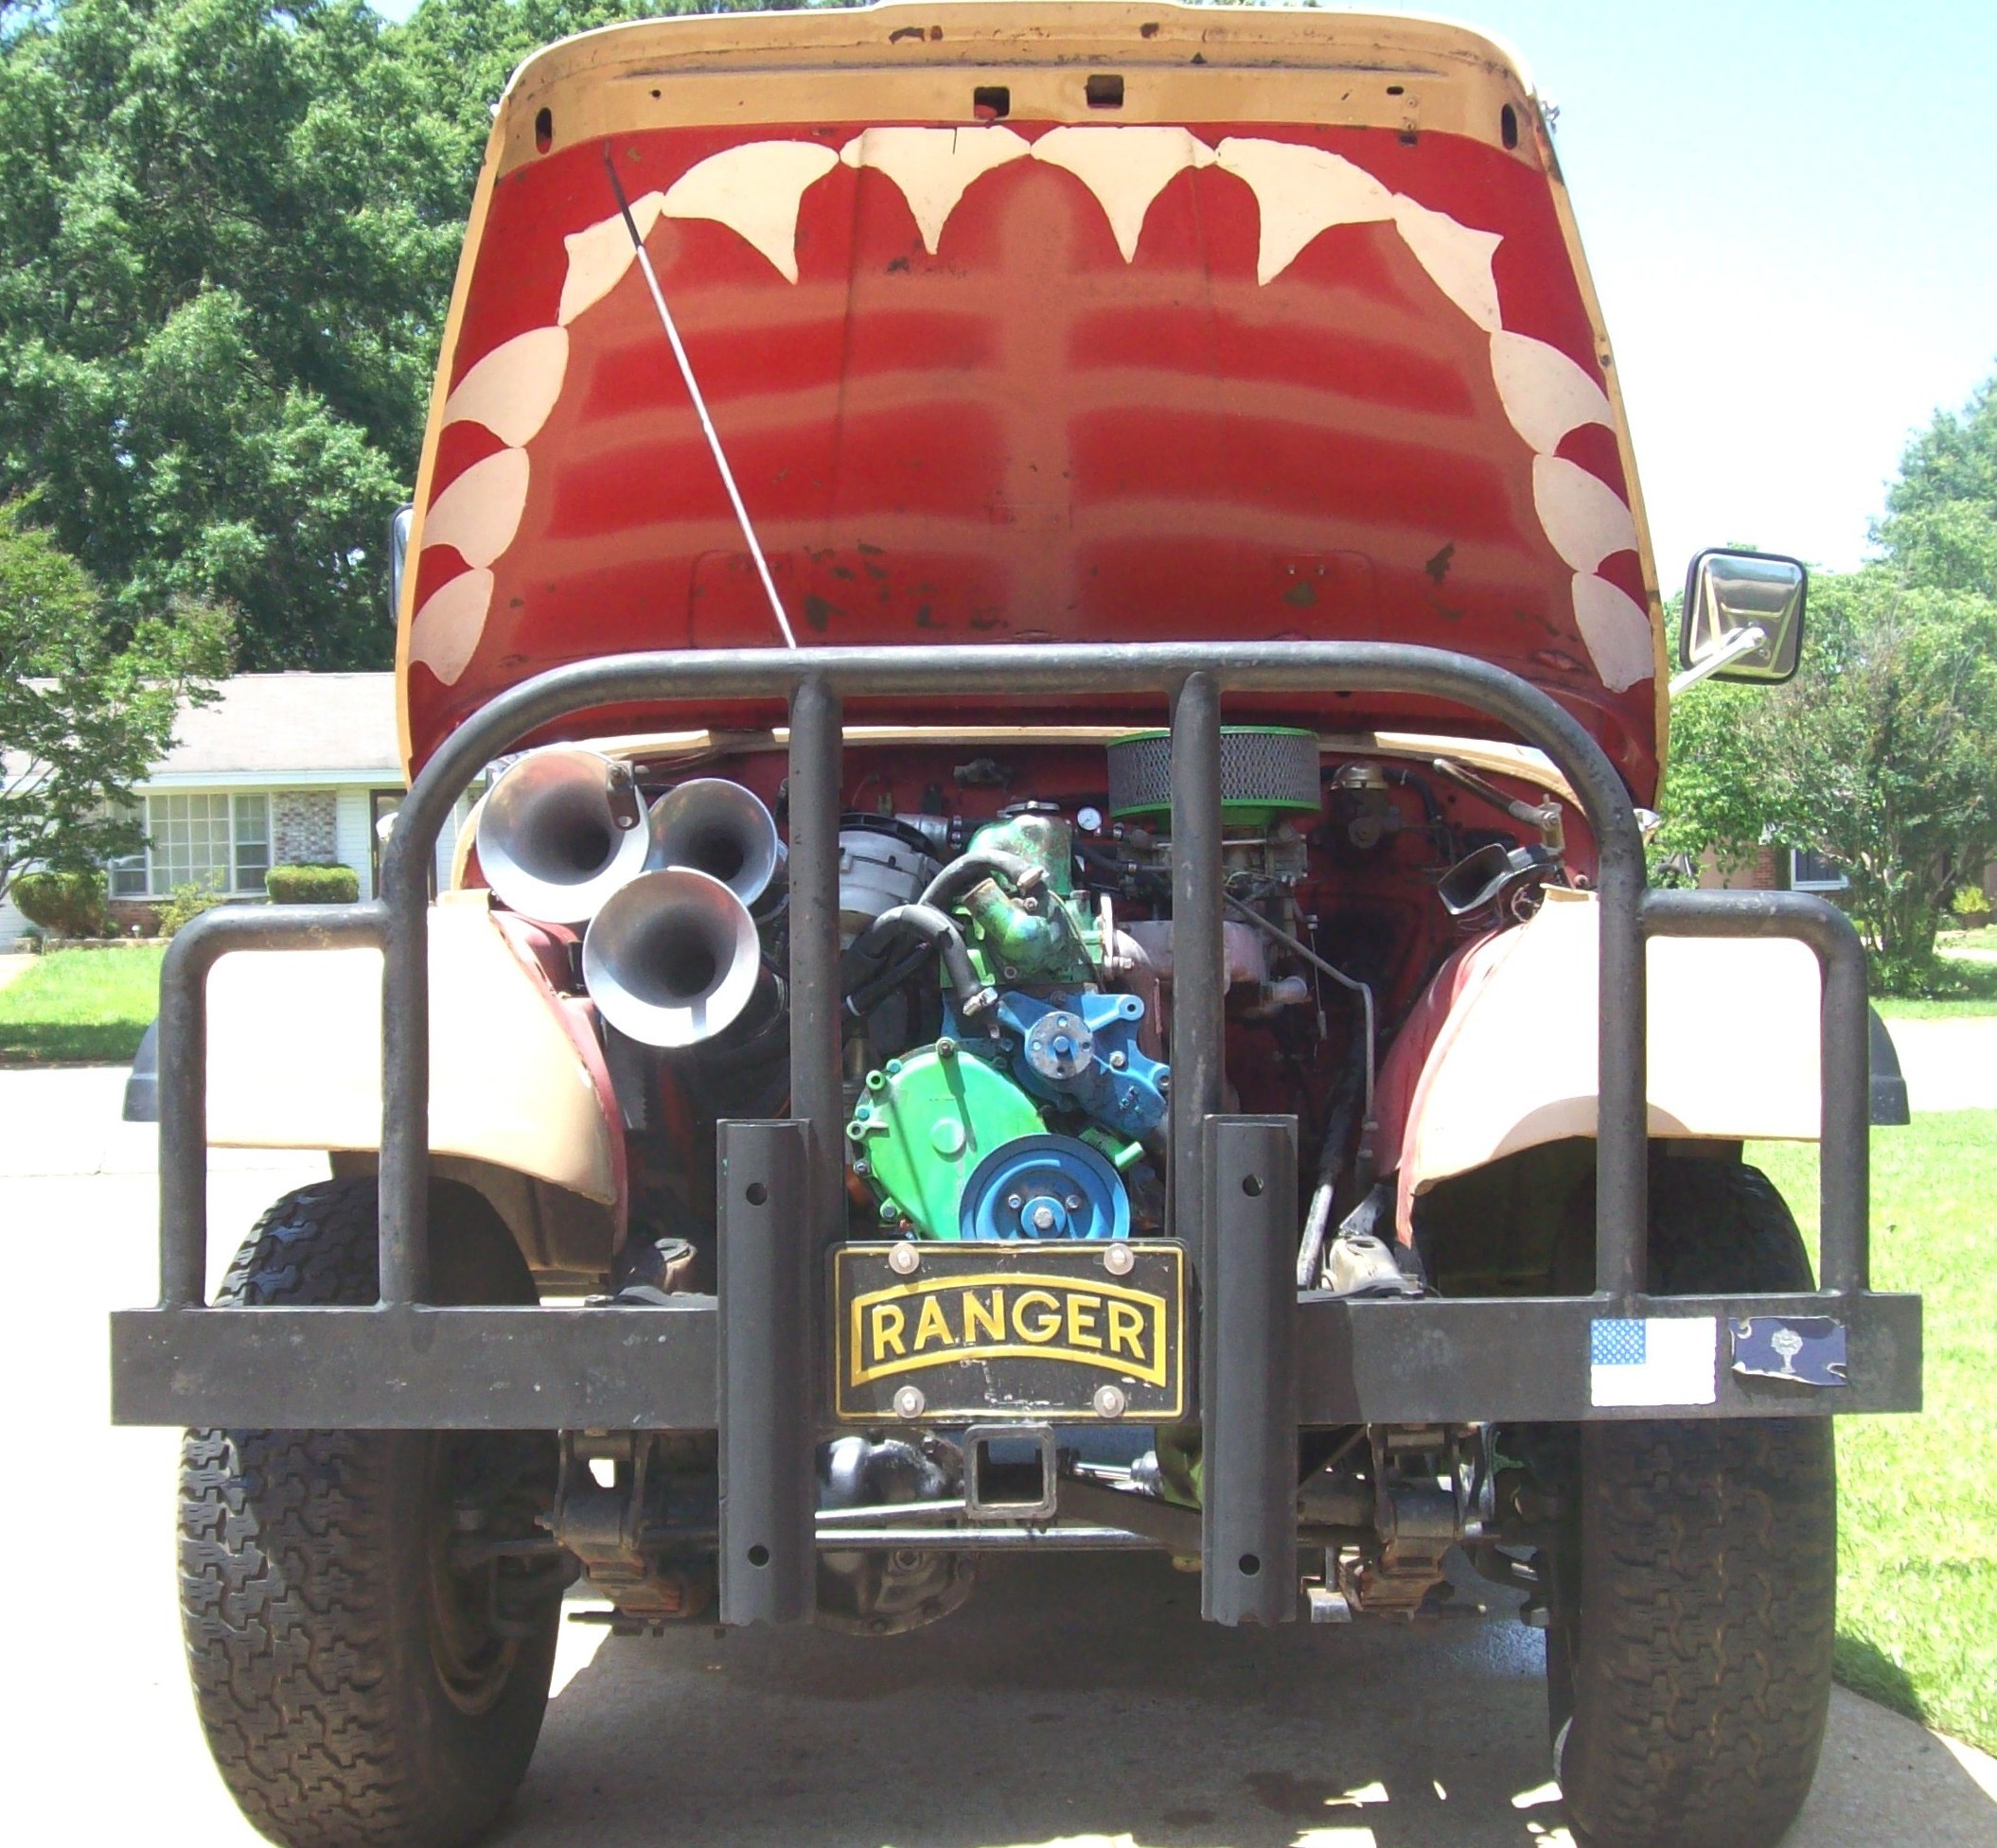
Hide your keys/chock your wheels/ go to neutral

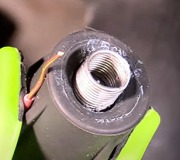
Remove #1 spark plug

Stick it back in , maybe 2 threads (instead of using your thumb)

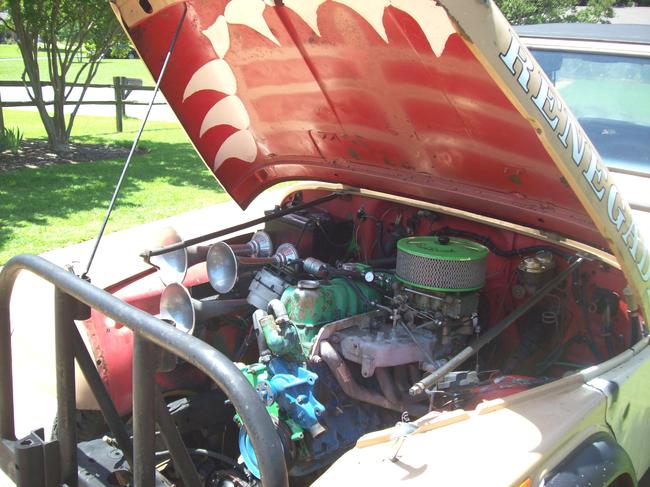
Rotate the engine with a wrench or ratchet (not the starter)

Clockwise as viewed from the grill

When you hear the "hiss" coming by #1 plug=-=-=stop! ( a friend may be helpful to hear this at #1 (as the other cylinders hiss internally (usually fainter) when you rotate the engine

Now, we are on compression stroke on #1 cylinder (piston is still coming up)

We ain't up yet!

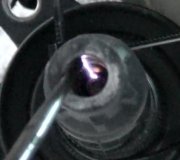
Ever so slowly rotate the engine (cw) till your timing mark (line) lines up with zero!

Stop!!!

I have found that using the starter for the "bumpage" usually results in "overrunning" the marks, compression kicks it back, etc.

Then you mistakenly rotate on around 180 degrees from where you should be (not sayin' bad things, but if you are new to this, it's an ez mistake!)

Ok, back to our slow-motionage!

Now look at the rotor button

It should be facing the "mark" you put on the 'stributor

.......or which ever tower you chose to be #1 (textbook or not)

The engine/ cam/ crank don't care which one it is!

As long as you were at tdc, you placed #1 spark plug wire on "that tower" (the one that rotor is pointing to)

And your 1-5-3-6-2-4 firing order starts there- and runs the sequence clockwise (looking down on the 'stributor cap)

Installing it "textbook" cuts down on confusion later on, as you may have forgotten the "deal"- simply hooking it all up like it shows in the book will make it ezier in 8 months! (but you gotta install it textbook now!)

Lets hears some info!

The medic
Was this
answer
helpful?
Yes
No
Saturday, July 13th, 2019 AT 11:45 AM (Merged)
Tiny
CJ MEDEVAC
  • MECHANIC
  • 11,004 POSTS
I'm sending "david and chad" to give you a hand

Listen to them real good---especially the part about installing a distributor that has been removed and the engine was turned over

Class 1

Http://www.youtube.com/watch?v=5a2x9msslqy

Class 2

Http://www.youtube.com/watch?nr=1&v=fhx1yxvyimg&feature=endscreen

If you did not mark the body of the distributor and the engine, you are gonna need a timing light and the "exact" procedure in setting the timing (might have to disconnect a wire or vacuum line while timing)

One of these is very helpful for doing it right

Http://www.2carpros.com/questions/2007-ford-taurus-tune-up

I'm glad to see you have a 258!

What's all of the splicing at the 'stributor?

Keep on replying

The medic
Was this
answer
helpful?
Yes
No
Saturday, July 13th, 2019 AT 11:45 AM (Merged)
Tiny
CJ MEDEVAC
  • MECHANIC
  • 11,004 POSTS
Somehow I lost the 1st lines of the last answer

Voltage at the pos side of the coil w/ key on?

Continuity test thru the distributor connector?

Did you try a jumper from pos battery to positive coil?

(then the answer above was supposed to start)

The medic
Was this
answer
helpful?
Yes
No
Saturday, July 13th, 2019 AT 11:45 AM (Merged)
Tiny
JAYBOT
  • MEMBER
  • 19 POSTS
Lets say the timing was off, wouldn't I still get spark from the distributor?
Was this
answer
helpful?
Yes
No
Saturday, July 13th, 2019 AT 11:45 AM (Merged)
Tiny
OZZIE62G
  • MEMBER
  • 30 POSTS
Hello sir sorry for the delay. I haven't had a chance to work on the cj( work?) I have seen the you tube vid you sent. As far as the TDC I have set it right on how ever I'm off tomorrow and I'll Doublecheck it Again. This is what I'm having problems with if I stick a screwdriver in the center of the coil and ground next to the engine their spark but if I plug in the coil wire that runs to the center of the distributor. I've also bought a new set of plug wires to test as well. But as always I do appreciate very much the support and I will advise you tomorrow with the results happen thank you.
Was this
answer
helpful?
Yes
No
Saturday, July 13th, 2019 AT 11:45 AM (Merged)
Tiny
JAYBOT
  • MEMBER
  • 19 POSTS
In trying to fix the no spark issue. Replaced the connector at the top of the coil and broke a wire on the connector that goes to the distributor.
Was this
answer
helpful?
Yes
No
Saturday, July 13th, 2019 AT 11:45 AM (Merged)
Tiny
CJ MEDEVAC
  • MECHANIC
  • 11,004 POSTS
I'm right here might near every evening

Take your time

Then answer all of my questions!

The medic
Was this
answer
helpful?
Yes
No
Saturday, July 13th, 2019 AT 11:45 AM (Merged)
Tiny
CJ MEDEVAC
  • MECHANIC
  • 11,004 POSTS
You did install the timing gears perfectly?

No doubt the marks were lined up as per pics you looked at in a manual. If this step is wrong. It will not do right unless you go back in!

You said it has not busted off and run at all. After the timing set?

I got more testing for you---just wanna stay on top of what's going on----no need in doing all of this. Then backtracking

Do you have an advance auto parts in your region?

Is the 'stributor in by david and chad standards?

Pickup in dist. Tested good. That's good!

The medic
Was this
answer
helpful?
Yes
No
Saturday, July 13th, 2019 AT 11:45 AM (Merged)
Tiny
OZZIE62G
  • MEMBER
  • 30 POSTS
OK I'm sending you a picture of the coil in the painless wiring kit came a ballast resistor my vehicle never had that before installed should I add it?
Was this
answer
helpful?
Yes
No
Saturday, July 13th, 2019 AT 11:45 AM (Merged)
Tiny
JAYBOT
  • MEMBER
  • 19 POSTS
Timing set was installed correctly. I did find tdc and re installed the distributor again so that my rotor starts on number one cylinder. I get power to my coil, I get power to my distributor but no spark coming out of the distributor. I changed the pick up coil inside the distributor thinking that might be the problem. Still no fire out of the distributor.
Was this
answer
helpful?
Yes
No
Saturday, July 13th, 2019 AT 11:45 AM (Merged)
Tiny
OZZIE62G
  • MEMBER
  • 30 POSTS
Ok it's Wednesday here's the latest. Bought a new set of plug wires Bingo I have spark to all the plugs. Now it did attempt to start I poured fuel in to the Carb to prime it up. I'll get working on the fuel delivery tomorrow and let you know how it gos. Thanks
Was this
answer
helpful?
Yes
No
Saturday, July 13th, 2019 AT 11:45 AM (Merged)
Tiny
CJ MEDEVAC
  • MECHANIC
  • 11,004 POSTS
I gotta send you away

I need answers to my questions (like advance auto).....i know you do too...bear with me!

Remove your ignition module

The correct connector is laying beside it.........'cause i put it there myself!

Test this puppy 5 to 7 times

If it fails onceyou need another one

When you get the new one........by gosh test it too!!!!

I really tore thru my wiring for 2 days, when it still would not fire up.................i only cried when no one was looking................... A friend suggested that i go back and test my new............bad.........module!

The module you get should have "blue" plastic where the wires come outother colors are for other applications

Since i don't know where you are----here's part of the '79 wire diagram that i scanned, painstakingly colored in microsoft paint, blew up, and laminated for my garage wall if it's too late to go to the parts store--you can look it over

As far as saving on parts......this is how to do it at advance auto parts online---pay online---pick up at store.............."a124" worked today.........see my answer in this link

https://www.2carpros.com/questions/1998-chevrolet-cavalier-there-constant-drain-on-battery-about-300-ma-now-after/page/5

That'll knock off $10 on an ign module

You do have a timing light and a dwell/ tach to time it once we get him running?

Your turn

The medic

Was this
answer
helpful?
Yes
No
Saturday, July 13th, 2019 AT 11:45 AM (Merged)
Tiny
CJ MEDEVAC
  • MECHANIC
  • 11,004 POSTS
Now

This would be the oe coil for prestolite, it does not need external resistance (also has a lifetime warranty)

Http://shop.advanceautoparts.com/p/carquest-by-bwd-ignition-coil-e30p/5240212-p?navigationpath=l1*14923%7cl2*15034%7cl3*16064

They have another one for $18 (1 year warranty)

The one in your pic does require the ballast resistor to be installed, (this would also be what you need if you switch over to motorcraft)

Pic 1) is of my ballast resistor (should it ever burn out) you can "get by" temporarily to get you home, by connecting the wires together, bypassing the ballast resistor)

pic 2) i used a piggy back, this way nuthin' gets cut and is reusable, should i need to connect the wires together

Once you get the ballast resistor on and everything hooked up, turn the key on and tell me what the voltage is on the positive side of the coil.

Pic 3 and 4) this is the correct way that the fuel lines connect, i have replaced my steel lines with new ones, except i used a tubing bender to "tidy up" the looks, the originals sort went over and under stuff they just made things look crappy.

The mini pressure gauge and regulator are not necessary, but are useful so you can see the actual pressure, it does pulsate as the fuel pump pumps. They're also a good conversation piece

Your fuel pump will fill the carb bowl pretty darn quick if you feed the carb maybe 2 teaspoons of gas down the carb throat moments before you attempt to start your jeep (dumping some down now is not gonna do nuthin' 'cept evaporate)

The medic
Was this
answer
helpful?
Yes
No
Saturday, July 13th, 2019 AT 11:45 AM (Merged)
Tiny
CJ MEDEVAC
  • MECHANIC
  • 11,004 POSTS
DIAGRAM DID NOT SHOW---HERE IT IS

THE MEDIC
Was this
answer
helpful?
Yes
No
Saturday, July 13th, 2019 AT 11:45 AM (Merged)

Please login or register to post a reply.

Sponsored links