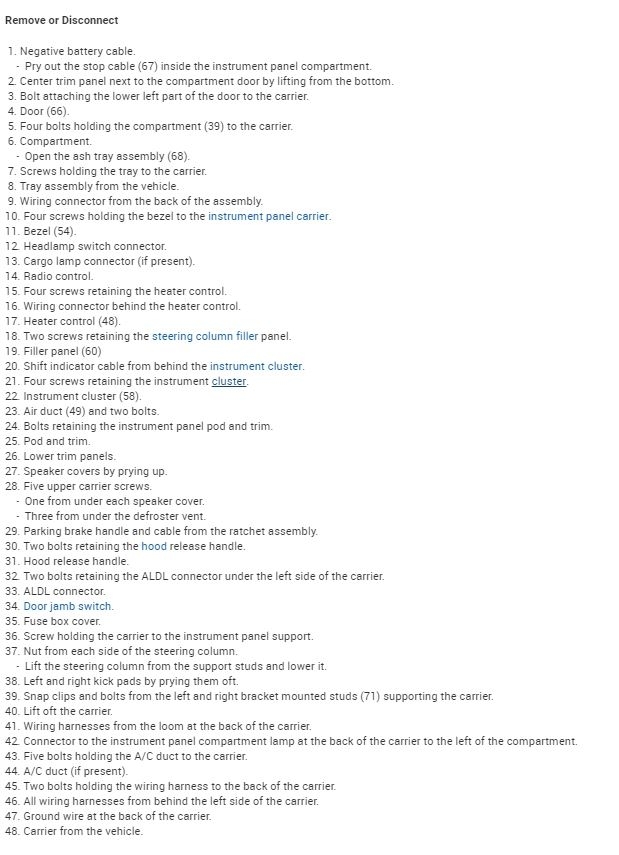
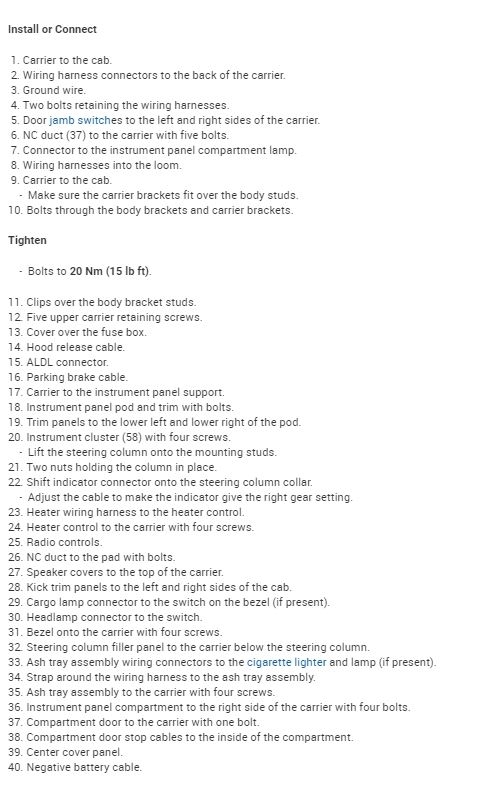
1. Disconnect negative battery cable.
2. Remove center trim panel next to the compartment door by lifting from the bottom.
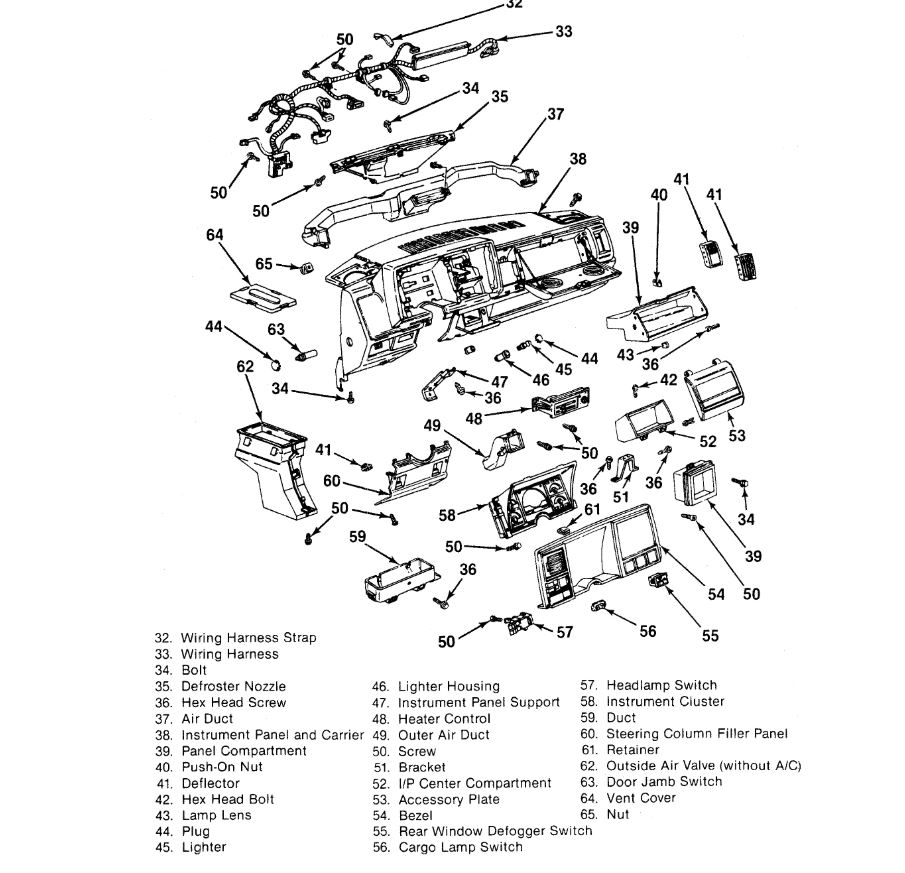
3. Glove Box.
? Remove the bolt attaching the lower left part of the glove box door to the carrier.
? Remove glove box door.
? Remove four bolts holding the interior glove box to the carrier.
? Remove interior glove box.
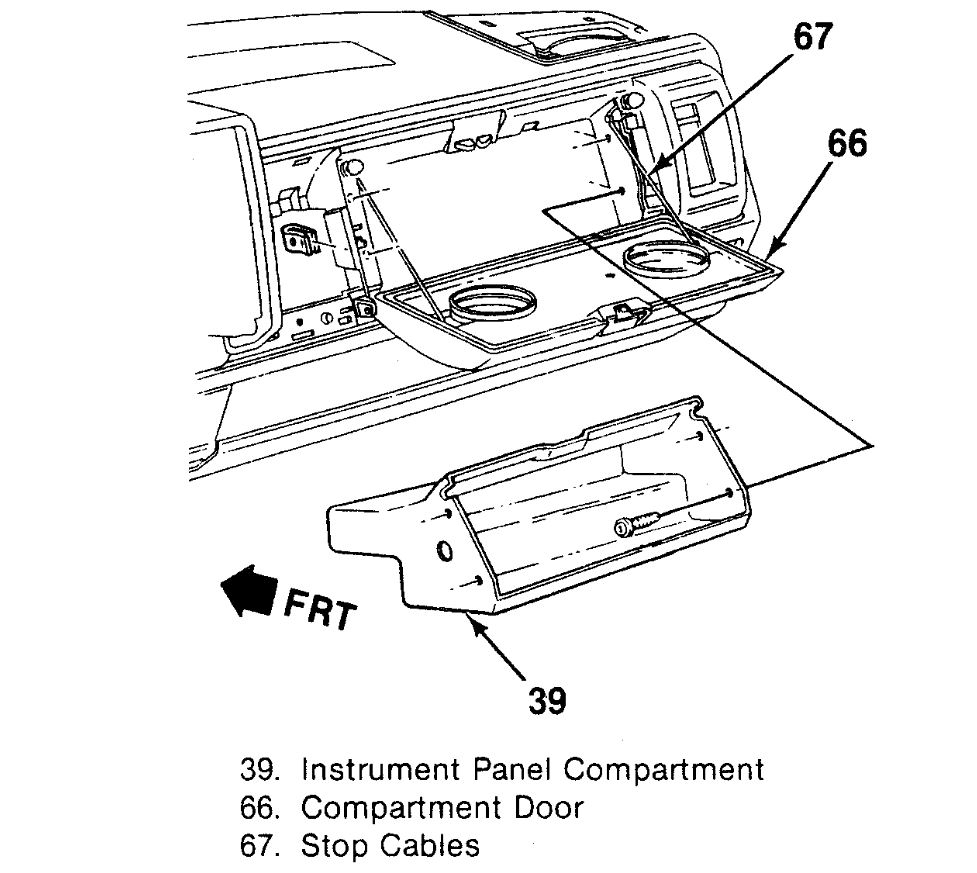
4. Ash tray assembly.
? Open ash tray.
? Remove screws holding assembly to the carrier.
? Disconnect wiring from the back of the assembly.
? Remove assembly.
5. Instrument panel.
Instrument Panel Bezel
? Remove 4 screws (T20 Torx) holding the instrument bezel to the instrument panel carrier
? Pull bezel slightly away from assembly � reach behind and disconnect headlamp switch connectors (2)
? Disconnect cargo lamp connector (if present)
? Remove Bezel
Radio Control
? Remove 4 screws retaining the radio control
? Pull control slightly away from assembly � reach behind and disconnect wiring connector(s)
? Remove radio control
? Push the wiring connector through the assembly
HVAC Control
? Remove 4 screws retaining the HVAC control
? Pull control slightly away from assembly � reach behind and disconnect wiring connector.
? Remove HVAC control
? Push the wiring connector through the assembly
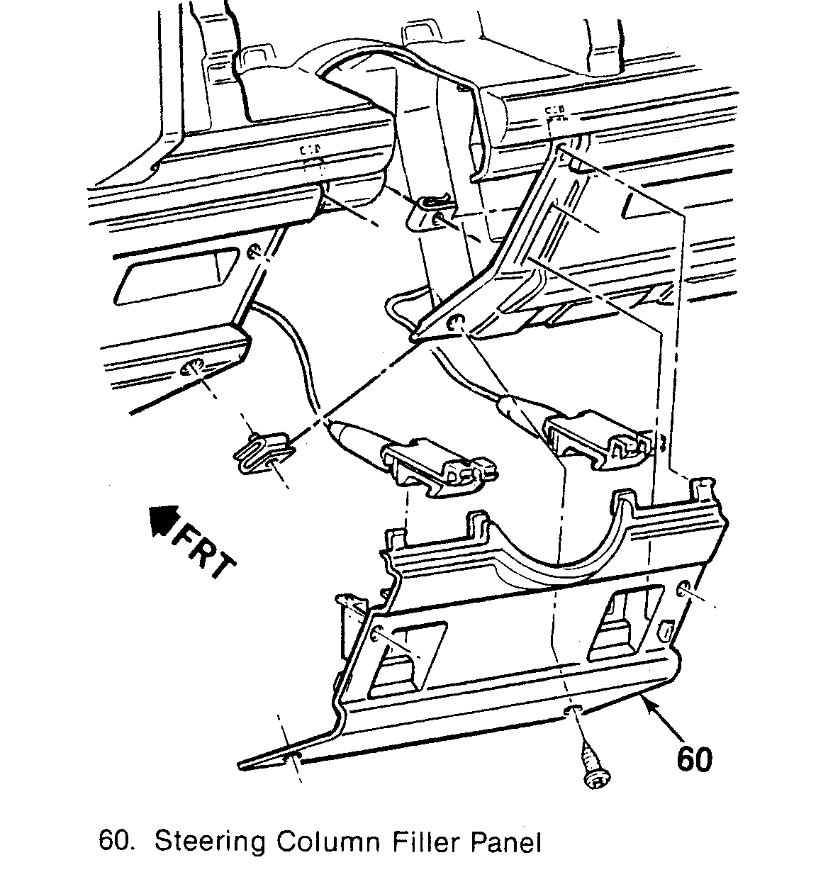
Steering Column Filler Panel
? Remove 2 screws retaining the steering column filler panel - remove panel
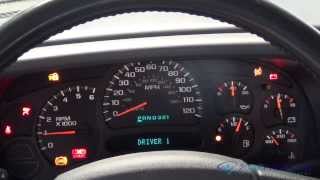
Instrument Cluster
? Disconnect shift indicator cable (connects to steering column) from behind cluster
? Remove 4 screws retaining the instrument cluster � remove cluster
? Slide pin connector in dash assembly to the left and push through the assembly.
Air Duct
? Remove 2 bolts retaining air duct on the left side of the instrument panel pod � remove duct
Instrument Panel Pod and Trim
? Remove 8 bolts retaining the instrument panel pod and trim � remove panel
6. Lower Trim Panels
? Remove 2 padded trim panels by gently prying with a wide, thin, soft tool (e.G. Plastic putty knife)
? Each panel is attached with 4 press in retainers.
7. Speaker Covers
? Remove speaker covers by prying up
? Each cover is attached with 2 press in retainers
8. Parking Brake Cable
? Disconnect parking brake cable from ratchet assembly
note: The parking brake handle and cable assembly is retained by clips accessed from behind the panel. This assembly is easily removed after the dash has been removed from the vehicle, should you choose to do so.
9. Hood Release Handle
? Remove 2 screws retaining hood release handle � allow to dangle
10. ALDL Connector
? Remove 2 screws retaining the Assembly Line Diagnostic Link (AKA ALDL or OBD1 port) � allow to dangle
11. Door Jam Switch
? Disconnect the wire connector from the door jam switch � allow to dangle
12. Remove the fuse box cover
13. Unclip the fuse box and push through the carrier � allow to dangle
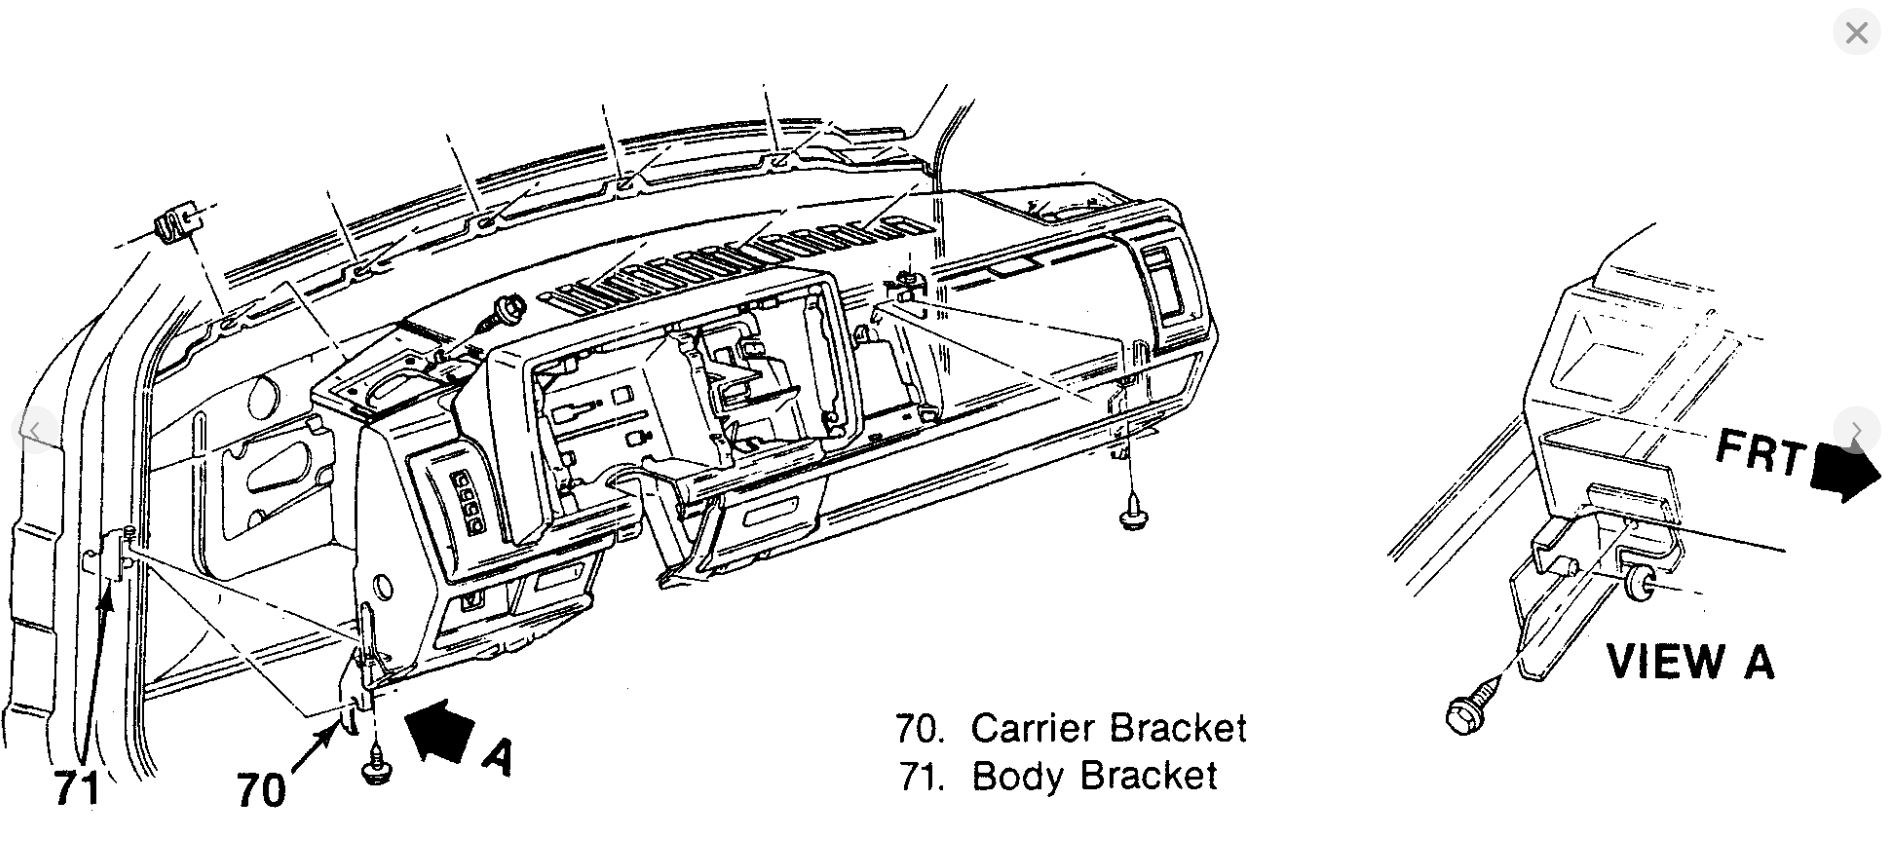
14. Remove the screw holding the carrier to the dash support [this is the support that is also the mount for the radio (7X4.25” silver box with fins)].
15. Remove 2 nuts from each side of the steering column
? Lower the steering column
16. Remove left and right kick pads by prying them off
17. Remove bolts from left and right bracket mounted studs supporting the carrier (front lower left and right)
18. Remove 5 upper carrier screws
? One from each speaker housing
? Three in defroster vent (left, center, right)
19. Disconnect Harness
? Remove 2 bolts retaining harness behind carrier at instrument cluster
? Remove harness from loom behind carrier (accessed through glove box and area covered by center trim panel)
? Remove ground wire at the back of the carrier
note: As an alternative, the wiring harness can be removed with the carrier, however, this approach requires disconnection of the convenience center through the firewall on the left side of the cab, the connection to the HVAC harness attached to the heater/AC box, and connections to the engine compartment through the right side of the cab.
20. Remove the carrier from the vehicle
SPONSORED LINKS
Monday, July 27th, 2020 AT 10:08 AM
(Merged)