Introduction
A cooling system leak is nothing to attended to lightly, this vital fluid is used to keep the vehicles engine running at normal temperatures. If a substantial amount of coolant is lost, the engine may overheat, potentially causing severe and irreversible damage. In this guide we go over the most poplar leak areas.
CAUTION! Never open the hood or check for problem whiles the engine it hot, the cooling system is under pressure and can burst which will cause sever burns. Wear safety gloves and goggles for protection, park the vehicle on a level surface, turn off the engine, and allow it to cool completely. Also, before repairs are made release the cooling system pressure slowly.
There are two types of coolant leaks, the first is vary obvious because coolant will be all over the ground where the car is parked, or you get an "Engine Overheating" warning on the dash. The second is a little more subtle, which will be the coolant level inside the reservoir is low continuously.
Tools and Materials Required
- Safety gloves and goggles
- Flashlight
- Cooling system pressure tester
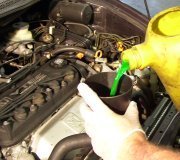
- Coolant (manufacturer-recommended type)
- Shop towels
- Drain pan
- Floor Jack and Stands (sometimes)
Coolant Leak Exploration
1. Radiator: The radiator is the number #1 item to have a leak due to it's surface area and construction. This unit is made of a thin aluminum tubing core with plastic collector tanks on either side which are prone to leakage, most of the time using a flashlight can detect a leak. When this problem occurs it will sometimes leave signs of dried coolant as in the image below:

2. Hose Clamp: A hose clamp can break, become weak, or not be installed correctly which will cause a leak. Depending on the problem with the clamp it can be replaced or simply repositioned squarely on the hose. Also, sometimes a radiator hose will not seal well due is corrosion under the hose or the hose clamp being not positioned correctly.

3. Coolant Hoses: Radiator and heater hoses have a high failure rate due to there operating conditions and construction. These rubber hoses are subject to heating and cooling cycles that can deteriorate the composition of the hose which will cause a rupture, this failure will be obvious and will require the coolant hose to be replaced.
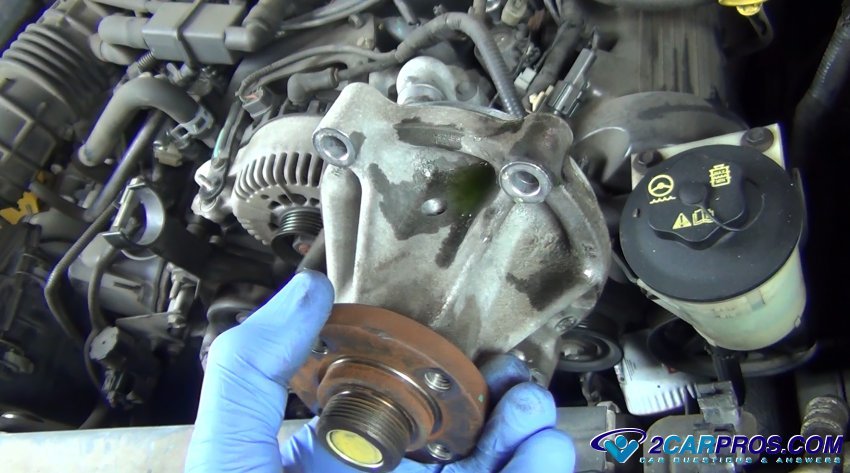
4. Coolant Pump: The cooling system water pump (coolant pump) is mounted to the engine block or timing chain cover and is designed to circulate coolant. This pump is designed with a main shaft seal which is used to prevent coolant from leaking from the pump housing, when it fails it allows a leak from the pump's weep hole which is seen in the image below. At this point the water pump must be replaced.
5. Coolant Reservoir: All cars have a coolant reservoir which handles the coolant as it expands and contracts during the normal engine operation, reservoir is made of plastic it can crack creating a leak meaning the coolant coolant reservoir will need replacement.
Hard to Find Leaks
1. Pressure Tester: When leaks are not obvious a cooling system pressure tester is your friend, this device will pressurize the system so the leak can be more easily found.
2. Head Gasket: A head gasket is designed to seal the cylinder head to the engine block. Over time, heat and corrosion will cause the gasket to leak, either pushing exhaust gasses into the cooling system or allowing coolant to leak inside of the engine.
3. Freeze Plugs: Freeze plugs are designed into a car’s engine block as a safety measure in case the engine freezes. Most engines will have 6 to 8 of these plugs in various places which will push out allowing the expanding frozen coolant to exit the block without cracking it. Freeze plugs are made of a relatively thin metal which can rot out and allow coolant to leak. When replacing a freeze plug it recommended replacing all of them to avoid future additional leaks.
4. Heater Core: This core is constructed much like a small radiator, in fact looks like a mini version of the radiator located inside of the HVAC system. Coolant will appear on the passenger's side floorboard indicating the heater core has failed and needs replacement.
5. Intake Manifold Gasket: On some V8 and V6 engines the intake manifold gasket will seal the coolant ports onto the cylinder head. When this gasket goes bad it can allow coolant to leak either outside or inside the engine.
Conclusion
With some minor troubleshooting you can find where the leak is coming from and see if you can fix it yourself, or have a repair garage do it for you. Also, flush the cooling system to prevent old coolant from becoming acidic which will cause additional leaks. By following this guide, you can identify and address leaks effectively, ensuring your vehicle operates reliably.
Watch the Video!
Please watch this video of the job being done to glean additional helpful information.
Credits
This guide knowledge base was created by the 2CarPros Team, and by Ken Lavacot: Automobile repair shop owner and certified master automobile technician of over 30 years. If you have question or need help please ask one of our experts we are happy to help. Please visit our 2CarPros YouTube Channel.

Article published 2024-12-24