Hi,
There was a technical service bulletin (TSB) related to the rear hatch not fully latching. If you took it to a Mercedes dealer, they should know this. Ask if they are familiar with it.
Here is the TSB. The attached pics correlate with the TSB.
__________________________________________
2007 Mercedes Benz Truck ML 350 4MATIC (164.186) V6-3.5L (272.967)
Body - Liftgate Open Message/Liftgate Won't Latch Fully
Vehicle Body and Frame Doors, Hood and Trunk Trunk / Liftgate Technical Service Bulletins Body - Liftgate Open Message/Liftgate Won't Latch Fully
BODY - LIFTGATE OPEN MESSAGE/LIFTGATE WON'T LATCH FULLY
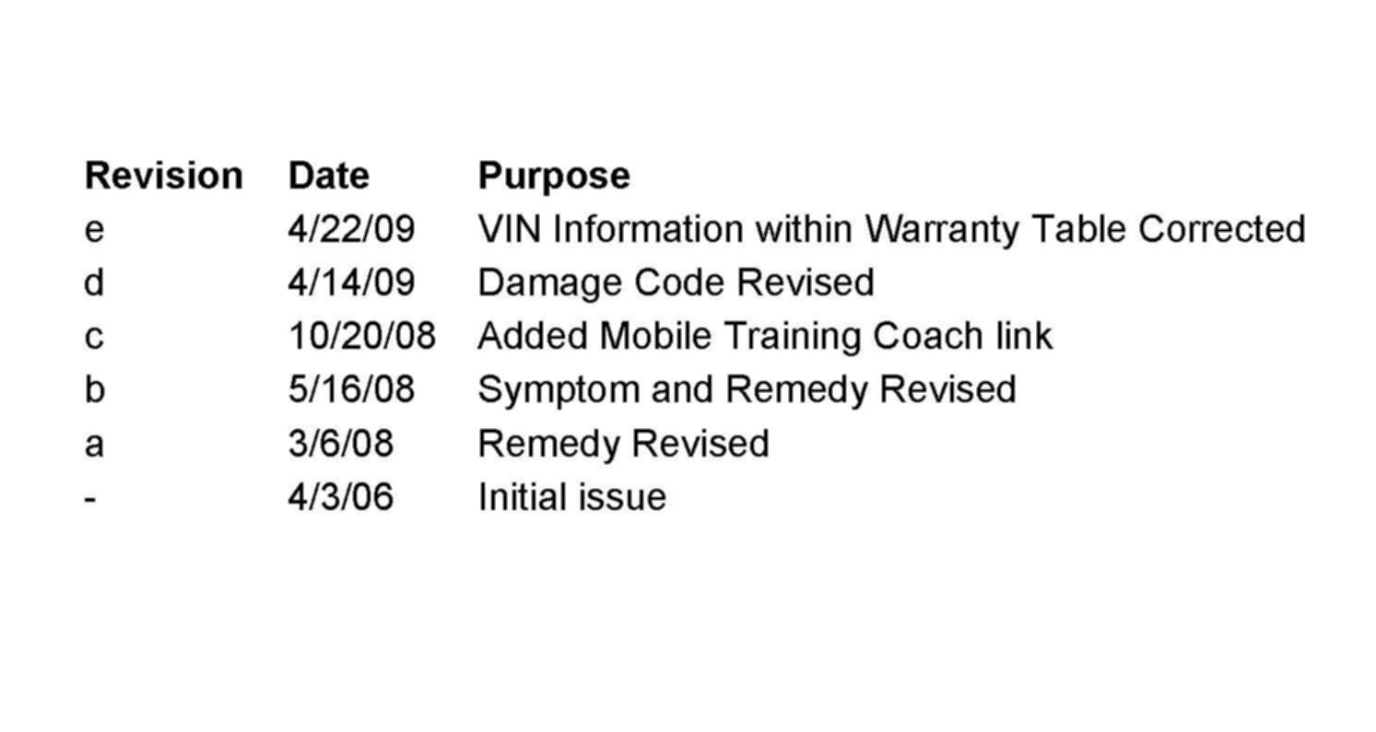
Date: April 22, 2009
Order No.: T-B-72.20/59e
Supersedes: T-B-72.20/59d dated April 14, 2009
Group: 72
pic 1
Revision History
SUBJECT:
All Model 164 and 251 Vehicles
Message "Liftgate Open" in Instrument Cluster Display or Liftgate Will Not Engage Completely
If you receive customer reports in the above model vehicles of the message "Liftgate Open" in the Instrument Cluster (IC) display or the liftgate lock will enter the first (initial) detent when the liftgate is closed, but will not pull into the main (locked) detent, this may be due to a malfunctioning lock, rear SAM software or misaligned striker. To resolve, perform the below applicable remedy based on the VIN.
For Model 164 up to VIN A093857 and 251 up to VIN A018881 - Replace the lock with a new assembly according to the part number listed in the Parts Information section below. Follow the appropriate WIS document for lock replacement, AR72.20-P-2550GZ (164) or AR72.20-P-2550RT (251).
Note:
New lock has a revised mounting position for the bowden cable, which addresses the misalignment issue that caused the incorrect switch status to be sent by the lock.
Caution!
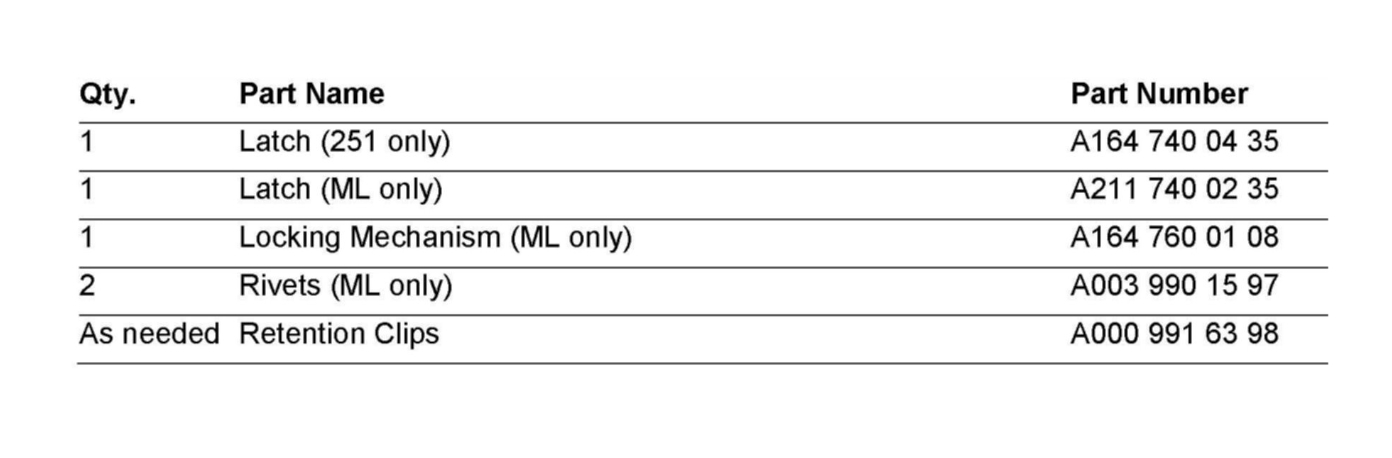
When removing the paneling from the liftgate, retention clips securing the panel may break. If a retention clip breaks, order new clips (A000 991 63 98) accordingly.
pic 2
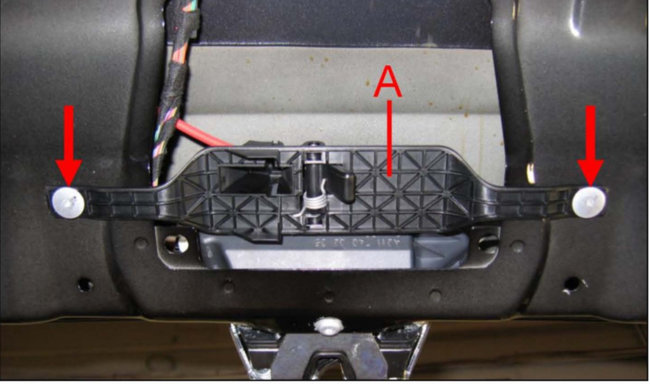
Note:
The latch designed for model 164 (ML) also requires installation of a new locking mechanism. When ordering a latch (A211 740 02 35) for a ML, also order a new locking mechanism (Figure 1, A) and rivets (Figure 1, arrows).
For Model 164 up to VIN A096835 and 251 up to VIN A020342 - Ensure the rear SAM has the latest software. Rear SAM can be flashed via Star Diagnosis menu path: Control units --> Body --> Rear SAM --> Control unit adaptations --> Control module programming.
For Model 164 as of VIN A093858 and 251 as of VIN A018882 - Adjust the striker as follows.
In the Y-direction: The liftgate lock must run into the center of the striker. If the gap dimensions are not in specification, correct at the hinge.
In the X-direction: The liftgate should be as flush as possible with the edges of the fender. Move the striker as far forward in the direction of travel without compromising the appearance of the liftgate flushness.
Note:
A slight recessed rear-end door increases the preload of the seal and improves the functional reliability of the power closing system.
Note:
The gap dimensions for the tailgate can be found in WIS documents AR72.20-P-3510GZ and AR72.20-P-3510RT.
After all modifications have been completed, perform a function test to verify that the liftgate closing assist system is operating correctly on a consistent basis. The liftgate must be pulled closed (to the main detent) by the power closing mechanism without fail.
Note:
To better understand the tailgate adjustment procedure, please reference the mobile training coach for a video that illustrates this process in detail. The video can be found at
http://www.mbusadigitalmedia.com/MTC/pages/allmtc.aspx via group 72 in the drop down menu.
pic 3
Parts Information
Note:
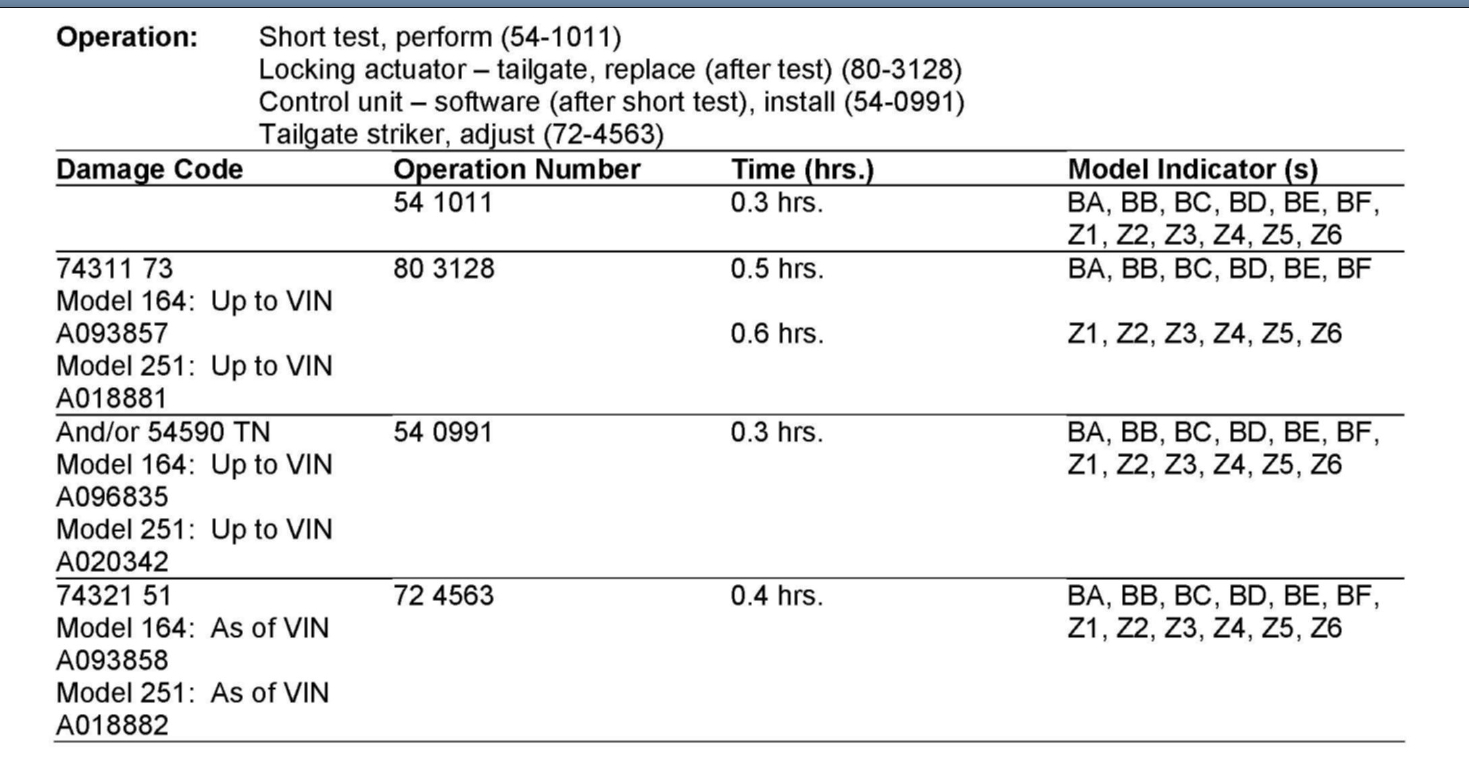
The following allowable labor operations should be used when submitting a warranty claim for this repair. This information has been generated on April 22, 2009. Please refer to Netstar --> Star TekInfo --> Star Time for the most current labor time allowance.
pic 4
In Case of Warranty, use the table above.
______________________________________
Let me know if this helps.
Take care,
Joe
Images (Click to enlarge)
Jan 7, 2020 at 8:59 PM