Good morning,
If you have water in the tank, the tank needs to come down and the flushed out of all the water.
https://www.2carpros.com/articles/how-to-replace-an-electric-fuel-pump
The fuel filter needs to be replaced as well.
https://www.2carpros.com/articles/how-to-change-a-fuel-filter
How did the water get into the tank?
Roy
FUEL TANK REPLACEMENT (DUAL TANKS - FRONT)
REMOVAL PROCEDURE
IMPORTANT: Clean all fuel and evaporative emission (EVAP) line connections and surrounding areas prior to disconnecting the lines in order to avoid possible fuel and/or EVAP system contamination.
imageOpen In New TabZoom/Print
1. Relieve the fuel system pressure. Refer to the Fuel Pressure Relief Procedure.
2. Drain the fuel tank. Refer to Fuel Tank Draining Procedure (Single Tank) Fuel Tank Draining Procedure (5.3L (L59) Engine) Fuel Tank Draining Procedure (Dual Tanks - Front) Fuel Tank Draining Procedure (Dual Tanks - Rear).
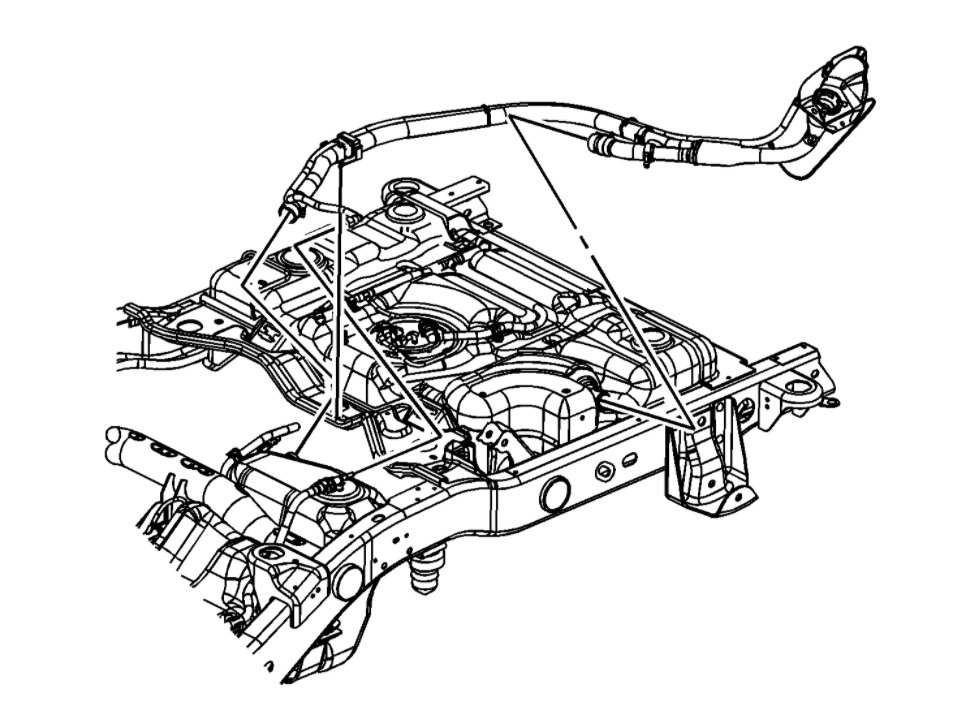
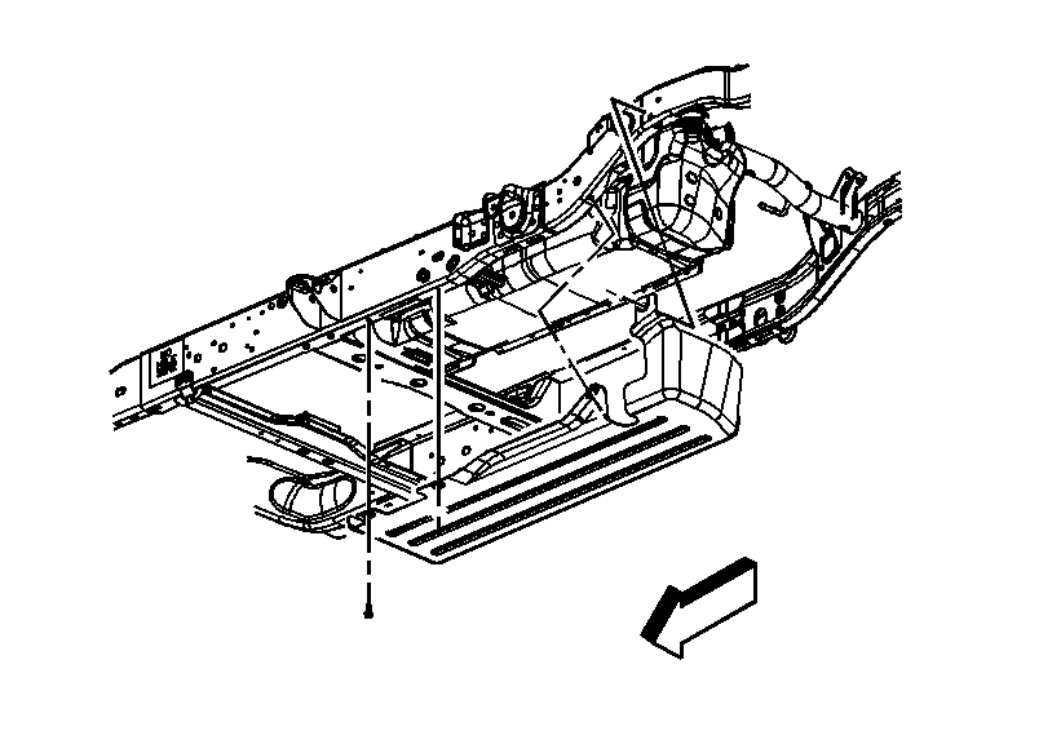
3. Disconnect the evaporative emission (EVAP) vent line from the fuel tank line.
imageOpen In New TabZoom/Print
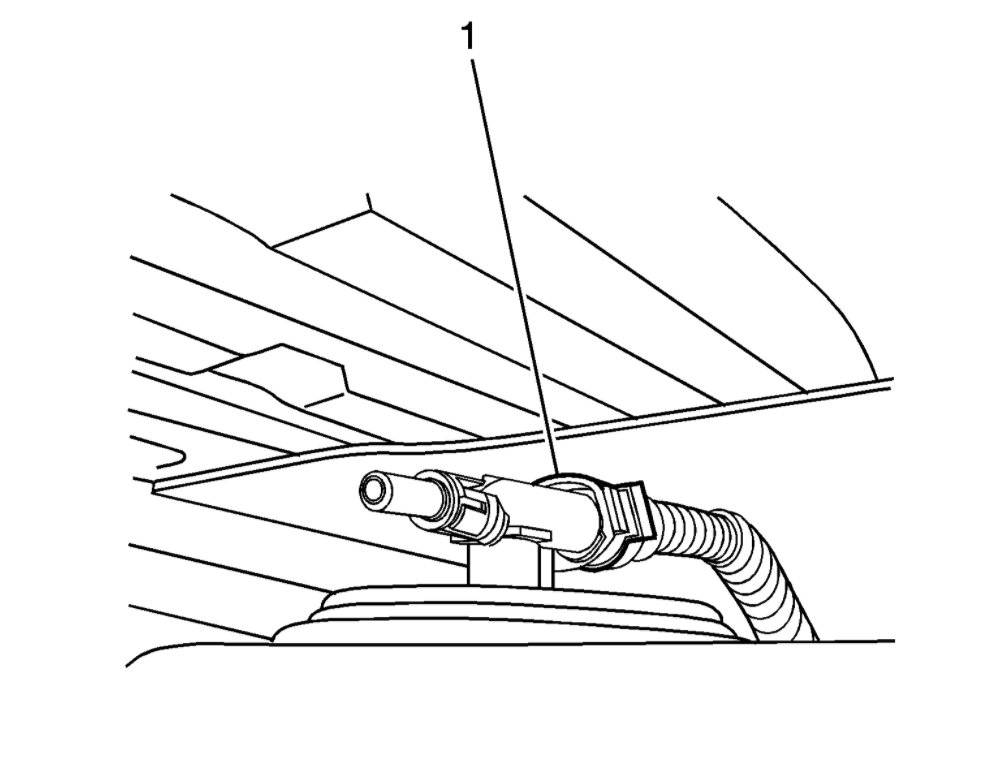
4. Disconnect the vapor line (1) from the fuel tank.
imageOpen In New TabZoom/Print
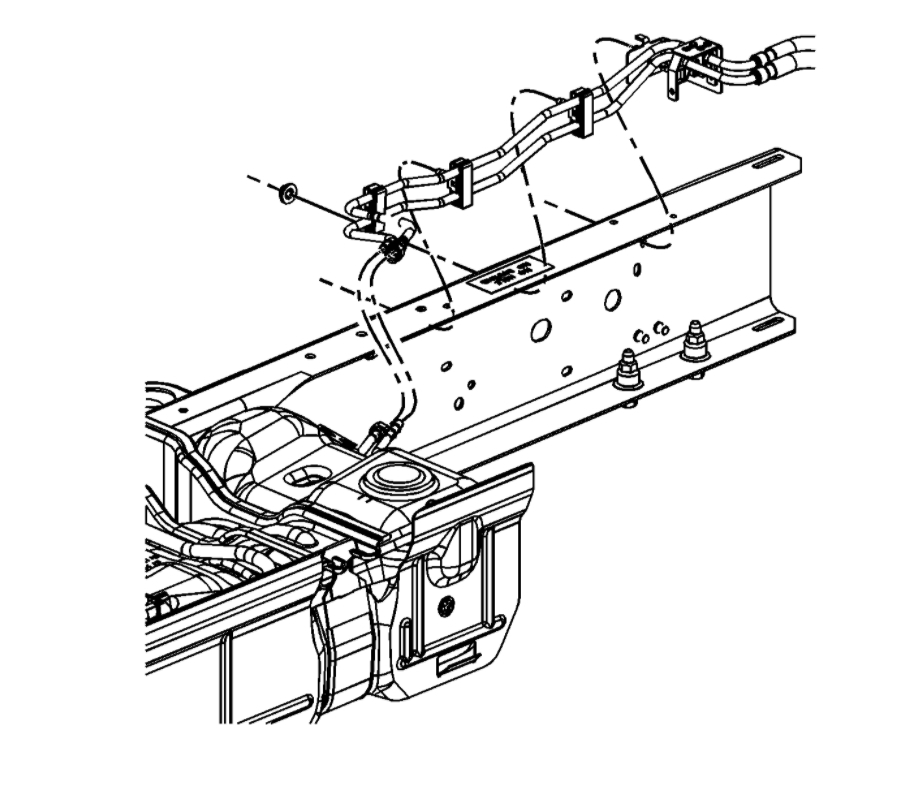
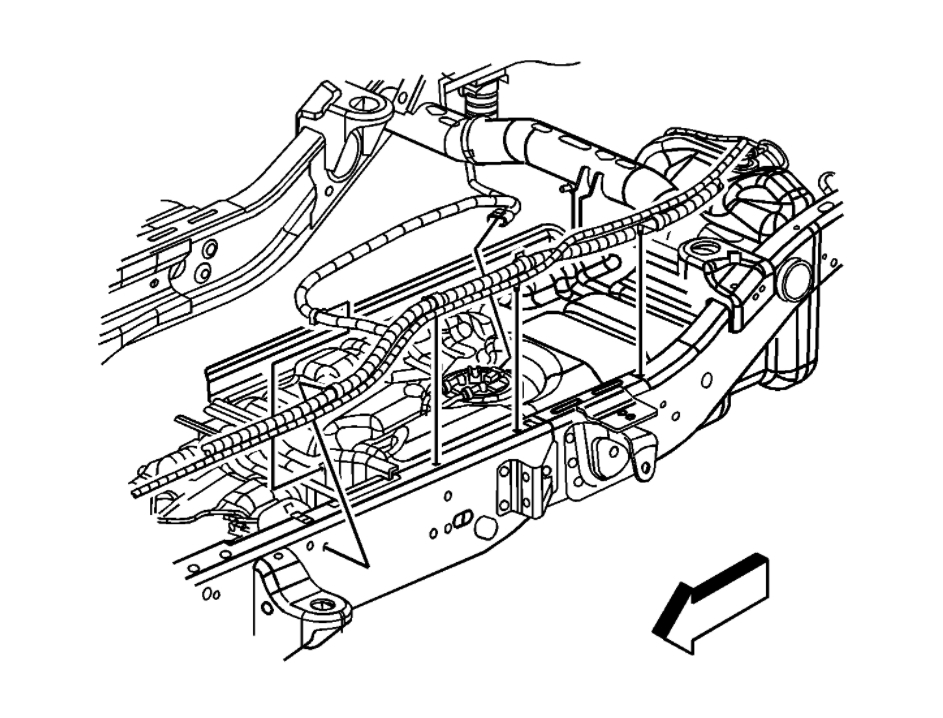
5. Disconnect the fuel feed and EVAP lines from the fuel tank.
imageOpen In New TabZoom/Print
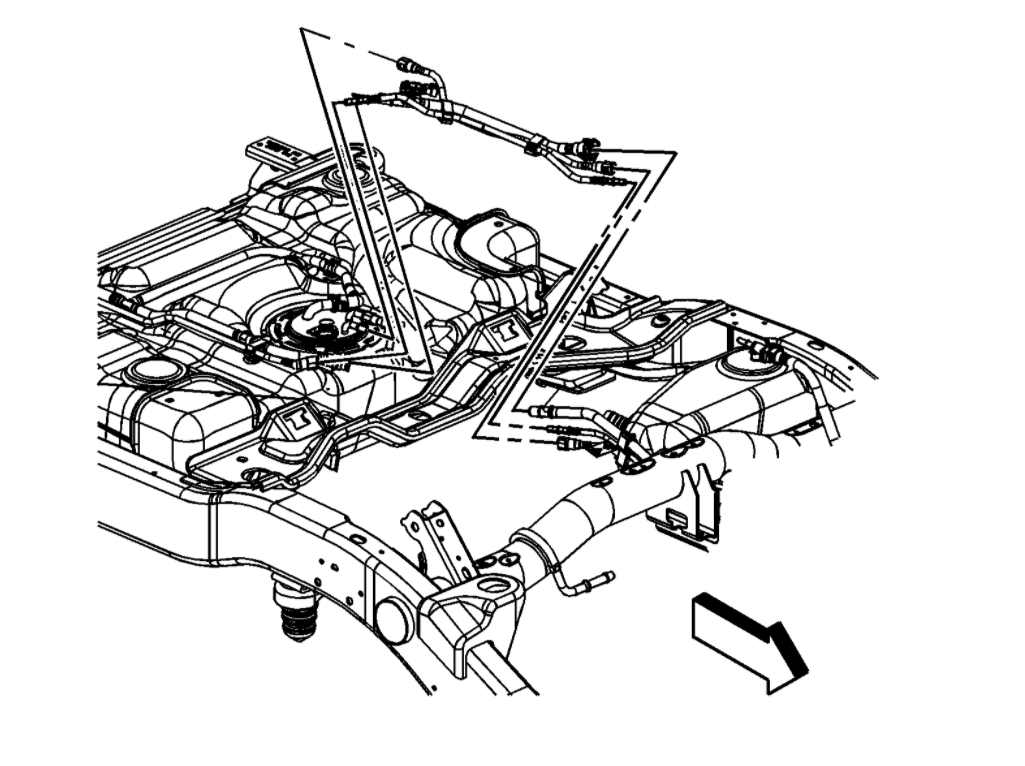
6. Open the clip on the side of the fuel tank retaining the intermediate lines.
7. Disconnect the fuel and EVAP intermediate lines from the front tank.
8. Cap the fuel and EVAP lines in order to prevent possible fuel/EVAP system contamination.
imageOpen In New TabZoom/Print
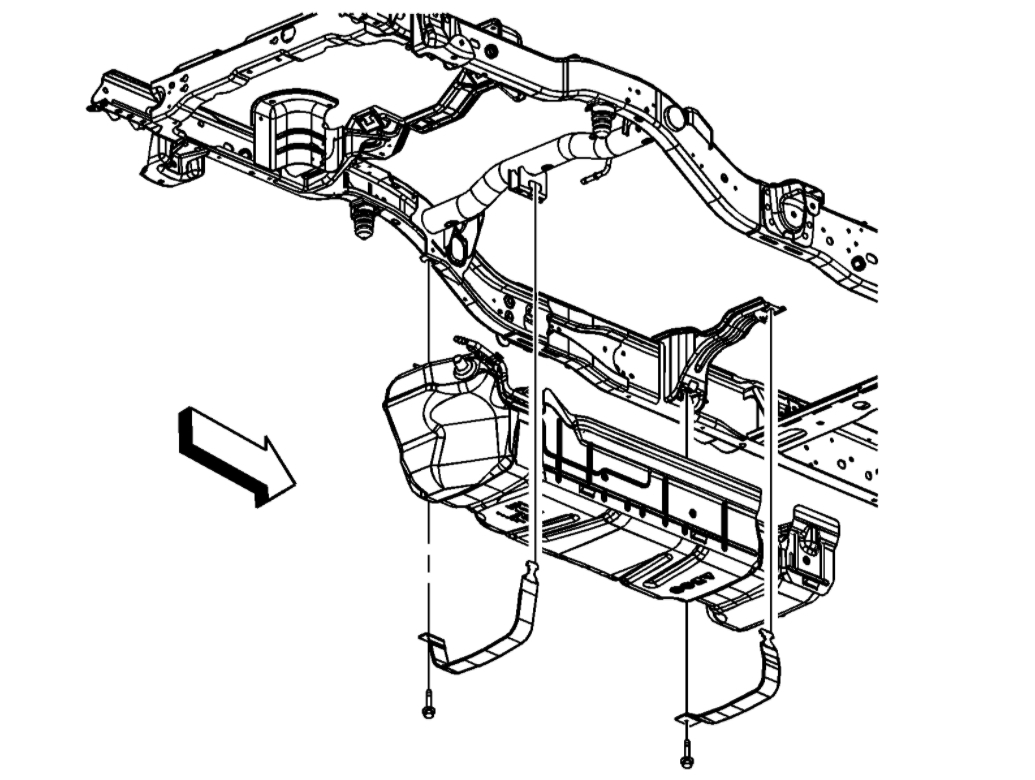
9. If equipped, remove the fuel tank shield bolts.
10. If equipped, remove the fuel tank shield.
imageOpen In New TabZoom/Print
11. Using an adjustable jack, support the fuel tank.
NOTE: Refer to Damage to Fuel Tank Straps Notice in Service Precautions.
12. Remove the fuel tank strap bolts.
13. Remove the fuel tank straps.
14. With the aid of an assistant, carefully lower the fuel tank until the sending unit is accessible.
imageOpen In New TabZoom/Print
15. Disengage the connector position assurance (CPA) retainer.
16. Disconnect the sending unit electrical connector.
17. Completely lower the fuel tank.
18. Place the fuel tank in a suitable work area.
19. If necessary, remove the sending unit.
Images (Click to enlarge)
Dec 22, 2020 at 3:33 AM