Hi and thanks for using 2CarPros.
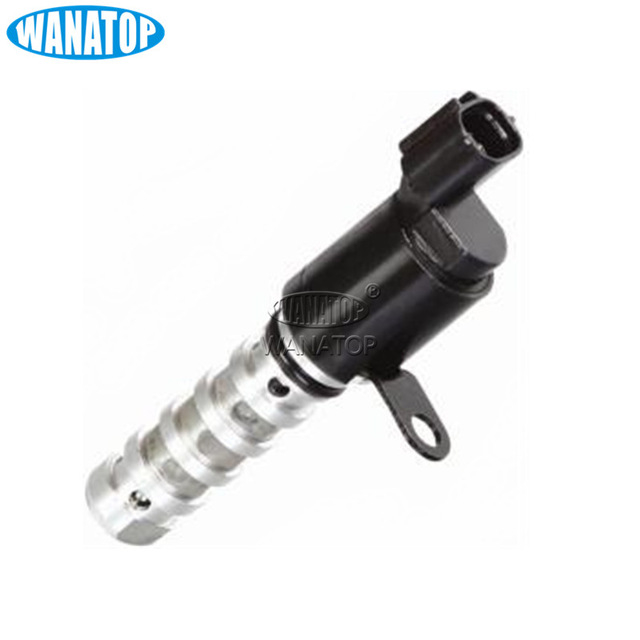
That is a camshaft position sensor. Here is a link that shows how one is replaced in general:
https://www.2carpros.com/articles/camshaft-angle-sensor-replacement
Here are the directions specific to your vehicle for replacement:
REMOVAL AND REPLACEMENT
SONATA(LFA) 2015 G 2.4 GDI Engine Control / Fuel System
Inspection
1. Check the signal waveform of the CMPS and CKPS using the GDS.
Specification:
Refer to "Wave Form" See: Camshaft Position Sensor > Oscilloscope Patterns and Waveforms
Removal
WARNING:
DON'T remove the camshaft position sensor while the engine is running or right after engine is turned off. The part and engine oil is hot and can cause burns.
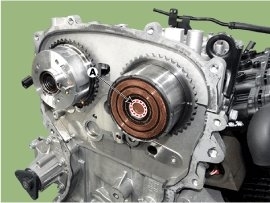
[Bank 1 / Intake]
1. Turn the ignition switch OFF and disconnect the battery negative (-) cable.
2. Disconnect the camshaft position sensor connector (A).
3. Remove the installation bolt (B), and then remove the sensor.
picture 1
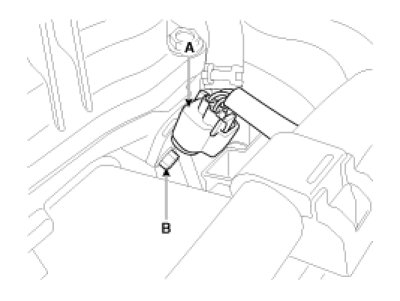
[Bank 1 / Exhaust]
1. Turn the ignition switch OFF and disconnect the battery negative (-) cable.
2. Disconnect the camshaft position sensor connector (A).
3. Remove the hanger and the protector.
4. Remove the installation bolt (B), and then remove the sensor.
picture 2
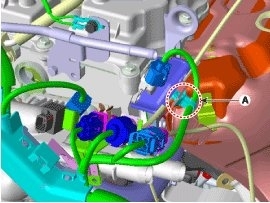
NOTICE:
When installing the sensor connector be sure to keep the wiring clip psition (A).
picture 3
Installation
CAUTION:
Install the component with the specified torques.
Note that internal damage may occur when the component is dropped. If the component has been dropped, inspect before installing.
CAUTION:
Apply the engine oil to the O-ring.
CAUTION:
Insert the sensor in the installation hole and be careful not to damage.
CAUTION:
Be careful not to damage the sensor housing and the connector.
Be careful not to damage the O-ring.
1. Installation is reverse of removal.
Camshaft position sensor installation bolt:
9.8 - 11.8 N.m (1.0 - 1.2 kgf.m, 7.2 - 8.7 lb-ft)
Let me know if this helps.
Take care,
Joe
Images (Click to enlarge)
Feb 8, 2019 at 9:44 PM