Welcome to 2CarPros.
Honestly, it is a big job. I am going to provide directions for taking the transfer case apart and directions for removal. With that, you can determine if it is something you want to do. Note that there are two different types of transfer cases on this vehicle. One is for AWD and the other is for automatic 4wd. You will need to let me know which one you have so I can confirm the information I provide. Regardless, is it basically the same for either.
The directions are for the automatic 4wd. If you have the other, let me know. Also, the attached pictures correlate with the directions. I only provided the directions to actually separate the two casings.
_____________________________
Change Vehicle Bookmarks Library Request Conversion Calculator Technician's Reference - Collision
transfer case
186
Community 66 Create Quote
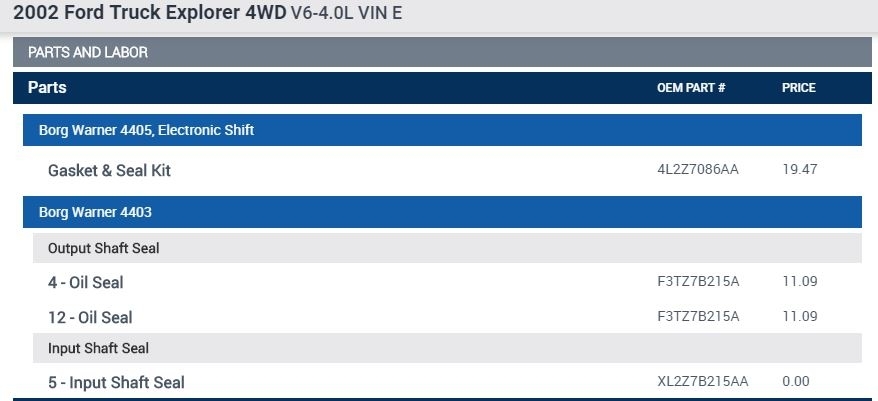
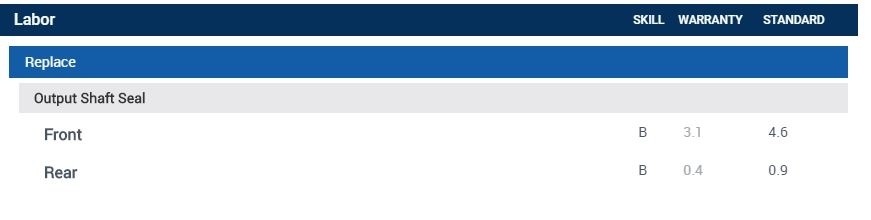
2002 Ford Truck Explorer 4WD V6-4.0L VIN E
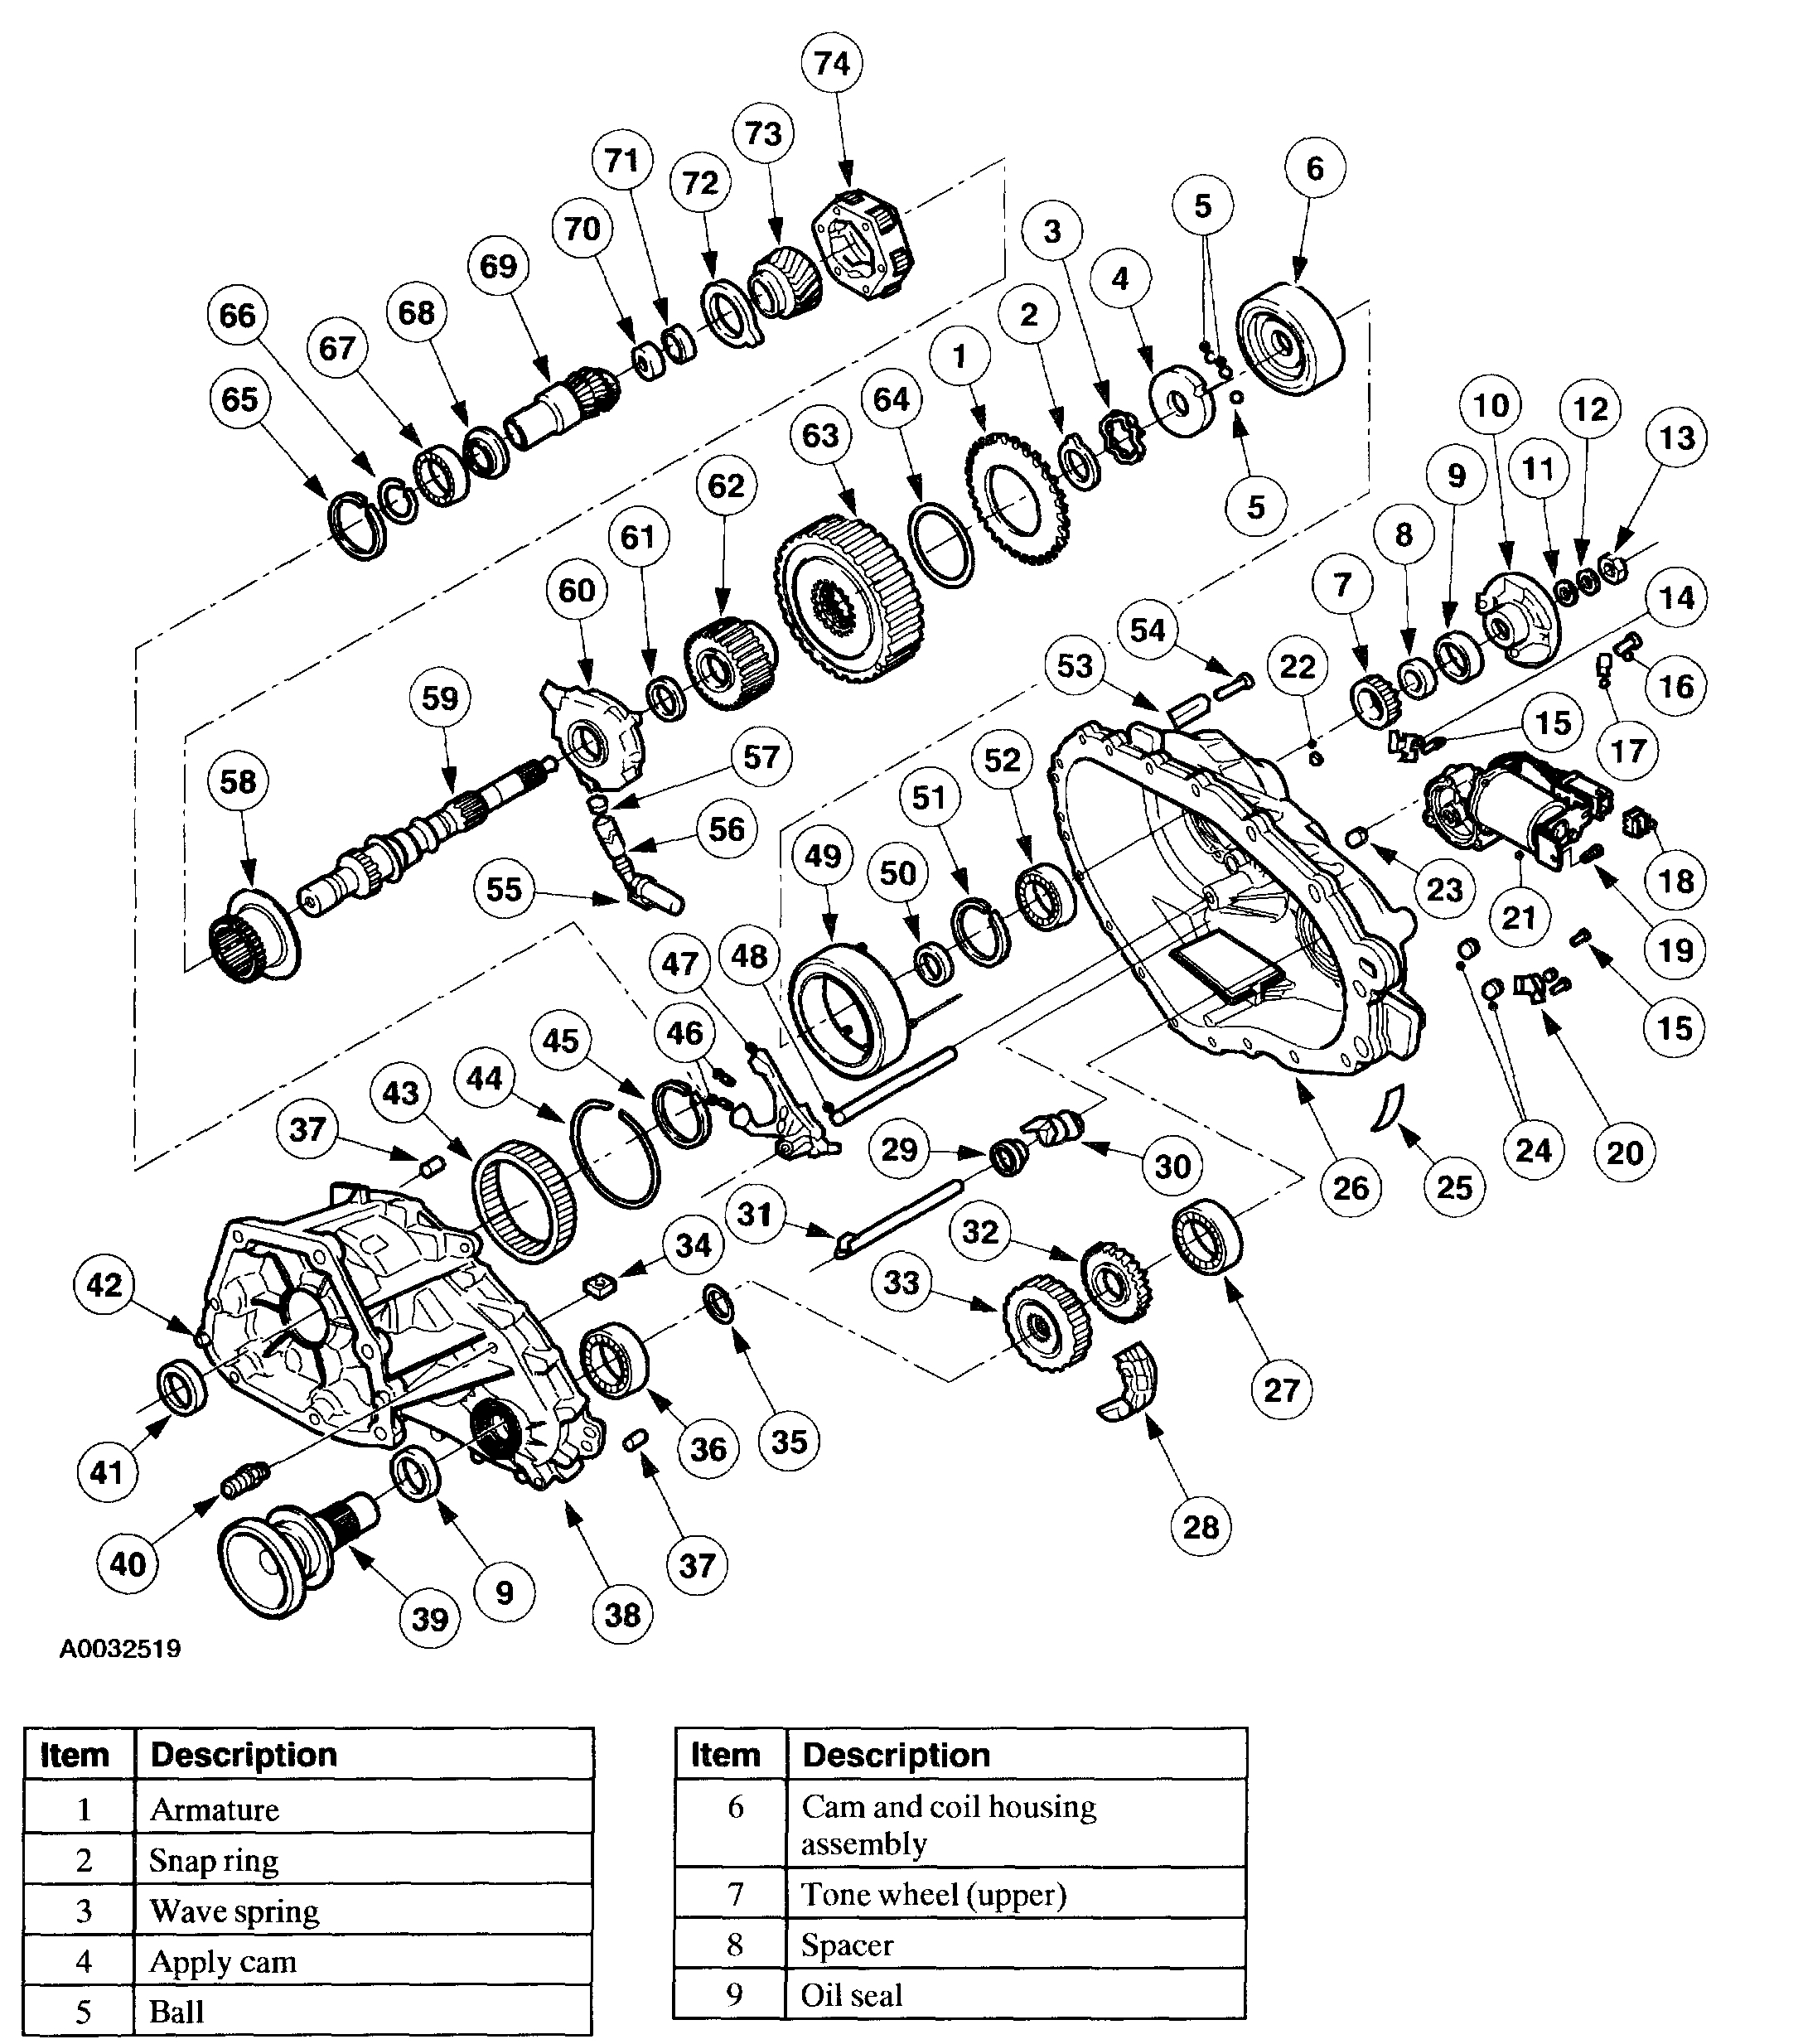
Disassembly
Vehicle Transmission and Drivetrain Transfer Case Service and Repair Procedures Transfer Case-Automatic Shift Disassembly
DISASSEMBLY
Transfer Case
picture 1
picture 2
picture 3
picture 4
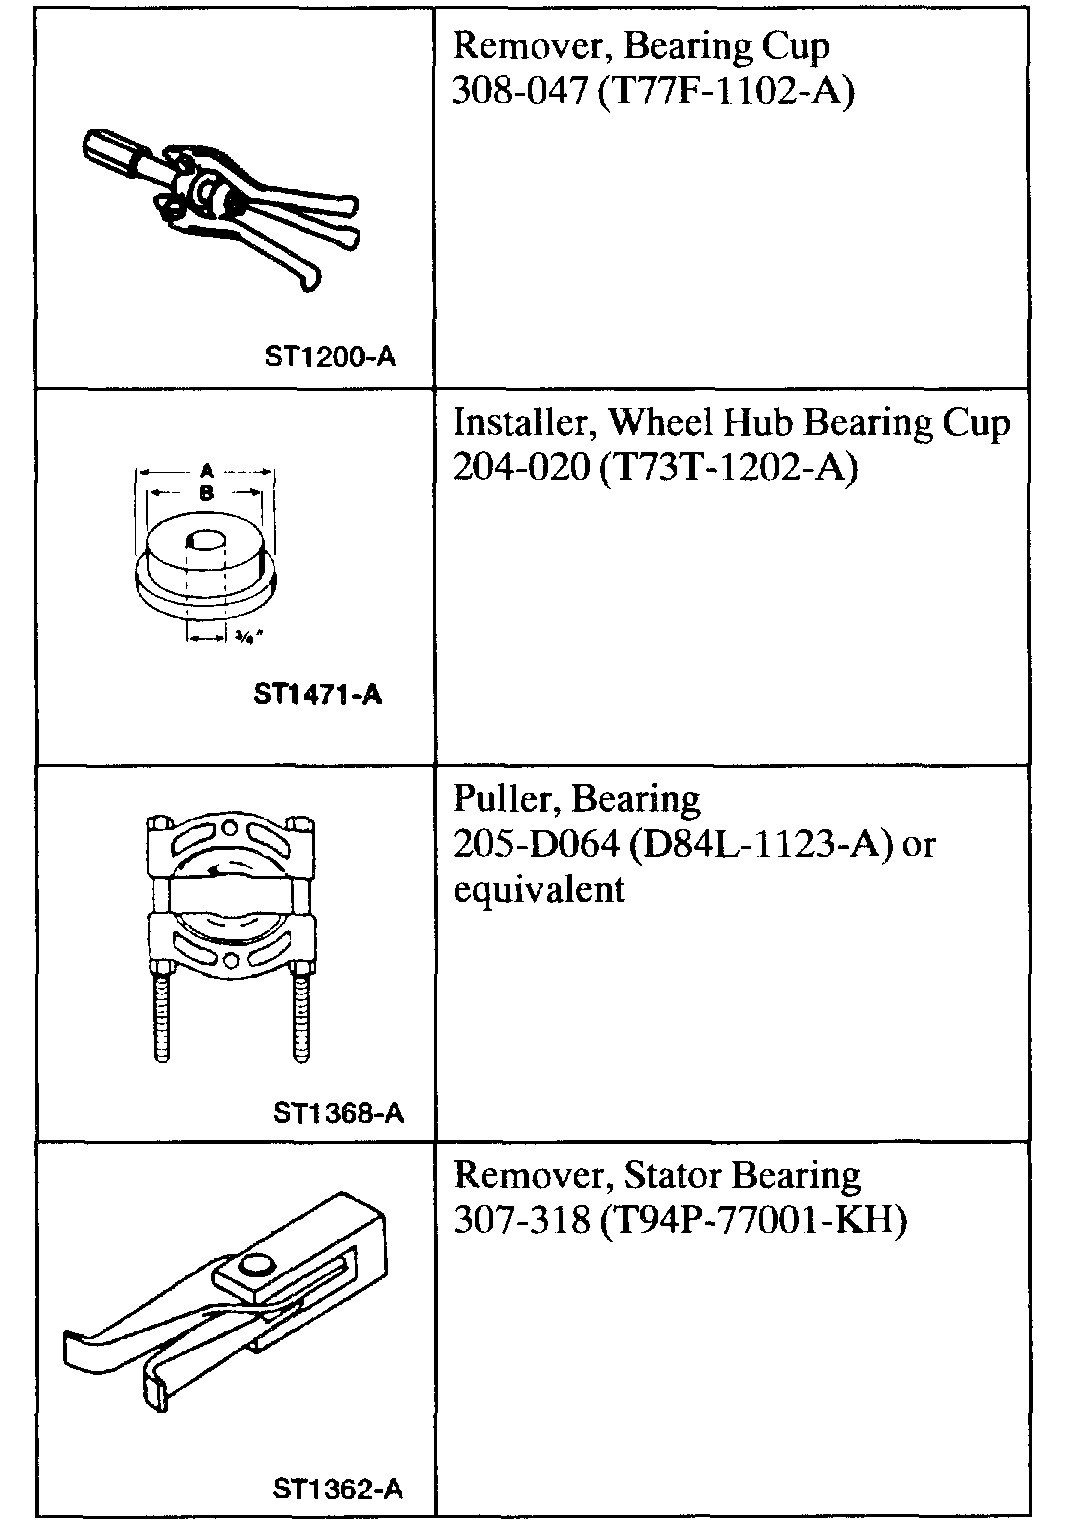
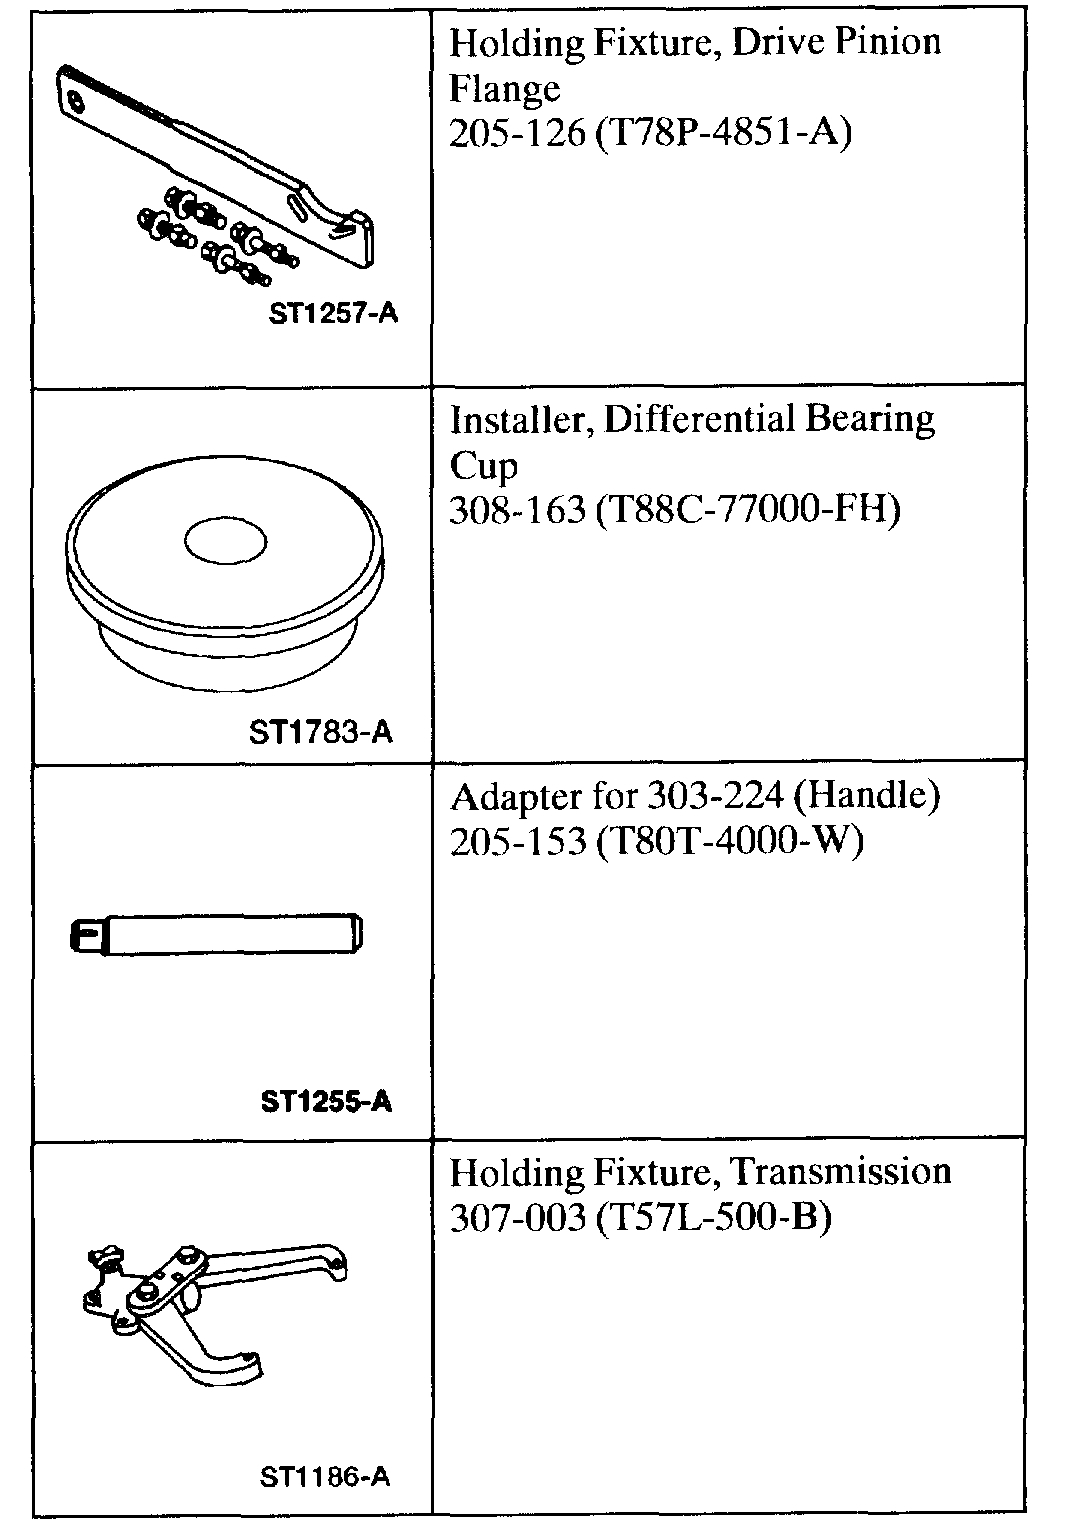
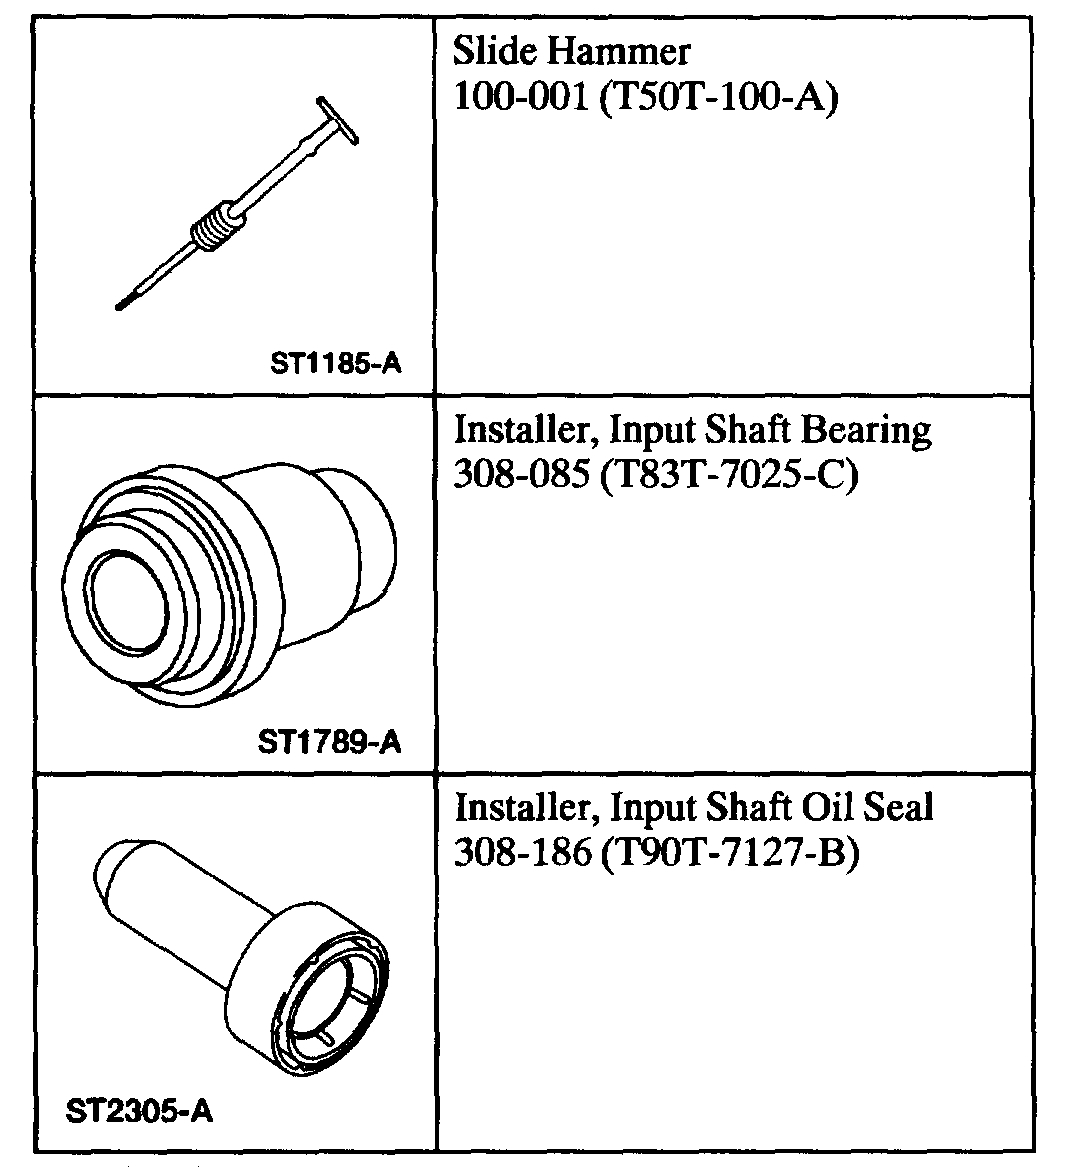
Special Tool(s)
Disassembly
picture 5
picture 6
Disassembled View
1. Remove the transfer case.
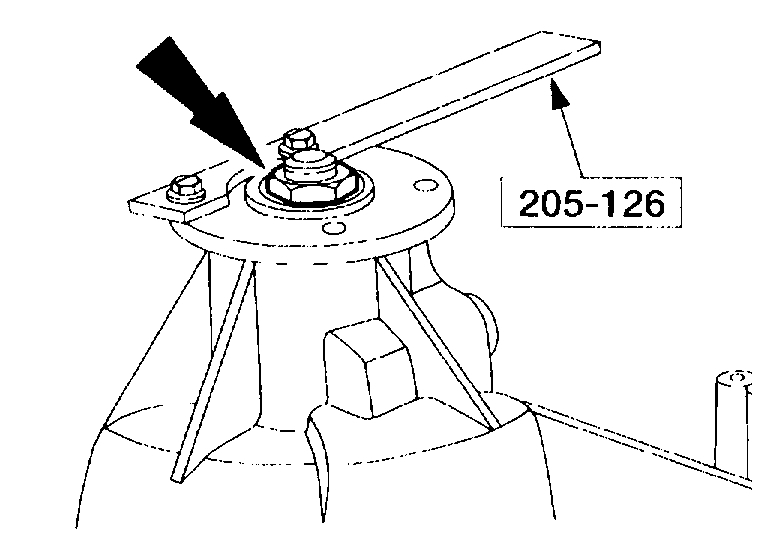
2. Remove the dampener.
picture 7
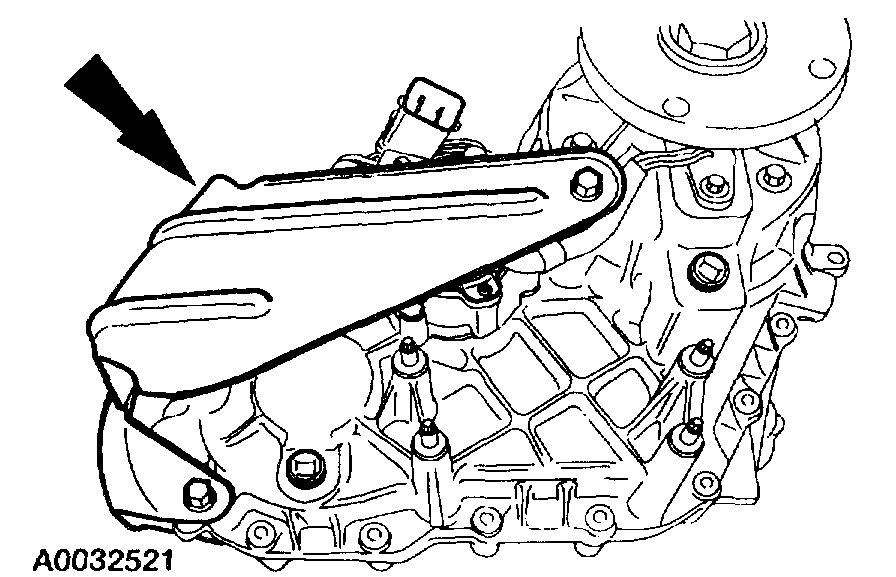
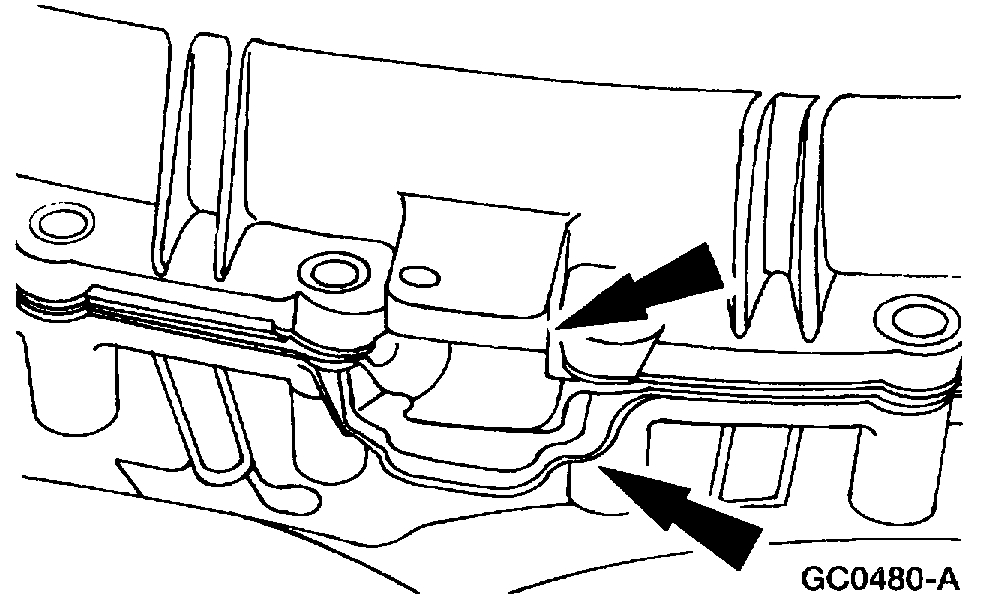
3. Remove the heat shield.
picture 8
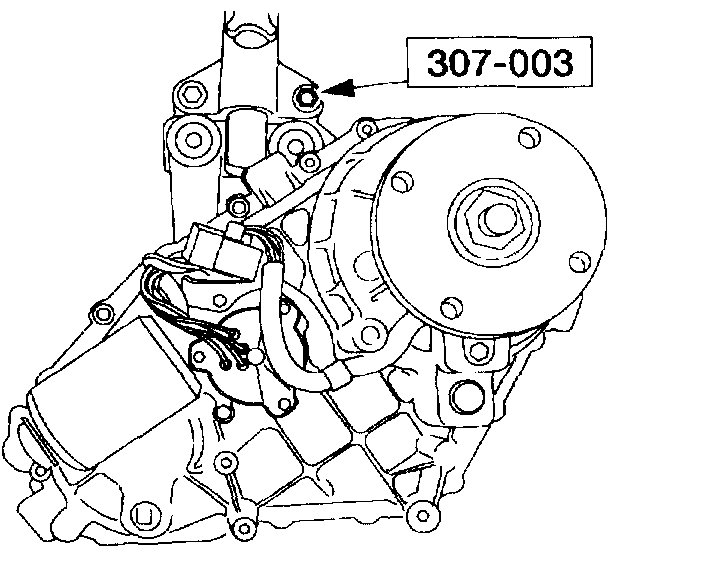
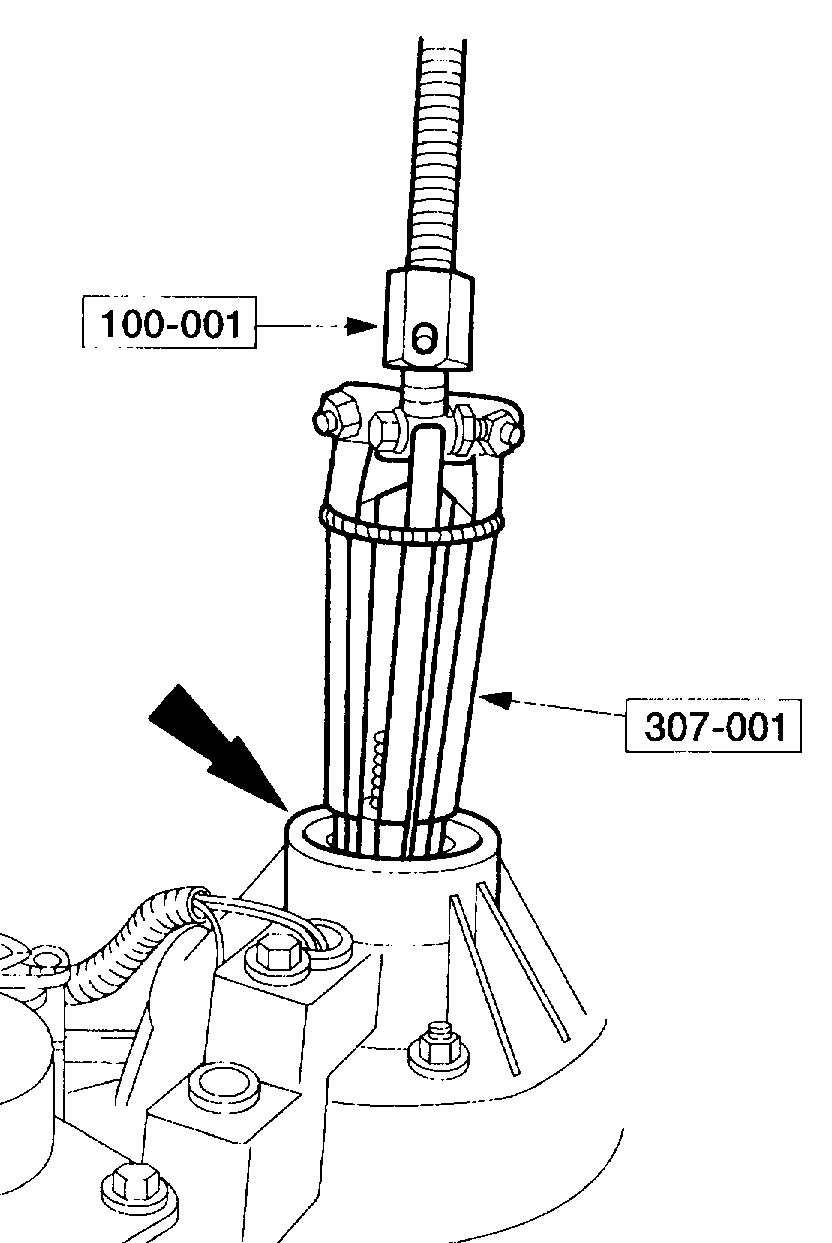
4. WARNING: Make sure the Holding Fixture lock pin is secure.
Using the special tool, secure the transfer case to the bench.
picture 9
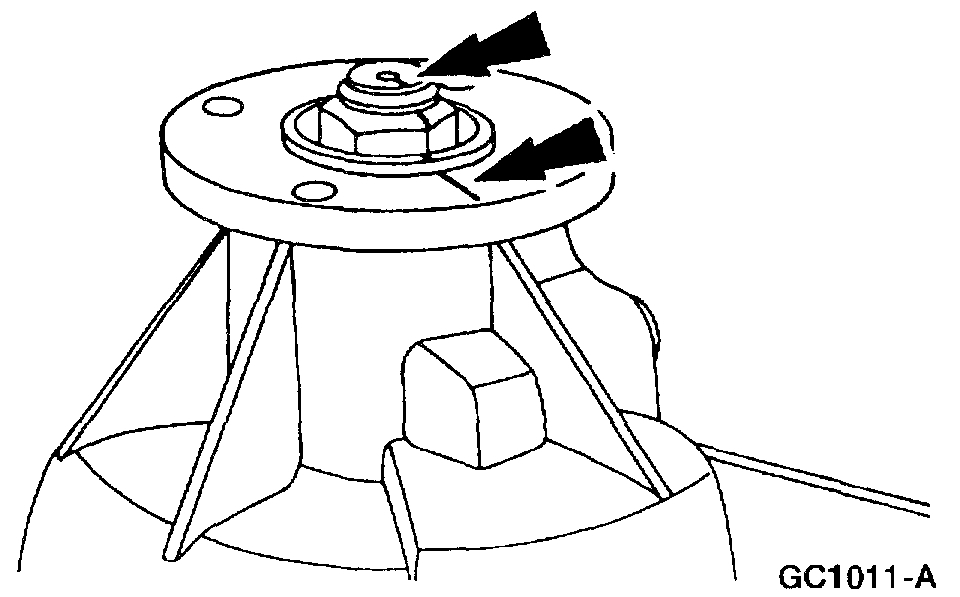
5. Index-mark the rear output flange and the rear output shaft.
picture 10
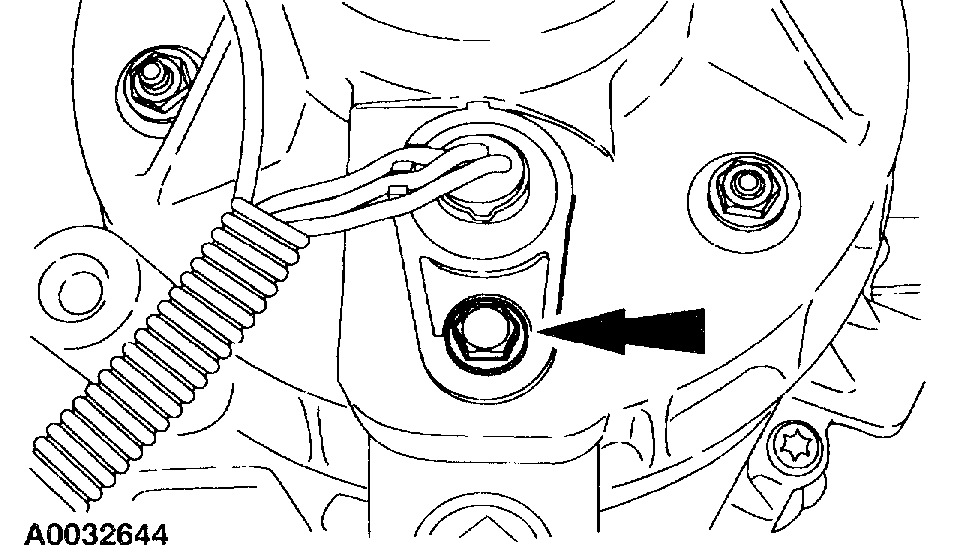
6. Using the special tool to hold the rear output flange, remove the nut.
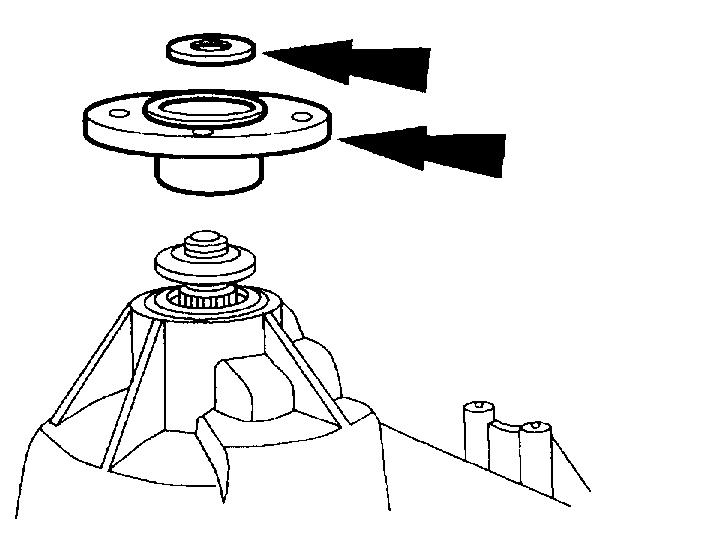
picture 11
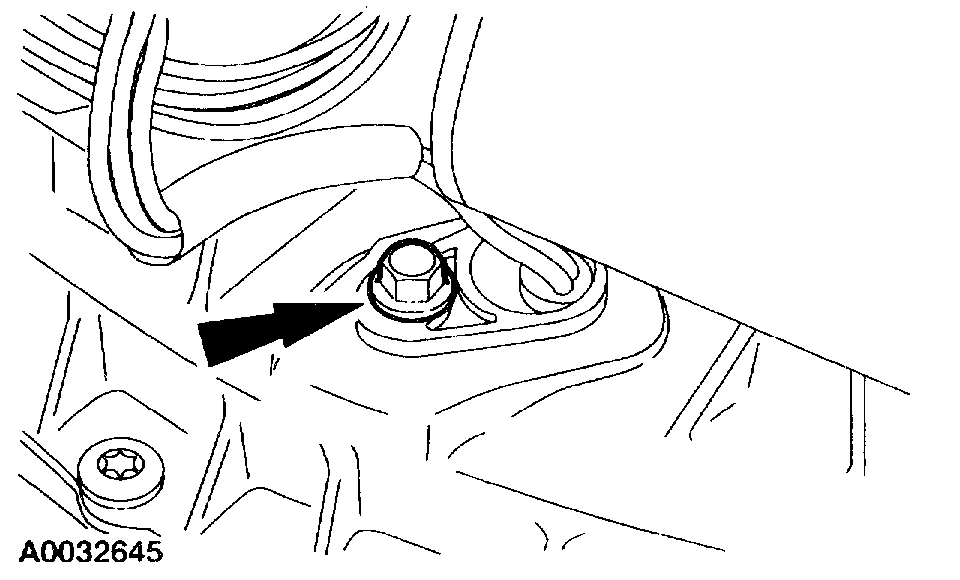
7. Remove the rear output flange and the output shaft yoke washer.
picture 12
8. Remove the oil seal.
picture 13
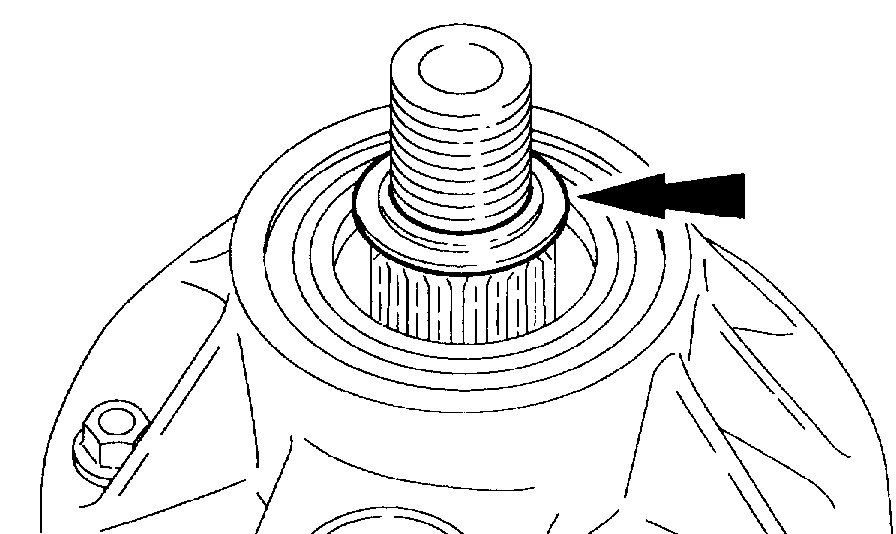
9. Using the special tools, remove the oil seal.
picture 14
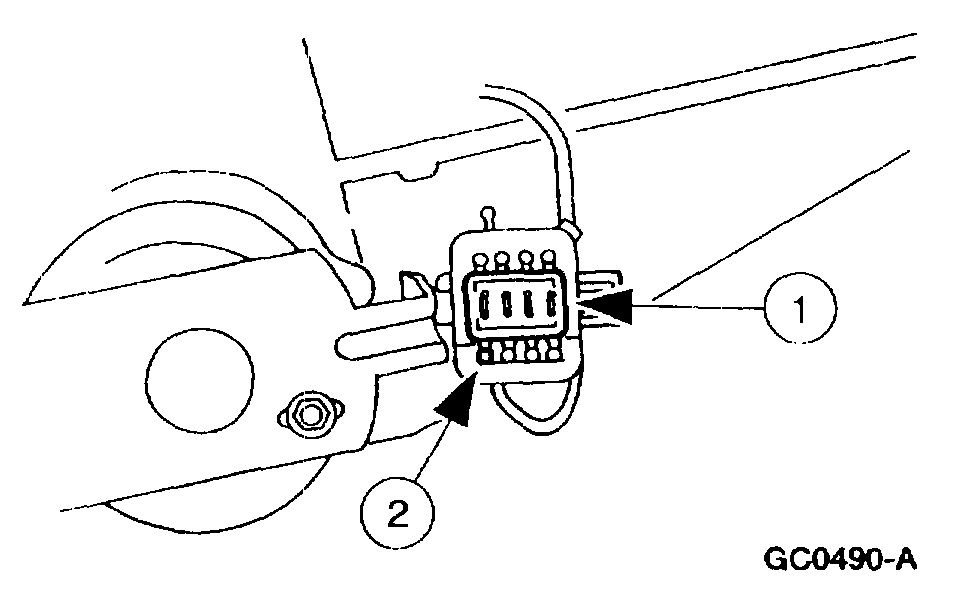
10. Remove the coil wire pin from the electrical connector.
1 Remove the connector interlock.
2 Remove the coil wire pin.
1 Use electrical connector pin extractor tool.
picture 15
picture 16
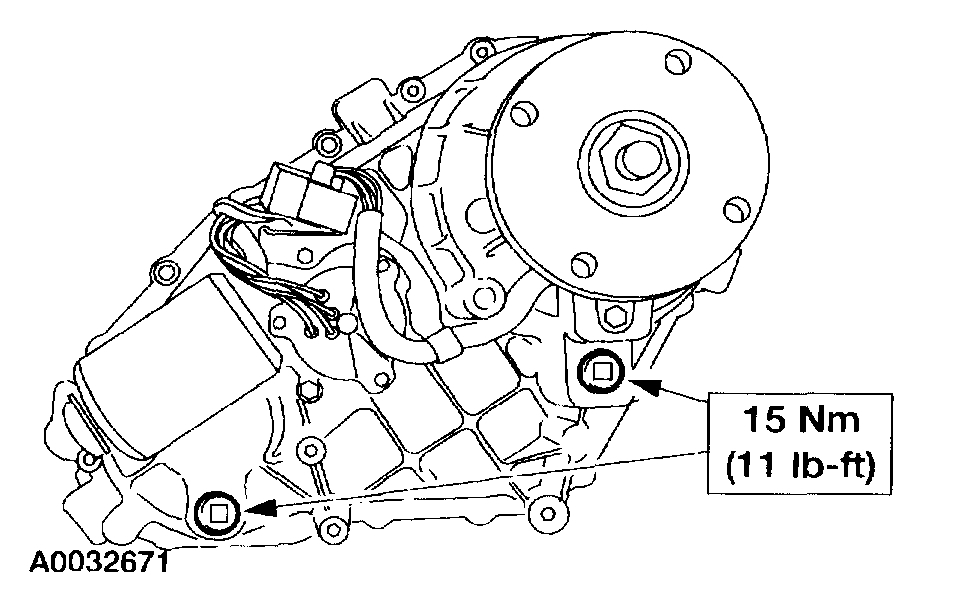
11. Remove the front and rear output shaft speed sensor bolts. Carefully remove the sensors from the transfer case.
picture 17
12. Remove the four bolts and the transfer case shift motor.
13. NOTE: Inspect the tone wheel teeth for damage.
If necessary, remove and discard the tone wheel.
picture 18
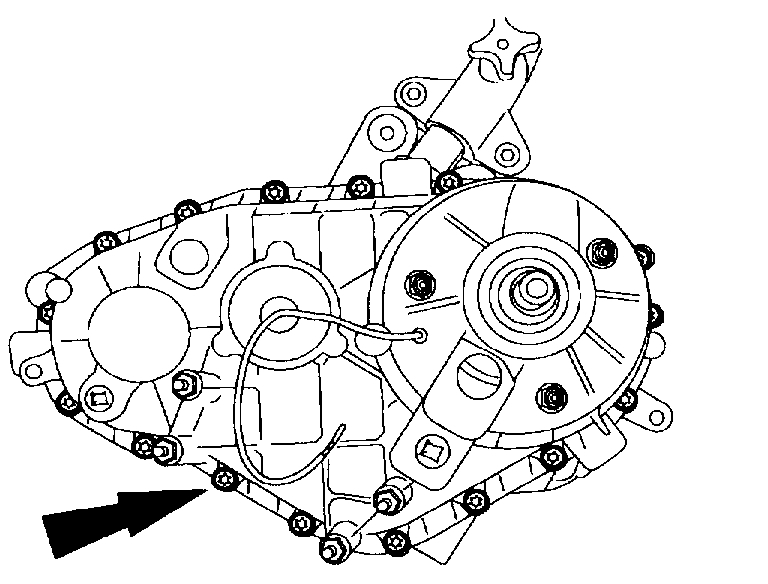
14. Remove the 17 bolts.
picture 19
15. Remove the clutch coil assembly nuts.
picture 20
16. Separate the transfer case halves at the transfer case pry bosses.
________________________________________
Here are the directions for removing the transfer case.
REMOVAL
Transfer Case -Automatic Transmission
picture 21
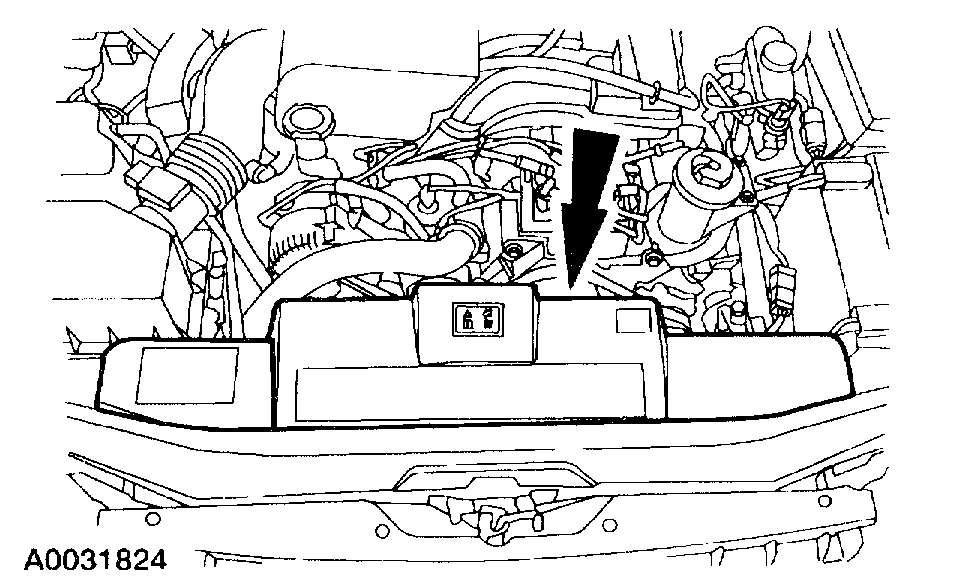
1. Remove the upper radiator cover.
picture 22
2. Carry out the following on the RH side of the upper fan shroud.
1 Disconnect the air conditioning line from the bracket, if equipped.
2 Remove the screw, if equipped.
3 Remove the bolt.
picture 23
3. Carry out the following on the LH side of the upper fan shroud.
1 Remove the screw, if equipped.
2 Remove the bolt.
3 Remove the upper fan shroud.
4. With the vehicle in neutral, raise and support the vehicle.
picture 24
5. Remove the four bolts and the skid plate, if equipped.
picture 25
6. Drain the fluid if the transfer case is to be disassembled.
7. NOTE: Index-mark the driveshaft yoke to the rear axle flange and to the transfer case flange.
Remove the rear driveshaft.
8. NOTE: Index-mark the driveshaft yoke to the transfer case flange and to the front axle flange.
Remove the front driveshaft.
picture 26
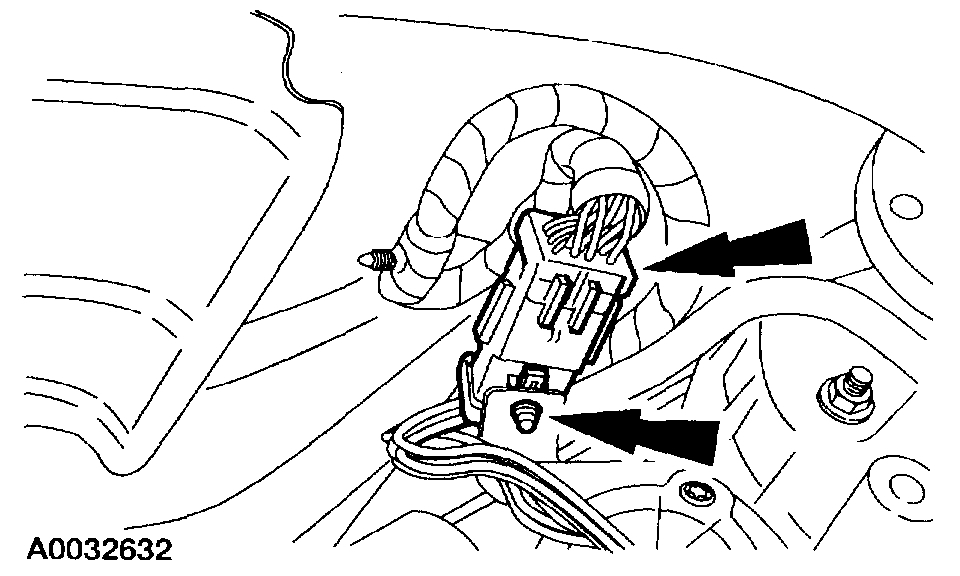
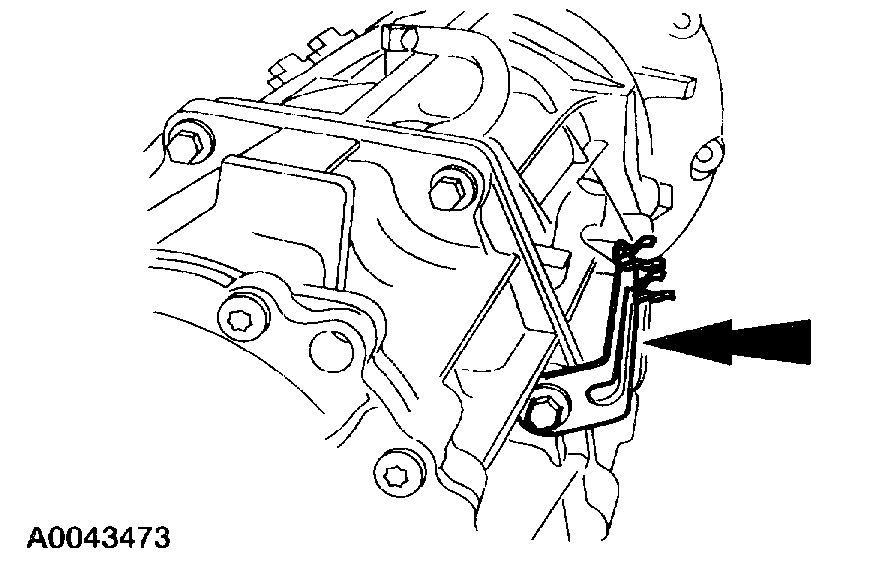
9. Disconnect the motor electrical connector, if equipped.
picture 27
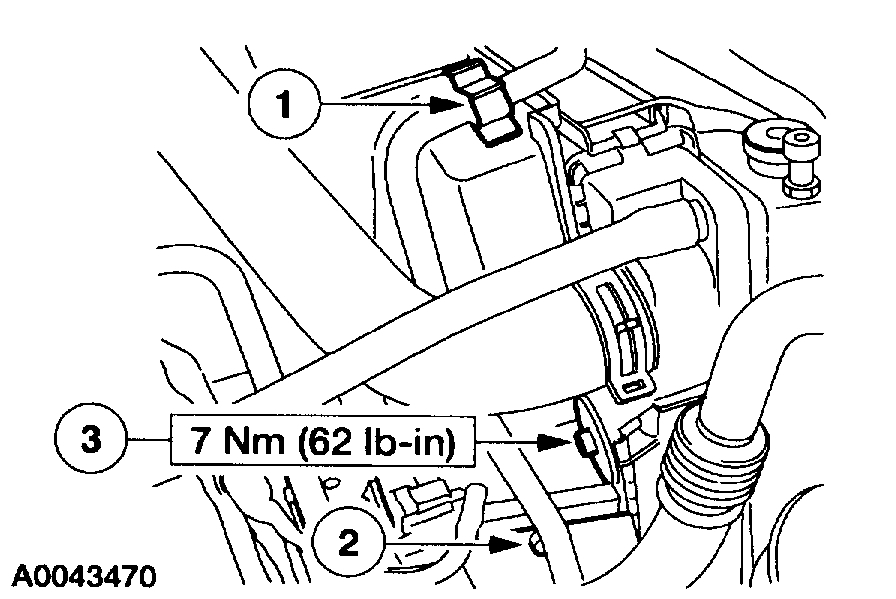
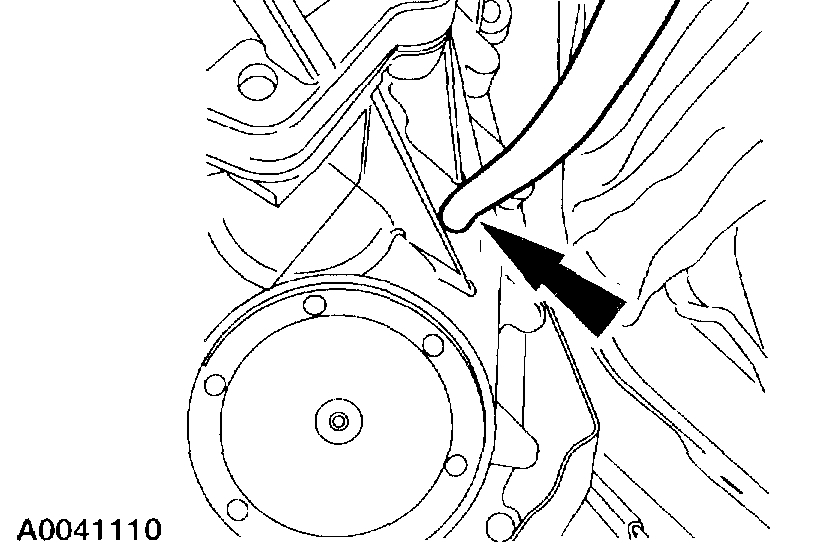
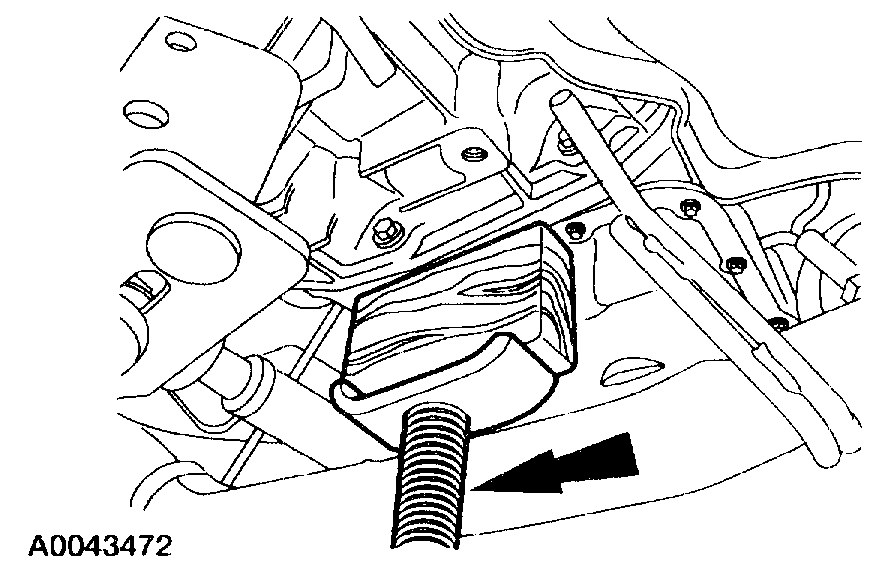
10. Disconnect the vent hose.
picture 28
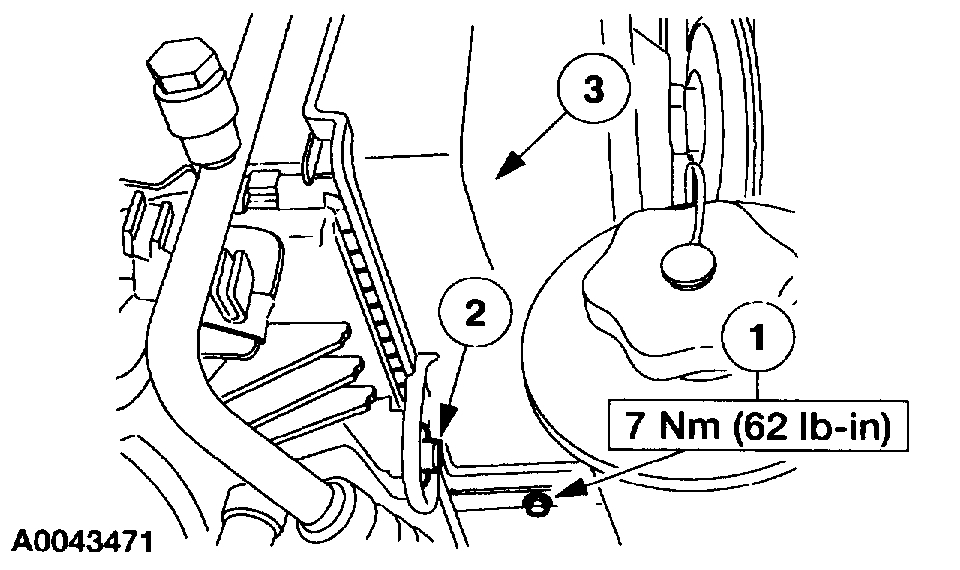
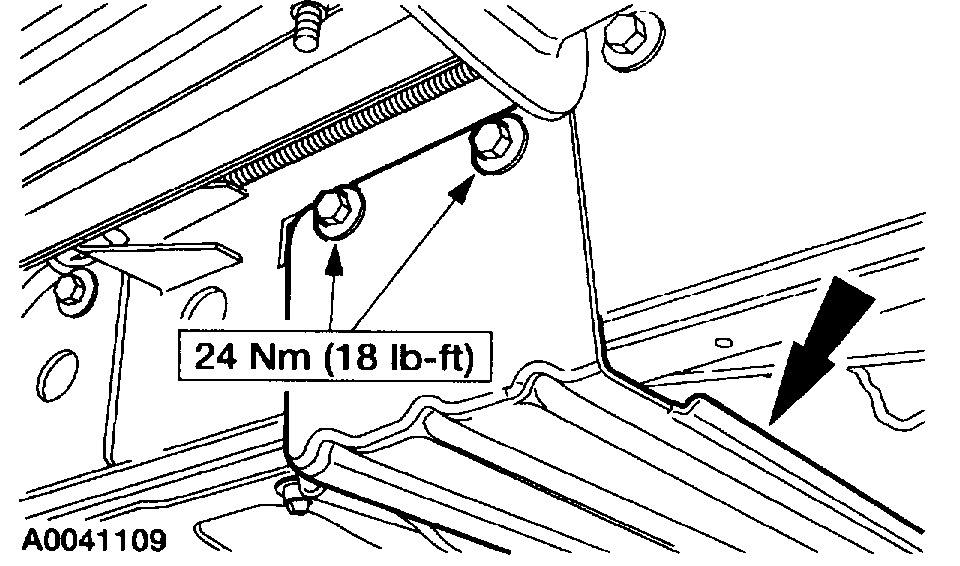
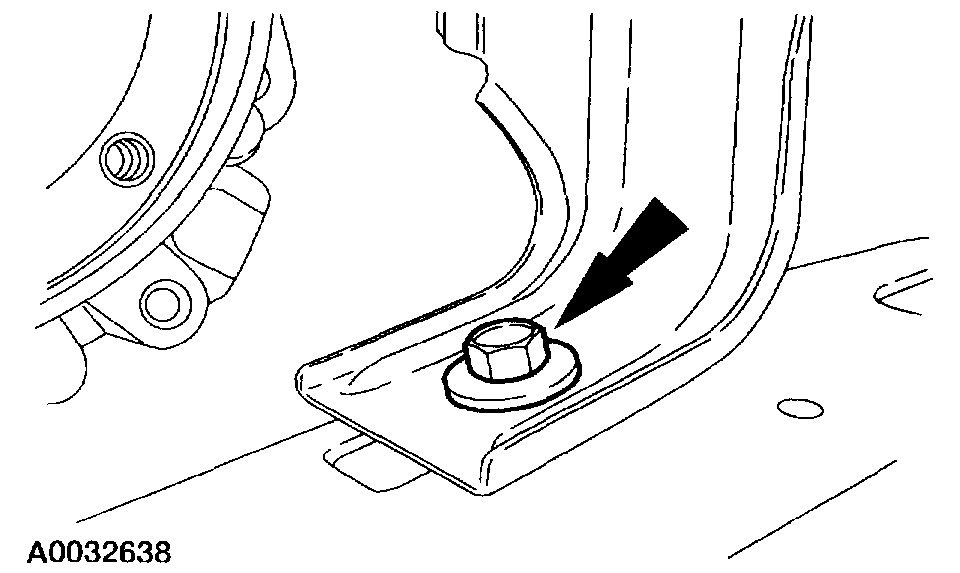
11. Remove the RH and LH heat shield-to-crossmember bolts.
pic 29
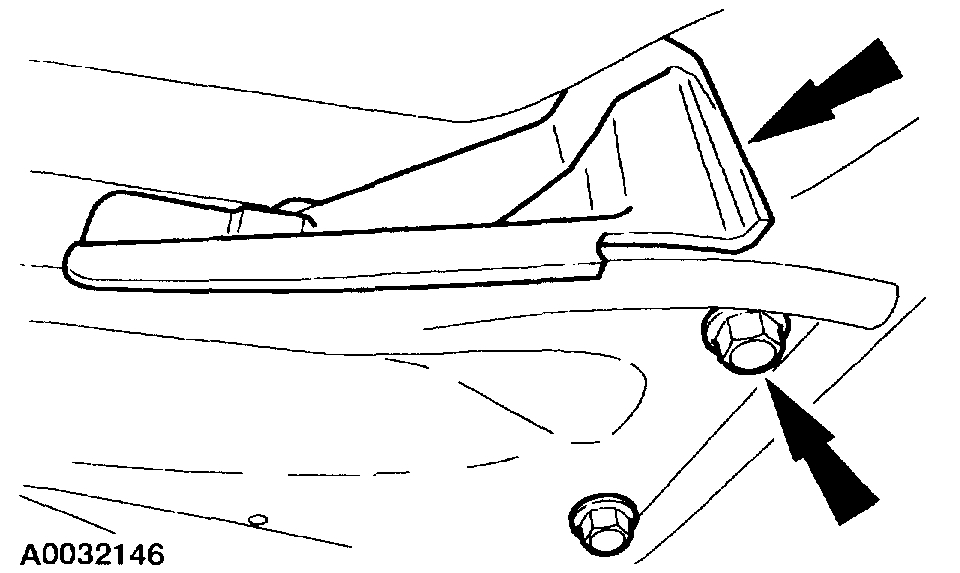
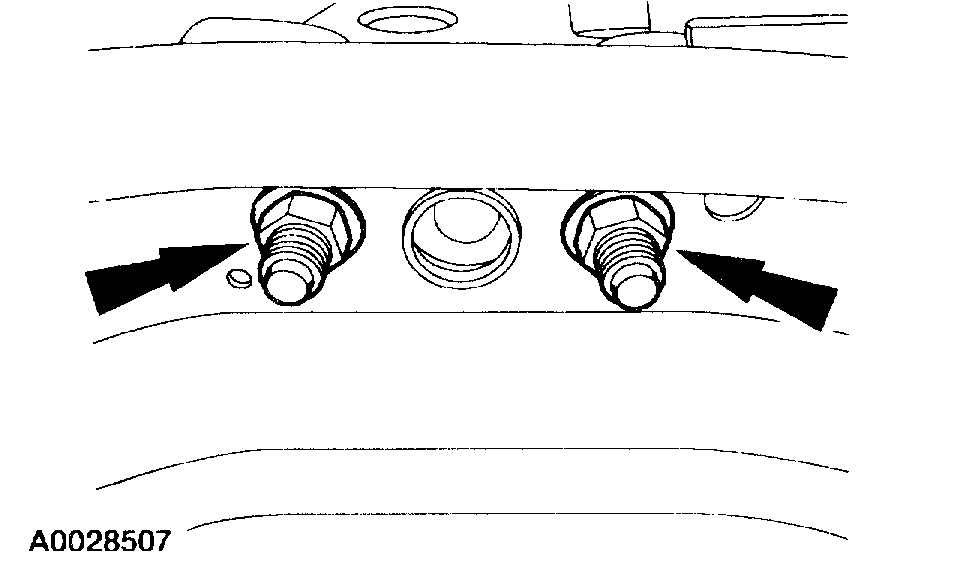
12. Remove the two nuts and the RH crossmember cover, then remove the four crossmember bolts.
pic 30
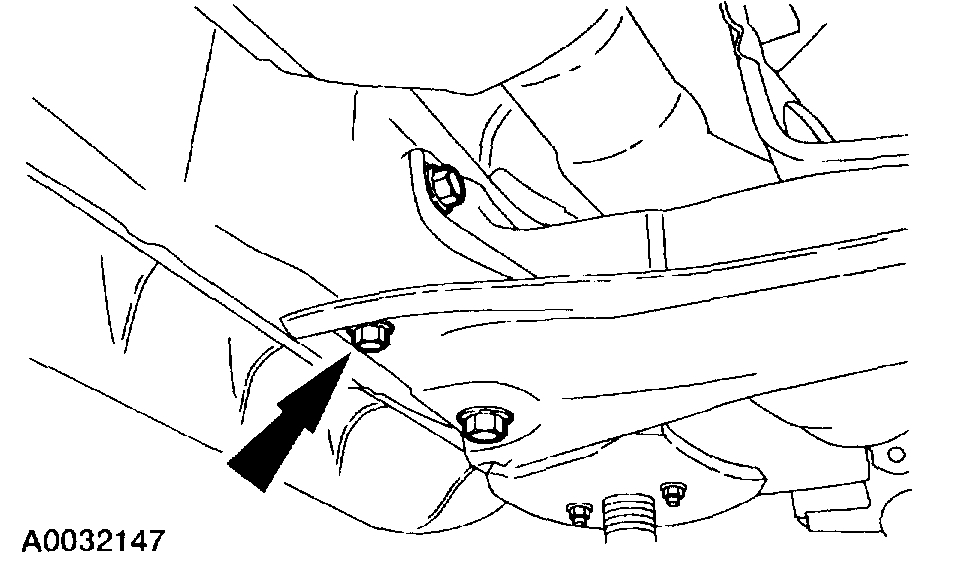
13. Remove the four LH crossmember bolts.
pic 31
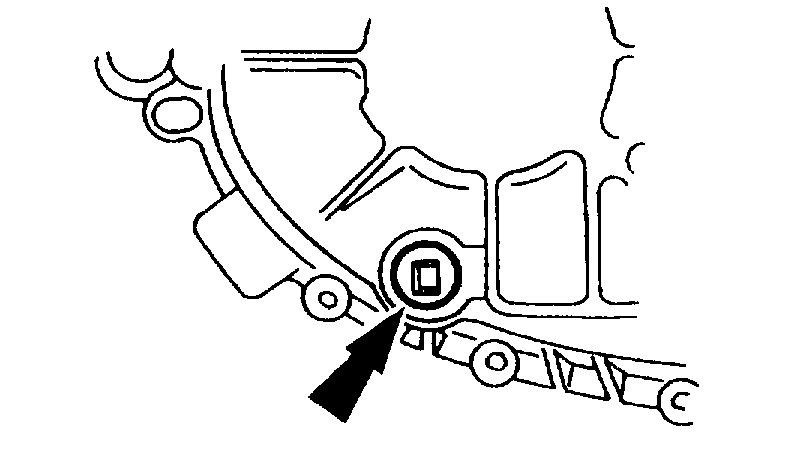
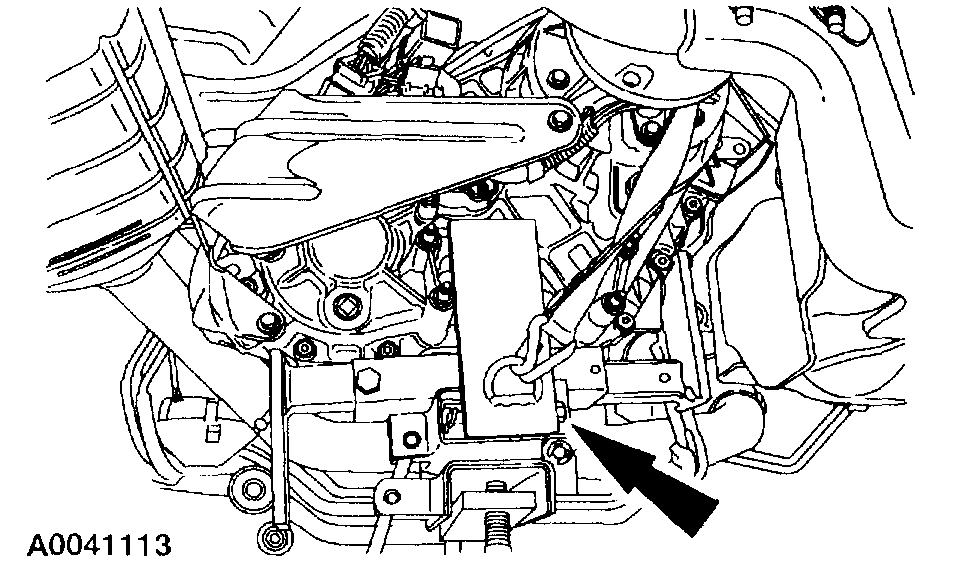
14. Position a suitable transmission jack to the transfer case. Securely strap the transfer case to the jack.
pic 32
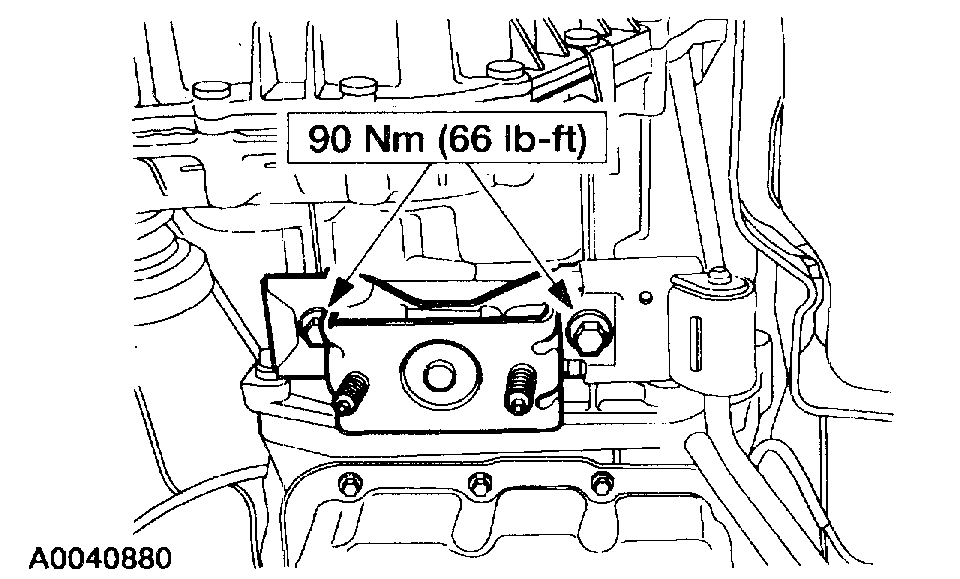
15. Remove the transmission mount nuts, then remove the crossmember.
^ It may be necessary to pry the crossmember from the vehicle.
pic 33
16. Remove the transmission mount.
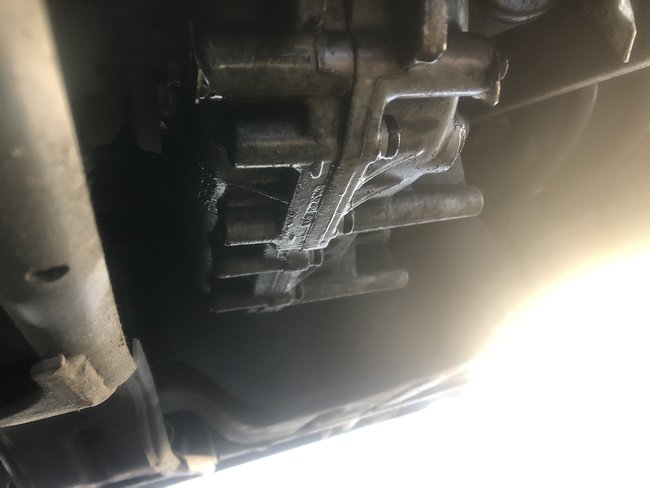
pic 34
17. Lower the transmission jack down just enough to access the upper transfer case to transmission bolts, including the bolt retaining the fuel line bracket. Position the bracket out of the way.
pic 35
18. Position a suitable jack under the transmission.
pic 36
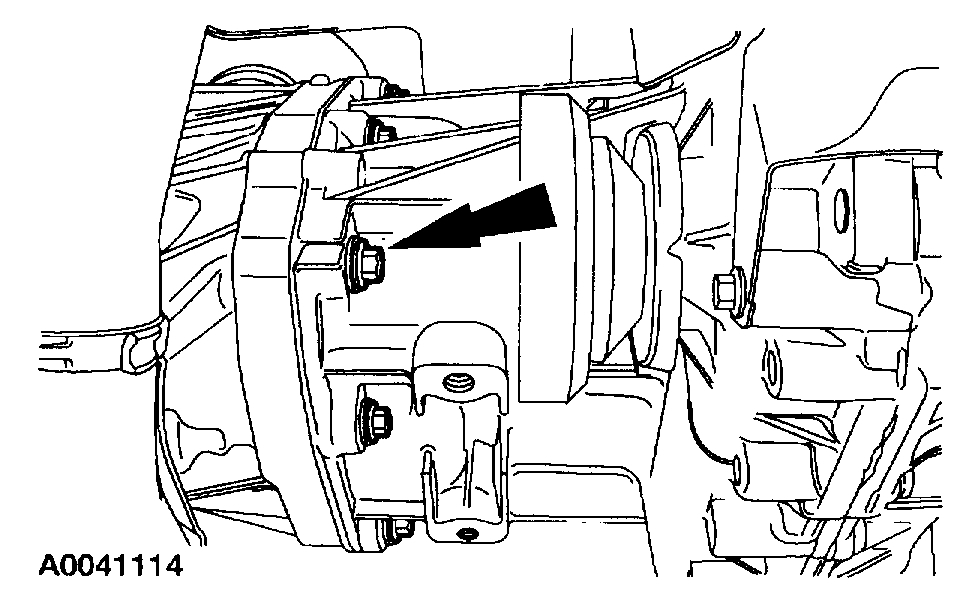
19. Remove the remaining transfer case to transmission bolts. Separate the transfer case from the transmission.
20. Remove the transfer case from the vehicle.
Move the transfer case rearward until the transfer case clears the output shaft. Lower and at the same time slightly tilt the rear of the transfer case downward.
pic 37
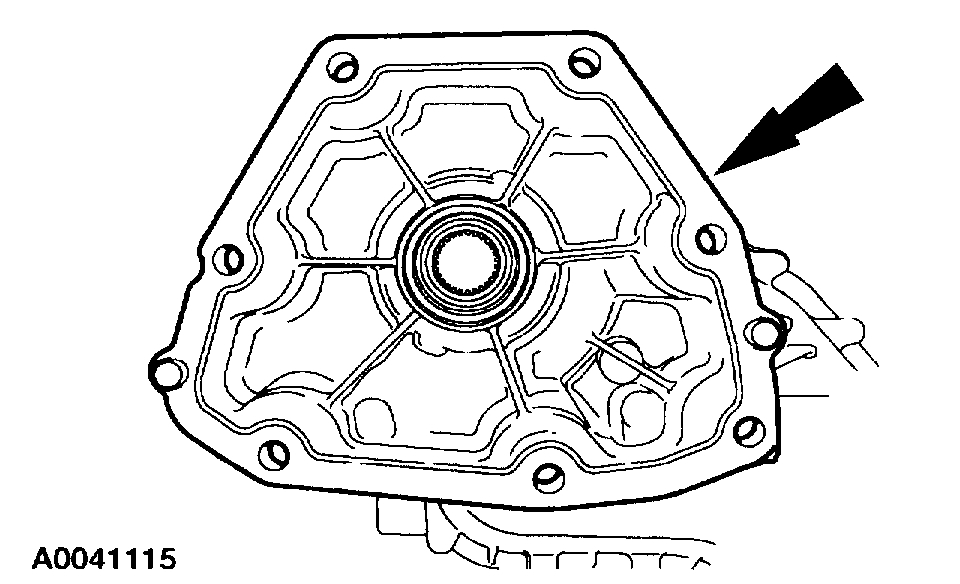
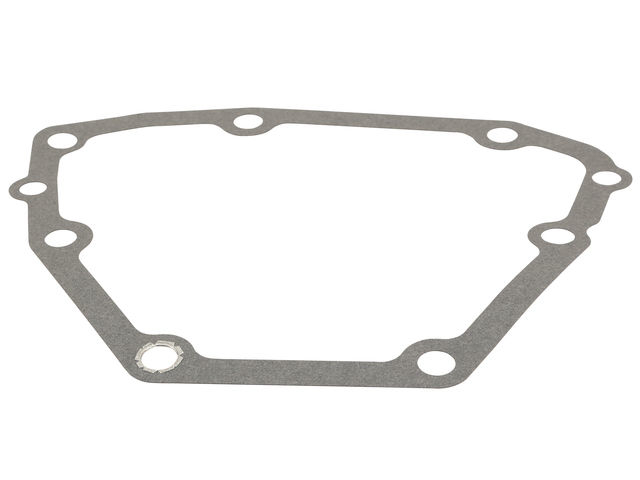
21. Remove and discard the transfer case to transmission gasket. Clean the transfer case and transmission mating surfaces.
________________________________
I hope this helps. Let me know the specifics if you decide to do the work.
Take care,
Joe
Images (Click to enlarge)
Apr 21, 2019 at 9:25 PM