Hi,
Replacing brakes isn't too hard to do. First, here is a link that explains in general how it's done. You can use these as a guide:
https://www.2carpros.com/articles/how-to-replace-front-brake-pads-and-rotors-fwd
Here are the directions specific to your vehicle. The attached pics correlate with the directions.
__________________________________________________________________________________________
2007 Toyota Corolla L4-1.8L (1ZZ-FE)
Front
Vehicle Brakes and Traction Control Disc Brake System Service and Repair Overhaul Front
FRONT
FRONT BRAKE
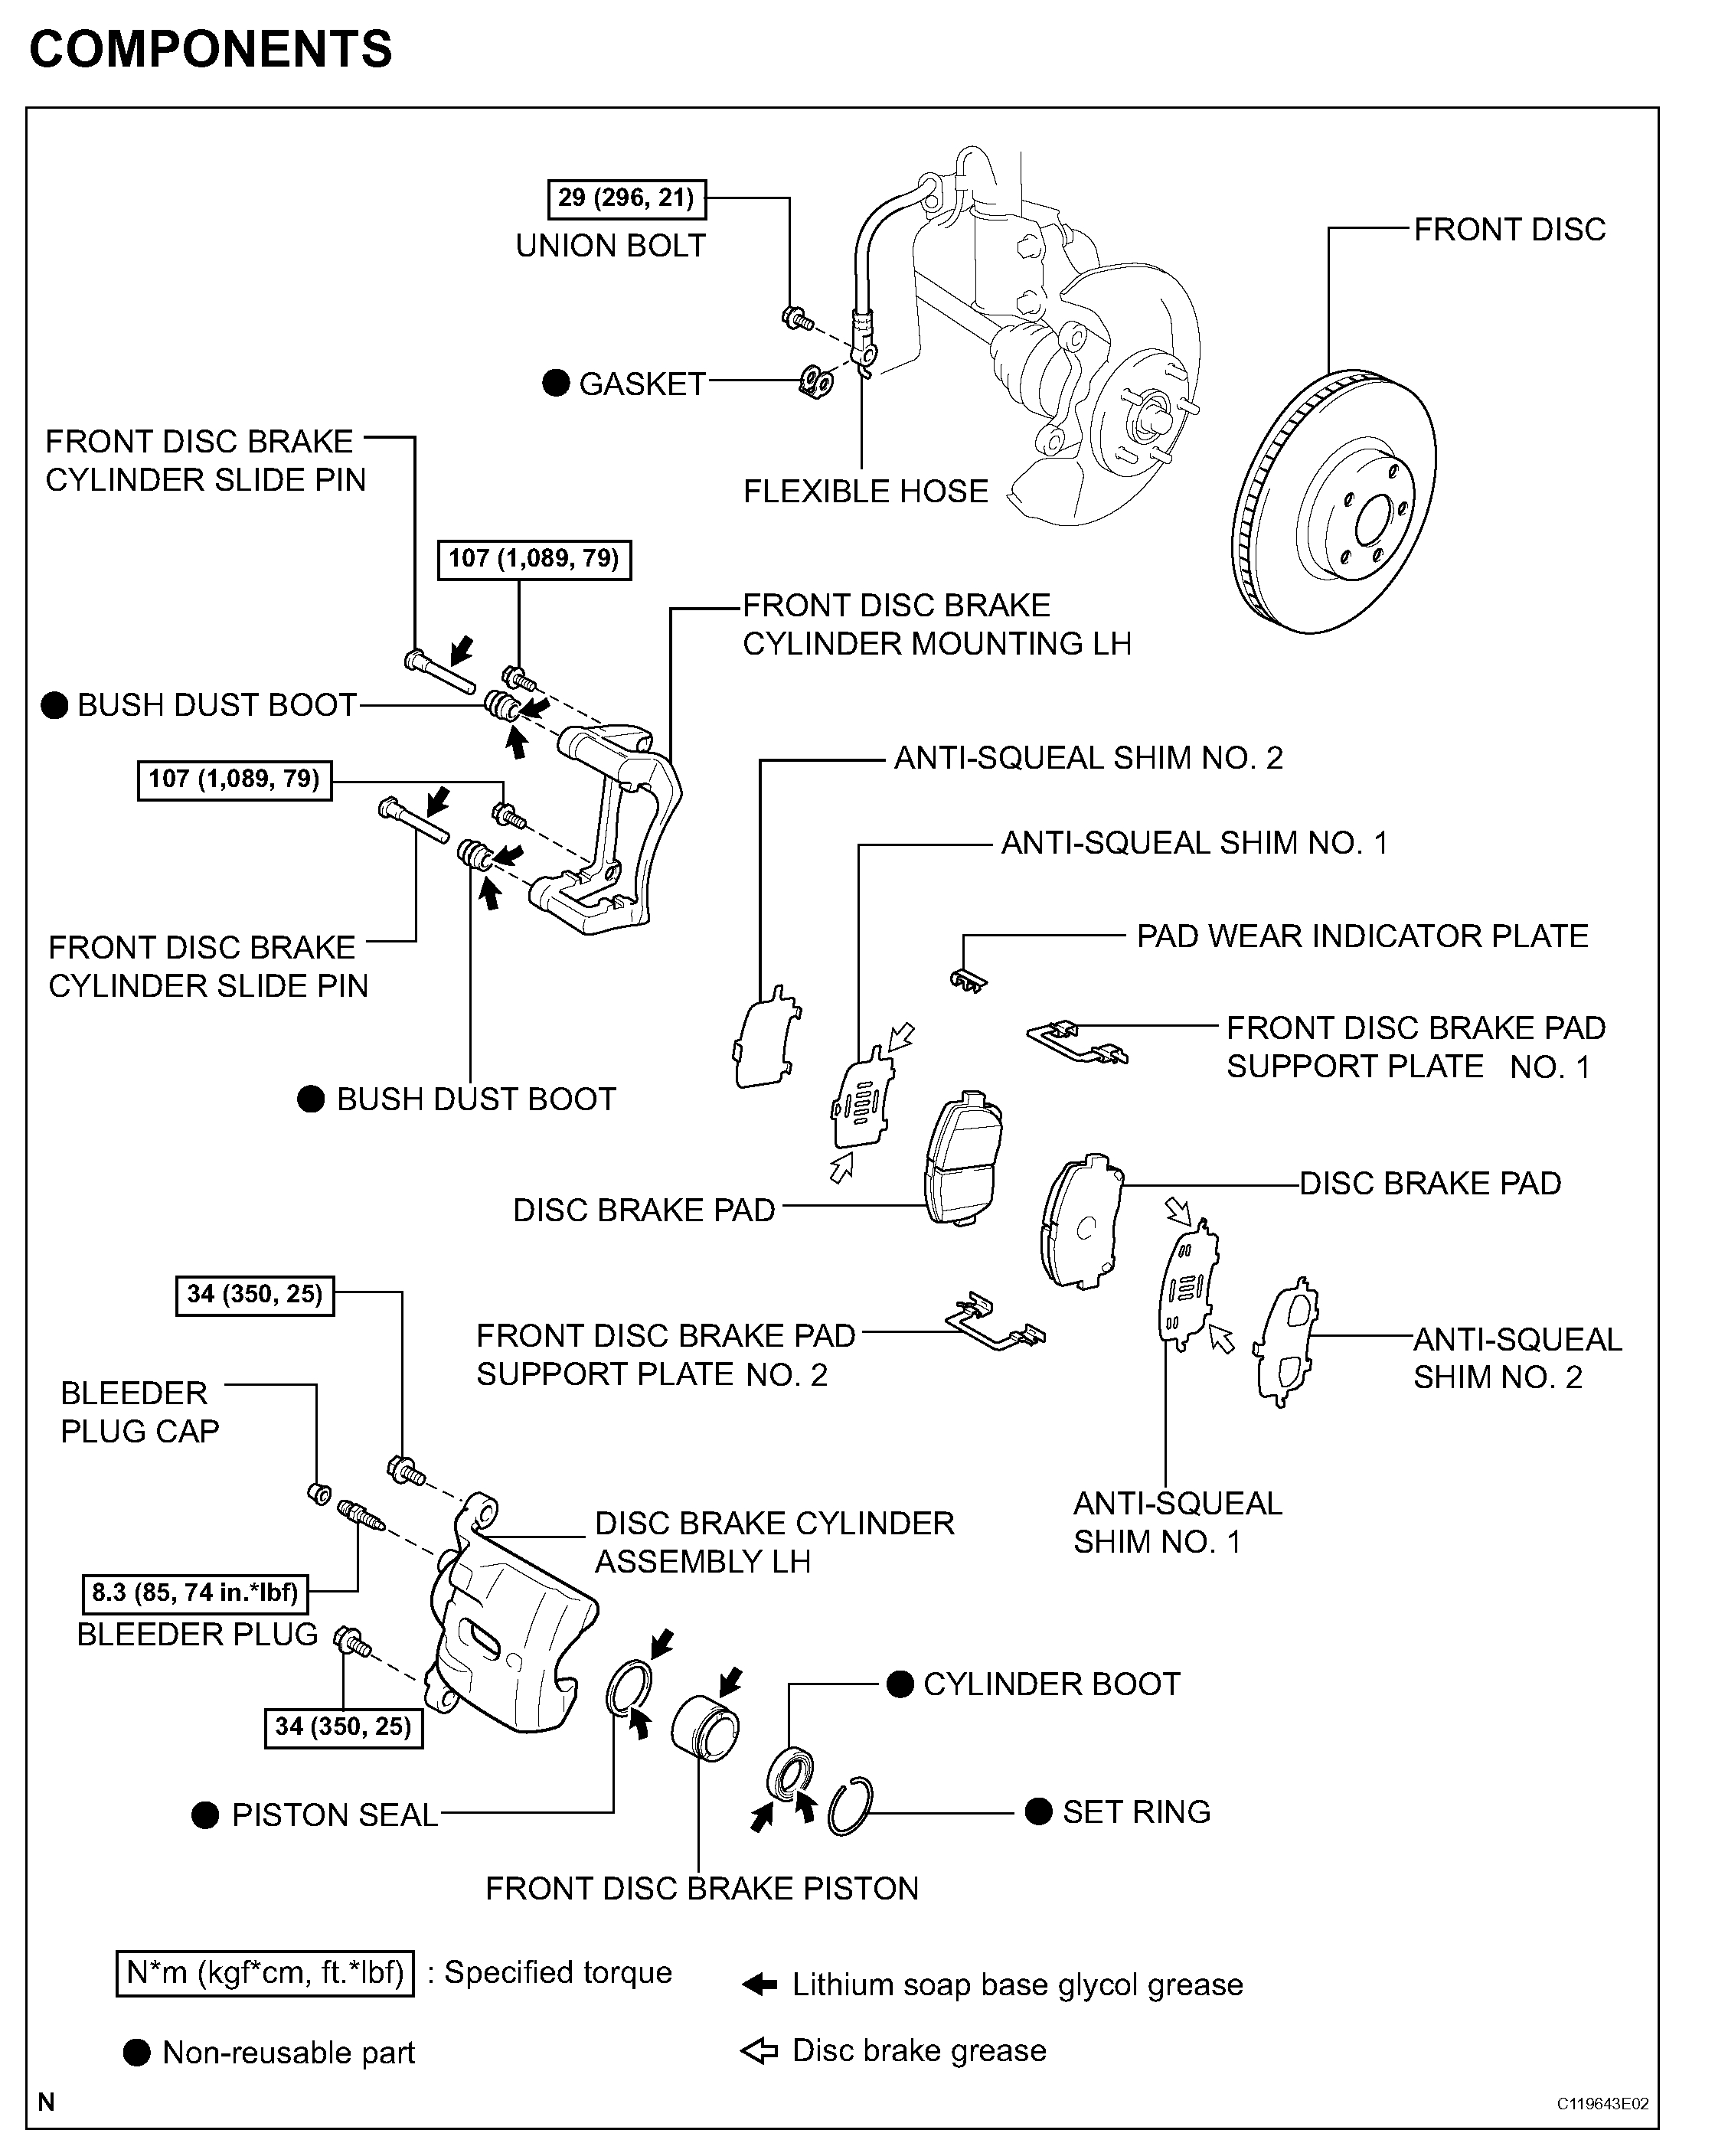
COMPONENTS
pic 1
DISASSEMBLY
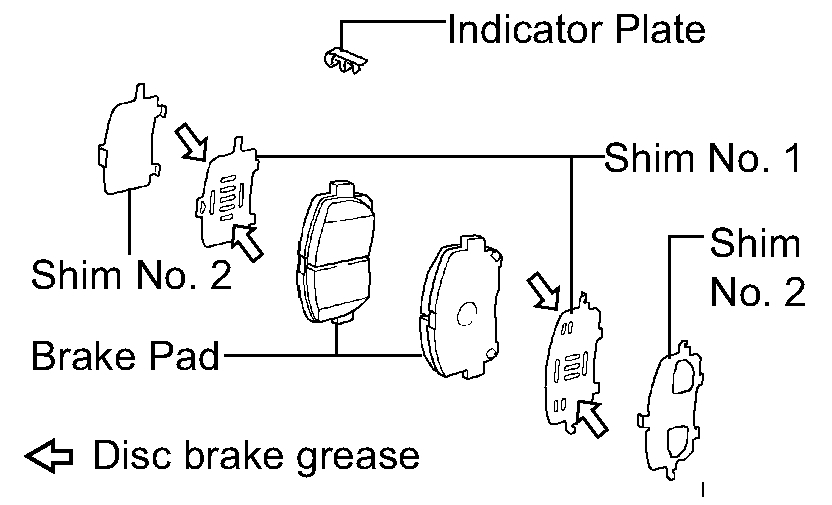
1. REMOVE DISC BRAKE PAD KIT FRONT (PAD ONLY)
(a) Remove the 2 brake pads with anti-squeal shims.
(b) Remove the anti-squeal shim No. 1 and anti-squeal shim No. 2 from each pad.
(c) Remove the pad wear indicator plates from each pad.
2. REMOVE FRONT DISC BRAKE PAD SUPPORT PLATE
(a) Remove the 2 front disc brake pad support plates from the cylinder mounting.
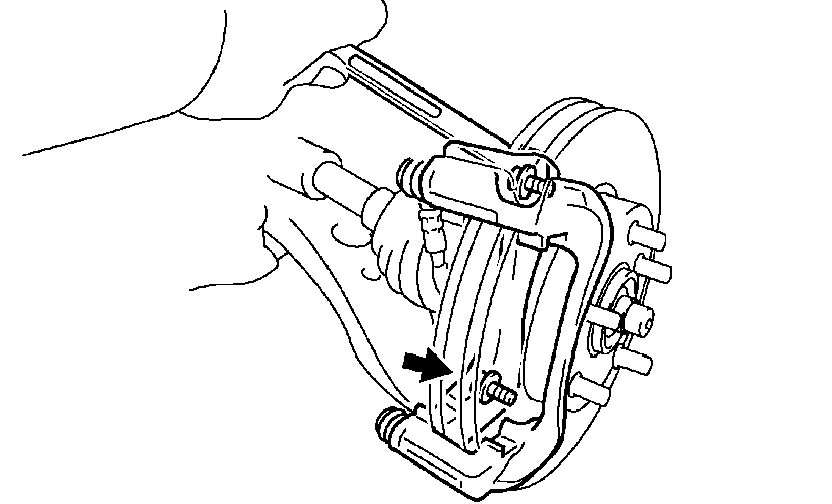
3. REMOVE FRONT DISC BRAKE CYLINDER SLIDE PIN
(a) Remove the 2 cylinder slide pins from the disc brake cylinder mounting.
pic 2
4. REMOVE FRONT DISC BRAKE CYLINDER MOUNTING LH
(a) Remove the 2 bolts and disc brake cylinder mounting.
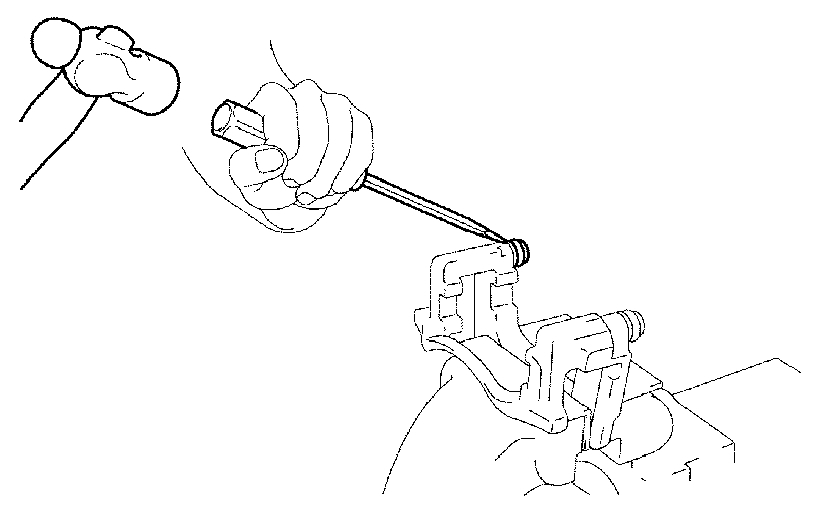
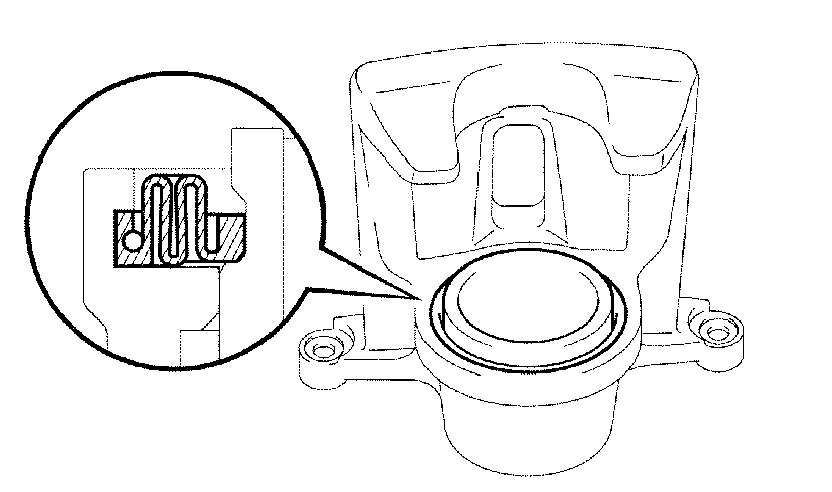
5. REMOVE FRONT DISC BRAKE BUSH DUST BOOT
(a) Place front disc brake cylinder mounting in vise.
pic 3
(b) Using a screwdriver and hammer, remove the 2 bush dust boots from the disc brake cylinder mounting.
pic 4
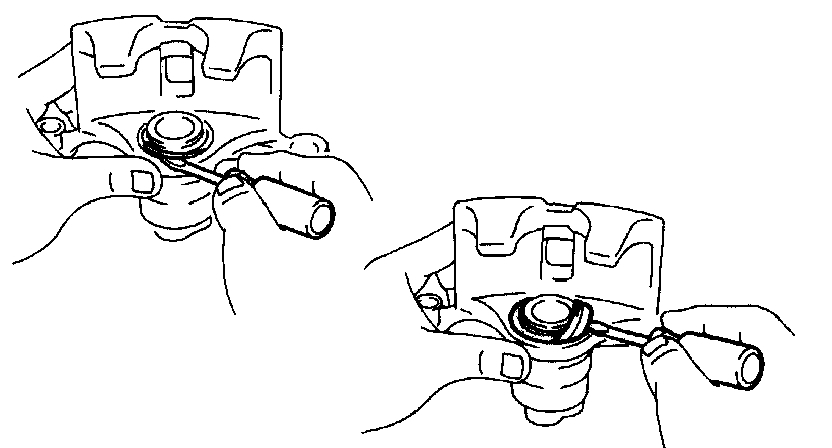
6. REMOVE CYLINDER BOOT
(a) Using a screwdriver, remove the set ring and cylinder boot.
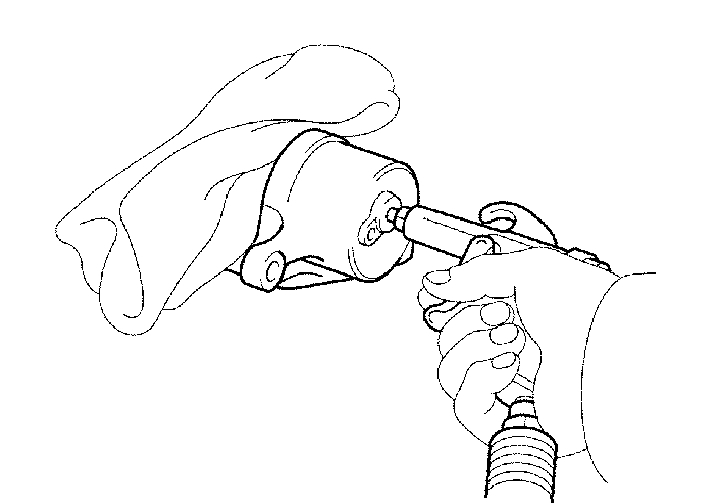
7. REMOVE FRONT DISC BRAKE PISTON
(a) Place a piece of cloth or similar, between the piston and the disc brake cylinder.
pic 5
(b) Use compressed air to remove the piston from the disc brake cylinder.
CAUTION: Do not place your fingers in front of the piston when using compressed air.
NOTICE: Do not spatter the brake fluid.
8. REMOVE PISTON SEAL
(a) Using a screwdriver, remove the piston seal from the disc brake cylinder.
NOTICE: Do not damage the inner cylinder and cylinder groove.
9. REMOVE FRONT DISC BRAKE BLEEDER PLUG
(a) Remove the bleeder plug cap and bleeder plug from the disc brake cylinder.
10. REMOVE FRONT DISC
(a) Make matchmarks on the front disc and the axle hub.
(b) Remove the front disc.
REASSEMBLY
pic 6
1. INSTALL FRONT DISC
(a) Aligning the matchmarks, install the front disc.
HINT: Select the installation position where the disc has the minimum runout.
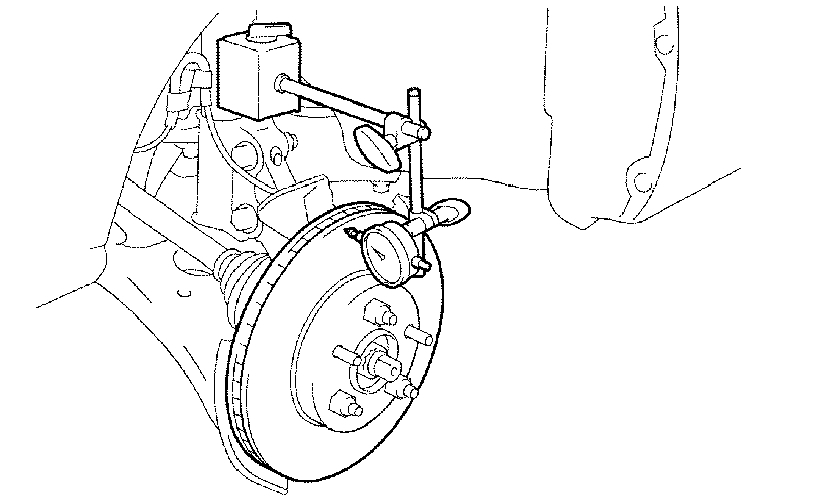
2. INSPECT DISC RUNOUT
(a) Temporarily fasten the disc with hub nuts.
Torque: 103 Nm (1,050 kgf-cm, 76 ft. lbs.)
pic 7
(b) Using a dial indicator, measure the disc runout 10 mm (0.39 inch) away from the outer edge of the disc.
Maximum disc runout: 0.05 mm (0.0020 inch)
(c) If the disc runout is the maximum value or greater, check the bearing play in the axial direction and check the axle hub runout. If the bearing play and axle hub runout are normal, adjust the disc runout or grind it on a "On-car" brake lathe.
3. TEMPORARILY TIGHTEN FRONT DISC BRAKE BLEEDER PLUG
(a) Temporarily tighten the bleeder plug, and install bleeder plug cap to the disc brake cylinder.
4. INSTALL PISTON SEAL
(a) Apply the lithium soap base glycol grease on a new piston seal.
(b) Install the piston seal to the disc brake cylinder.
5. INSTALL FRONT DISC BRAKE PISTON
(a) Apply the lithium soap base glycol grease on the piston.
(b) Install the piston to the disc brake cylinder.
NOTICE: Do not screw the piston forcedly in the disc brake cylinder.
pic 8
6. INSTALL CYLINDER BOOT
(a) Apply the lithium soap base glycol grease to a new cylinder boot. Install the cylinder boot to the disc brake cylinder.
HINT: Install the boot securely to the grooves of the cylinder and piston.
(b) Using a screwdriver, install the set ring.
NOTICE: Do not damage the cylinder boot.
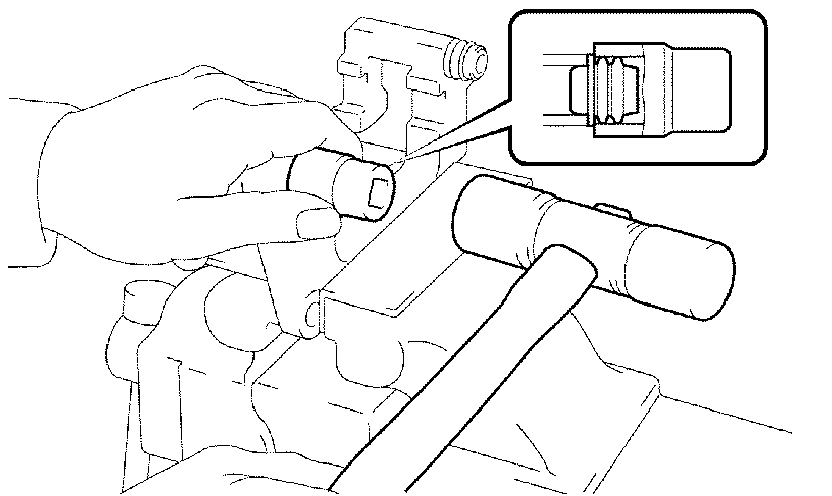
7. INSTALL FRONT DISC BRAKE BUSH DUST BOOT
(a) Place front disc brake cylinder mounting in vise.
(b) Apply the lithium soap base glycol grease to seal surface of 2 new bush dust boots.
pic 9
(c) Using a socket wrench (19 mm) and hammer, drive the 2 bush dust boots to the disc brake cylinder mounting.
8. INSTALL FRONT DISC BRAKE CYLINDER MOUNTING LH
(a) Install the disc brake cylinder mounting LH with the 2 bolts.
Torque: 107 Nm (1,089 kgf-cm, 79 ft. lbs.)
9. INSTALL FRONT DISC BRAKE CYLINDER SLIDE PIN
(a) Apply the lithium soap base glycol grease to the sliding part and the seal surface of the 2 cylinder slide pins.
(b) Install the 2 cylinder slide pins to the disc brake cylinder mounting.
10. INSTALL FRONT DISC BRAKE PAD SUPPORT PLATE
(a) Install the 2 front disc brake pad support plates to the cylinder mounting.
11. INSTALL DISC BRAKE PAD KIT FRONT (PAD ONLY)
NOTICE: When replacing the brake pads, the anti-squeal shims must be replaced together with the brake pads.
(a) Apply disc brake grease to each anti-squeal shim No. 1.
(b) Install anti-squeal shims on each pad.
pic 10
(c) Install the pad wear indicator plate to the upper side of the inner pad.
(d) Install the brake pads to the cylinder mounting.
NOTICE: Install the brake pads in correct position and direction.
______________________________________
I hope this helps. Let me know if you have other questions.
Take care and God Bless,
Joe
Images (Click to enlarge)
Mar 13, 2021 at 11:10 AM