Hi,
Front brake pads and rotors aren't too hard to replace. Expect them to last approximately 25,000 miles. However, that will change based on driving habits and terrain.
First, here is a link that shows in general how it's done. You can use this as a guide.
https://www.2carpros.com/articles/how-to-replace-front-brake-pads-and-rotors-fwd
Here are the directions specific to your vehicle. The attached pics correlate with the directions. Note: The directions for checking and installing brake rotors are also included.
_____________________________________
2004 Toyota Truck 4 Runner 2WD V6-4.0L (1GR-FE)
Front
Vehicle Brakes and Traction Control Disc Brake System Service and Repair Procedures Front
FRONT
pic 1
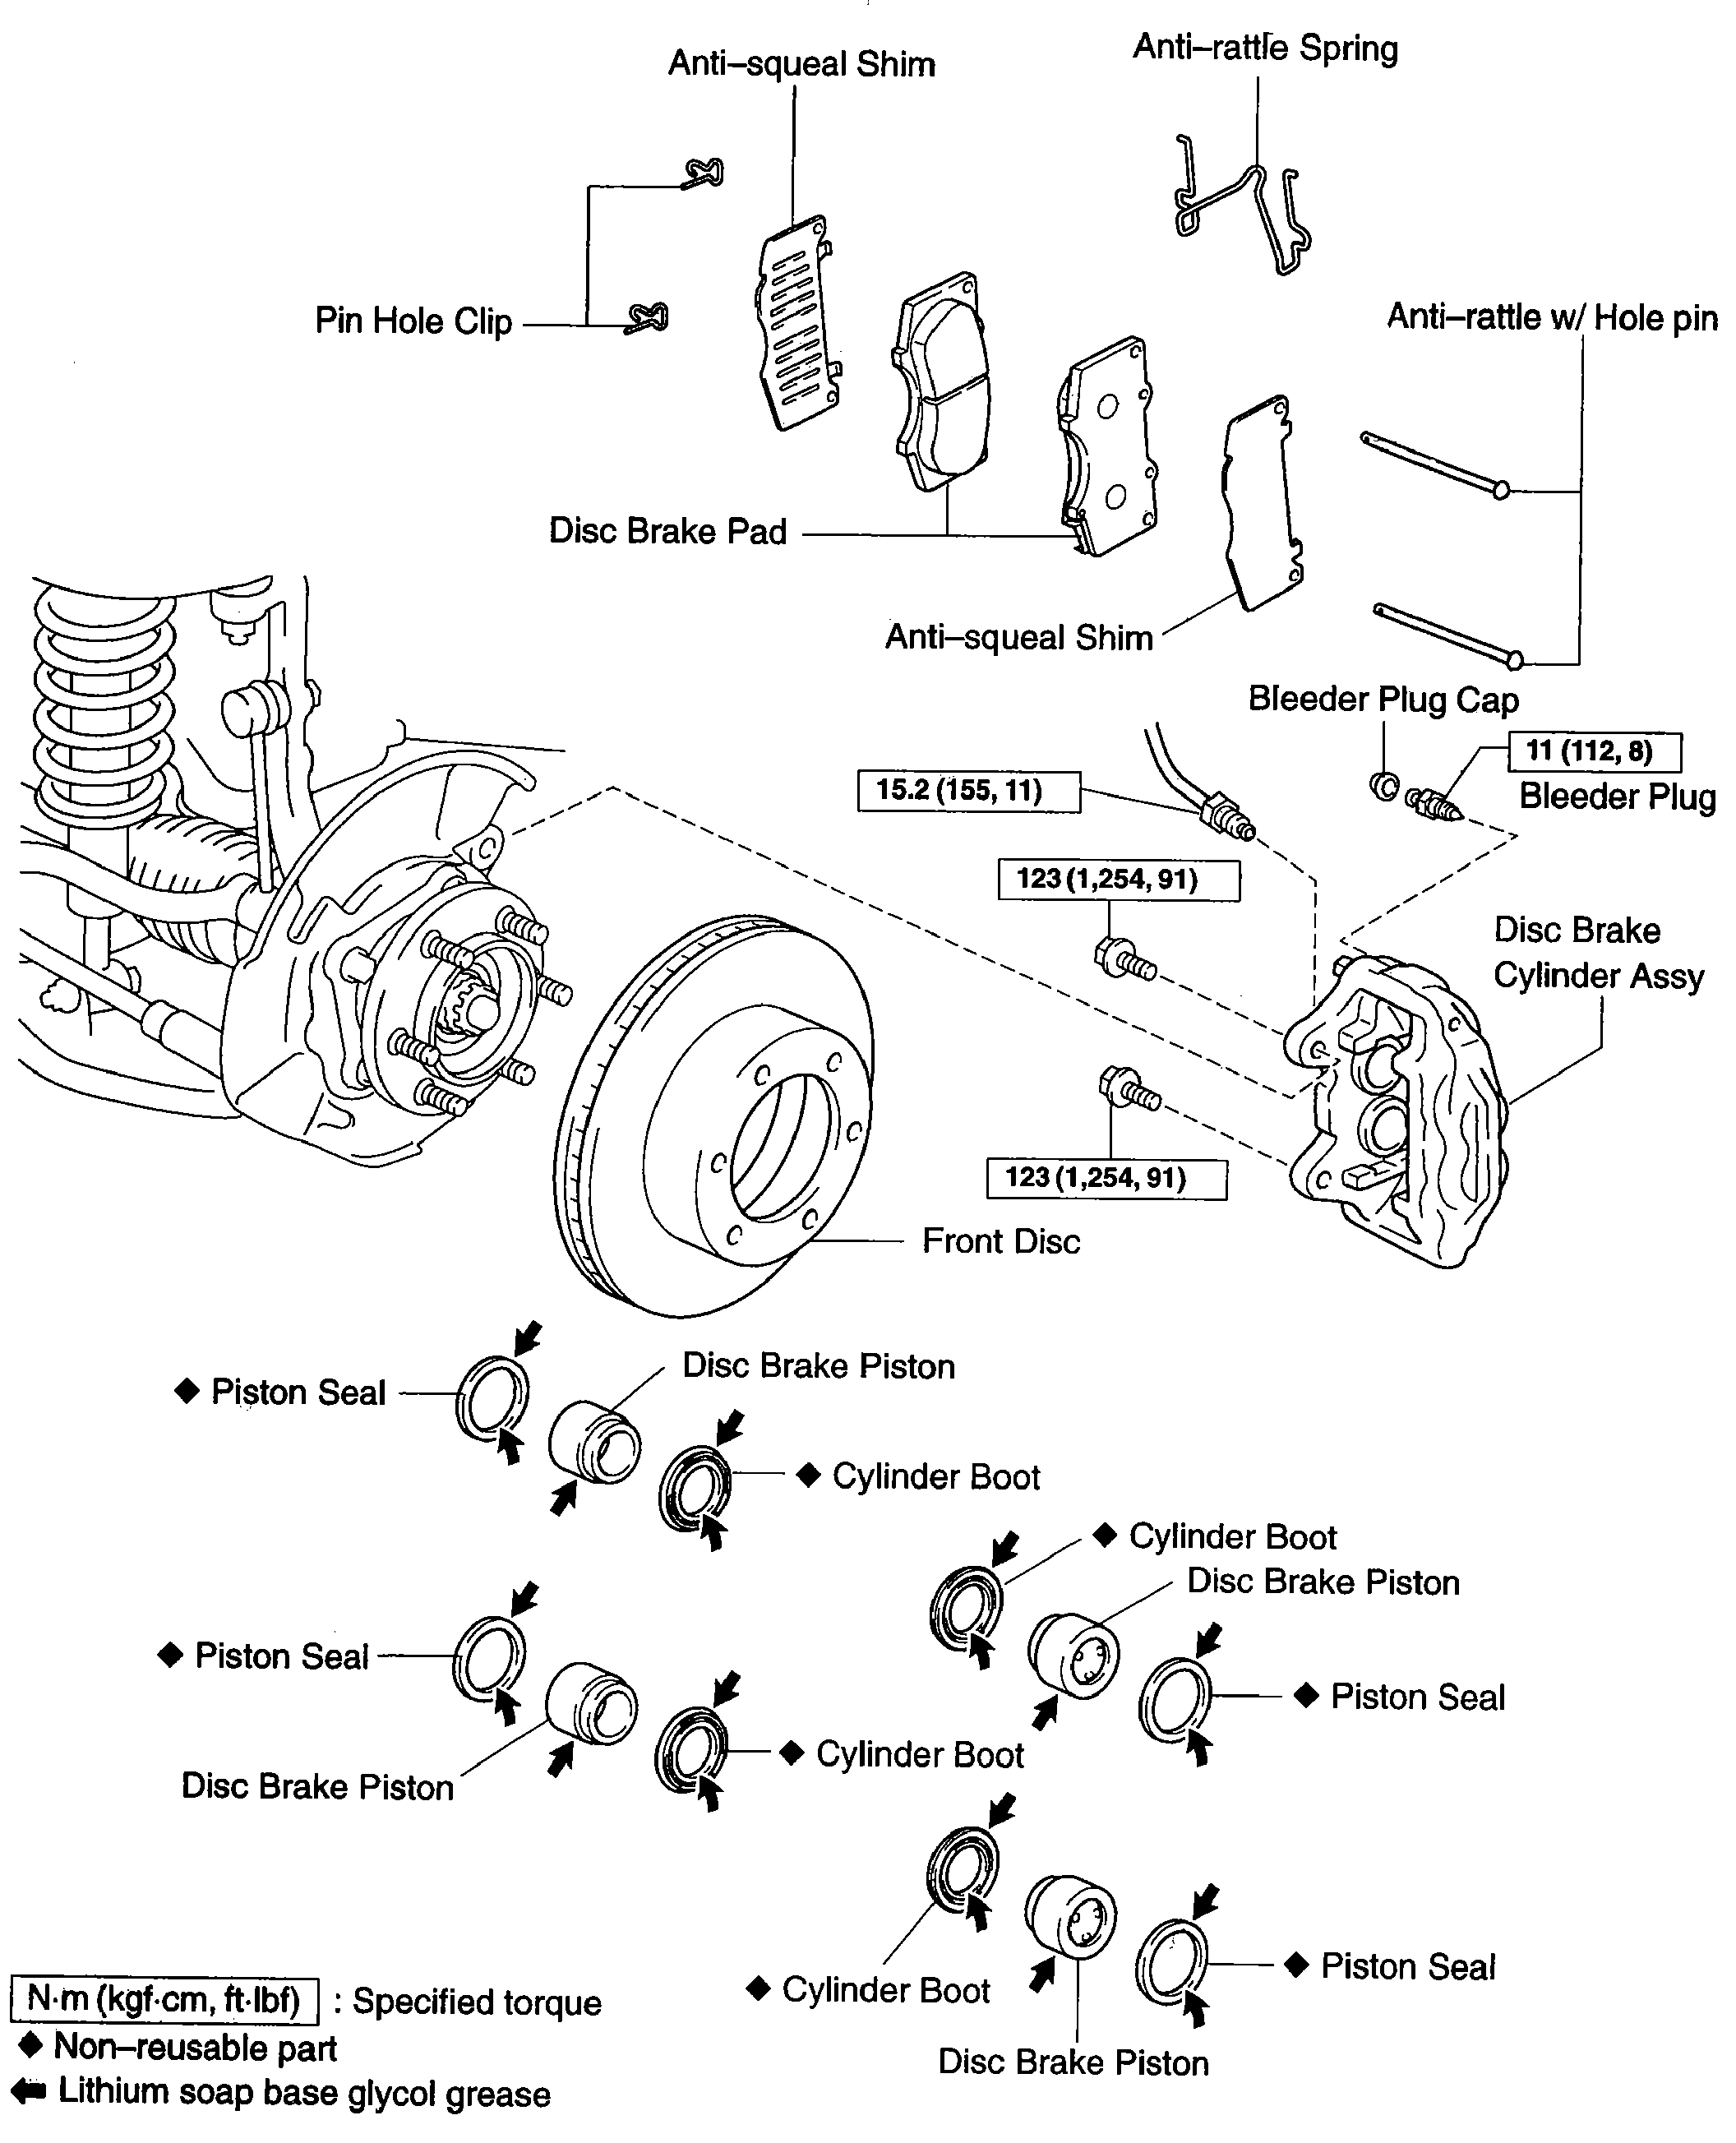
OVERHAUL
HINT: Overhaul procedure of the RH side is the same as that of with LH side.
1. REMOVE FRONT WHEEL
2. DRAIN BRAKE FLUID
NOTICE: Wash off the brake fluid immediately if it comes into contact with a painted surface.
pic 2
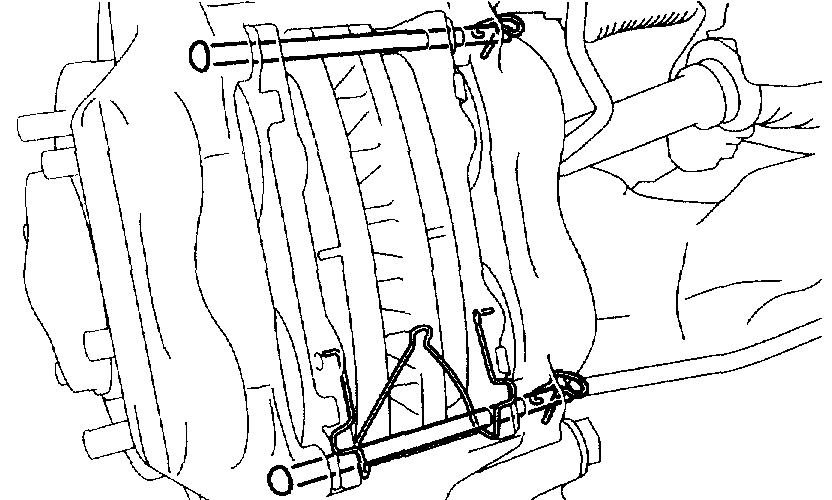
3. REMOVE FRONT DISC BRAKE ANTIRATTLE W/HOLE PIN
a. Remove the 2 pin hole clips, then remove the 2 anti-rattle w/hole pins from disc brake cylinder assy.
b. Remove the anti-rattle spring from the disc brake pad.
4. REMOVE DISC BRAKE PAD KIT FRONT (PAD ONLY)
a. Remove the 2 disc brake pads with anti-squeal shim from the disc brake cylinder assy.
5. REMOVE ANTI SQUEAL SHIM KIT FRONT
a. Remove the 2 anti-squeal shims from each of the disc brake pads.
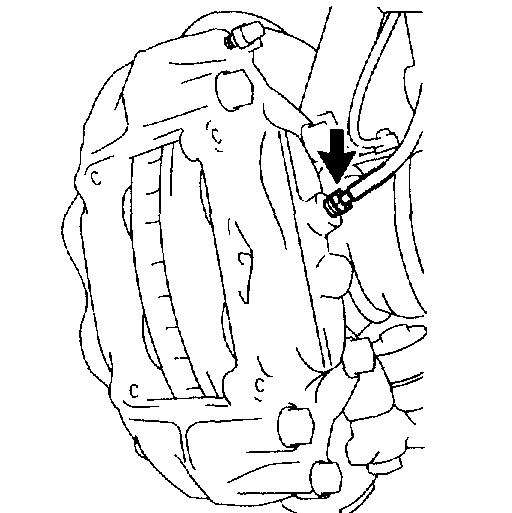
6. REMOVE DISC BRAKE CYLINDER ASSY LH
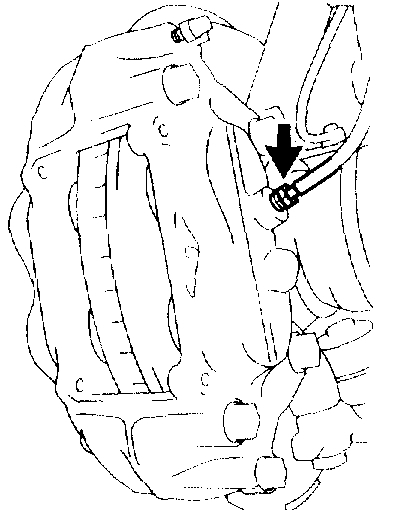
pic 3
a. Using SST, disconnect the brake tube from the disc brake cylinder assy.
SST 09023-00100
HINT: Use a container to catch brake fluid as it drains out.
pic 4
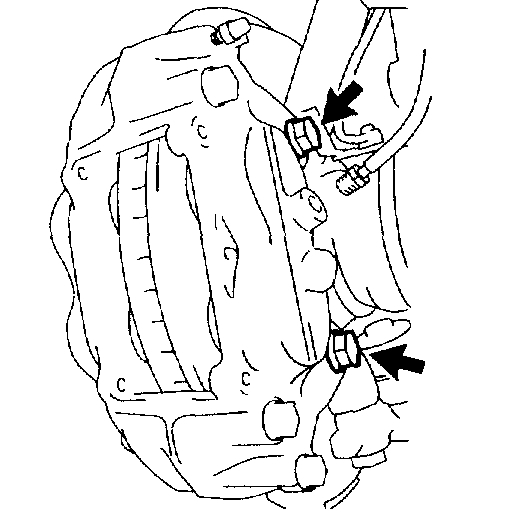
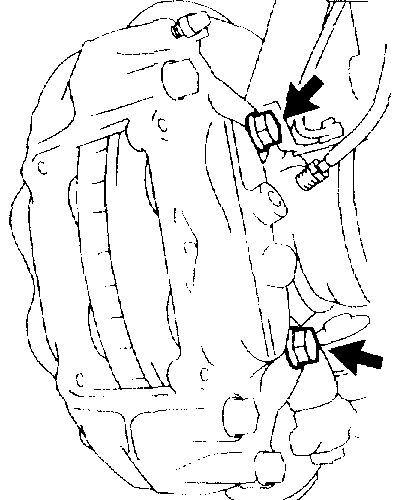
b. Remove the 2 bolts and remove the disc brake cylinder assy.
pic 5
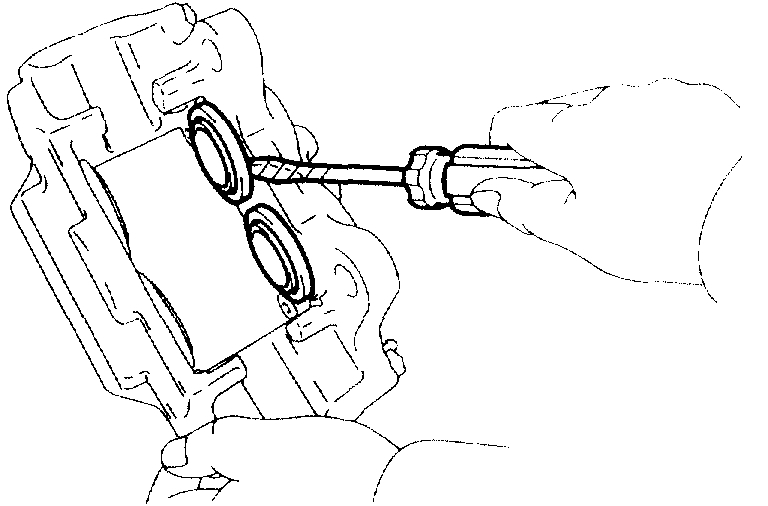
7. REMOVE CYLINDER BOOT
a. Using a screwdriver, remove the 4 cylinder boots from the caliper,
8. REMOVE FRONT DISC BRAKE PISTON
pic 6
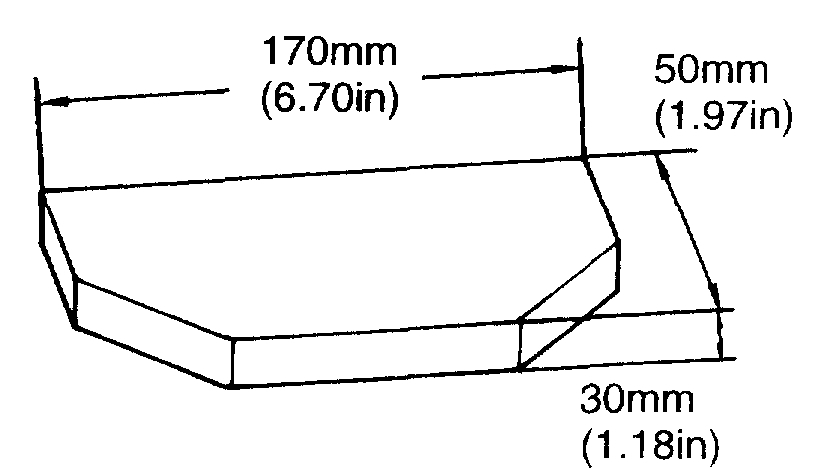
a. Prepare the wooden plate to hold the pistons.
pic 7
b. Place the plate between the pistons and insert a pad at one side.
c. Use compressed air to remove the pistons alternately from the cylinder.
CAUTION: Do not place your fingers in front of the piston when using compressed air.
pic 8
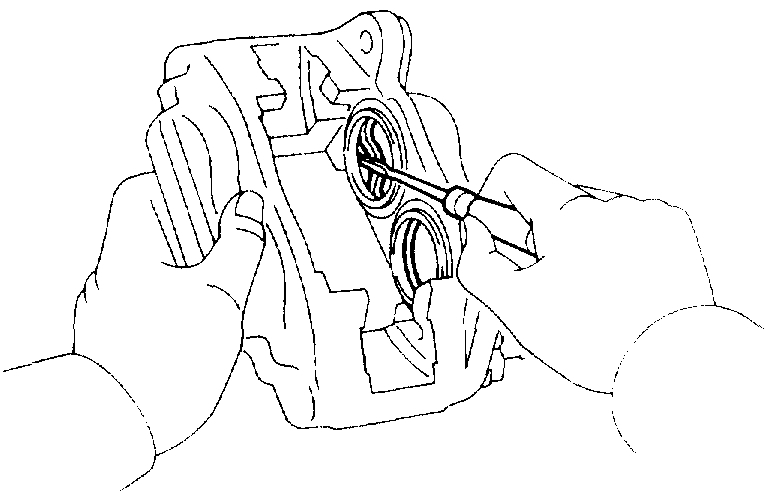
9. REMOVE PISTON SEAL
a. Using a screwdriver, remove the 4 piston seals from the cylinder.
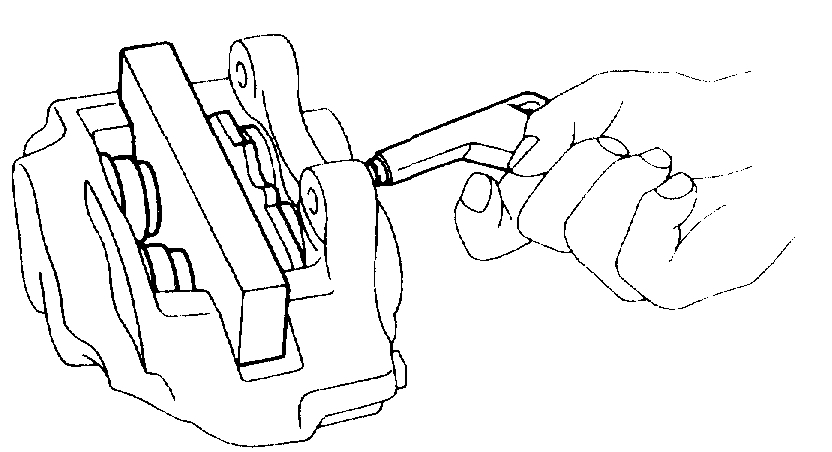
10. REMOVE FRONT DISC BRAKE BLEEDER PLUG
a. Remove the breeder plug cap and breeder plug from the disc brake cylinder assy.
11. INSPECT BRAKE CYLINDER AND PISTON
a. Check the cylinder bore and piston for rust or scoring.
pic 9
12. INSPECT PAD LINING THICKNESS
a. Using a ruler, measure the pad lining thickness.
Standard thickness: 11.5 mm (0.453 inch)
Minimum thickness: 1.0 mm (0.039 inch)
pic 10
13. INSPECT DISC THICKNESS
a. Using a micrometer, measure the disc thickness.
Standard thickness: 28.0 mm (1.102 inch)
Minimum thickness: 26.0 mm (1.024 inch)
14. REMOVE FRONT DISC
a. Make matchmarks on the disc and the axle hub.
b. Remove the front disc.
15. INSTALL FRONT DISC
a. Aligning the matchmarks, install the front disc.
HINT: When replacing the disc with a new one, select the installation position where the disc has the minimum runout.
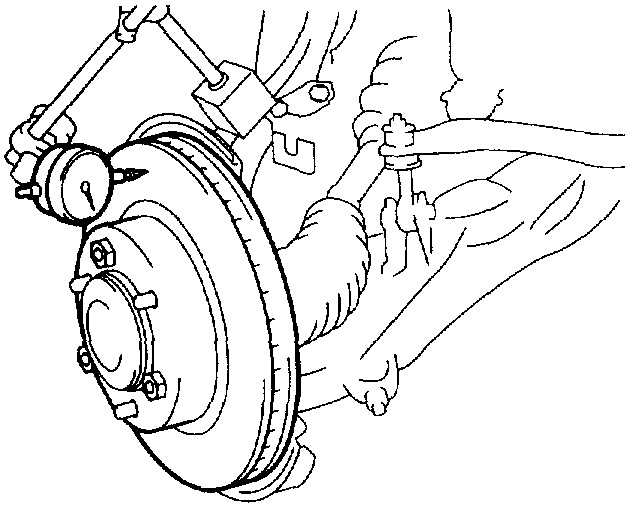
pic 11
16. INSPECT DISC RUNOUT
a. Temporarily fasten the disc with hub nuts.
Torque: 110 Nm (1,122 kgf-cm, 81 ft. lbs.)
b. Using a dial indicator, measure the disc runout 10 mm (0.39 inch) away from the outer edge of the disc.
Maximum disc runout: 0.05 mm (0.0020 inch)
c. If the disc runout is maximum value or greater, check the bearing play in the axial direction and check the axle hub runout. If the bearing play and axle hub runout are normal, adjust the disc runout or grind it on a "On car" brake lathe.
17. TEMPORARILY TIGHTEN FRONT DISC BRAKE BLEEDER PLUG
a. Temporarily tighten the bleeder plug to the disc brake cylinder assy.
b. Install the breeder plug cap to the breeder plug.
18. INSTALL PISTON SEAL
a. Apply the lithium soap base glycol grease to the 4 new piston seals.
b. Install the 4 piston seals to the disc brake cylinder assy.
19. INSTALL FRONT DISC BRAKE PISTON
a. Apply the lithium soap base glycol grease to the 4 disc brake pistons.
b. Install the 4 disc brake pistons on the disc brake cylinder assy.
NOTICE: Do not screw the disc brake piston forcedly in the disc brake cylinder assy.
20. INSTALL CYLINDER BOOT
a. Apply the lithium soap grease glycol grease to the 4 new cylinder boots.
b. Install the 4 cylinder boots on the disc brake cylinder assy.
HINT: Install the cylinder boot securely on the grooves of the disc brake cylinder and piston.
21. INSTALL DISC BRAKE CYLINDER ASSY LH
pic 12
a. Install the disc brake cylinder assy with 2 bolts.
Torque: 123 Nm (1,254 kgf-cm, 91 ft. lbs.)
pic 13
b. Using SST, connect the brake tube to the disc brake cylinder assy.
SST 09023-00100
Torque: 15.2 Nm (155 kgf-cm, 11 ft. lbs.)
22. INSTALL ANTI SQUEAL SHIM KIT FRONT
NOTICE: If necessary, replace the anti-squeal shim kit when replacing the brake pad.
a. Install the anti-squeal shims on each brake pads.
NOTICE: There should be no oil or grease on the friction surfaces of the brake pads and the front disc.
23. INSTALL DISC BRAKE PAD KIT FRONT (PAD ONLY)
a. Install the 2 disc brake pads with anti-squeal shim to the disc brake cylinder assy.
pic 14
24. INSTALL FRONT DISC BRAKE ANTIRATTLE W/HOLE PIN
a. Install the 2 anti-rattle w/hole pins and anti-rattle spring to the disc brake cylinder.
HINT: Anti-rattle spring is installed with bottom side of anti-rattle w/hole pin.
b. Install the 2 new pin hole clips to the anti-rattle w/hole pin.
NOTICE: When installing the pin hole clip, be sure to install the pin hole clip with the handle facing to the vehicle center.
25. FILL RESERVOIR WITH BRAKE FLUID
26. BLEED BRAKE LINE
27. CHECK FLUID LEVEL IN RESERVOIR
28. CHECK BRAKE FLUID LEAKAGE
29. INSTALL FRONT WHEEL
Torque: 110 Nm (1,122 kgf-cm, 81 ft. lbs.)
__________________________________
I hope this helps. Let me know if you have other questions.
Take care and God Bless,
Joe
Images (Click to enlarge)
Feb 16, 2021 at 6:06 PM