Good afternoon,
I attached the procedure for you below. This is a huge project if you never did one before.
https://www.2carpros.com/articles/how-a-timing-belt-works
This engine is an interference engine which means if the timing changed or is installed incorrectly, valve damage will result in the cylinders.
Roy
This procedure is revised by TSB # 98-107 Date: January 15, 1999
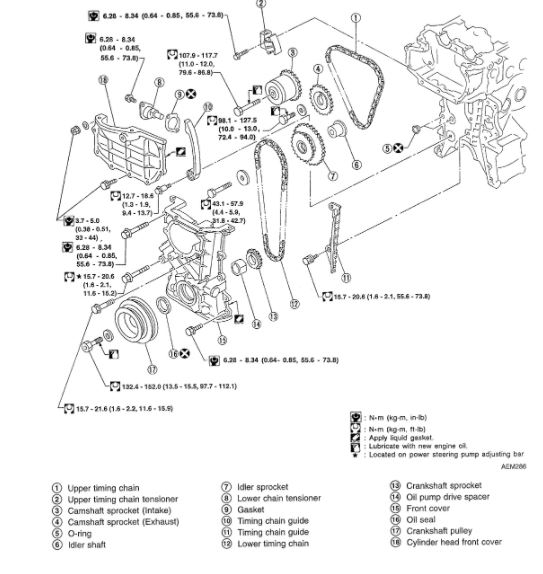
Note: A revised service procedure for the engine front cover/timing chain has been adopted for the GA16DE. It is no longer recommended to remove the cylinder head when removing the timing chain/front cover(s). Utilize the following steps when servicing the front cover, timing chain, guides or tensioner(s)
Caution:
- After removing the timing chain, do not turn the crankshaft and camshaft separately or the valves will strike the piston heads.
- When installing chain tensioners or other sliding parts, lubricate contacting surfaces with new engine oil.
- Apply new engine oil to bolt threads and seat surfaces when installing the camshaft sprockets and the crankshaft pulley.
- Do not spill engine coolant on the drive belts.
- Please use the correct tightening torque.
imageOpen In New TabZoom/Print
1. Set # 1 piston at TDC on its compression stroke.
2. Remove the spark plug wires.
imageOpen In New TabZoom/Print
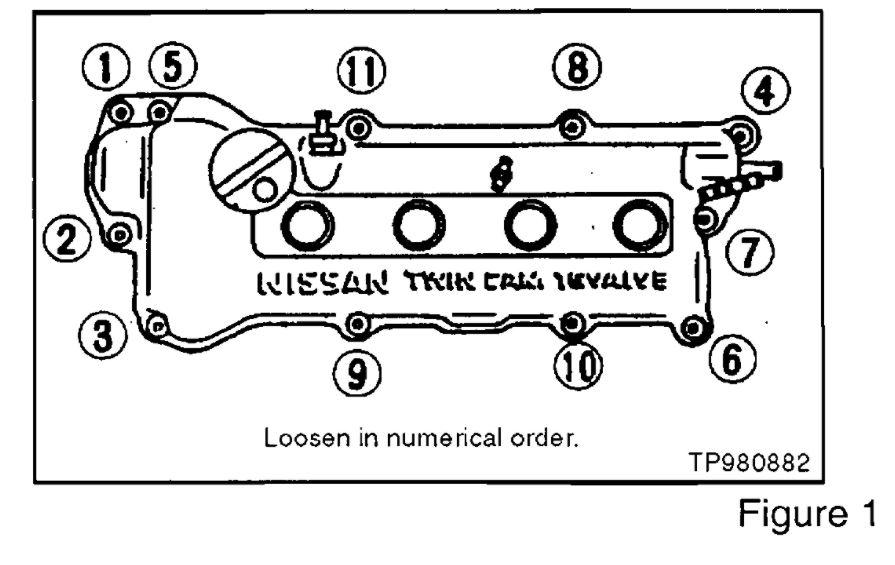
3. Remove the rocker cover (see figure 1). 4.Remove the coolant reservoir tank with bracket and reposition it for clearance.
5. Support the engine with a suitable jack.
6. Remove cylinder head front mounting bracket.
7. Remove engine front mounting, then the engine front mounting bracket.
8. Remove cylinder head front cover.
imageOpen In New TabZoom/Print
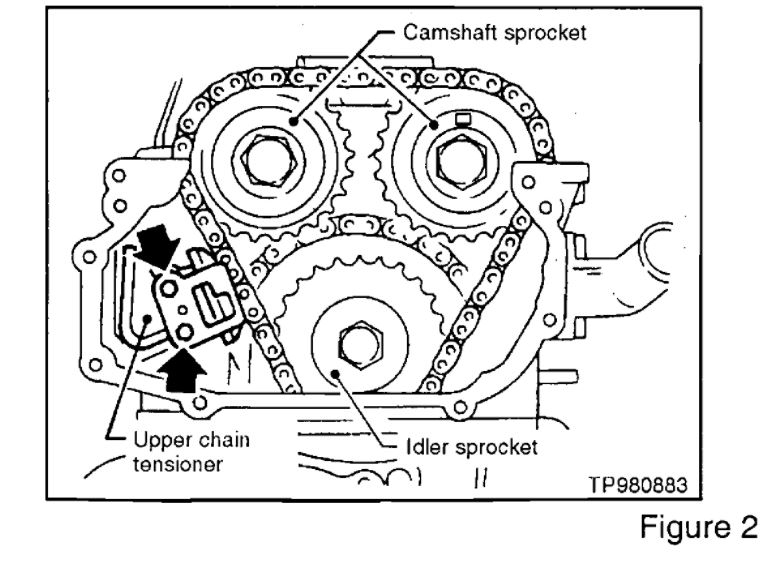
9. Remove the upper chain tensioner (see figure 2).
imageOpen In New TabZoom/Print
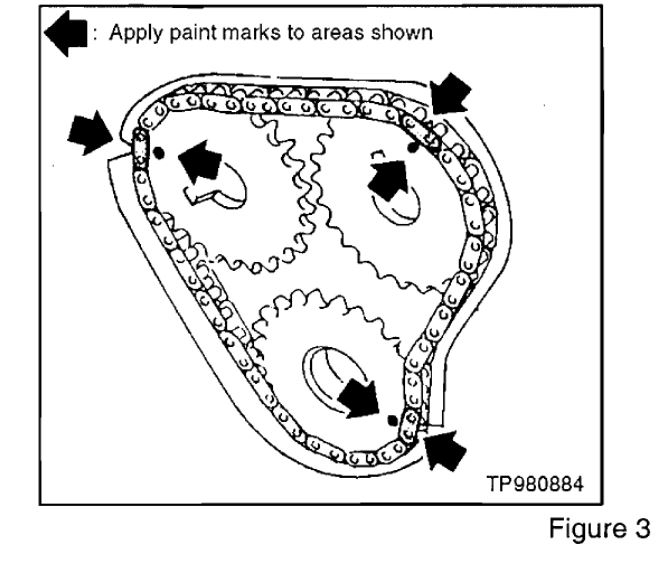
10. Wipe off the links of the upper timing chain next to the timing marks on the sprockets. Put paint marks on the timing chain, matching them with the timing marks on the cam sprockets and idler sprocket (see image 3)
11. Remove the four (4) front cover to cylinder head bolts.
12. Remove side and lower engine compartment splash covers.
13. Remove the accessory drive belts.
14. Remove the crankshaft pulley.
15. Drain coolant by removing the cylinder block drain plug and opening the radiator drain cock.
16. Drain engine oil.
17. Remove intake manifold support of engine front side.
18. Remove power steering pump, pump bracket and tension rod. Position pump aside for clearance.
imageOpen In New TabZoom/Print
19. Remove the thermostat housing (See figure 4).
imageOpen In New TabZoom/Print
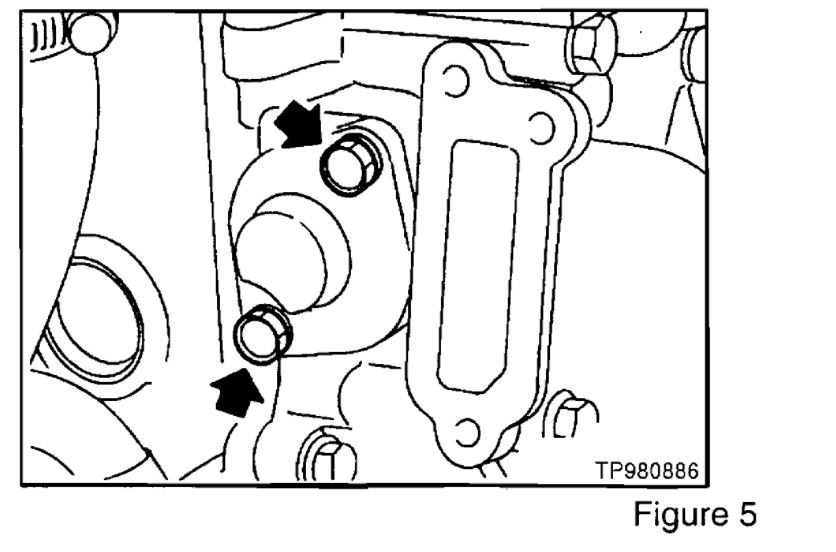
20. Remove the lower chain tensioner (see figure 5).
21. Remove the front exhaust tube.
22. Remove the front and rear engine gussets (if equipped) on either side of the oil pan.
NOTE:
On A/T models, remove the rear plate cover.
imageOpen In New TabZoom/Print
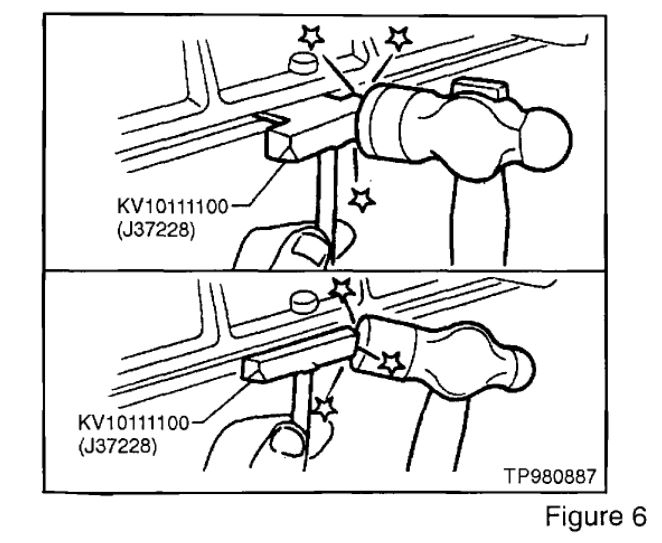
23. Remove the oil pan (see figure 6).
a. Insert the tool between the cylinder block and oil pan.
CAUTION:
Be careful not to damage the aluminum mating face. Do not insert a screwdriver, or the oil pan flange will become damaged.
b. Slide the tool by tapping it on the side of the tool with a hammer.
24. Remove the A/C compressor and position it aside for clearance.
25. Remove the A/C and alternator bracket with the alternator.
26. Remove the oil pump drive spacer.
CAUTION: Be careful not to scratch the drive spacer when removing it.
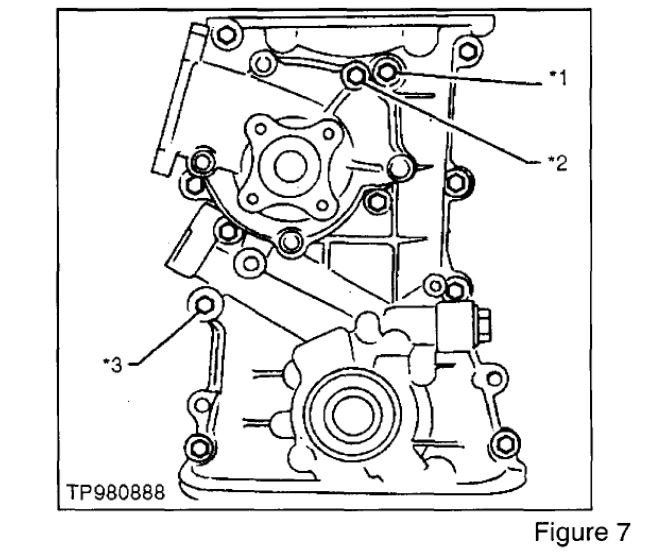
27. Remove the front cover bolts and front cover.
imageOpen In New TabZoom/Print
CAUTION:
One bolt is located on the water pump (see figure 7).
1: Located on engine front mounting bracket.
2: Located on the water pump.
3: Located on the power steering oil pump adjusting bar.
CAUTION: Be careful not to tear or damage the cylinder head gasket.
28. Remove the cylinder block to front cover alignment dowels.
CAUTION: Do not hit the dowels or the cylinder block will crack.
imageOpen In New TabZoom/Print
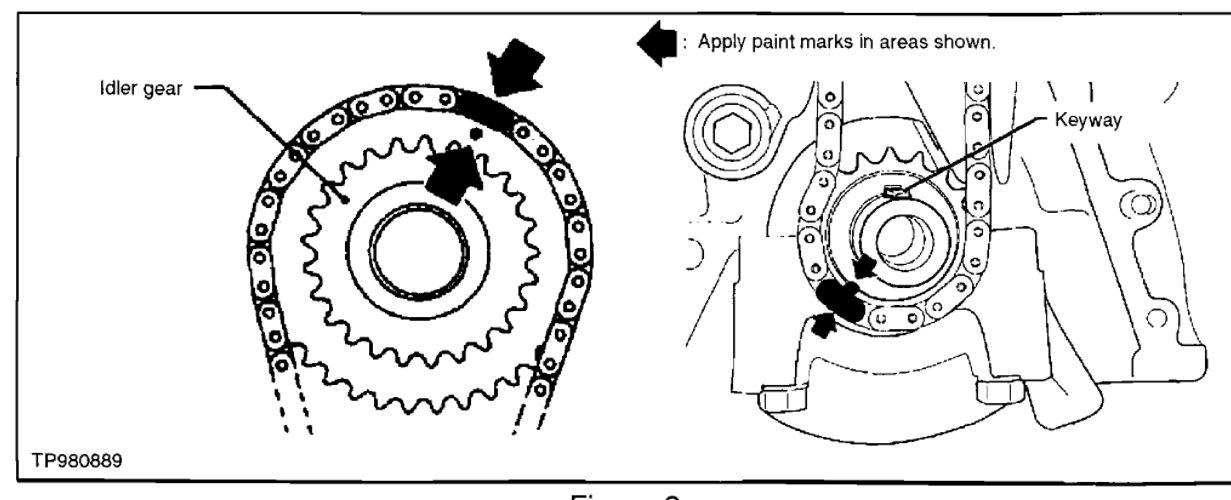
29. Wipe off the links of the lower timing chain next to the timing marks on the sprockets. Put paint marks on the timing chain, matching them with the timing marks on the idler sprocket and crankshaft sprocket (see image 8).
Images (Click to enlarge)
Jan 15, 2021 at 1:35 PM