Good morning,
They need to do a leak down test on each cylinder to see if the gaskets are leaking. It is where they remove the spark plugs and insert shop air into the cylinder and watch for movement in the radiator.
https://www.2carpros.com/articles/head-gasket-blown-test
No, the motor does not need to be removed. There is plenty of room to do this repair in the car.
Roy
Cylinder Head
REMOVAL
1) Remove the V-belt.
2) Remove the crankshaft pulley.
3) Remove the timing belt cover.
4) Remove the timing belt.
5) Remove the camshaft sprocket.
6) Remove the intake manifold.
7) Remove the bolt which installs A/C compressor bracket on cylinder head.
8) Remove the valve rocker assembly.
9) Remove the camshaft.
imageOpen In New TabZoom/Print
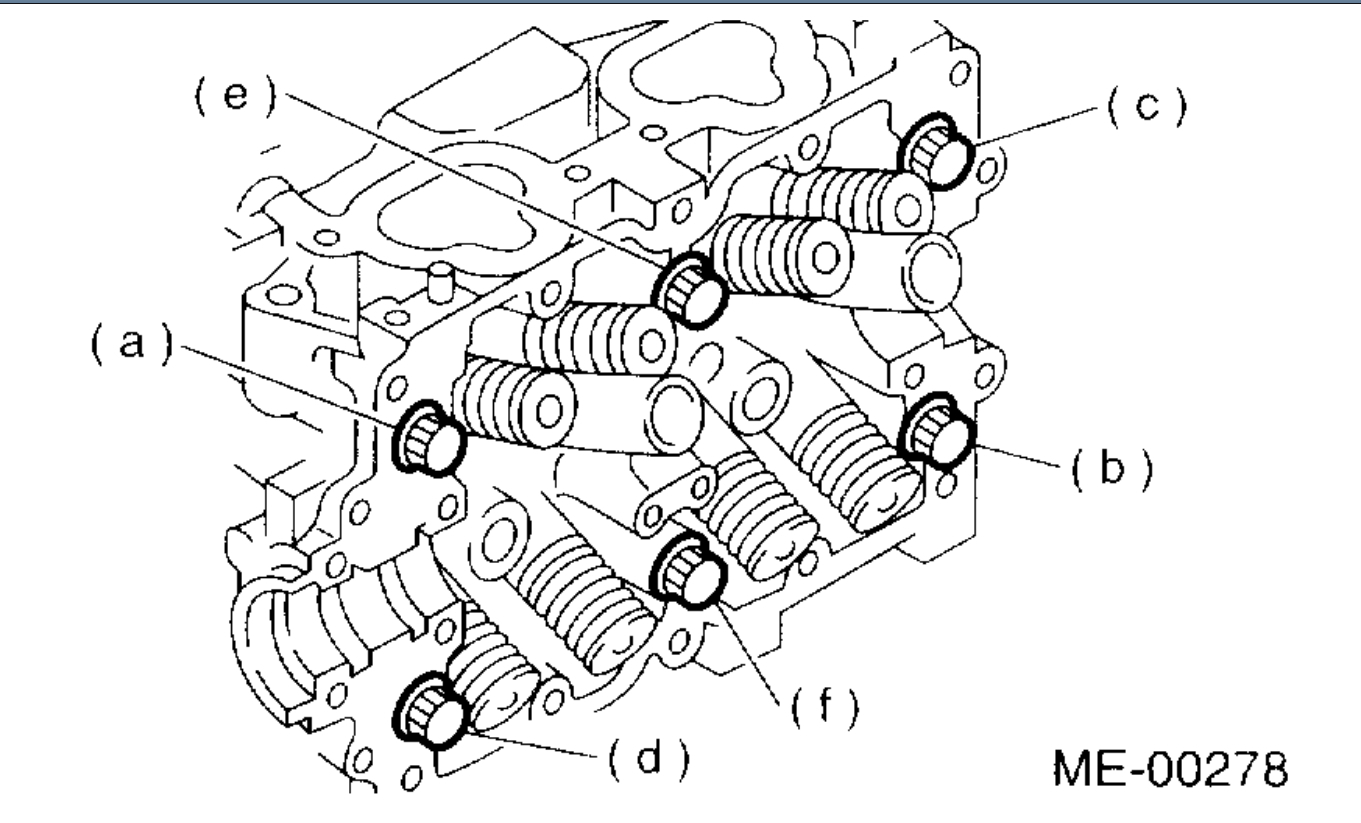
10) Remove the cylinder head bolts in alphabetical sequence shown in the figure.
NOTE: Leave bolts (a) and (c) engaged by three or four threads to prevent cylinder head from falling.
11) While tapping the cylinder head with a plastic hammer, separate it from cylinder block.
imageOpen In New TabZoom/Print
12) Remove bolts (a) and (c) to remove cylinder head.
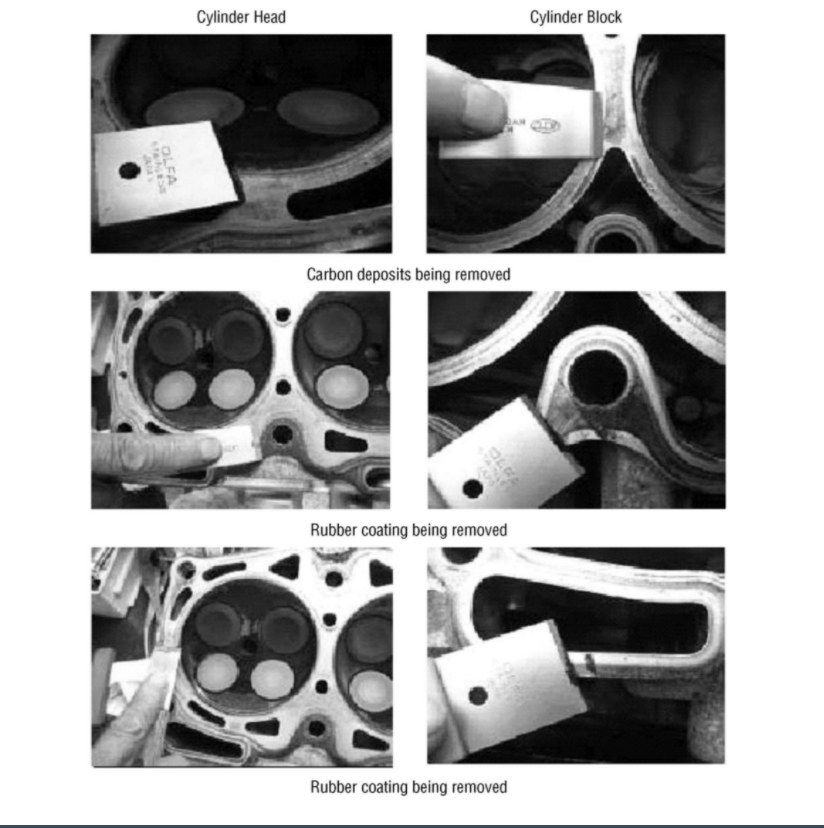
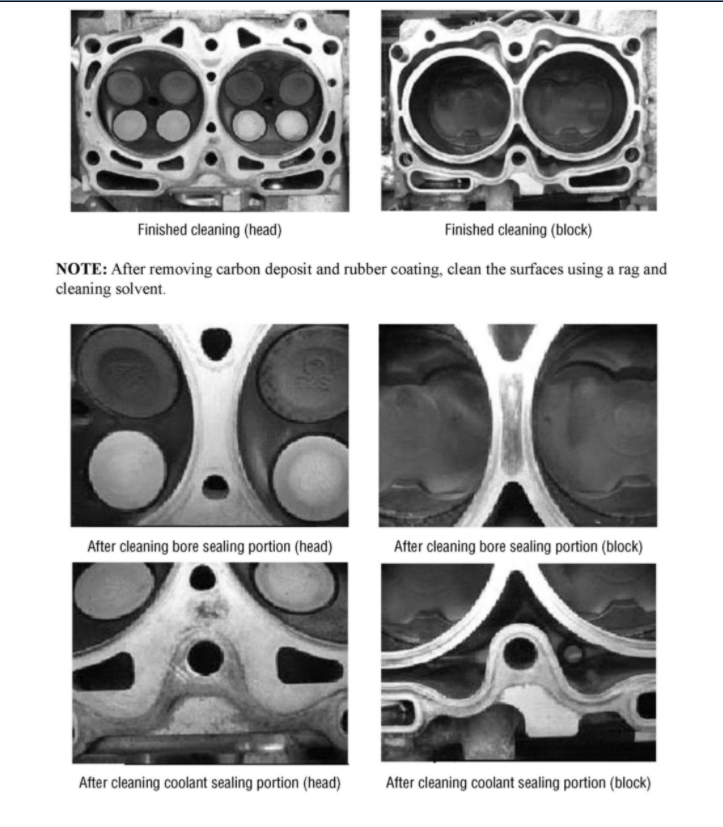
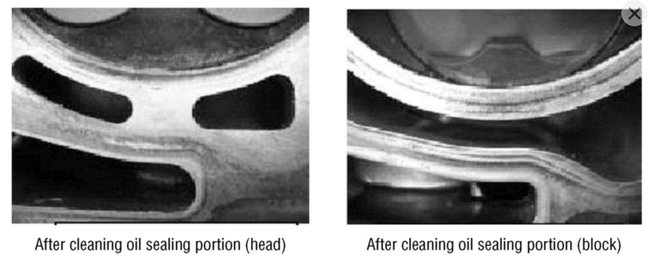
13) Remove the cylinder head gasket.
CAUTION: Do not scratch the mating surface of cylinder head and cylinder block.
14) Similarly, remove the right side cylinder head.
INSTALLATION
1) Install the cylinder head and gaskets on cylinder block.
CAUTION:
^ Use new cylinder head gaskets.
^ Be careful not to scratch the mating surface of cylinder block and cylinder head.
2) Tighten the cylinder head bolts.
a) Apply a coat of engine oil to the washers and bolt threads.
b) Tighten all bolts to 29 Nm (3.0 kgf-m, 22 ft-lb) in alphabetical sequence.
Then tighten all bolts to 69 Nm (7.0 kgf-m, 51 ft-lb) in alphabetical sequence.
c) Back off all bolts in reverse order of assembly by 180° first; back them off by 180° again.
d) Tighten the bolts (a) and (b) to 34 Nm (3.5 kgf-m, 25 ft-lb).
e) Tighten bolts (c), (d), (e) and (f) to 15 Nm (1.5 kgf-m, 11 ft-lb).
f) Tighten all bolts by 80 to 90° in alphabetical sequence.
CAUTION: Do not tighten bolts more than 90°.
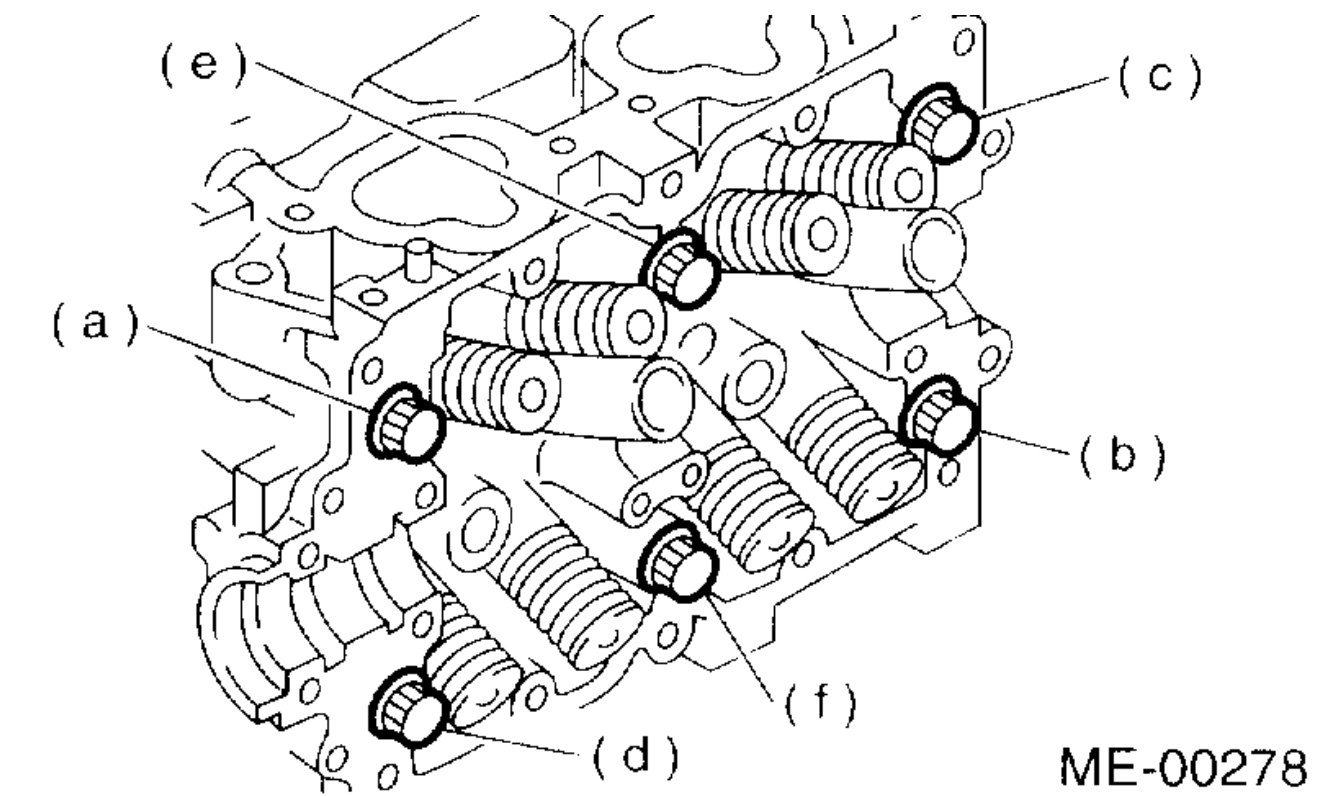
imageOpen In New TabZoom/Print
g) Further tighten all bolts by 80 to 90° in alphabetical sequence shown in figure below.
CAUTION: Ensure that the total "re-tightening angle" [in the former two steps], do not exceed 180°.
3) Install the camshaft.
4) Install the valve rocker assembly.
5) Install the A/C compressor bracket on cylinder head.
6) Install the intake manifold.
7) Install the camshaft sprocket.
8) Install the timing belt.
9) Install the timing belt cover.
10) Install the crankshaft pulley.
11) Install the V-belt.
Images (Click to enlarge)
Feb 2, 2021 at 3:34 AM