Hi,
Here are the directions. The attached pictures correlate with the directions.
_________________________________________
SIR STEERING WHEEL MODULE COIL - CENTERING
Inflatable Restraint Coil Centering - Off Vehicle (Column Shift and Floor Shift)
Notice: The new SIR coil assembly will be centered. Improper alignment of the SIR coil assembly may damage the unit, causing an inflatable restraint malfunction.
Pic 1
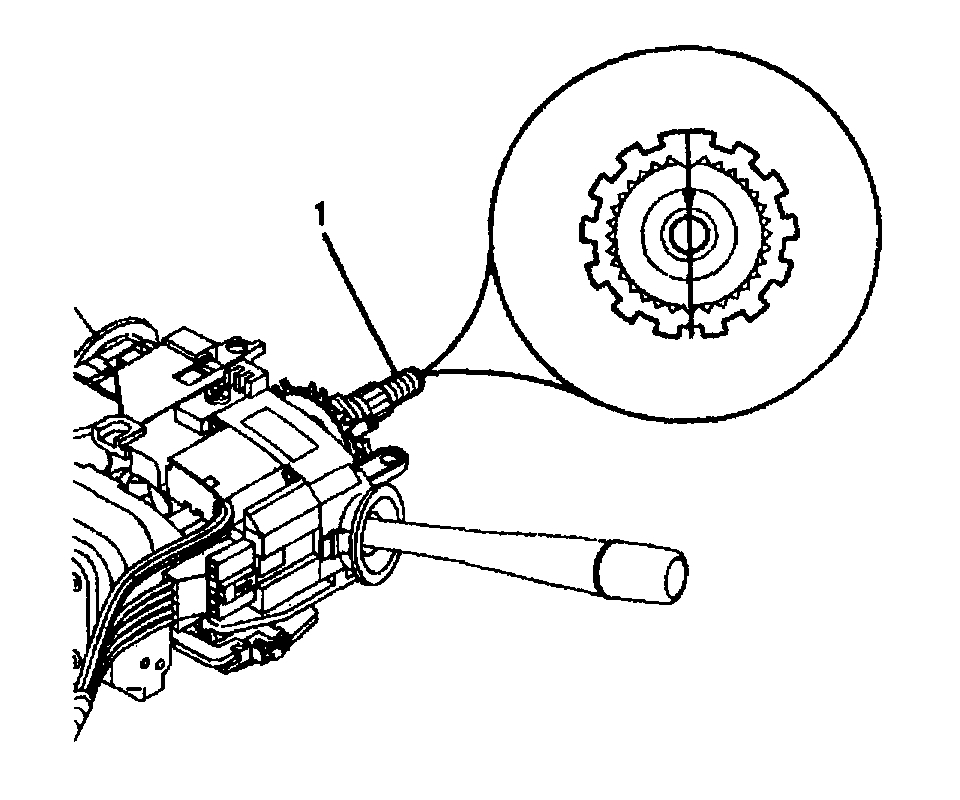
1. Verify the following before centering the inflatable restraint steering wheel module coil:
The wheels on the vehicle are straight ahead.
The block tooth (1) of the steering shaft assembly is in the 12 o'clock position.
The ignition switch is in the LOCK position.
Pic 2
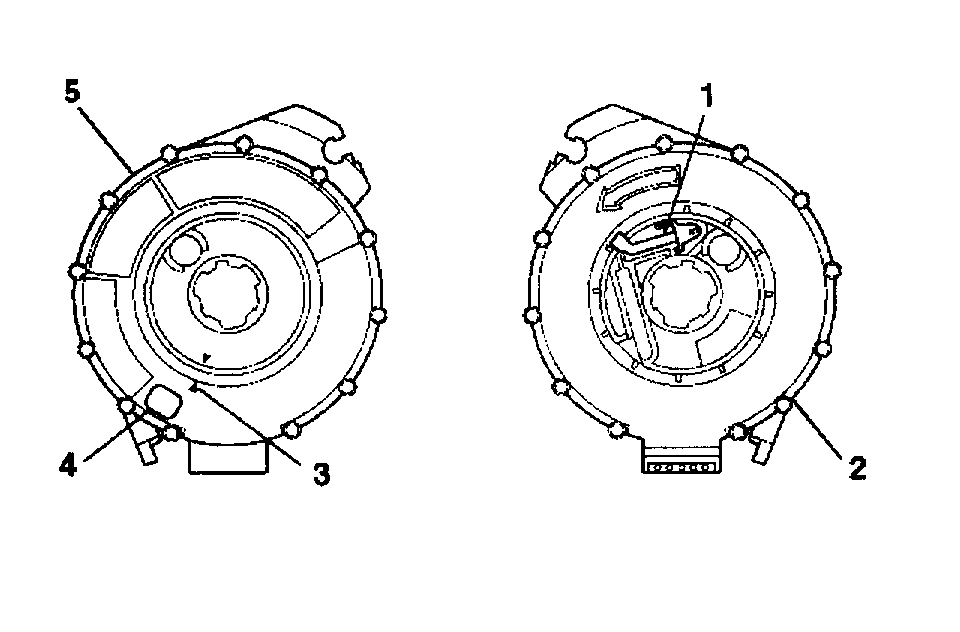
2. If the front (5) of the inflatable restraint steering wheel module coil has a centering window (4), and on the back side (2) a spring service lock (1), perform the following steps:
2.1. Hold the inflatable restraint steering wheel module coil with the face up.
2.2. While depressing the spring service lock, rotate the coil hub clockwise until the coil ribbon stops.
2.3. Rotate the coil hub slowly, counterclockwise, until the centering window appears yellow and both arrows (3) line up.
2.4. Release spring service lock between the locking tab. The inflatable restraint steering wheel module coil is now centered.
2.5. Align the centered inflatable restraint steering wheel module coil with the horn tower and slide onto the steering shaft assembly.
Pic 3
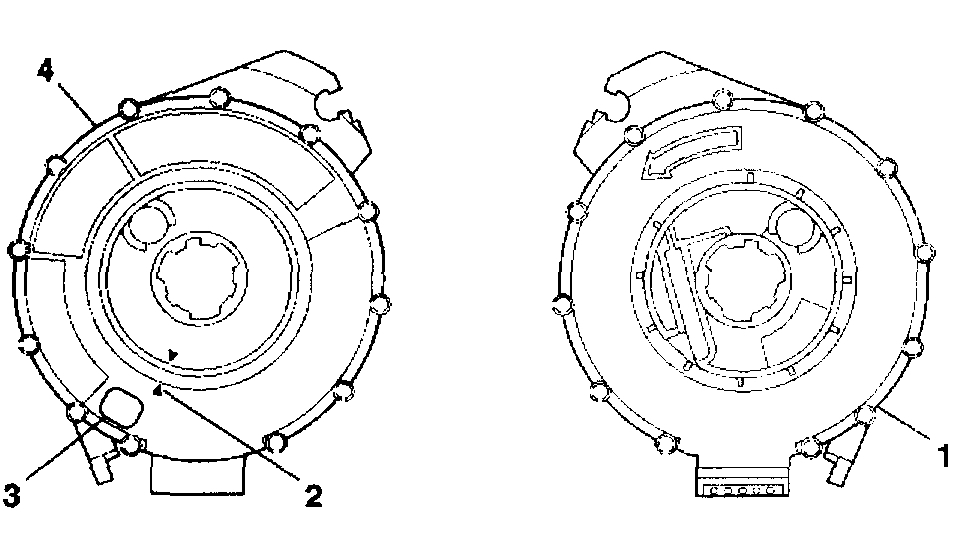
3. If the front (4) of the inflatable restraint steering wheel module coil has a centering window (3) and no spring service lock on the back side (1), perform the following steps:
3.1. Hold the inflatable restraint steering wheel module coil with the face up.
3.2. Rotate the coil hub clockwise until the coil ribbon stops.
3.3. Rotate the coil hub slowly, counterclockwise until the centering window appears yellow and both arrows (2) line up. This is the CENTER position.
3.4. While holding the coil hub in the CENTER position, align the inflatable restraint steering wheel module coil with the horn tower and slide onto the steering shaft assembly.
Pic 4
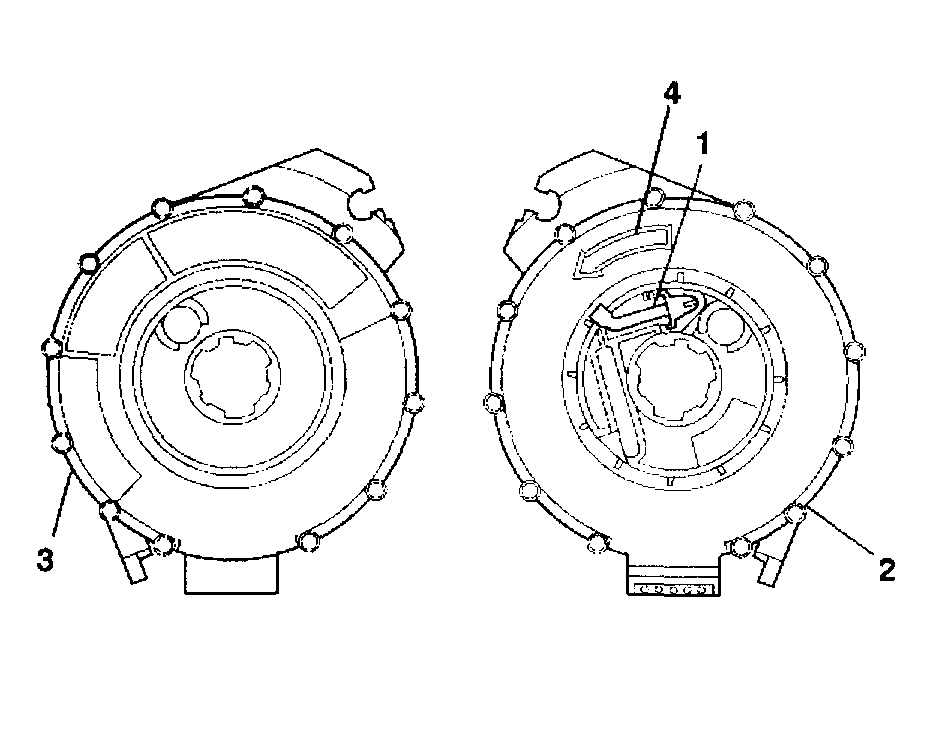
4. If no centering window is present on the front side (3) of the inflatable restraint steering wheel module coil, but a spring service lock (1) is on the back side (2), perform the following steps:
4.1. Hold the inflatable restraint steering wheel module coil with the back side up.
4.2. While depressing the spring service lock, rotate the coil hub in the direction of the arrow (4) until the coil ribbon stops.
4.3. Still pressing the spring service lock, rotate the coil hub in the opposite direction 2 1/2 revolutions.
4.4. Release the spring service lock between locking tabs. The inflatable restraint steering wheel module coil is now centered.
4.5. Align the centered inflatable restraint steering wheel module coil with the horn tower and slide onto the steering shaft assembly.
Pic 5
5. For no centering window on the front side (2) of the inflatable restraint steering wheel module coil and no spring service lock on the back side (1), perform the following steps:
5.1. Hold the inflatable restraint steering wheel module coil with the face up.
5.2. Rotate the coil hub in the direction of the arrow until the coil ribbon stops.
5.3. Rotate the coil hub, slowly, counterclockwise, for 2 1/2 revolutions. This is the CENTER position.
5.4. While maintaining the coil hub in the CENTER position, align the centered inflatable restraint steering wheel module coil with the horn tower and slide onto the steering shaft assembly.
______________________________________________
Let me know if this helps or if you have other questions.
Take care,
Joe
Images (Click to make bigger)
Tuesday, November 26th, 2019 AT 8:06 PM