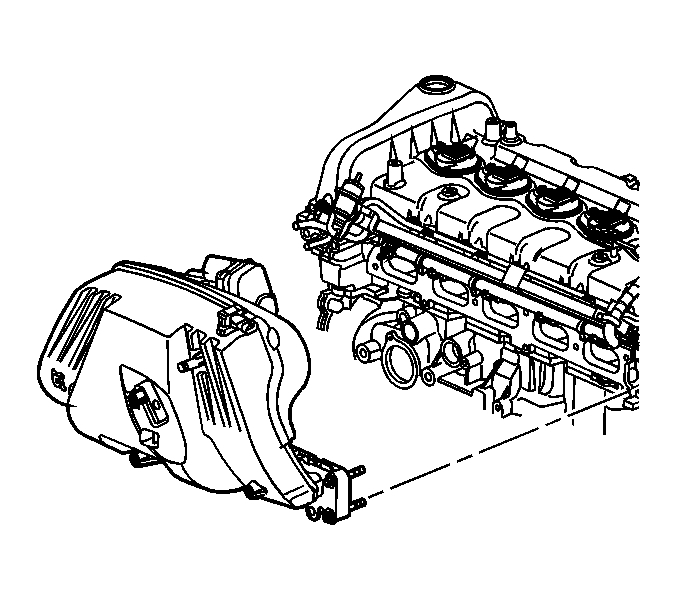
The five cylinder is the 3.5 and the starter is under the intake manifold.
It is a five hour job at the least.
Intake manifold replacement
Removal Procedure:
1.Remove the throttle body. Refer to Throttle Body Assembly Replacement in Engine Controls-3.5L (L52).
2.Remove the battery box. Refer to Battery Box Replacement in Engine Electrical.
3.Remove the oil level indicator and tube. Refer to Oil Level Indicator and Tube Replacement .
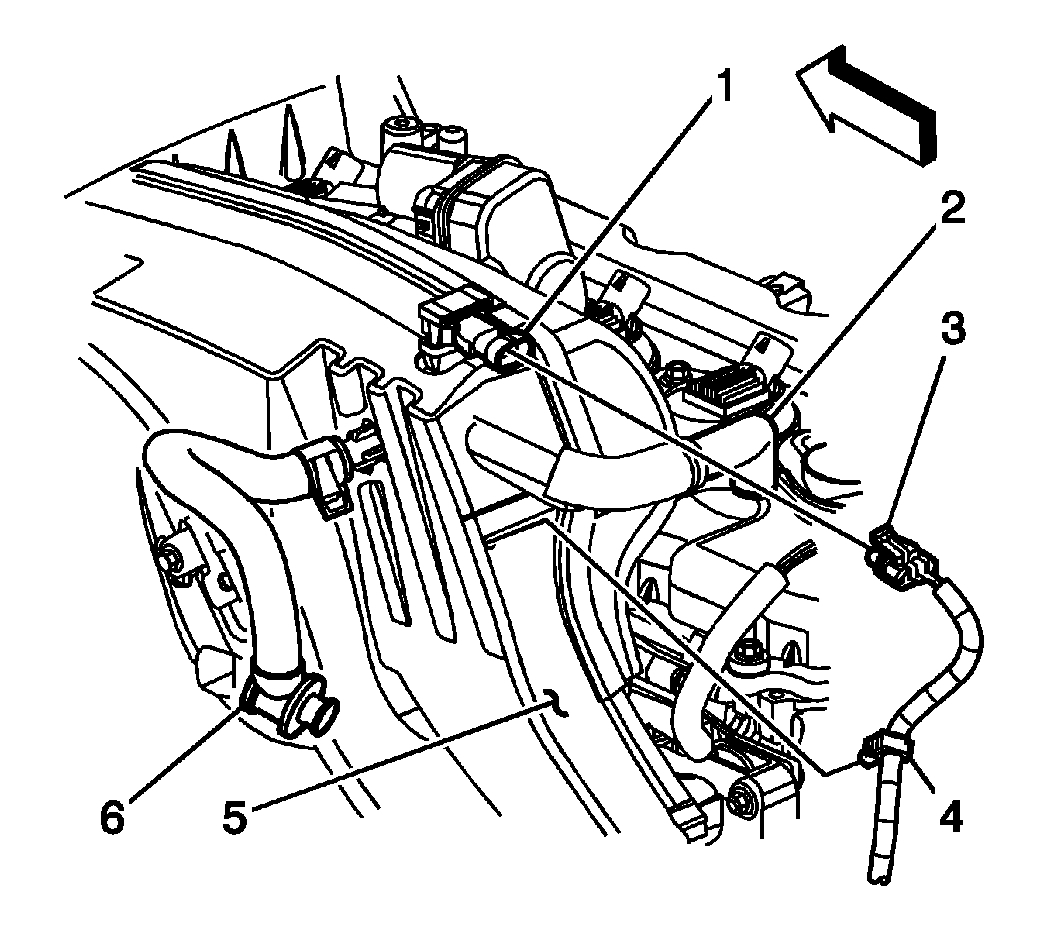
4.Disconnect the brake booster hose (6) from the brake booster.
5.Disconnect the MAP sensor electrical connector (3).
6.Disconnect the MAP sensor wiring harness retainer (4) from the intake manifold (5).
7.Disconnect the PCV dirty air tube (2) from the camshaft cover.
8.Remove the generator. Refer to Generator Replacement in Engine Electrical.
Fig 1: Identifying Intake Manifold External Components
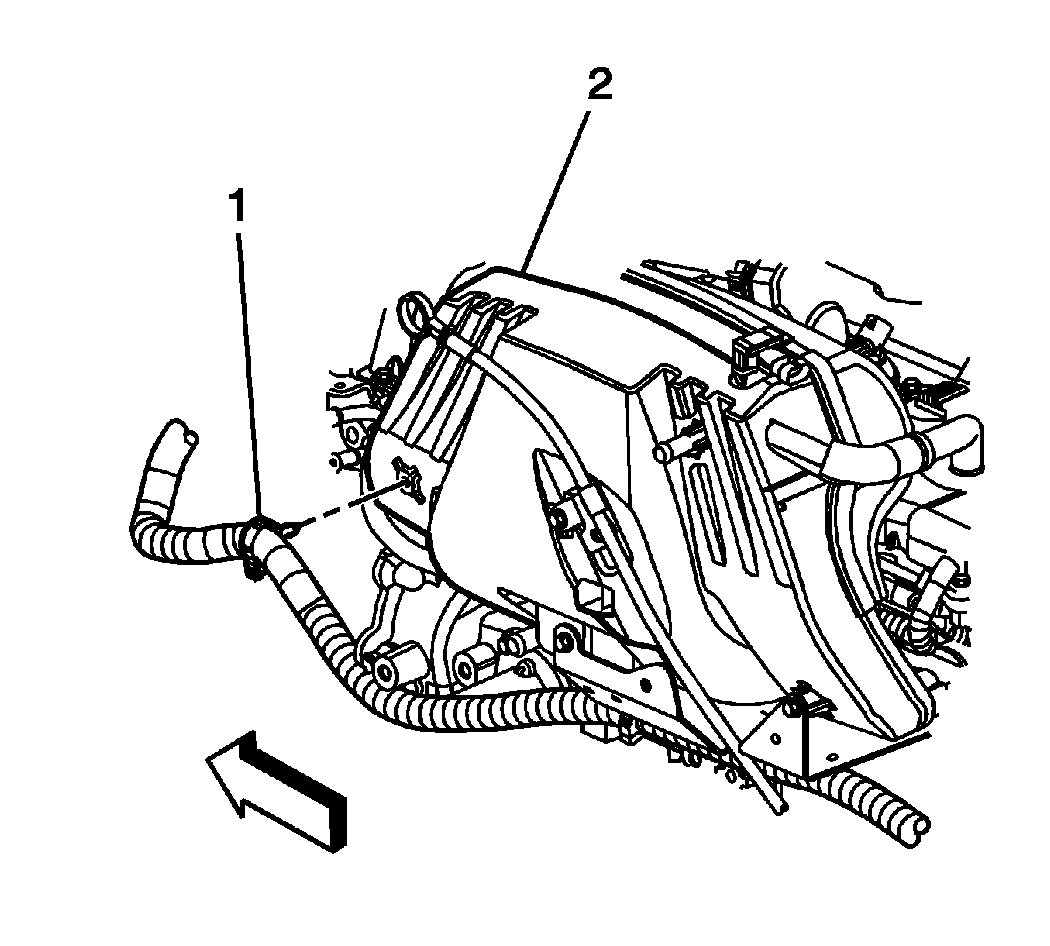
9.Disconnect the engine wiring harness retainer (1) from the intake manifold (2).
Fig 2: View Of Intake Manifold Engine Wiring Harness Retainer
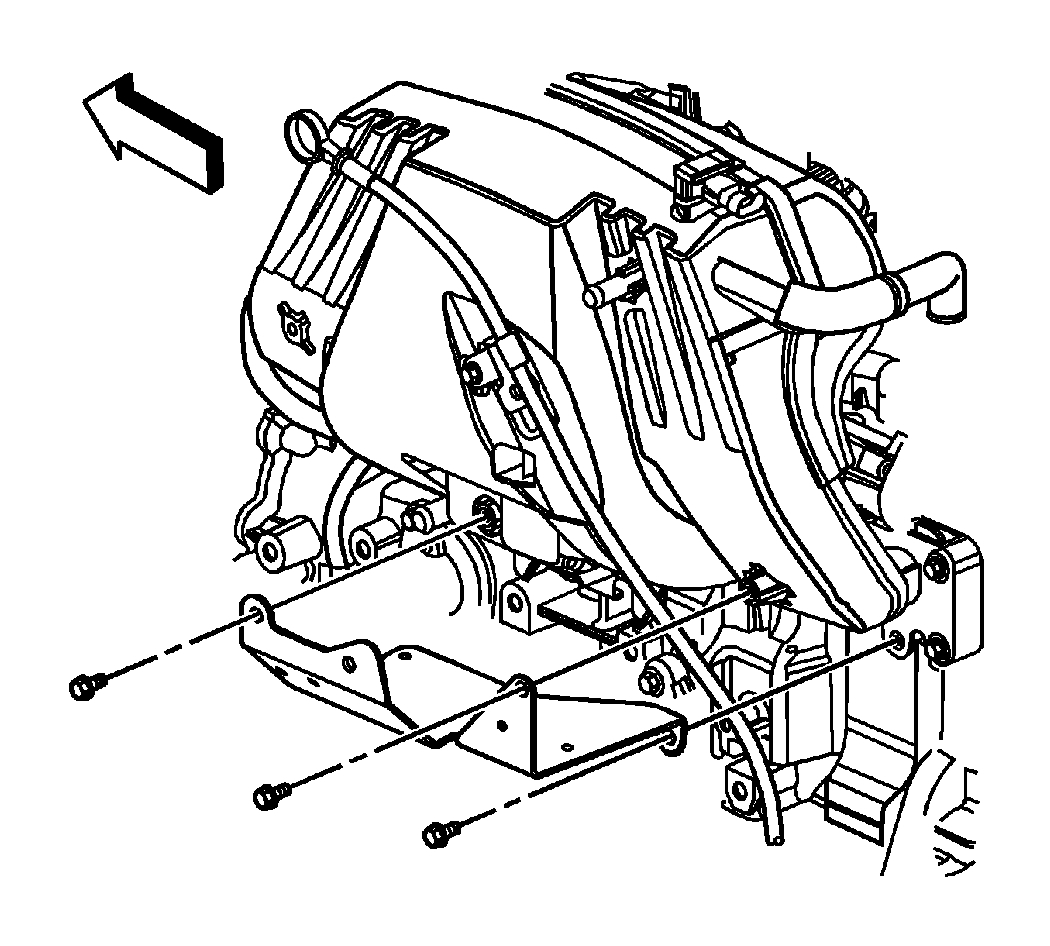
10.Remove the 2 upper bolts securing the engine wiring harness bracket to the intake manifold.
Fig 3: View Of Engine Wiring Harness Bracket
11.Raise and support the vehicle only high enough to access the remaining components through the wheelhouse. Refer to Lifting and Jacking the Vehicle in General Information.
12.Remove the left front wheel. Refer to Tire and Wheel Removal and Installation in Tires and Wheels.
13.Remove the left front wheelhouse liner. Refer to Wheelhouse Liner Replacement - Front in Body Front End.
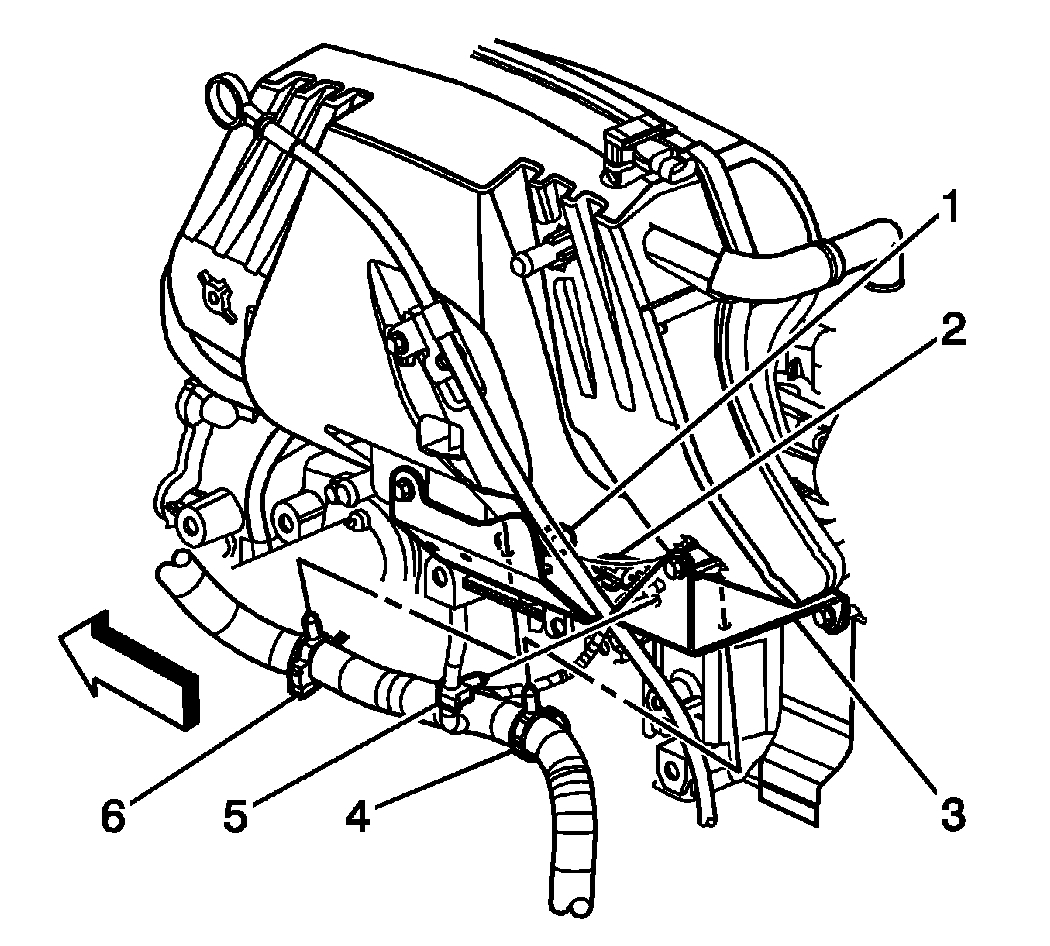
14.Disconnect the following wiring harness retainers from the engine wiring harness bracket:1.The battery cable
2.The engine (4, 6)
3.The MAP sensor (5)
Fig 4: Engine Wiring Harness Bracket Wiring Harness Retainers
15.Remove the remaining engine wiring harness bracket bolt.
Remove the bracket from the engine compartment through the wheelhouse opening.
Fig 5: View Of Engine Wiring Harness Bracket
16.Remove the intake manifold bolts.
Fig 6: View Of Intake Manifold
17.Lower the vehicle.
18.Remove the intake manifold from the cylinder head.
19.Remove the seal from the intake manifold.
Discard the seal.
20.Mask off the open ports to the cylinder head, in order to prevent foreign objects from entering the engine.
21.Clean and Inspect the intake manifold. Refer to Intake Manifold Cleaning and Inspection .
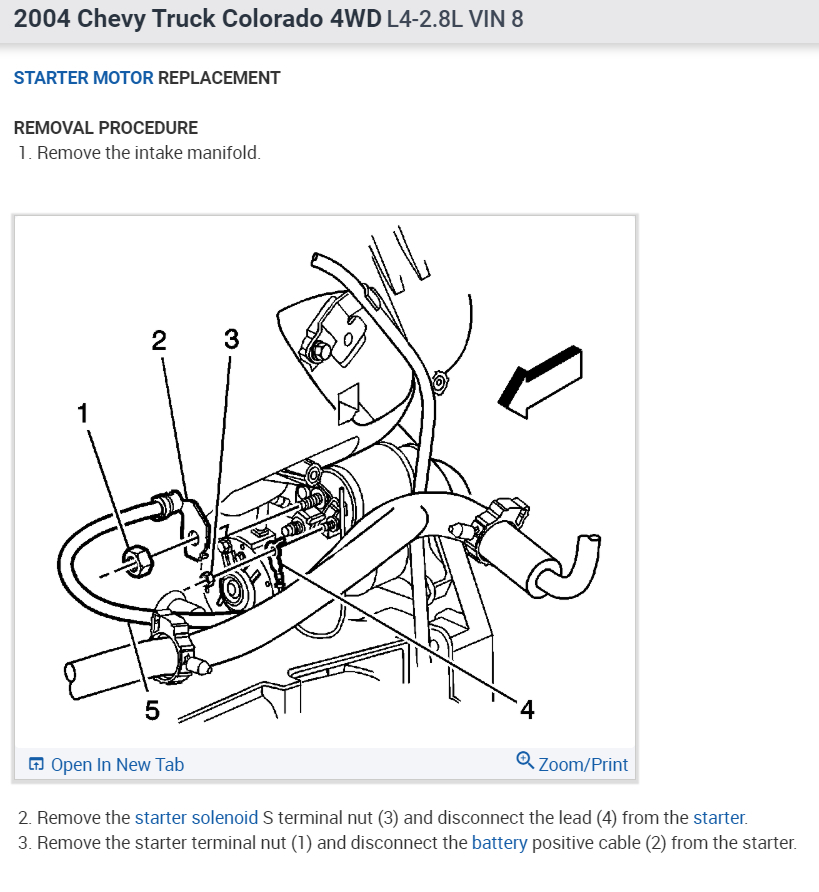
Check out the diagrams (Below). Please let us know if you need anything else to get the problem fixed.
Images (Click to enlarge)
Dec 22, 2017 at 6:05 AM