Yes, these cars have a huge problem with the camshaft vanos (actuator) that wears out at the front of the camshaft. The crankshaft becomes out of time which in turn gives you those codes.
Here is some instructions on how to change it out. (below) Diagrams.
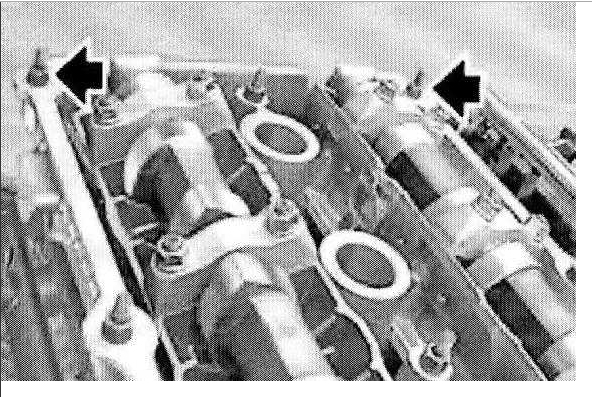
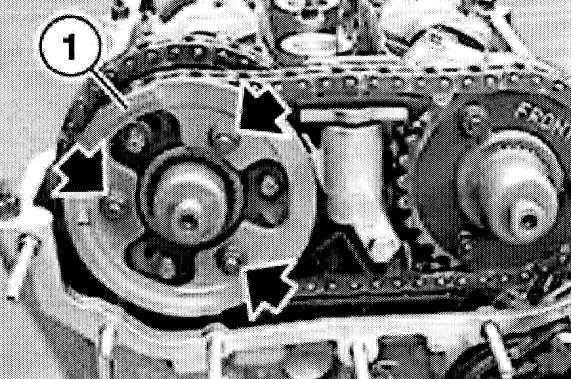
Crank engine in direction of rotation until cam tips on inlet and exhaust camshafts on first cylinder face one another.
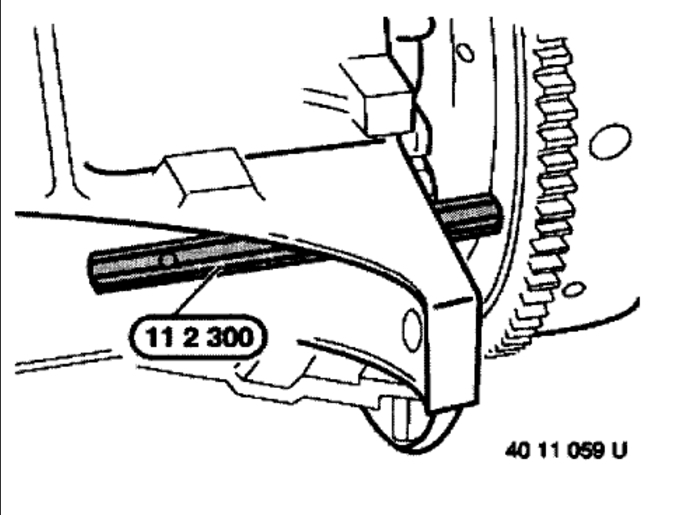
Secure crankshaft with special tool 11 2 300 in TDC position of first cylinder.
Caution:
Do not turn the engine back.
Remove special tool 11 2 300 before switching on the engine.
Unscrew studs.
Remove double VANOS adjustment unit, refer to Service and Repair.
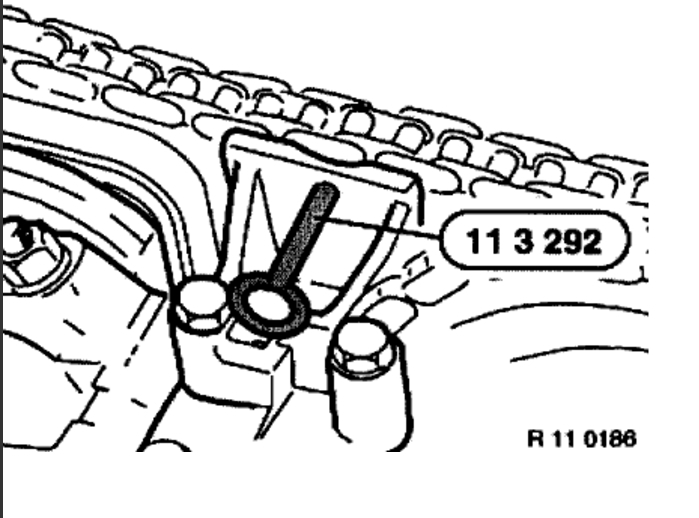
Press down secondary chain tensioner at top and lock with special tool 11 3 292.
Caution: Cylinder for chain tensioning piston is under spring pressure.
Remove cylinder for chain tensioning piston.
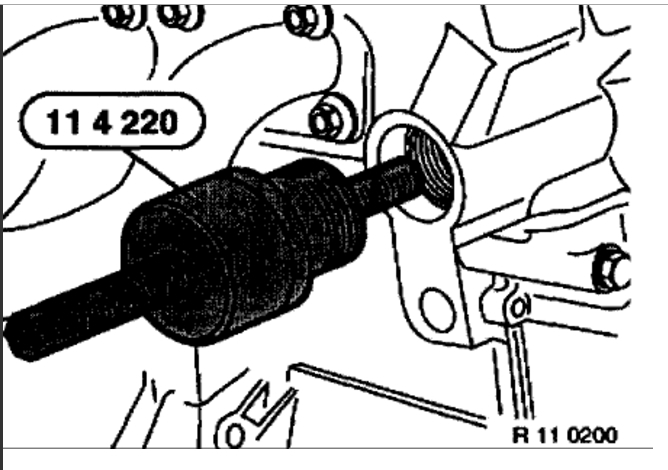
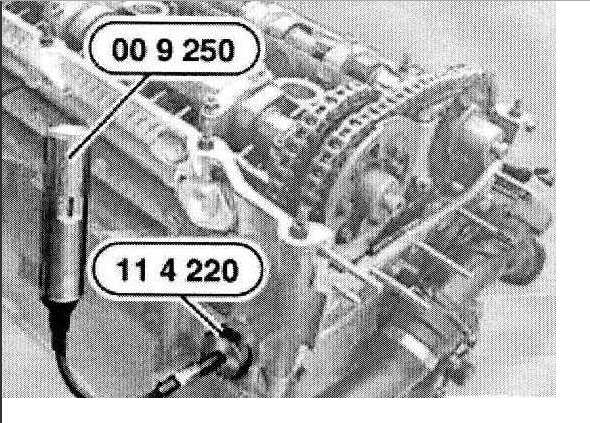
Install special tool 11 4 220.
Fit adjusting screw to bow cover.
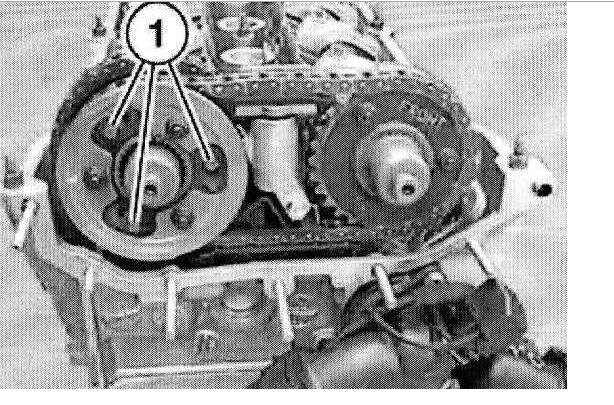
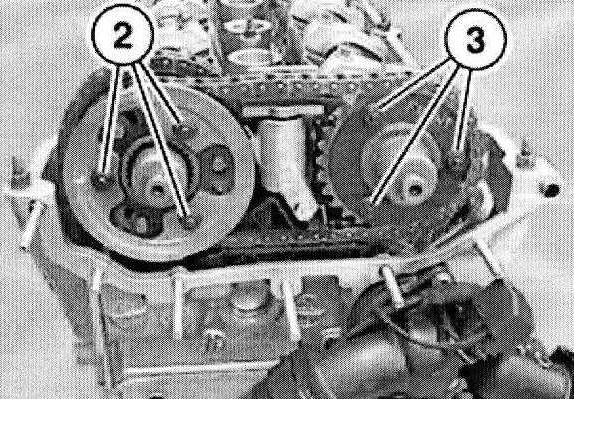
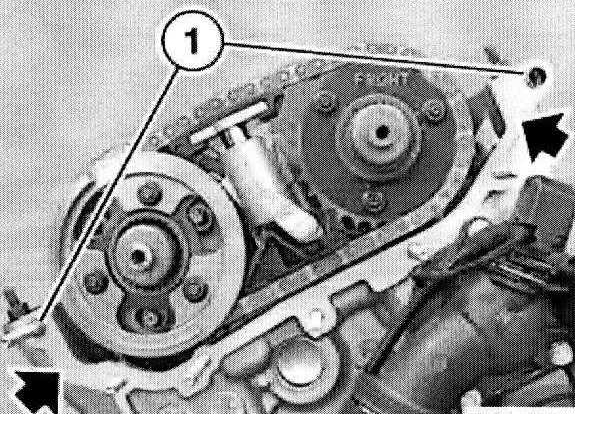
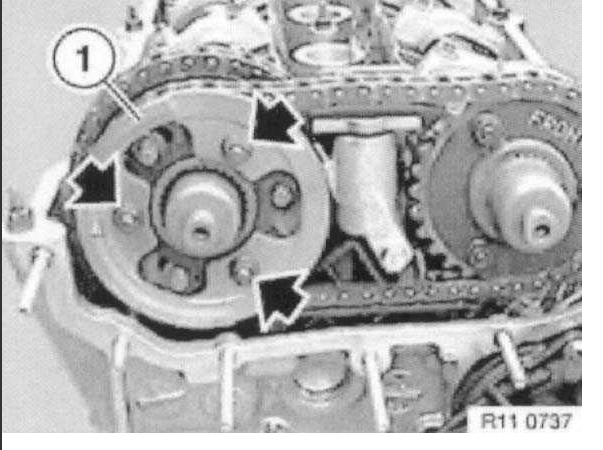
Release screws (1) by half a turn.
Release nuts (2) by two turns.
Release nuts (3) by one turn.
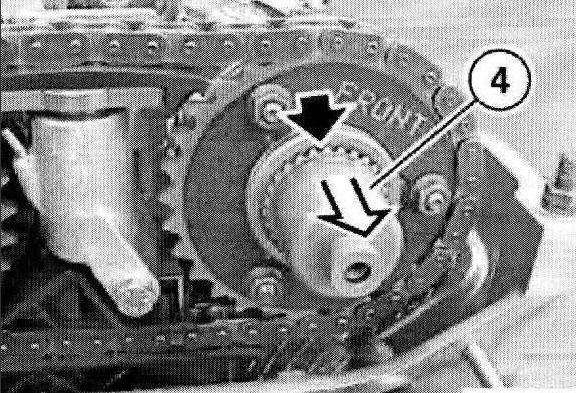
Caution: Toothed shaft (4) slips very easily from splines.
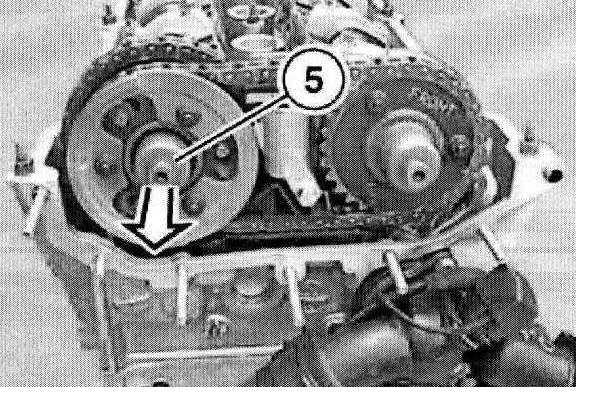
Carefully withdraw toothed shaft (4) until approx. 1 mm of splines can be seen.
Withdraw toothed shaft (5) up to stop.
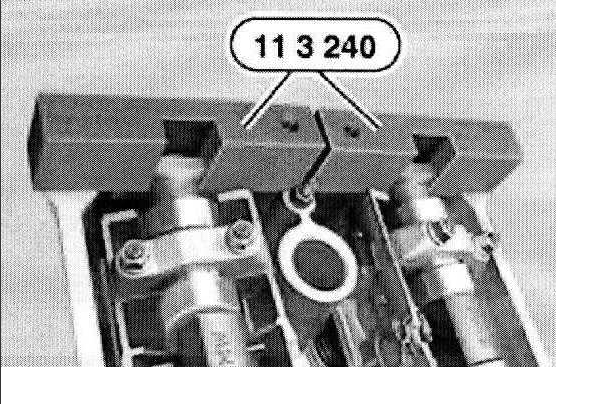
Fit special tool 11 3 240 to camshafts on cylinder 6.
Align camshafts so that special tool 11 3 240 rests without gaps on cylinder head.
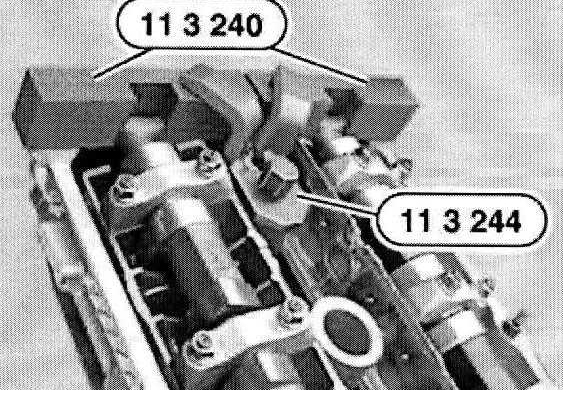
Attach special tool 11 3 244 to special tool 11 3 240 and locate by way of spark plug thread.
Press down secondary chain tensioner at top and remove special tool 11 3 292.
Preload tensioning rail with special tool 11 4 220 by rotating adjusting screw with special tool 00 9 250 or standard torque wrench to 0.7 Nm .
Preload cup spring slightly by pressing on sensor gear (1) and tighten nuts by hand.
Caution: Do not tighten down nuts fully.
Remove gasket.
Check dowel sleeves (1) for damage and correct installation position.
Keep sealing face clean and free of oil.
Caution:
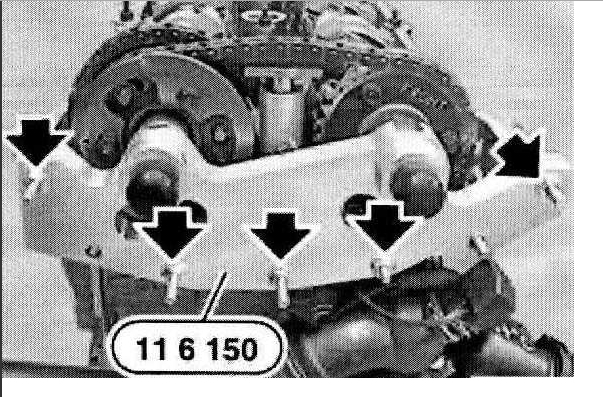
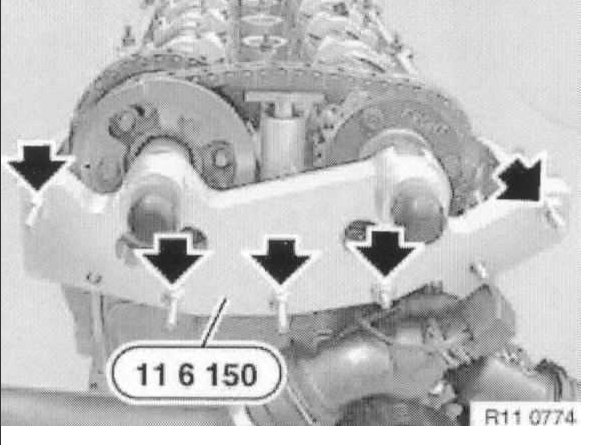
Fit special tool 11 6 150 "without gasket" only.
If gasket remains underneath special tool 11 6 150, camshaft timing will be "incorrectly" set.
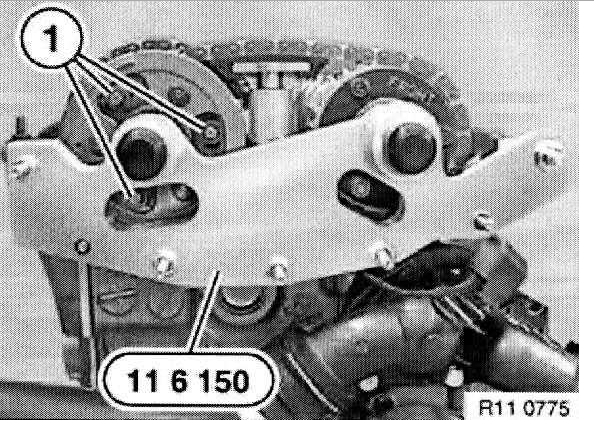
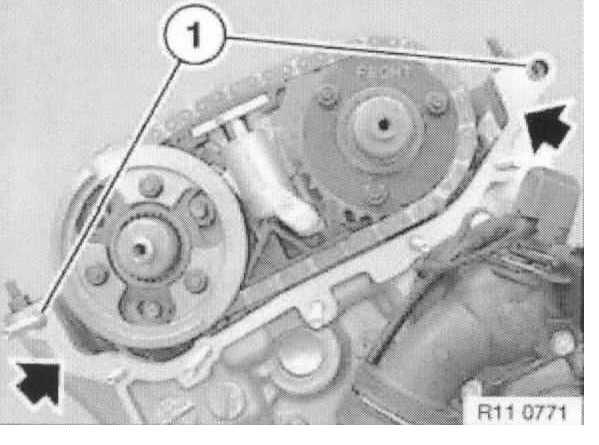
Attach special tool 11 6 150 "without gasket", tighten nuts by hand and then tighten down uniformly until special tool 11 6 150 is in full contact with cylinder head.
Bring screws (1) on exhaust side into contact by initially tightening to approx. 5 Nm .
Bring nuts (2) on exhaust side and nuts (3) on inlet side into contact by initially tightening to approx. 5 Nm
Tighten down screws (1) on exhaust side.
Tightening torque, refer to Specifications, Mechanical.
Tighten down nuts (2) on exhaust side and nuts (3) on inlet side.
Tightening torque, refer to Specifications, Mechanical.
Pull special tool 11 2 300 back until flywheel is no longer secured in position.
Remove special tool 11 3 244 and special tool 11 3 240.
Crank engine twice in direction of rotation until cam tips on inlet and exhaust camshafts on 1st cylinder face one another.
Secure crankshaft in TDC position with special tool 11 2 300.
Caution:
Do not turn the engine back.
Remove special tool 11 2 300 before switching on the engine.
Fit special tool 11 3 240 to camshafts.
Note: In spite of correctly set camshafts, special tool 11 3 240 may protrude by up to 1 mm over inlet side.
Reason:
Rubberized chain wheel
Tolerances in VANOS adjustment unit
Running clearance in splines If special tool 11 3 240 protrudes above the exhaust side, it will be necessary to readjust the timing.
Relieve tension on special tool 11 4 220 and remove.
Install cylinder for chain tensioning piston.
Remove special tool 11 2 300.
Remove special tool 11 6 150.
Install VANOS adjustment unit.
Assemble engine.
Please let us know what happens and upload pictures of the problem.
Cheers, Ken
Images (Click to enlarge)
Sep 6, 2017 at 1:56 PM