Welcome to 2CarPros.
They are two different parts and will not work. I don't know if you need it, but here are the directions for replacing front pads on your vehicle. To remove the rotor, you will need to take off the wheel bearing. When installing new rotors, your old bearings (if good) will need repacked and installed into the new rotor. Additionally, a new wheel bearing seal will need installed.
REMOVAL
1. Raise and support vehicle.
2. Remove wheel and tire assemblies.
3. Press caliper piston back into bore with large flat blade screwdriver. Use large C-clamp if more force is required to bottom piston in bore.
4. Loosen bolt that secures front brake hose fitting bolt in caliper.
5. Remove caliper mounting bolts with 3/8 hex wrench or socket.
6. Rotate caliper rearward off rotor. And out of steering knuckle support ledges.
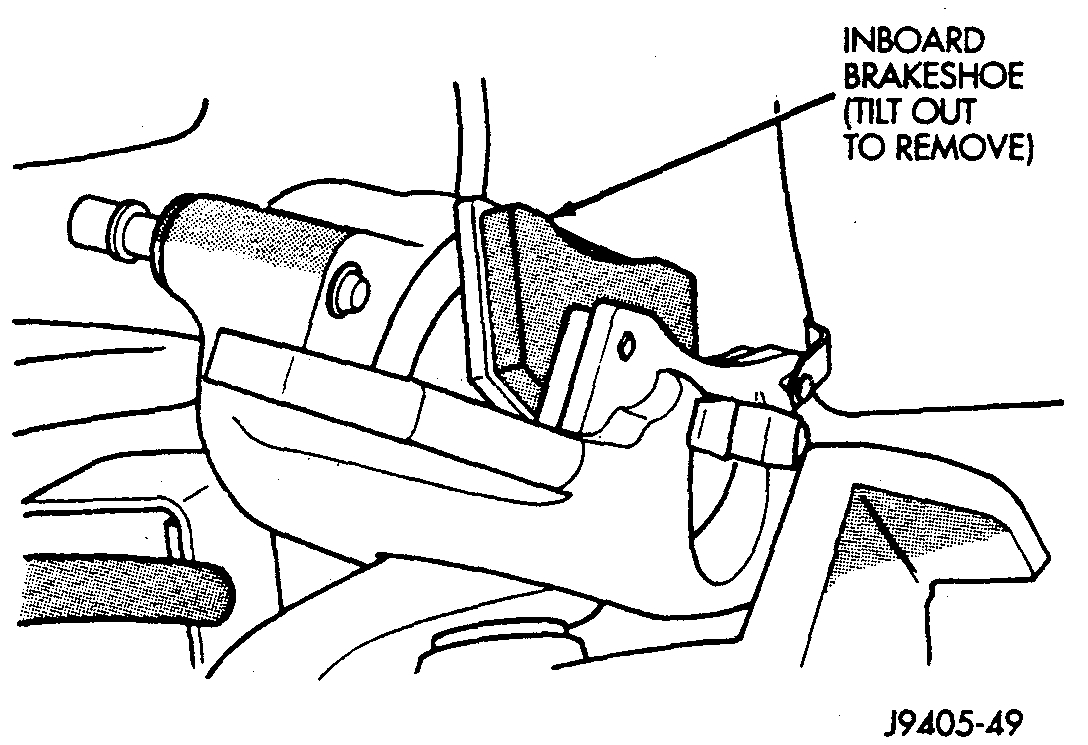
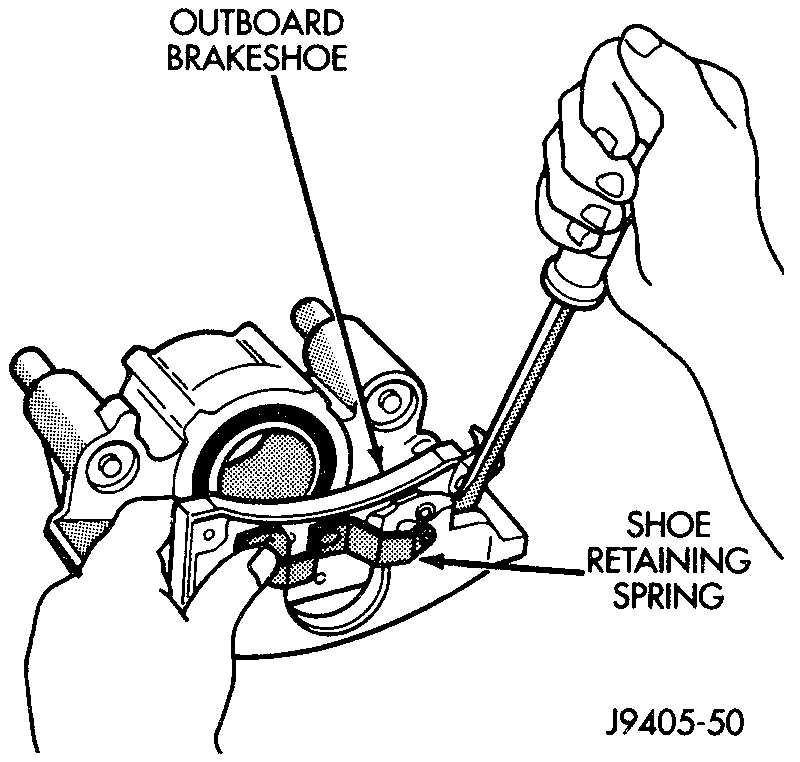
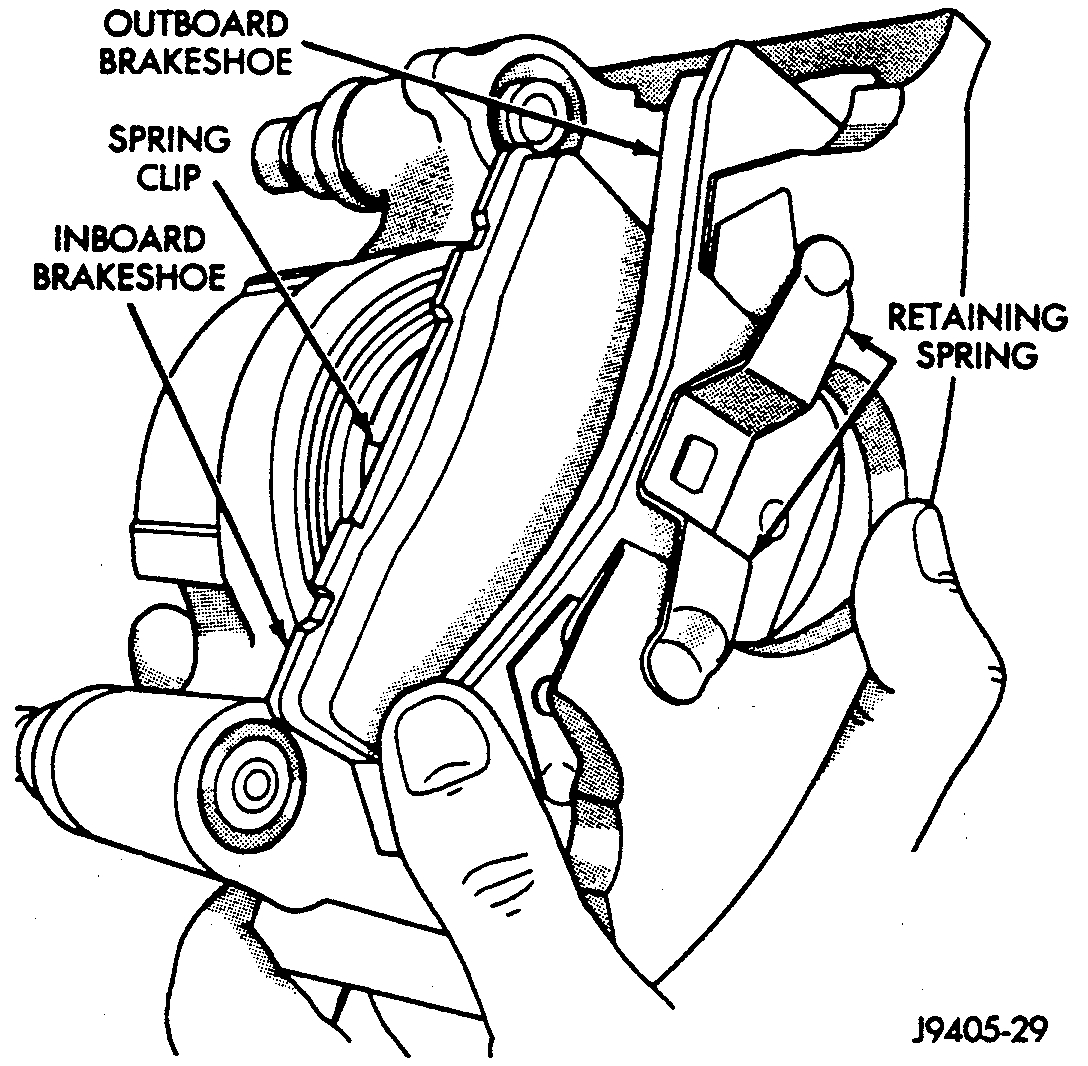
7. Remove inboard and outboard brake shoes. Inboard shoe has spring clip that holds it in caliper piston. Tilt this shoe out at top to unseat clip. Outboard shoe has, retaining spring that secures it in caliper. Unseat one spring end and rotate shoe out of caliper.
8. Secure caliper to convenient chassis or suspension component with wire.
CAUTION: Do not allow the brake hose to support the caliper. Suspending the caliper by the brake hose can damage the hose and fitting joints. Use wire to support and secure the caliper to a chassis or suspension component.
If the brake shoes will be reused, do not intermix them. Keep the brake shoes with the caliper they were removed from.
INSTALLATION
NOTE: Replace riveted lining if worn to within 1.5 mm (1/16 inch) of rivet heads. Replace bonded lining if thickness is 3 mm (3/16 inch) or less.
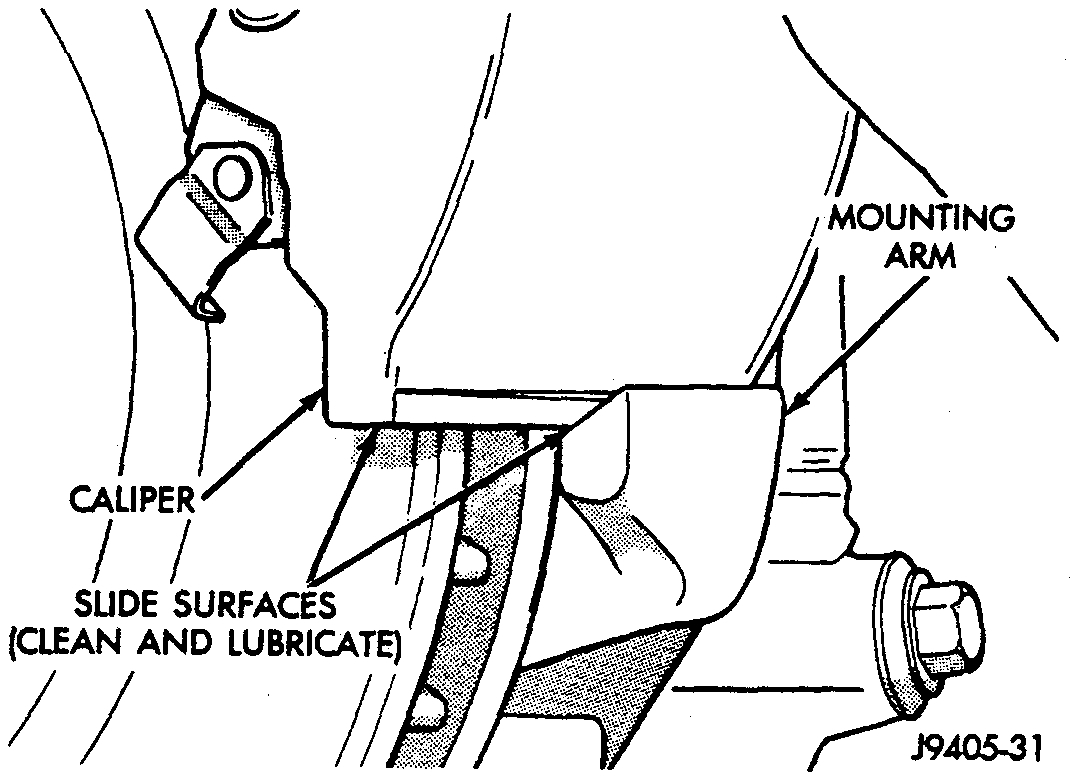
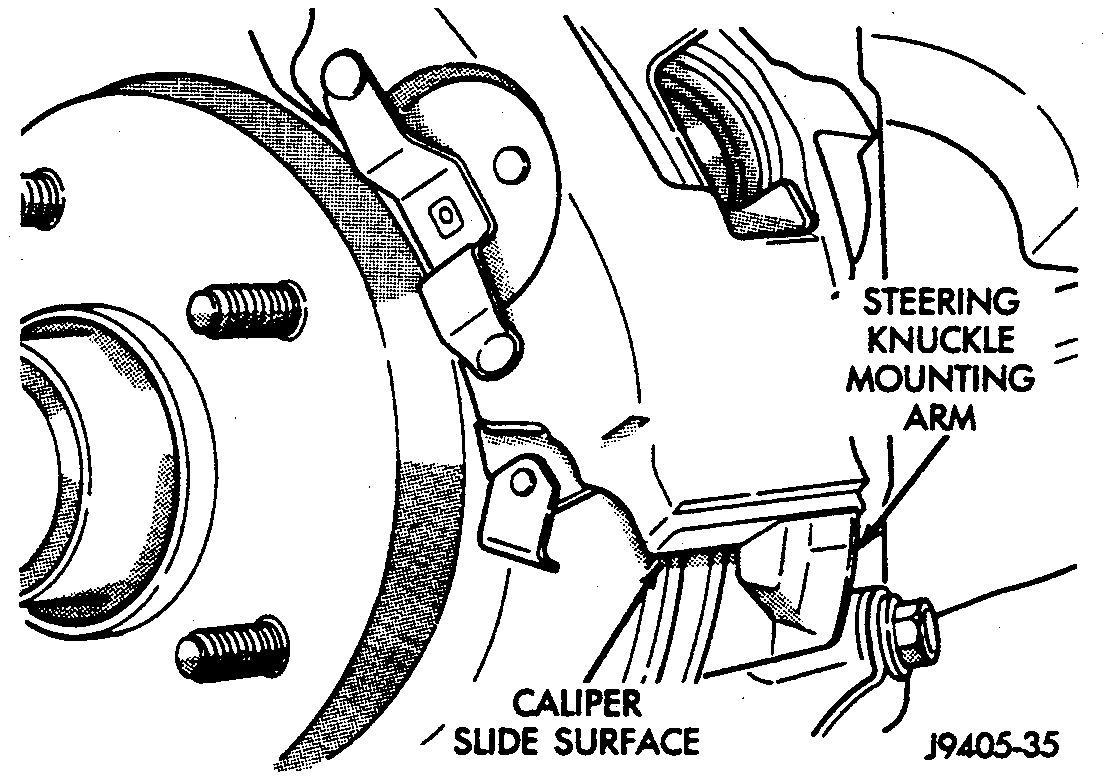
Caliper And Steering Knuckle Slide Surfaces
1. Clean caliper and steering knuckle slide surfaces with wire brush. Then apply coat of Mopar multi-mileage grease to slide surfaces.
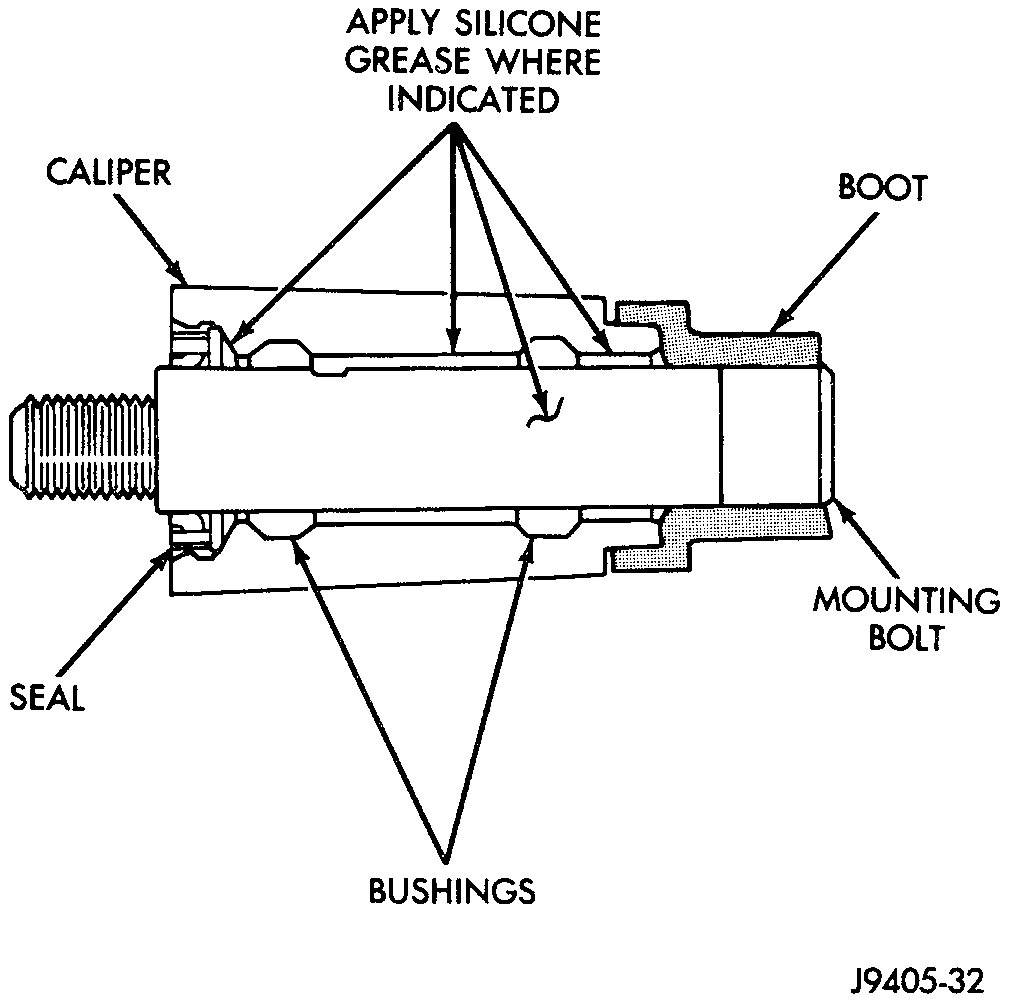
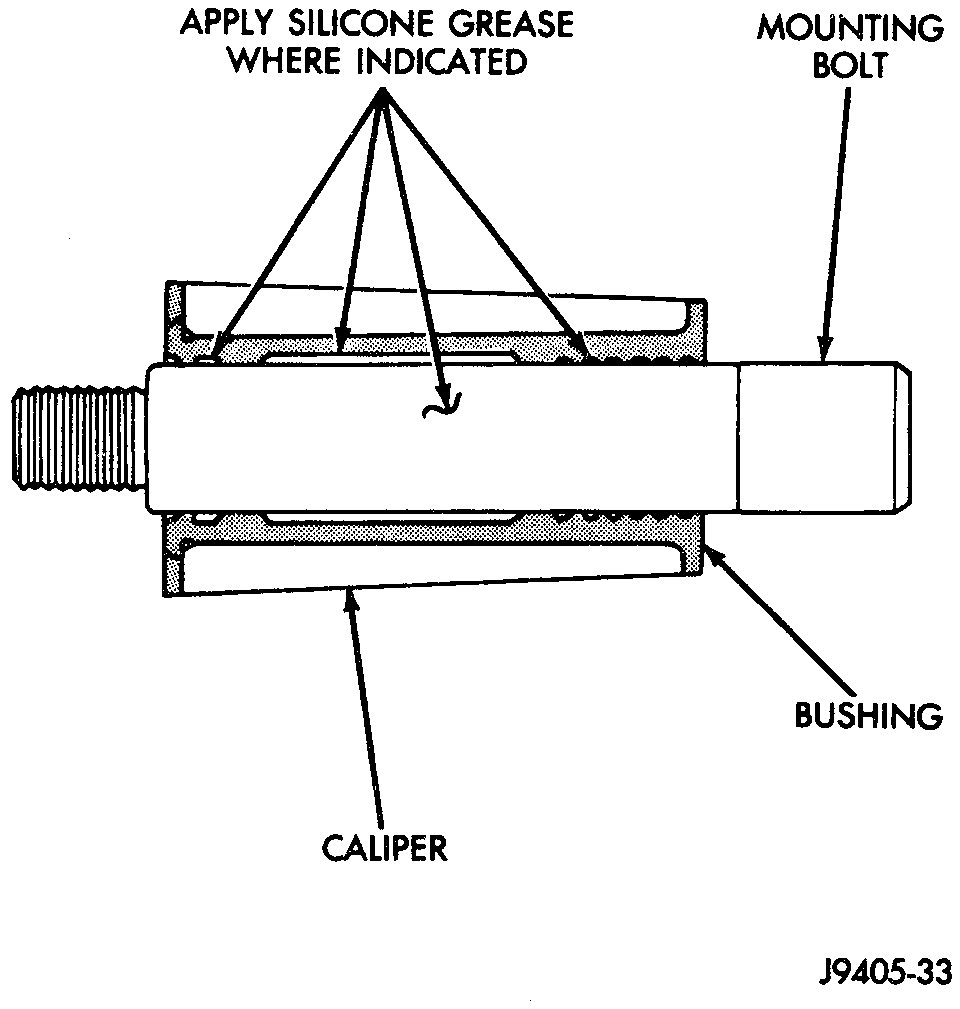
2. Lubricate caliper mounting bolts, collars, bushings and bores with silicone grease as follows:
Mounting Bolt Lubrication (75mm Caliper)
- 1/2 ton models with 75 mm caliper, apply silicone grease to mounting pins and collars. Then fill space between bushings in caliper.
Mounting Bolt Lubrication (80 Or 86mm Caliper)
- 3/4 and 1 ton models with 80 or 86 mm calipers, coat mounting pin and interior of bushing with silicone grease.
Inboard Brake Shoe Installation
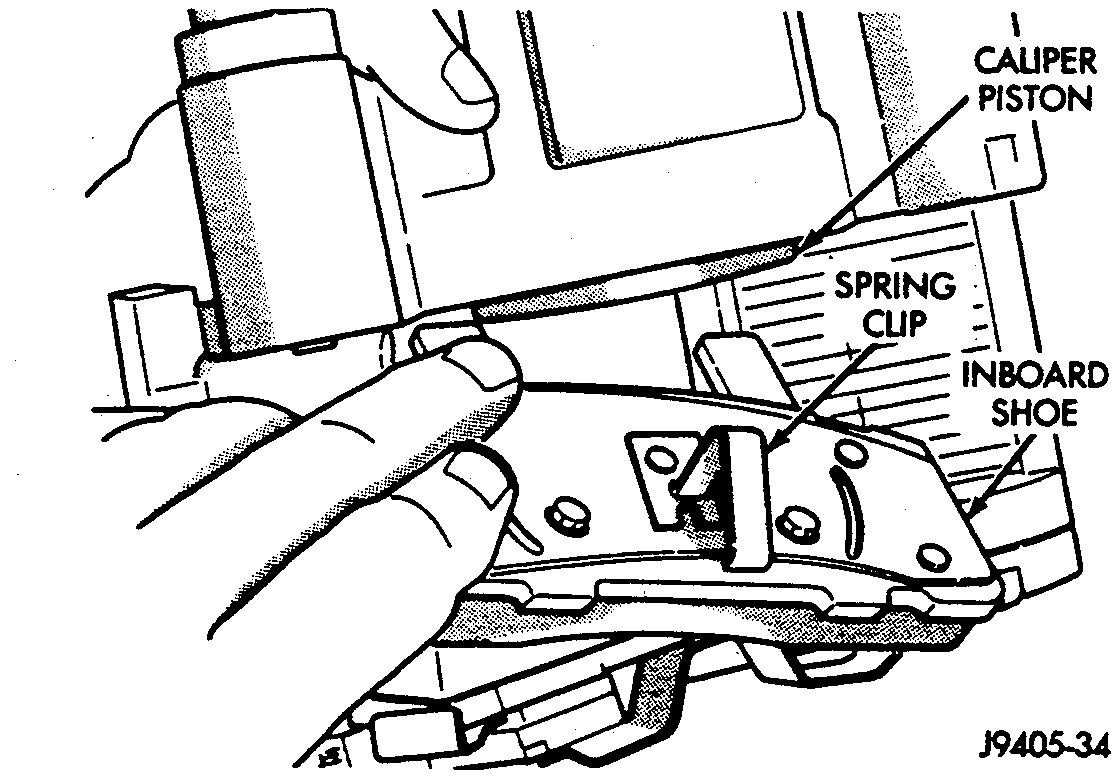
3. Install inboard brake shoe in caliper. Be sure spring clip on shoe is properly aligned and seated in caliper piston.
Brake Shoe Position In Caliper
4. Install outboard brake shoe in caliper. Be sure spring ends are seated in dimples in caliper.
Caliper Installation
5. Install caliper over rotor and into steering knuckle mounting arms. Be sure caliper is seated flush on mounting arm surfaces as shown.
6. Start caliper mounting bolts by hand to avoid cross threading. Then tighten mounting bolts to 51 Nm (38 ft. Lbs.) Torque.
7. Install wheel and tire assemblies.
8. Pump brake pedal to reseat caliper pistons and brake shoes. Do not move vehicle until shoes have been properly seated.
9. Check brake fluid level and add fluid if necessary
Here are the directions for replacing the bearings. These directions explain removal of the rotor so you can access the bearings. This is why 4wd parts won't work. They do not have a spindle and bearing the way this one does.
REMOVAL
1. Raise and support the vehicle.
2. Remove the wheel and tire assembly.
3. Remove disc brake caliper.
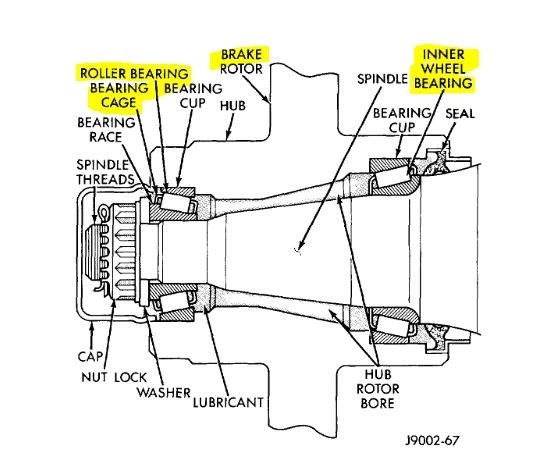
4. Remove the dust cap, cotter pin, nut lock, nut and washer from spindle.
Wheel Bearings & Hub/Rotor
5. Carefully slide the hub/rotor from spindle.
CAUTION: Use care to prevent inner wheel bearing and seal from contacting spindle threads during removal.
6. Remove the seal and inner wheel bearing from the hub/rotor.
7. Remove the inner and outer bearing cups from hub/rotor with a pin punch.
INSTALLATION
1. Install the new bearing cups with an appropriate size driver tool.
2. Apply a coating of MOPAR Wheel Bearing Grease to inner surface area of hub.
3. Clean and grease inner and outer wheel bearings.
4. Install inner wheel bearing and new bearing seal.
5. Inspect bearing and seal contact surfaces on spindle for burrs and roughness.
6. Remove all rough contact surfaces from spindle. Apply a coating of lubricant.
CAUTION: Use care to prevent inner wheel bearing and seal from contacting spindle threads during installation.
7. Carefully slide the hub/rotor onto the spindle. Install outer wheel bearing, washer and retaining nut.
8. Tighten the nut to 41-54 Nm (30-40 ft. Lbs.) To preload bearing while rotating the hub/rotor. Stop hub/rotor and loosen nut to completely release bearing preload torque. Tighten the nut finger-tight and install the nut lock. Install a new cotter pin.
NOTE: The end play should be 0.25-0.076 mm (0.001-0.003 inch).
9. Clean the dust cap and apply a coating lubricant to the internal surface. Do not fill the dust cap with lubricant. Install the cap.
10. Install disc brake caliper.
11. Install the wheel and tire assembly and lower the vehicle.
Check out the diagrams (Below). Please let us know if you need anything else to get the problem fixed.
Images (Click to make bigger)
Tuesday, March 30th, 2021 AT 9:36 AM