Hi, Dana. Here are the directions specific to your vehicle for replacing the sensor. The attached pictures correlate with the directions.
__________________________________________
1992 Ford Truck Ranger 2WD L4-140 2.3L SOHC
Procedures
Vehicle Powertrain Management Sensors and Switches - Powertrain Management Sensors and Switches - Computers and Control Systems Crankshaft Position Sensor Service and Repair Procedures
PROCEDURES
REMOVAL
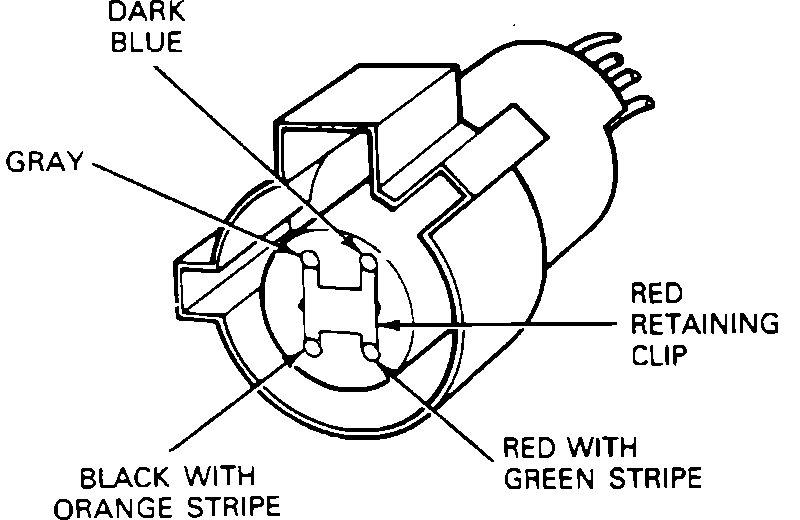
Crankshaft Position Sensor Connector
Pic 1
1. Disconnect the crankshaft timing sensor assembly electrical connector.
2. If the colors differ from the image, make a chart showing the locations of the wires (by color). Remove the wires from the sensor connector by removing the red retaining clip and then the wires.
3. Remove the accessory drive belts.
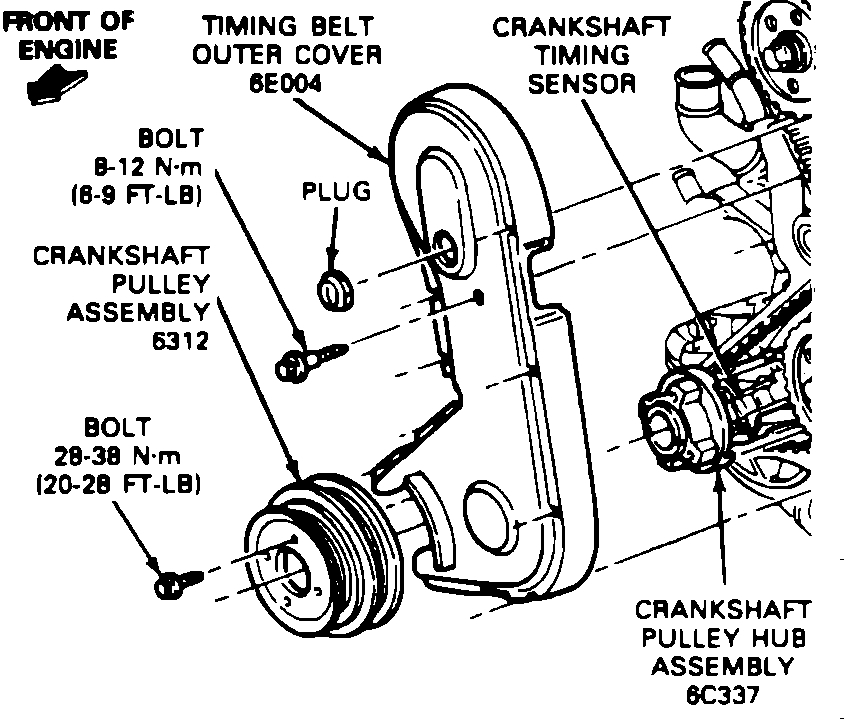
Timing Belt Cover Area Exploded View
Pic 2
4. Remove the four crankshaft pulley assembly bolts and remove the pulley.
5. Remove the timing belt outer cover.
6. Rotate the crankshaft until the keyway is at the ten o'clock position. This will place the vane window of both the inner and outer cups over the crankshaft timing sensor assembly.
7. Remove the two crankshaft timing sensor assembly retaining bolts.
8. Remove the plastic wire harness retainer that holds the sensor harness to its mounting bracket.
9. Remove the crankshaft timing sensor assembly, sliding the electrical wires out from behind the inner timing belt cover.
10. Remove the large electrical connector from the new crankshaft timing sensor assembly.
INSTALLATION
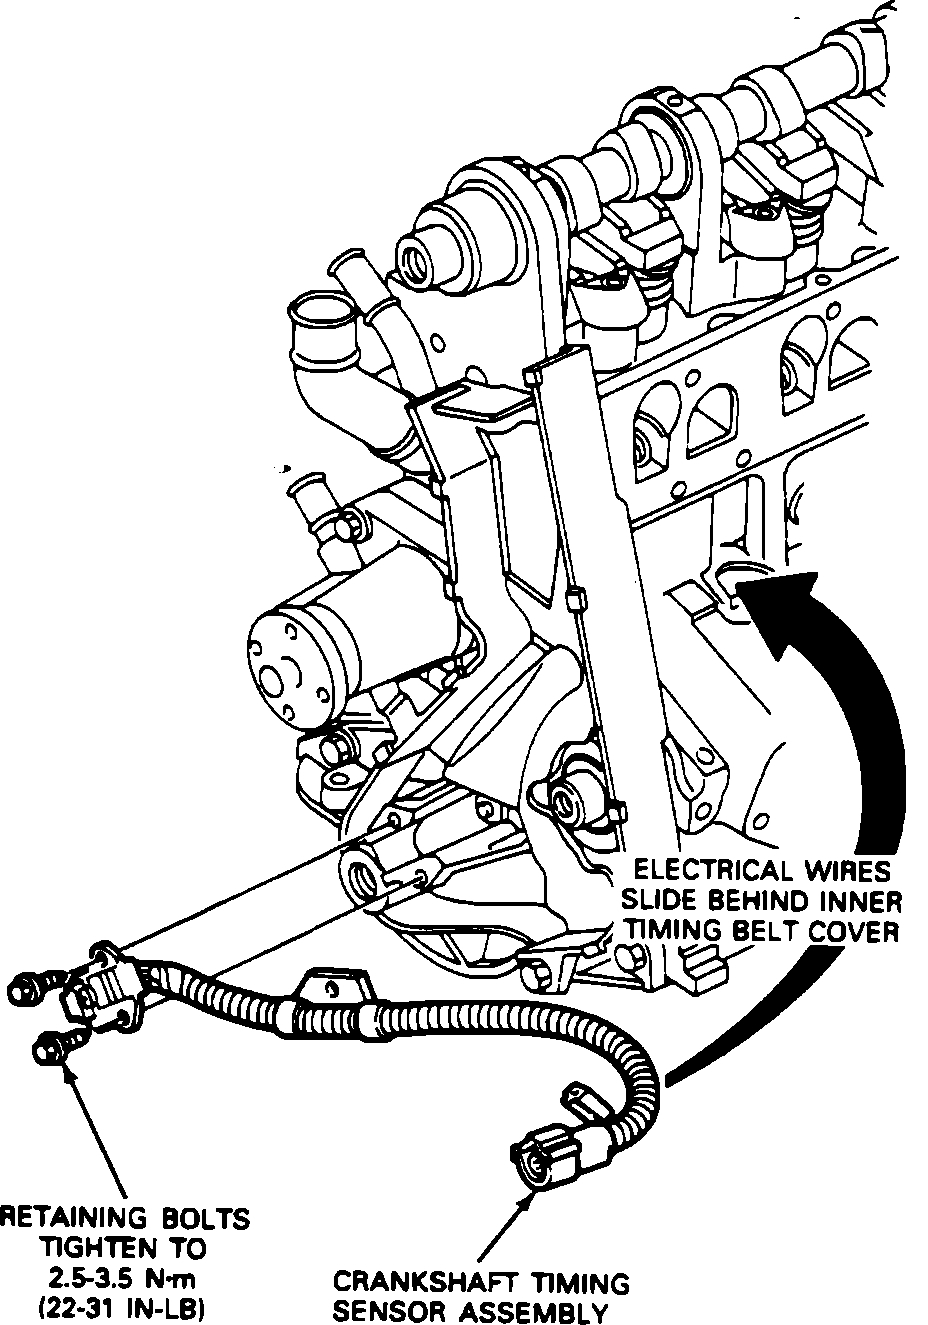
Crankshaft Position Sensor
Pic 3
1. Position the crankshaft timing sensor assembly by sliding the electrical wires behind the inner timing belt cover, then loosely install the retaining bolts. Do not tighten the bolts at this time.
2. Install the large electrical connector onto the crankshaft timing sensor harness.
NOTE: Make sure the wires are located in their original positions. Refer to the chart made in REMOVAL STEP 2.
3. Reconnect the crankshaft timing sensor electrical connectors to the engine harness.
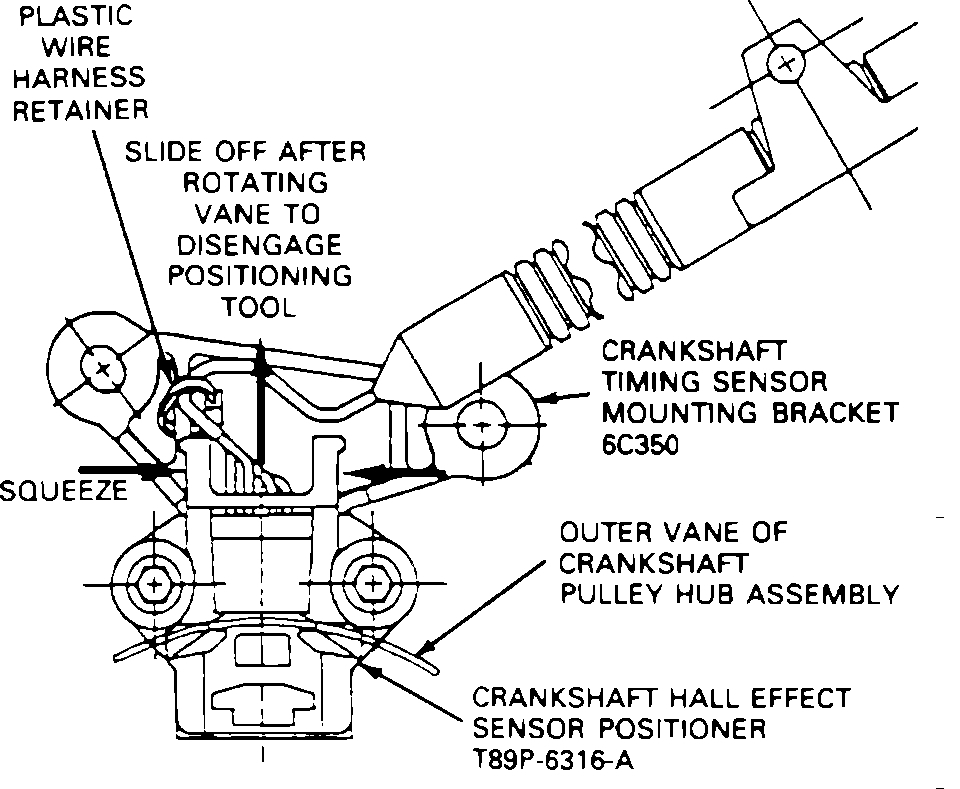
Aligning Crankshaft Position Sensor
pic 4
4. Rotate the crankshaft so that the outer vane on the crankshaft pulley hub engages both sides of the crankshaft Hall effect sensor positioner (Ford T89P-6316-A, or equivalent), then tighten the sensor retaining bolts to 22-31 in lb (2.5-3.5 Nm).
5. Rotate the crankshaft until the crankshaft pulley vane clears the positioning tool, then remove the tool.
6. Install a new plastic wire harness retainer to secure the crankshaft timing sensor harness to its mounting bracket, trimming off any excess retainer.
7. Install the timing belt outer cover.
8. Install the crankshaft pulley assembly and tighten the four attaching bolts to 15-22 ft lb (20-30 Nm).
9. Install the accessory drive belts.
_____________________________
Let me know if this helps.
Joe
Images (Click to make bigger)
Sunday, November 10th, 2019 AT 10:51 PM