Rattling/clunking from front end of the vehicle

Tiny
JOEL R. BUEHNER
  • MEMBER
  • 2006 SATURN VUE
  • 3.5L
  • 6 CYL
  • 2WD
  • AUTOMATIC
  • 170,000 MILES
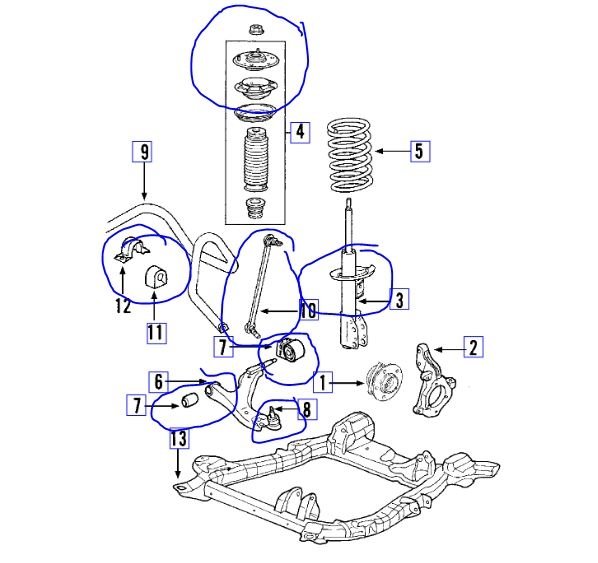
The last few days my car has developed a rattling or clunking sound coming from the front drivers side. It doesn’t seem to have any obvious effect apart from the sound. I have read it might be a ball joint, tie rod end, or sway bar link. How do I determine which it is?
Tuesday, June 16th, 2020 AT 7:33 AM

5 Replies

Tiny
ASEMASTER6371
  • MECHANIC
  • 52,797 POSTS
Good morning,

You will need 2 people for this.

Bounce the front end and see if can feel the noise on the front strut. You should be able to feel it if it is a strut.

https://www.2carpros.com/articles/popping-noise

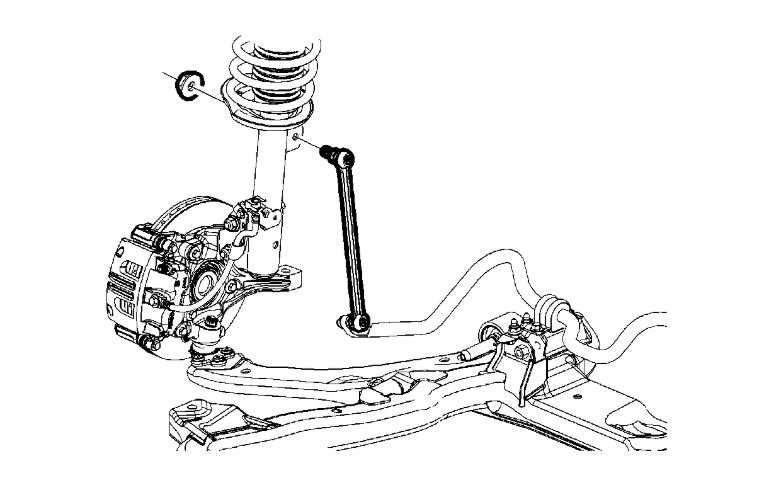
There is also sway bars link bolts that are common for breaking

worse case is take it to a shop and have them check it on a lift for you and tell you the failure. Then you can decide to fix it yourself or have them give you an estimate.

Roy

Was this
answer
helpful?
Yes
No
Tuesday, June 16th, 2020 AT 8:08 AM
Tiny
JOEL R. BUEHNER
  • MEMBER
  • 8 POSTS
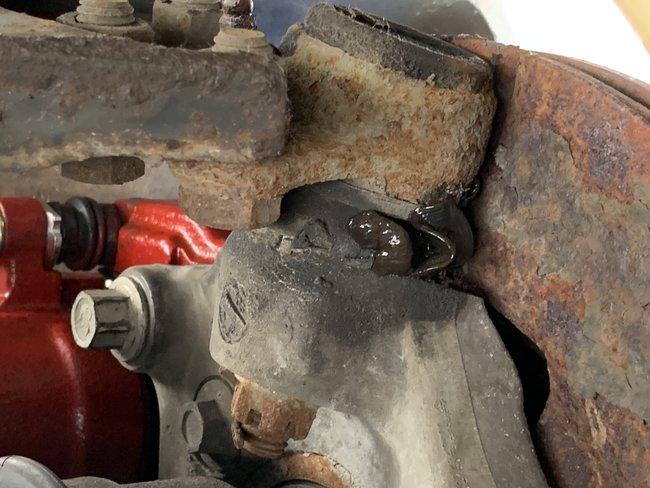
I think the strut is okay. Everything looks good from a visual inspection except the ball joint. The boot looks to be torn. I included an image because I am not sure if this is normal.
Was this
answer
helpful?
Yes
No
Tuesday, June 16th, 2020 AT 3:18 PM
Tiny
ASEMASTER6371
  • MECHANIC
  • 52,797 POSTS
No, it is not. You need to replace that. The boot should never be torn as weather will destroy the ball joint.

Roy

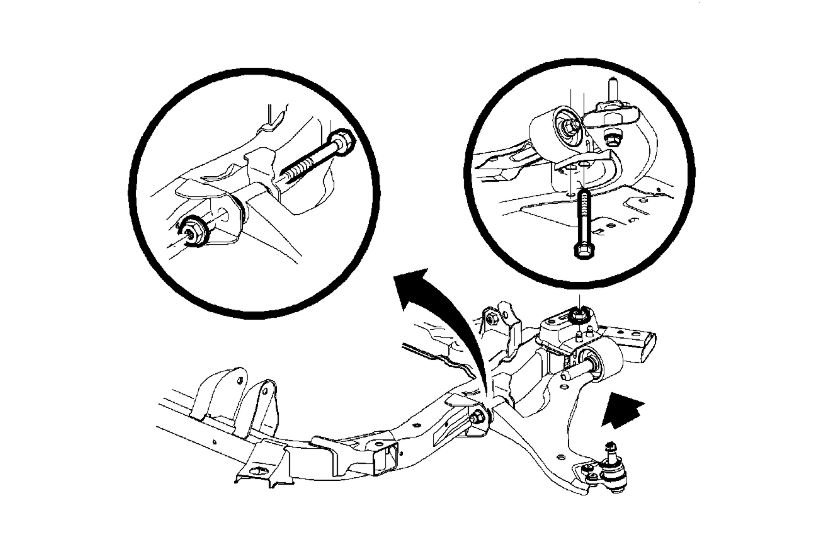
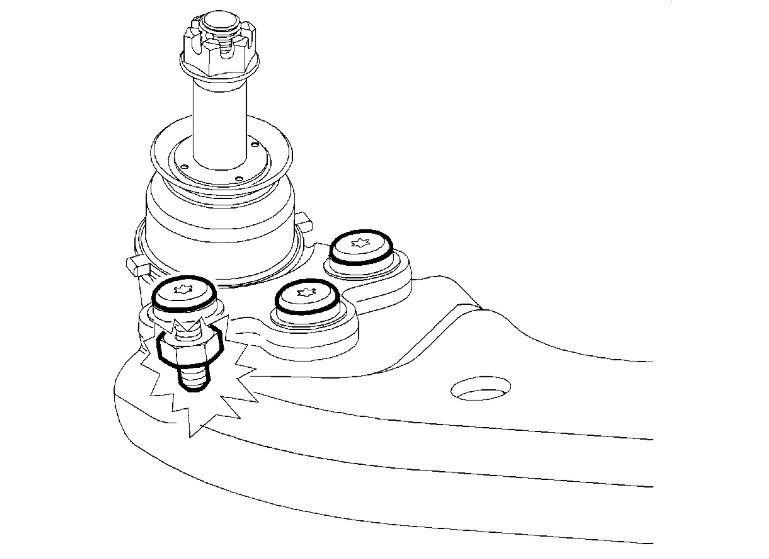
Lower Ball Joint Replacement

Removal Procedure

imageOpen In New TabZoom/Print

1. Remove the lower control arm.
2. Place the control arm in a vise or suitable holding device.
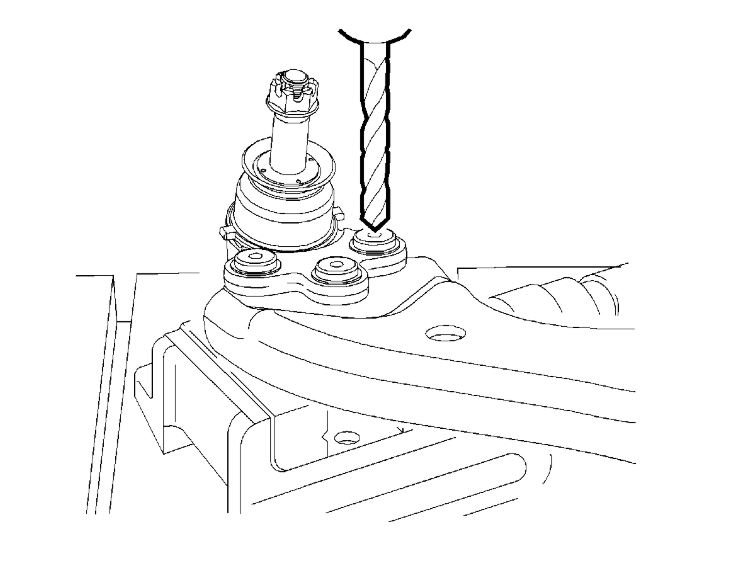
3. Remove the ball joint rivets using the following procedure.
1. Drill through the rivets using a 8 mm (5/16 inch) drill bit.
2. Enlarge the hole using a 12 mm (31/64 inch) drill bit.
3. Remove any remaining burs from the control arm.
4. Remove the ball joint from the control arm. Note the position of the ball joint for reassembly.

Installation Procedure

imageOpen In New TabZoom/Print

Important: The control arm must be clean and free of debris.

1. Install the ball joint to the control arm as previously noted.

Notice: Refer to Fastener Notice in Service Precautions.

Important:
Only use hardware provided with the new ball joint.
The bolts must be installed with the bolt head on top of the ball joint.

2. Install the ball joint to control arm bolts.
Tighten the bolts and nuts to 68 Nm (50 ft. Lbs.).
3. Install the lower control arm.
Was this
answer
helpful?
Yes
No
Tuesday, June 16th, 2020 AT 4:08 PM
Tiny
JOEL R. BUEHNER
  • MEMBER
  • 8 POSTS
Replaced both ball joints. Pain in the butt, lol. But no rattling or clunking when going over bumps.
Was this
answer
helpful?
Yes
No
Sunday, July 5th, 2020 AT 10:11 AM
Tiny
ASEMASTER6371
  • MECHANIC
  • 52,797 POSTS
Good jobs.

Glad to hear it is fixed.

Roy
Was this
answer
helpful?
Yes
No
Sunday, July 5th, 2020 AT 10:14 AM

Please login or register to post a reply.

Sponsored links