Hi and thanks for using 2CarPros.com.
There are many things which can create a rattle when hitting bumps. Components such as sway bar links, strut mounts, bushings, the list goes on. What I suggest is this. Read through this link. It describes in general what you have described. Additionally, it explains how to check the different components.
https://www.2carpros.com/articles/popping-noise
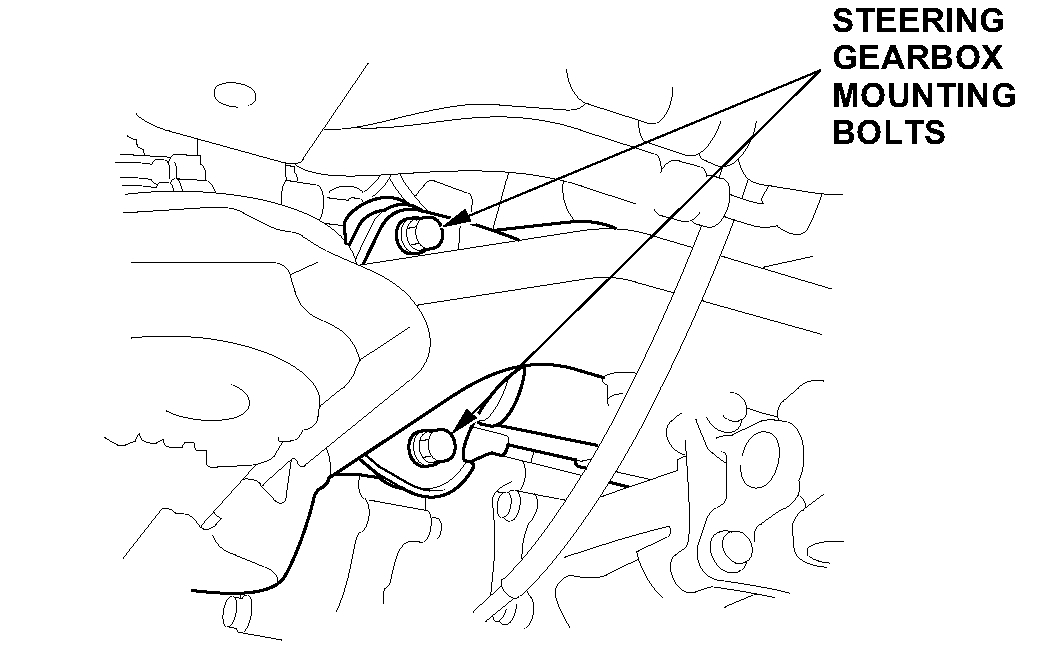
Next, I would like to add that there is a technical service bulletin (TSB) from some years back that defined a pop, clunk when turning. It was related to the steering box bolts. If they are loose enough, you may be hearing them. Pictures 1 and 2 correlate with this TSB. Additionally, at the end it explains how to diagnose if this is the problem. I listed this because the steering box is on the front driver's side of the vehicle.
Here is the TSB:
______________________________________________
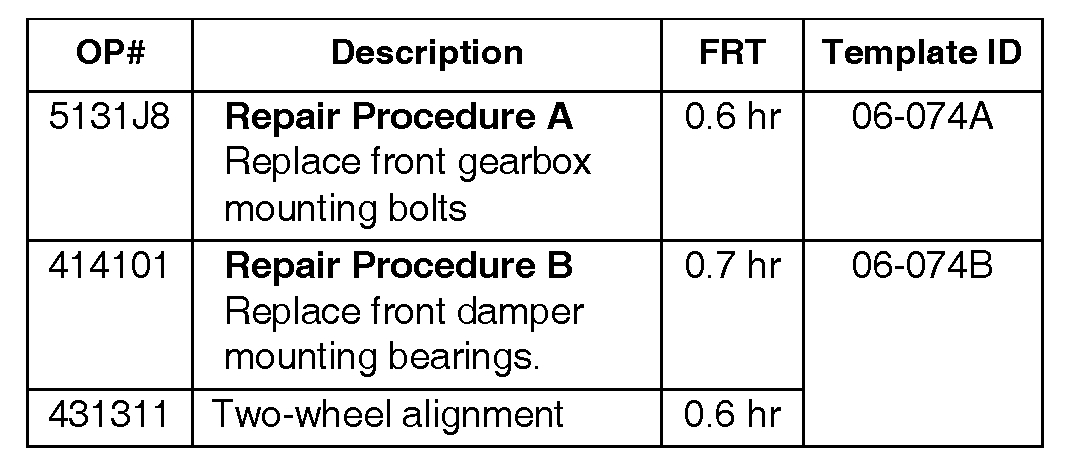
06-074
October 12, 2006
Applies To:
2006 Ridgeline - ALL
Front Suspension Pops or Clunks While Turning
SYMPTOM
The front suspension pops or clunks while turning.
PROBABLE CAUSE
From VIN 2HJYK1...6H553776 thru 2HJYK1...6H570484: Loose steering gearbox mounting bolts or damaged front damper mounting bearing(s).
All 2006 Ridgelines: Damaged front damper mounting bearing(s).
CORRECTIVE ACTION
Diagnose the cause, and do the appropriate repair:
^ Replace the two driver's side gearbox mounting bolts: see REPAIR PROCEDURE A, or
^ Replace both front damper mounting bearings: see REPAIR PROCEDURE B.
PARTS INFORMATION
Bolt, Flange (10 x 55) (2 required) P/N 90161-SJC-A00, H/C 8116873
Bearing, Front (2 required) P/N 51726-SJC-A03, H/C 8495517
WARRANTY CLAIM INFORMATION
In warranty:
The normal warranty applies.
Failed Part: Repair Procedure A P/N 90161-SJC-A00, H/C 8116873 Repair Procedure B P/N 51 726-SJC-A01, H/C 7929144 Defect Code: 07405 Symptom Code: 04201 Skill Level: Repair Technician
Out of warranty:
Any repair performed after warranty expiration may be eligible for goodwill consideration by the District Parts and Service Manager or your Zone Office. You must request consideration, and get a decision, before starting work.
DIAGNOSIS
NOTE:
From VIN 2HJYK1...6H553776 thru 2HJYK1...6H570484 do the complete DIAGNOSIS. For all other 2006 Ridgelines, do only step 7.
1. Park the vehicle on an asphalt-paved surface (some shop floors do not provide enough friction).
2. Start the engine. Open the hood.
3. Have an assistant turn the steering wheel quickly from the left to the right while you inspect the steering gearbox pinion area. Look for the gearbox moving from side-to-side on the subframe, causing it to thump or pop.
4. Raise the vehicle on a lift.
5. Inspect the two bolts holding the gearbox to the subframe in the pinion shaft area on the driver's side.
^ If the bolts are loose, go to REPAIR PROCEDURE A.
^ If the bolts are tight, go to step 6.
6. Lower the vehicle.
7. Turn the steering wheel lock to lock, and check the right and left damper springs for noise. If the noise is coming from the damper spring(s), go to REPAIR PROCEDURE B.
REPAIR PROCEDURE A
Replace the two steering gearbox mounting bolts in the pinion shaft area. Torque the new bolts to 58 N.m (43 ft-lb).
REPAIR PROCEDURE B
Replace both front damper mounting bearings (even if only one is noisy).
^ Refer to page 18-23 of the 2006-2007 Ridgeline Service Manual, or
^ Online, enter the keyword DAMPER, and select Front Damper/Spring Removal and Installation from the list.
^ Do a two-wheel alignment. Refer to page 18-5 of the 2006-2007 Ridgeline Service Manual, or
^ Online, enter the keyword ALIGN, and select Wheel Alignment from the list.
_______________________________________________________
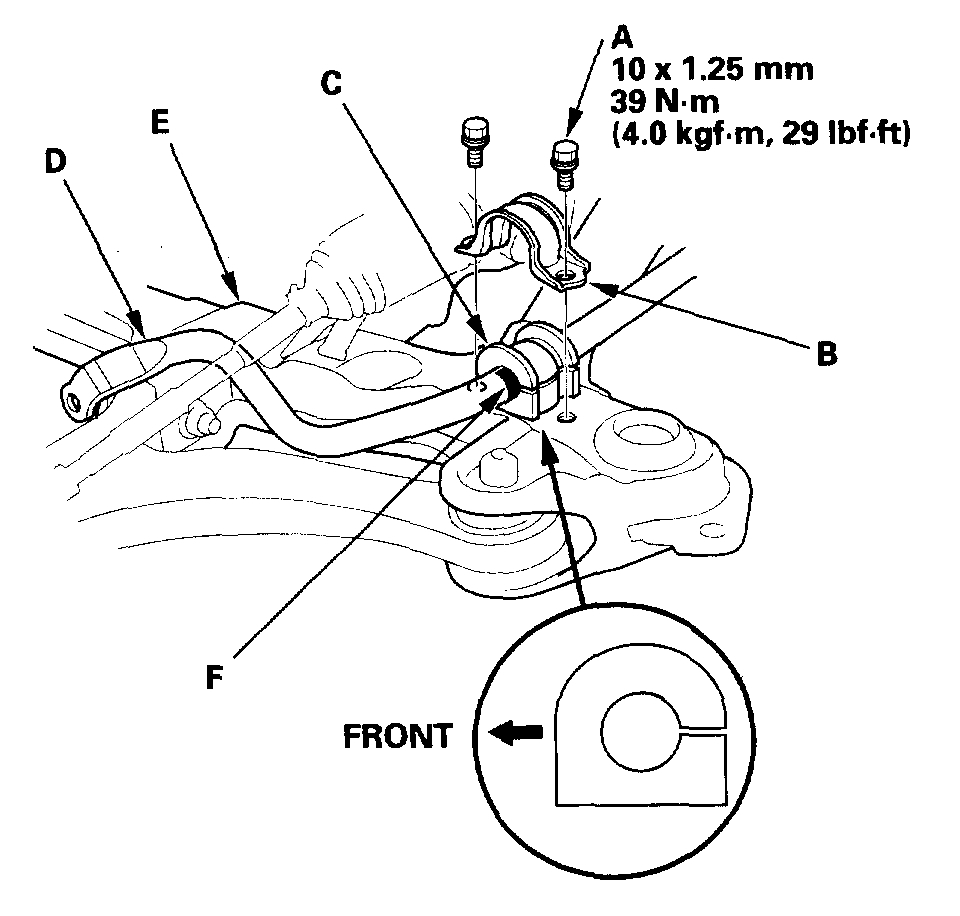
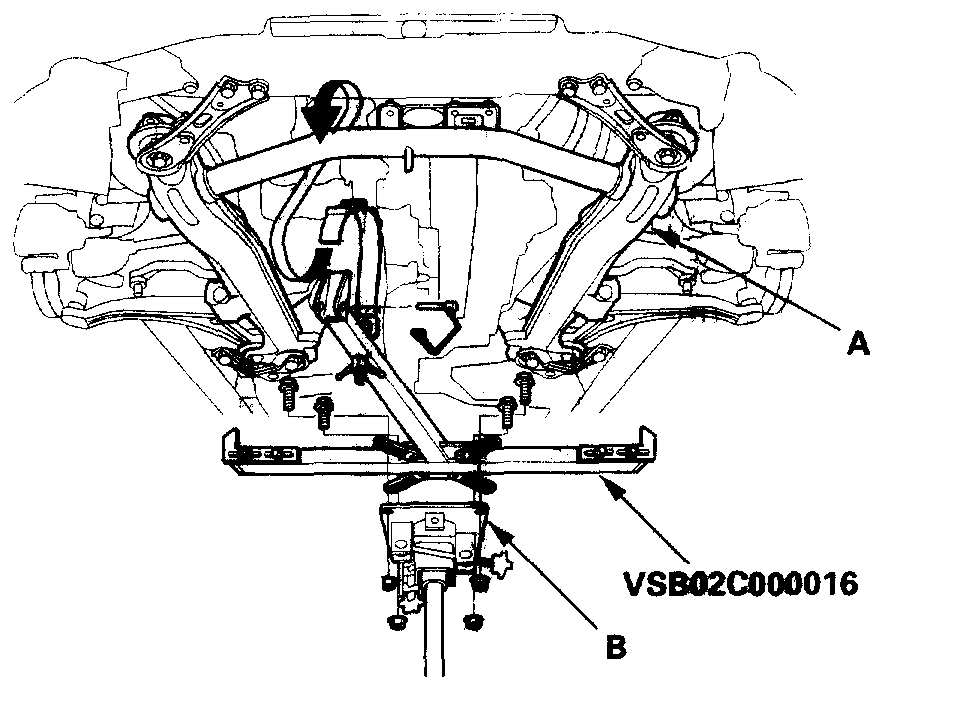
I added pictures 3 and 4 to show you what the sway bar and bushings look like. For you to actually seem them from under the front of the vehicle, you will have to remove the plastic splash shield.
I hope this information is helpful. Let me know if you have other questions or need additional help.
Take care,
Joe
Images (Click to enlarge)
Aug 1, 2018 at 7:31 PM