Hi and thanks for using 2CarPros.
Here are the directions specific to your vehicle. The attached pictures correlate with these directions.
Please see the second set of directions that follow these.
________________________
REMOVAL AND INSTALLATION
Removal
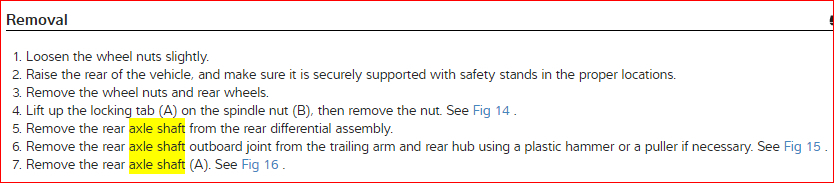
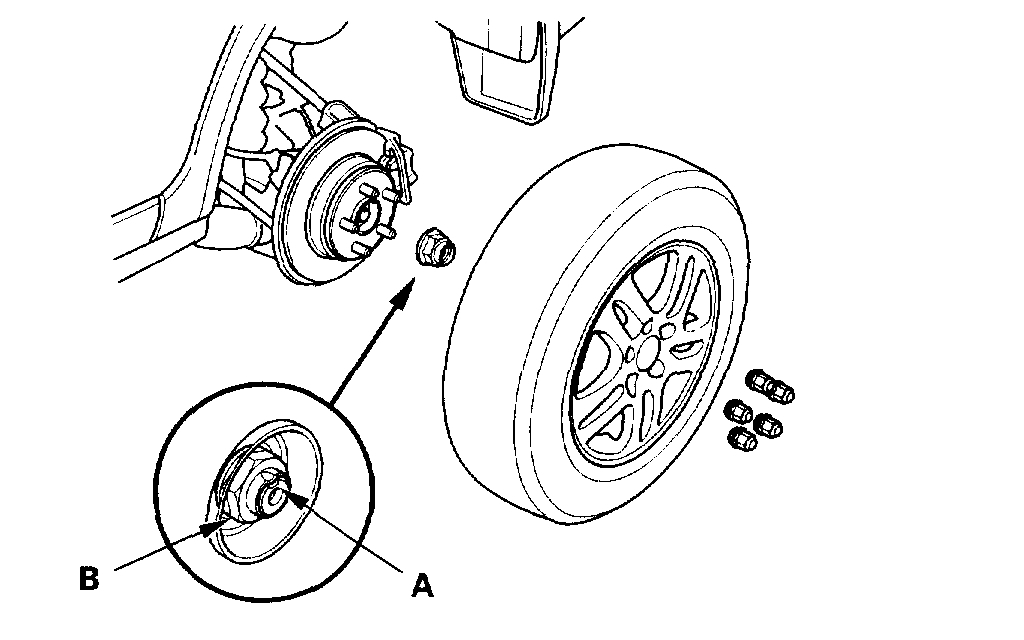
1. Loosen the wheel nuts slightly.
2. Raise the rear of the vehicle, and support it with safety stands in the proper locations.
3. Remove the wheel nuts and rear wheels.
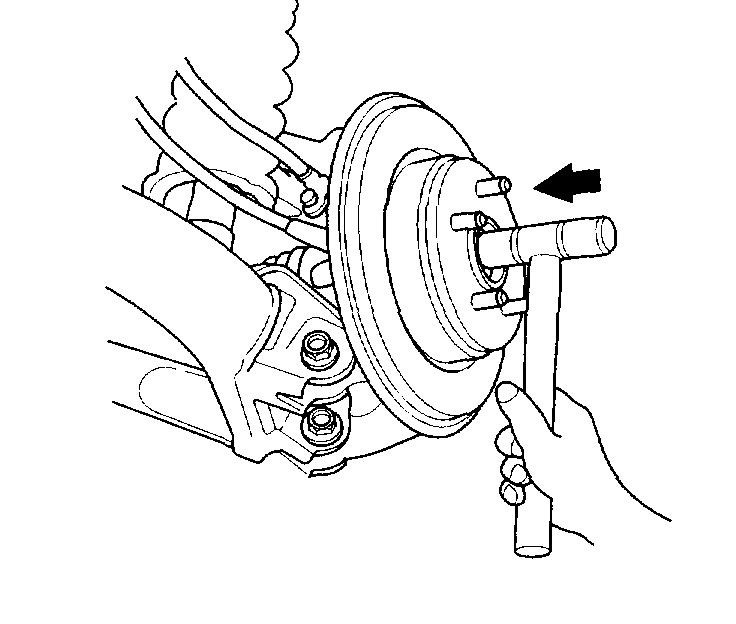
4. Lift up the locking tab (A) on the spindle nut (B), then remove the nut.
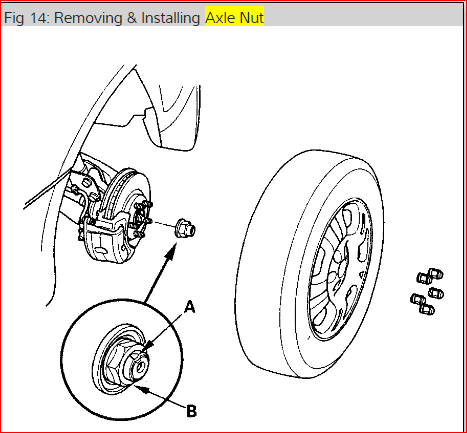
5. Remove the rear driveshafts from the rear differential assembly (see step 9).
6. Remove the rear driveshaft outboard joint from the trailing arm and rear hub using a plastic hammer or a puller if necessary.
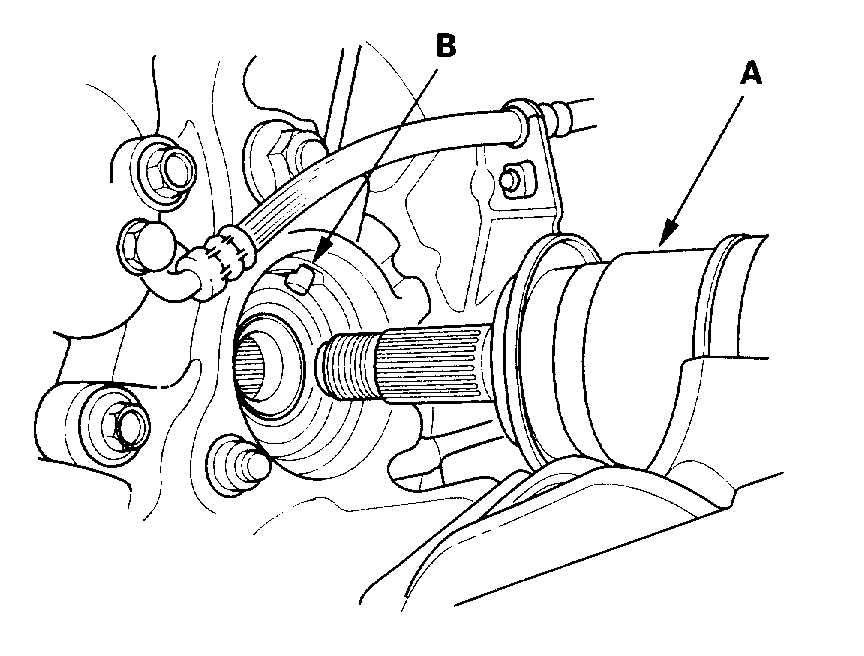
7. Remove the rear driveshaft (A).
NOTE:
^ Be careful not to damage the ABS wheel sensor (B).
^ Pull on the outer joint. Do not pull on the driveshaft because the joint may come apart.
Installation
NOTE: Before starting installation, make sure the mating surfaces of the joint and the splined section are free from dirt or dust.
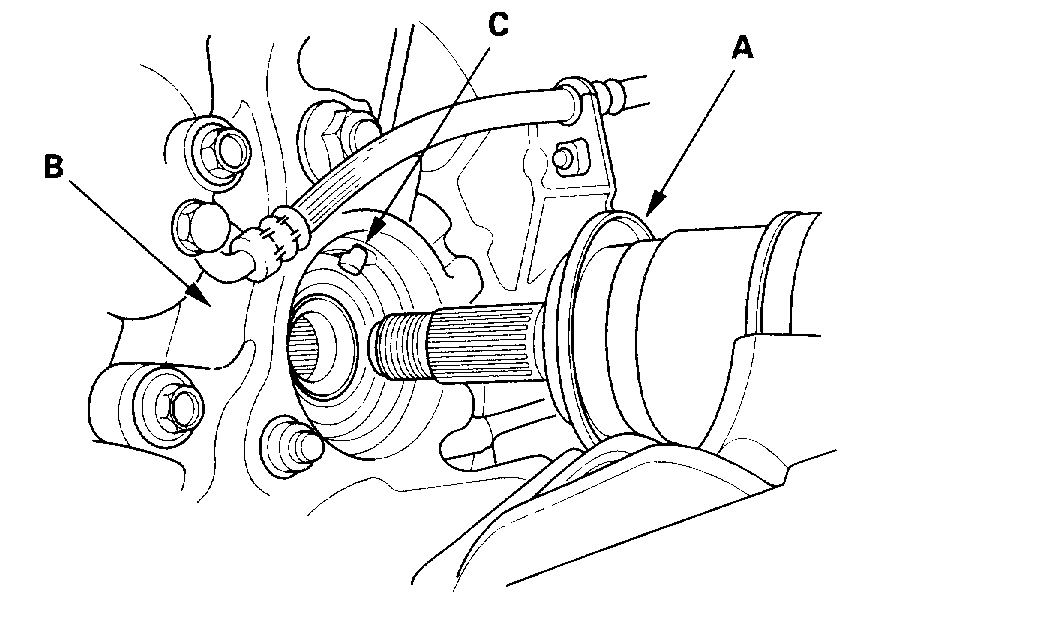
1. Install the outboard joint (A) into the rear hub (B).
NOTE: Be careful not to damage the ABS wheel sensor (C).
2. Install the rear driveshafts into the rear differential assembly (see step 3).
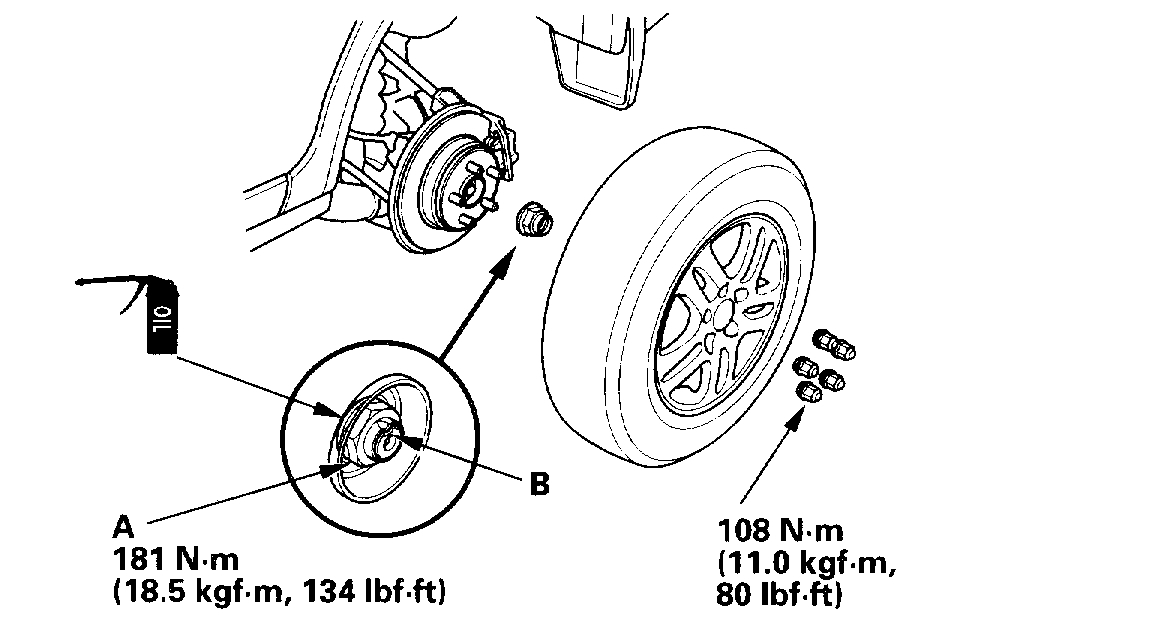
3. Apply a small amount of engine oil to the seating surface of the new spindle nut (A).
4. Install a new spindle nut, then torque the nut. After tightening, use a drift to stake the spindle nut shoulder against the driveshaft (B).
5. Clean the mating surfaces of the brake disc and the wheel, then install the rear wheel and torque the wheel nuts.
______________________________
**********
Now, based on the aforementioned directions, the axle should come out. However, it isn't, so we have to go further. I looked up the directions for replacing the hub bearing and took out the part I think you need. You will have to mark the cam bolts to maintain alignment, but if you follow the directions, you should be fine. Here are the directions. Pictures starting with number 6 correlate with these directions.
_____________________________
10. Place a floor jack under the trailing arm (A) to support it.
NOTE: Do not place the jack against the plate section of the lower arm. Be careful not to damage any suspension components.
See pic 6
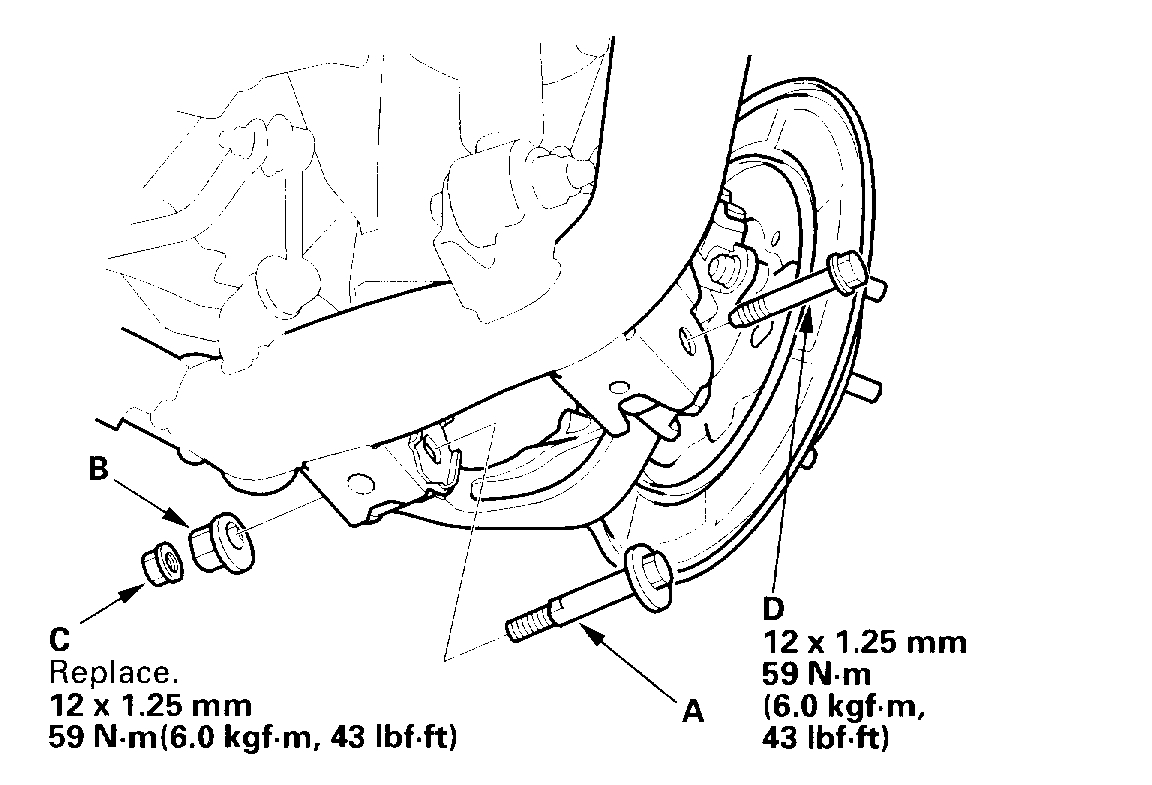
11. Remove the flange bolt, and disconnect the upper arm (B) from the knuckle.
12. Mark the cam positions of the adjusting bolt (A) and adjusting cam (B), then remove the self-locking nut (C), adjusting cam, and adjusting bolt. Discard the self-locking nut.
13. Remove the flange bolt (D).
See pic 7
14. Remove the knuckle (A) while pushing in the driveshaft and holding the driveshaft outboard joint (B) (4WD only).
15. Install the knuckle in the reverse order of removal, and note these items:
- First install all the suspension components, and lightly tighten the bolts and nuts, then place a floor jack under the lower arm, and raise the suspension to load it with the vehicle's weight before fully tightening the bolts and nuts to the specified torque values. Align the cam positions of the adjusting bolt and adjusting cam with the marked positions when tightening.
- Use a new self-locking nut on reassembly.
- Use a new spindle nut on reassembly.
- Before installing the spindle nut, apply a small amount of engine oil to the seating surface of the nut. After tightening, use a drift to stake the spindle nut shoulder against the driveshaft.
- Before installing the brake disc/drum, clean the mating surfaces of the rear hub and the inside of the brake disc/drum.
- Before installing the wheel, clean the mating surfaces of the brake disc/drum and the inside of the wheel.
- Check the rear wheel alignment, and adjust it if necessary.
_____________________________________________________________
Please remember, the second set of directions I added are only a partial section from a much longer procedure. However, if you look at picture 6, I feel you should be able to pull out the hub assembly far enough if remove the flange bolt from the upper mount. Removing the bolt should not change alignment.
________________________________________________________
Let me know if this helps. It is hard to make these determinations looking at pictures, but that is where I think you need to focus. Just make sure to mark anything that may change alignment, safely secure the vehicle, and take your time.
Let me know how things go.
Joe
Images (Click to enlarge)
Nov 29, 2018 at 7:27 PM