Hi and thanks for using 2CarPros.
I have no idea what has been done to the vehicle, but an EGR leak can cause problems. If they replaced the valve with a plate, make sure nothing is leaking.
Interestingly, the P300 and the lean mixture can be the result of a vacuum leak, and my first suspect is the work that was done to the EGR. Here is a link that shows how to check for a vacuum leak:
https://www.2carpros.com/articles/how-to-use-an-engine-vacuum-gauge
Next, confirm that fuel pump pressure is within the manufacturer's specs. Here is a link that shows in general how to check pressure:
https://www.2carpros.com/articles/how-to-check-fuel-system-pressure-and-regulator
Here are the directions specific to your vehicle for pressure testing. The specs are listed in the directions.
___________________________
COMPONENT TESTS AND GENERAL DIAGNOSTICS
FUEL PRESSURE CHECK
Before disconnecting fuel line, release fuel pressure from fuel line to eliminate danger.
CAUTION:
- Prepare pans or saucers under the disconnected fuel line because the fuel may spill out. The fuel pressure cannot be completely released because B15 models do not have fuel return system.
- The fuel hose connection method used when taking fuel pressure check must not be used for other purposes.
- Be careful not to scratch or put debris around connection area when servicing, so that the quick connector maintains sealability with O-rings inside.
1. Release fuel pressure to zero. Refer to "FUEL PRESSURE RELEASE"
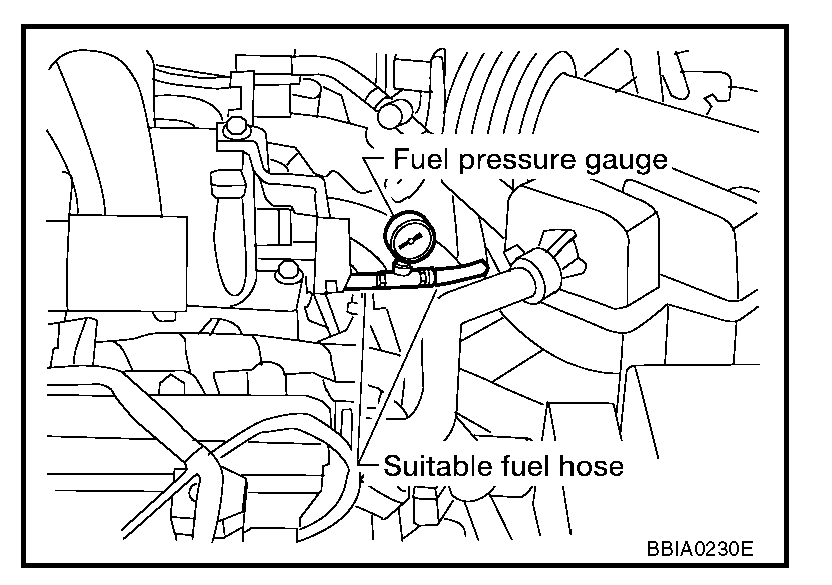
2. Prepare fuel hose for fuel pressure check, and connect fuel pressure gauge.
- Use suitable fuel hose for fuel pressure check (genuine NISSAN fuel hose without quick connector).
- To avoid unnecessary force or tension to hose, use moderately long fuel hose for fuel pressure check.
- Do not use the fuel hose for checking fuel pressure with damage or cracks on it.
- Use Pressure Gauge to check fuel pressure.
3. Remove fuel hose. Refer to "INTAKE MANIFOLD".
- Do not twist or kink fuel hose because it is plastic hose.
- Do not remove fuel hose from quick connector.
- Keep the original fuel hose to be free from intrusion of dust or foreign substances with a suitable cover.
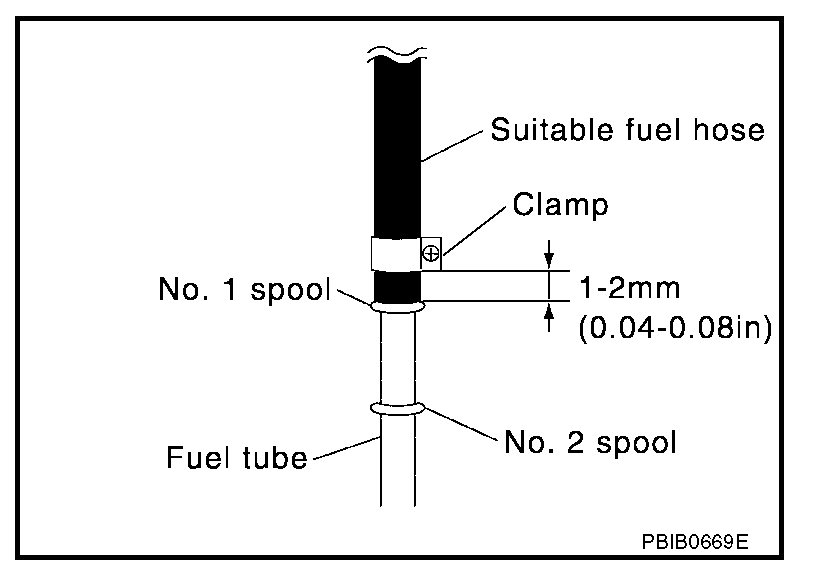
4. Install the fuel pressure gauge as shown in the figure.
- Wipe off oil or dirt from hose insertion part using cloth moistened with gasoline.
- Apply proper amount of gasoline between top of the fuel tube and No.1 spool.
- Insert fuel hose for fuel pressure check until it touches the No.1 spool on fuel tube.
- Use NISSAN genuine hose clamp (part number: 16439 N4710 or 16439 40U00).
- When reconnecting fuel line, always use new clamps.
- When reconnecting fuel hose, check the original fuel hose for damage and abnormality.
- Use a torque driver to tighten clamps.
- Install hose clamp to the position within 1 - 2 mm (0.04 - 0.08 in).
Tightening torque: 1 - 1.5 Nm (0.1 - 0.15 kg-m, 9 - 13 in-lb)
- Make sure that clamp screw does not contact adjacent parts.
5. After connecting fuel hose for fuel pressure check, pull the hose with a force of approximately 98 N (10 kg, 22 lb) to confirm fuel tube does not come off.
6. Turn ignition switch ON and check for fuel leakage.
7. Start engine and check for fuel leakage.
8. Read the indication of fuel pressure gauge.
- Do not perform fuel pressure check with system operating. Fuel pressure gauge may indicate false readings.
- During fuel pressure check, confirm for fuel leakage from fuel connection every 3 minutes.
At idling: Approximately 350 kPa (3.57 kg/sq.cm, 51 psi)
9. If result is unsatisfactory, go to next step.
10. Check the following.
- Fuel hoses and fuel tubes for clogging
- Fuel filter for clogging
- Fuel pump
- Fuel pressure regulator for clogging
If OK, replace fuel pressure regulator.
If NG, repair or replace.
___________________
If pressure is low, it can cause a P0300 and a lean fuel mixture.
Let me know if this helps or if you have other questions.
Joe
Images (Click to enlarge)
Dec 27, 2018 at 3:44 PM