Hi and thanks for using 2CarPros.com.
If you are getting oil into the cooling system, chances are you have a bad head gasket. Here is a how to for checking head gaskets:
https://www.2carpros.com/articles/head-gasket-blown-test
If you are not able to confirm anything using the methods discusses in the link, I recommend checking engine compression.
Here is a link that shows in general how this is done:
https://www.2carpros.com/articles/how-to-test-engine-compression
Here are the directions specific to your vehicle for testing compression. The manufacturer's specification variations are listed in the directions. Compression should be 140psi.
____________________
Engine Compression Test
Removal Procedure
1. Remove the throttle body. Refer to Throttle Body Assembly Replacement (1.6L LDE, LXV, 1.8L 2H0, and LUW) (See: Throttle Body > Removal and Replacement).
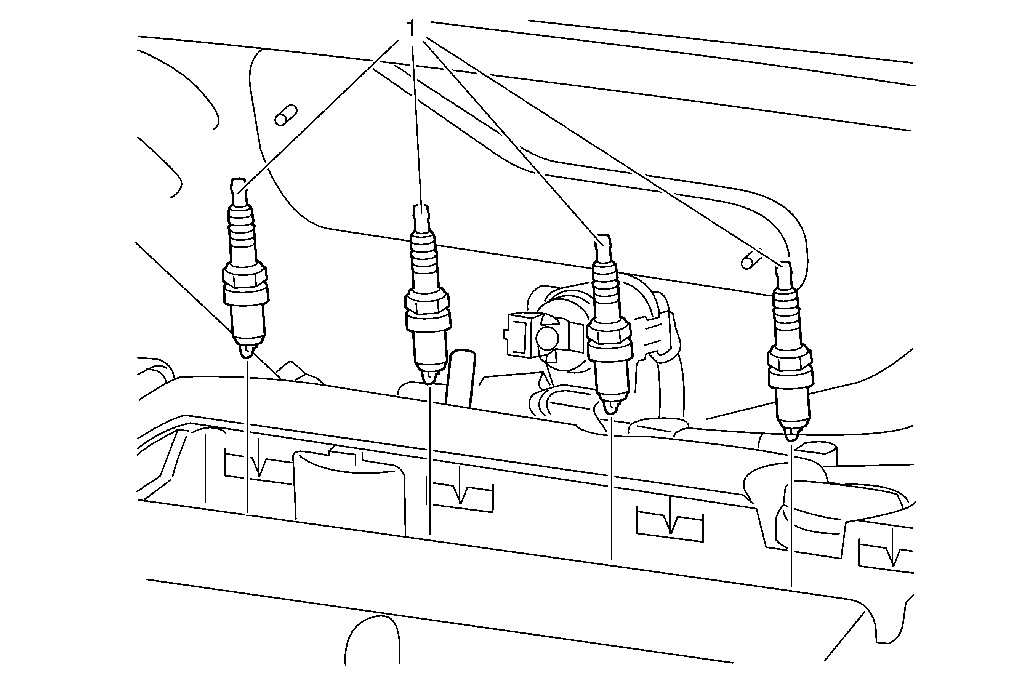
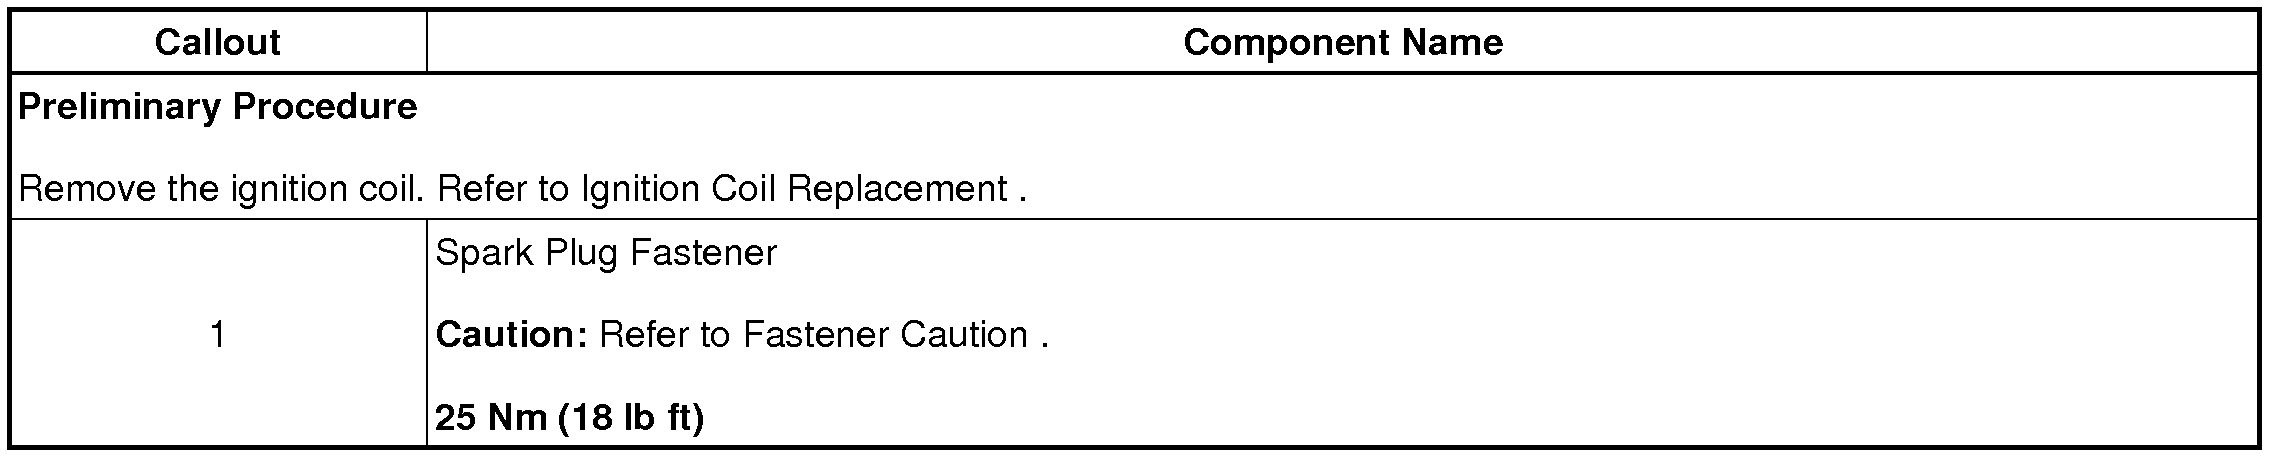
2. Remove the spark plugs. Refer to Spark Plug Replacement (See: Spark Plug > Removal and Replacement > Spark Plug Replacement).
3. Remove the relay holder cover.
4. Remove the fuel pump relay.
Measurement Procedure
Check Compression for all cylinders:
Note: Engine revs at least 300/min.
1. Start the engine (approx. 4 seconds).
2. Compare the compression values.
Maximum pressure differential 100 kPa (14.5 psi)
Installation Procedure
1. Install the fuel pump relay.
* Place into the socket.
* Ensure the plug contacts are sound.
2. Install the relay carrier cover.
3. Install the spark plugs. Refer to Spark Plug Replacement (See: Spark Plug > Removal and Replacement > Spark Plug Replacement).
4. Install the throttle body. Refer to Throttle Body Assembly Replacement (1.6L LDE, LXV, 1.8L 2H0, and LUW) (See: Throttle Body > Removal and Replacement).
_______________________________
Here are the components that need removed.
______________________________
Throttle Body Assembly (1.6L LDE, LXV, 1.8L 2H0, and LUW)
Removal Procedure
1. Open the hood.
2. Remove the air cleaner assembly. Refer to Air Cleaner Assembly Replacement (1.6L LDE, LXV, and 1.8L 2H0) (See: Air Cleaner Housing > Removal and Replacement).
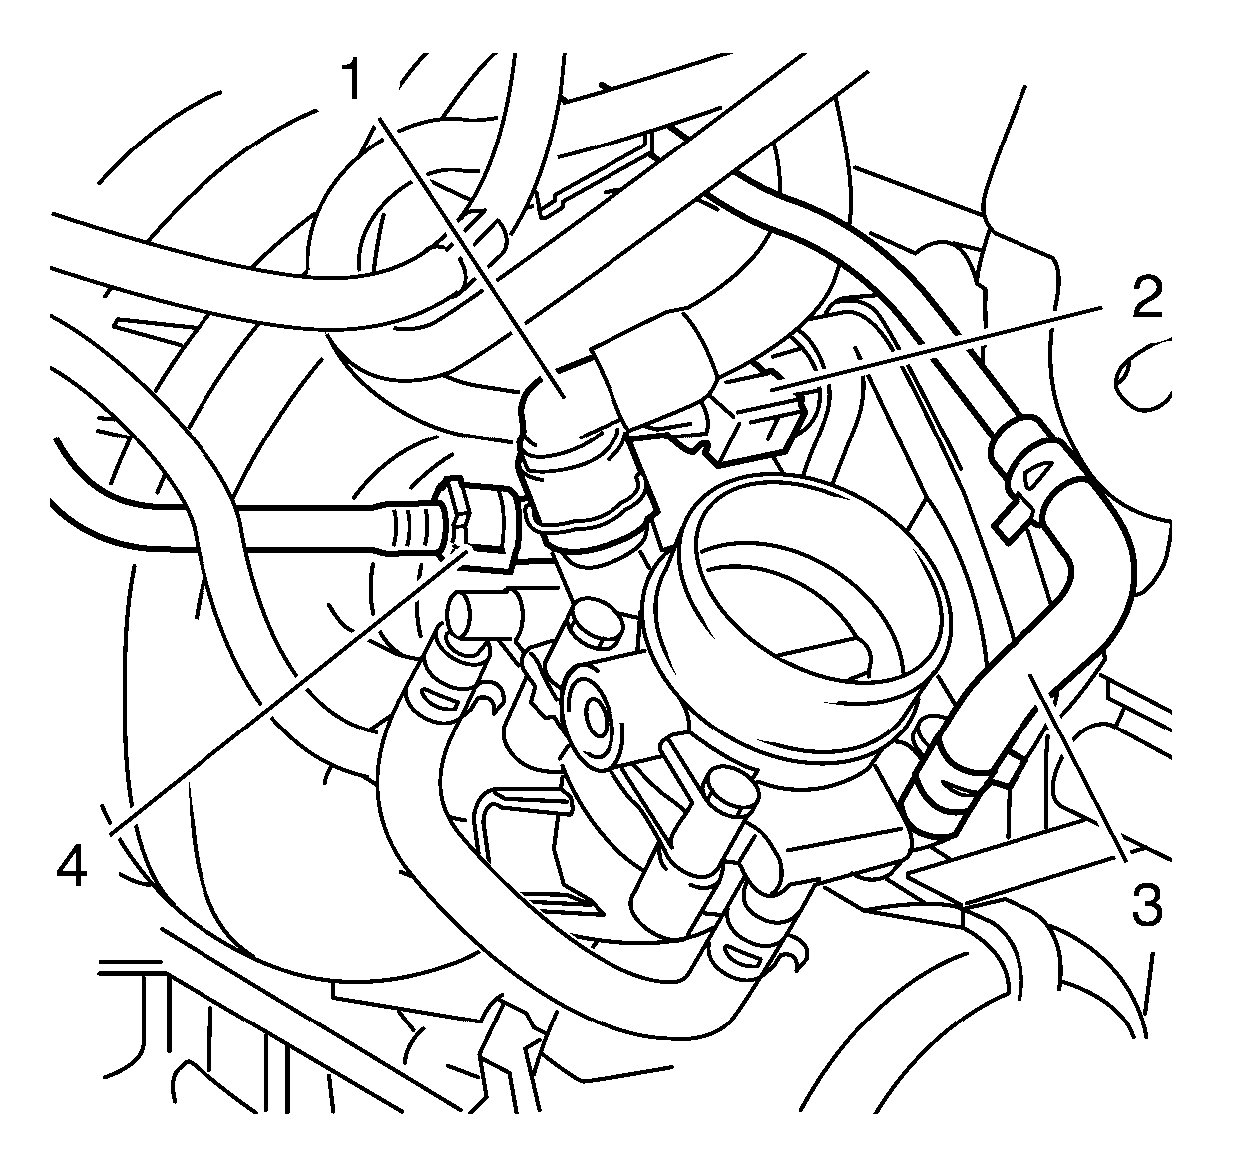
3. Disconnect the wiring harness plug (2).
4. Disconnect the positive crankcase ventilation pipe (1).
5. Place collecting basin underneath.
6. Disconnect the throttle body heater outlet pipe (4).
7. Disconnect the throttle body heater inlet pipe (3).
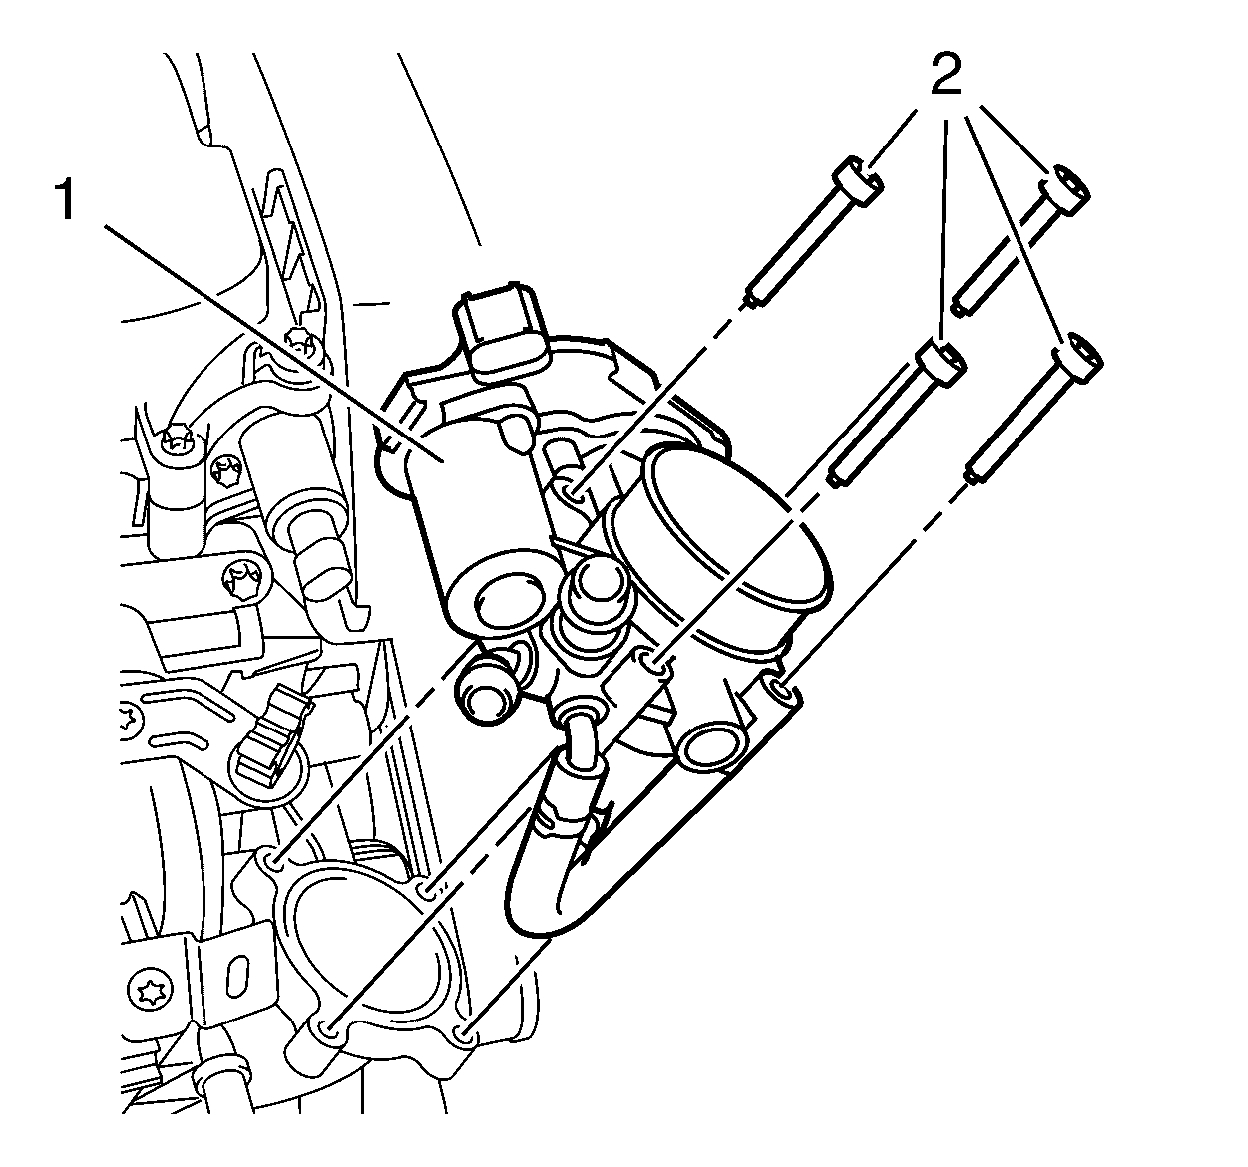
8. Remove the 4 throttle body bolts (2).
9. Remove the throttle body (1).
Installation Procedure
1. Install the throttle body (1).
Caution: Refer to Fastener Caution (See: Vehicle > Vehicle Damage Warnings > Fastener Caution).
2. Install the 4 throttle body bolts (2) and tighten to 8 Nm (71 lb in).
3. Connect the throttle body heater inlet pipe (3).
4. Connect the throttle body heater outlet pipe (4).
5. Connect the positive crankcase ventilation pipe (1).
6. Connect the wiring harness plug (2).
7. Install the air cleaner assembly. Refer to Air Cleaner Assembly Replacement (1.6L LDE, LXV, and 1.8L 2H0) (See: Air Cleaner Housing > Removal and Replacement).
8. Close the hood.
_____________________________________________
See pics 5 / 6 for spark plug removal.
___________________________________________
I hope this helps. Let me know what you find or if you have other questions.
Take care,
Joe
Images (Click to enlarge)
Oct 20, 2018 at 4:30 PM