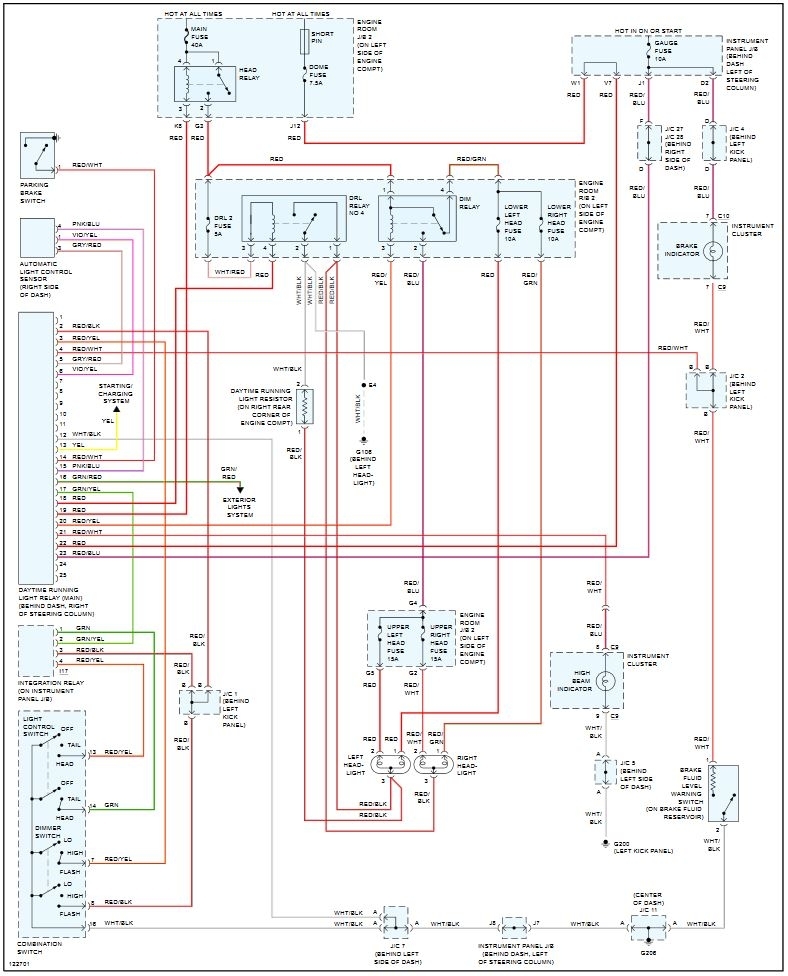
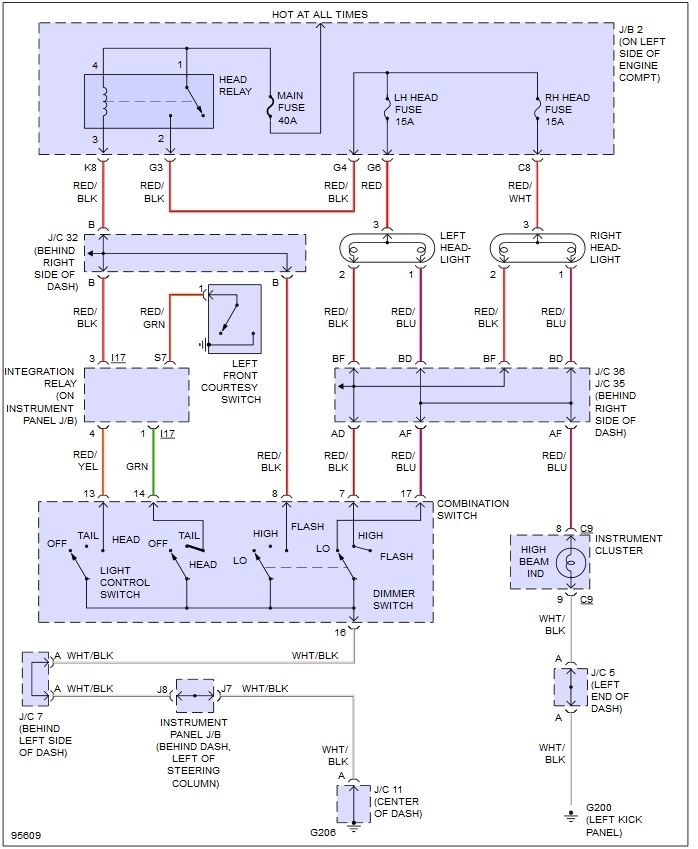
It sounds to me that you may have a bad combination switch. Sometimes they call them a stalk switch. It sounds to me like the dimmer switch is malfunctioning and since they do not sell these separately you would need to replace the whole switch. I have included some wiring diagrams (one with DRL and the other without DRL) so you know how the system works as well as instructions on how to replace it.
See the images and diagrams attached.
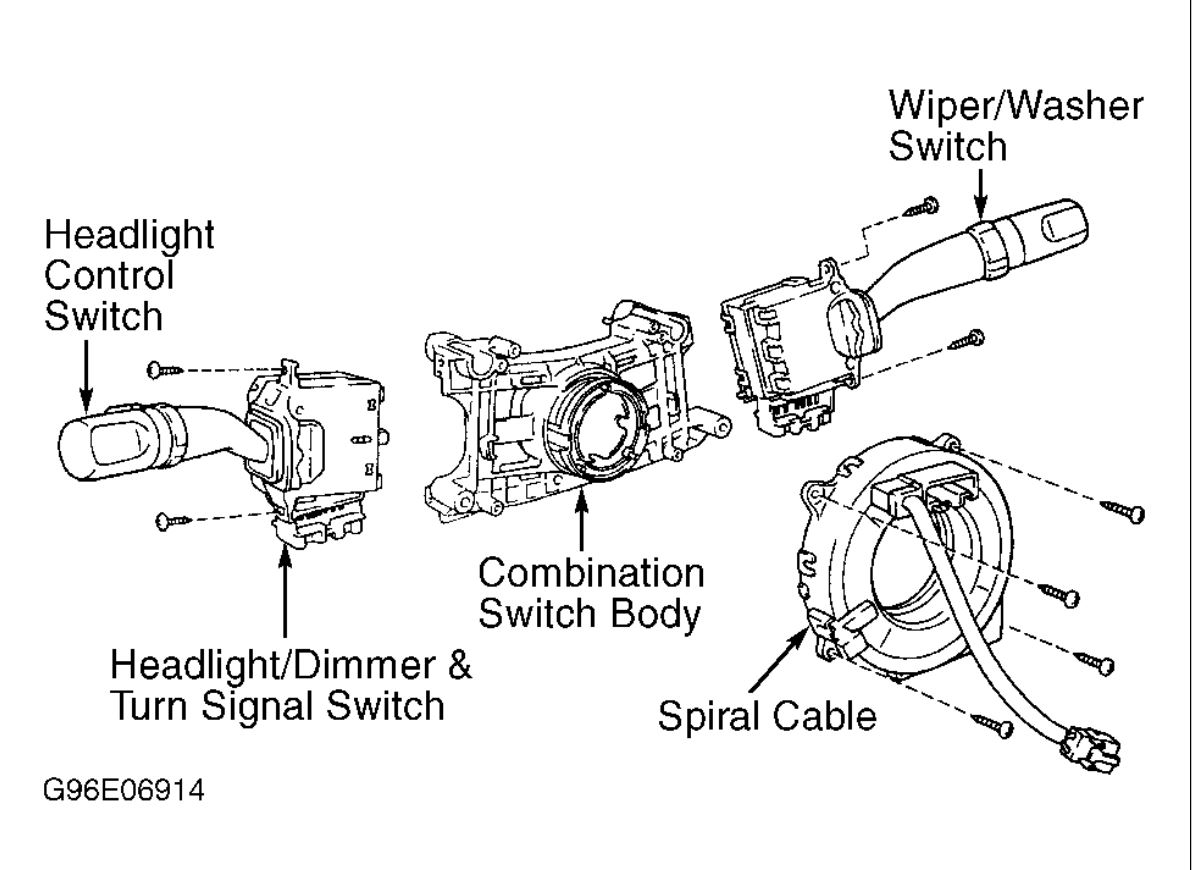
To replace the Combination Switch
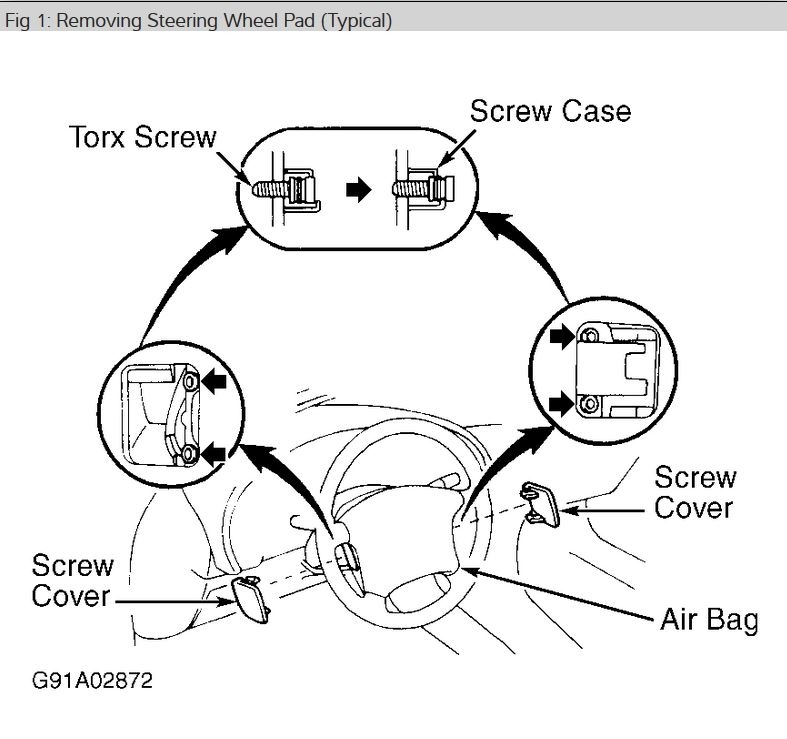
1. Remove the Steering wheel and air bag by following the instruction below. Caution: Use extreme caution when handling the airbag.
A. Center the steering wheel so that the front wheels are pointing straigh ahead.
B. Remove the lower instrument cluster trim panel.
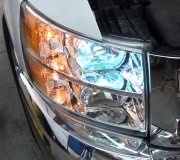
C. Remove the steering wheel cover pad by loosening the torx screws. Back them out until the heads run into the the top of the screw case See the image attached below.
D. Pull Steering Pad off of the steering wheel and carefully disconnect the air bag connector.
E. Place the steering wheel cover face-up so the airbag is aimed upward. Warning:(this is to prevent the airbag from flying across the room if it accidentally discharges. If placed face up, it will not propel the assembly and cause bodily harm)
F. Remove the steering wheel nut.
G. With a sharpie or paint pen, place match marks on the shaft and the steering wheel so that when you put it together you can ensure they are in the same orientation.
H. Disconnect the wire harness from the steering wheel.
I. Remove the steering wheel from the shaft using a steering wheel puller.
Then:
2. Remove the Instrument Panel Lower trim panel.
3. Remove the top and bottom steering wheel cover trim covers.
4. Locate and remove the Combination Switch assembly and cable connector(s)
5. Remove cruise control switches on the steering wheel and disconnect the cruise control connectors from the slip ring.
6. Remove the slip ring from the combination switch.
7. Remove the wire ties that hold the combination switch wiring harness to the steering column.
8. Remove screws and release the claws that secure the combination switch and spiral cable to the steering column.
9. Remove the combination switch and spiral cable.
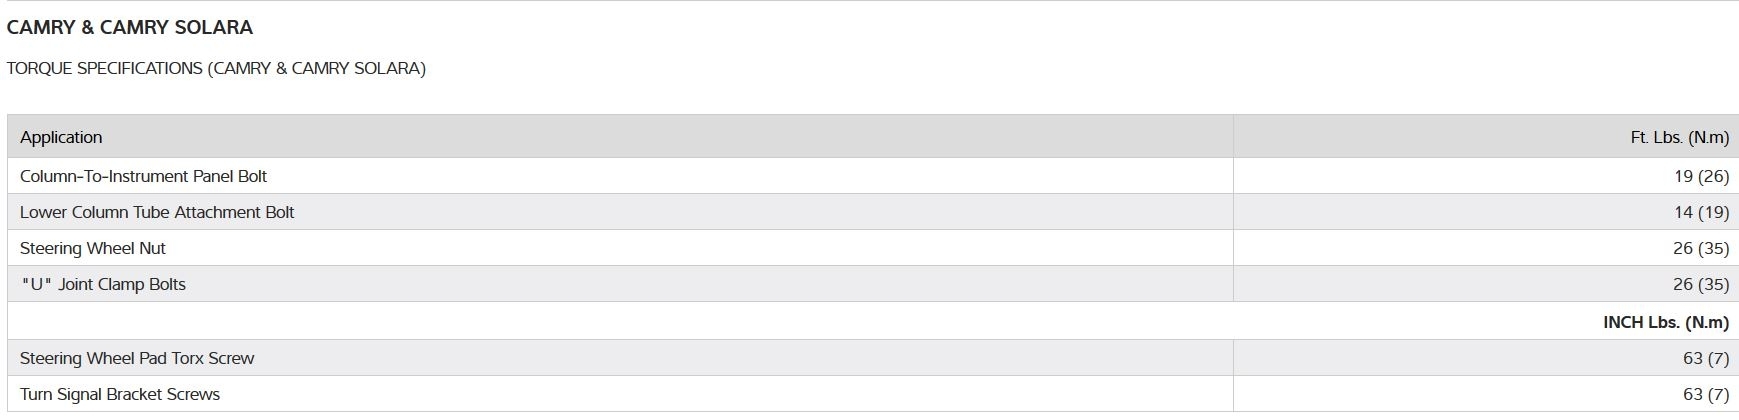
Reassemble in the reverse order with the new switch stalk. Use the torque specifications attached.
Let us know if you have any questions.
Regards
Jon
Images (Click to make bigger)
Tuesday, November 20th, 2018 AT 8:11 AM