No heat from vents

Tiny
D70DRIVER
  • MEMBER
  • 1999 VOLKSWAGEN JETTA
  • 2.0L
  • 4 CYL
  • 2WD
  • MANUAL
  • 220,000 MILES
Not getting hot air out of the vents. I have replaced thermostat and coolant, replaced several hoses, replaced heater core, replaced engine coolant flange, repaired blender doors. Temperature gauge shows 190, upper radiator hose gets hot lower hose does not. Heater core was bypassed when I got the car there is a small 3/8 vacuum line coming off throttle body that has been capped off. Does it tie into cooling system at heater core? I have seen couplings that would suggest it does. Would that cause no heat if it is not connected?
Do you
have the same problem?
Yes
No
Saturday, November 17th, 2018 AT 4:02 PM

4 Replies

Tiny
D70DRIVER
  • MEMBER
  • 3 POSTS
Where is the heater control valve on this car?
Was this
answer
helpful?
Yes
No
Saturday, November 17th, 2018 AT 4:20 PM
Tiny
JACOBANDNICKOLAS
  • MECHANIC
  • 108,014 POSTS
Hi and thanks for using 2CarPros.com.

A traditional type heater control valve does not exist on this vehicle. I did not think it did. So, I checked through all my manuals and temperature is controlled via the blend door, which you said you repaired.

Here is a general link that discusses possible causes of no heat:

https://www.2carpros.com/articles/car-heater-not-working

Next, with the engine warm, the heater control knob on heat, do both heater chore hoses get hot under the hood?

I was able to find a technical service bulletin (TSB) related to temperature issues. Its focus is on the blend door actuator. Take a look through it. All attached pictures correlate with the TSB.

The blend door control lever moves freely, but the blend door does not operate.

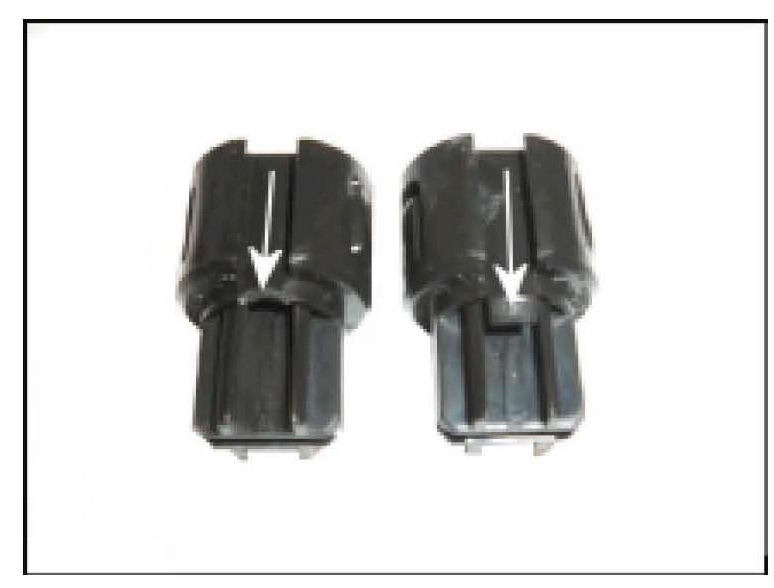
A bushing that fits on the lever may have a broken tab/clip, -arrows-, as shown.

This tab/clip may cause the bushing to fall out of the fresh air housing which can result in the door becoming inoperative and result in undesired air temperature.
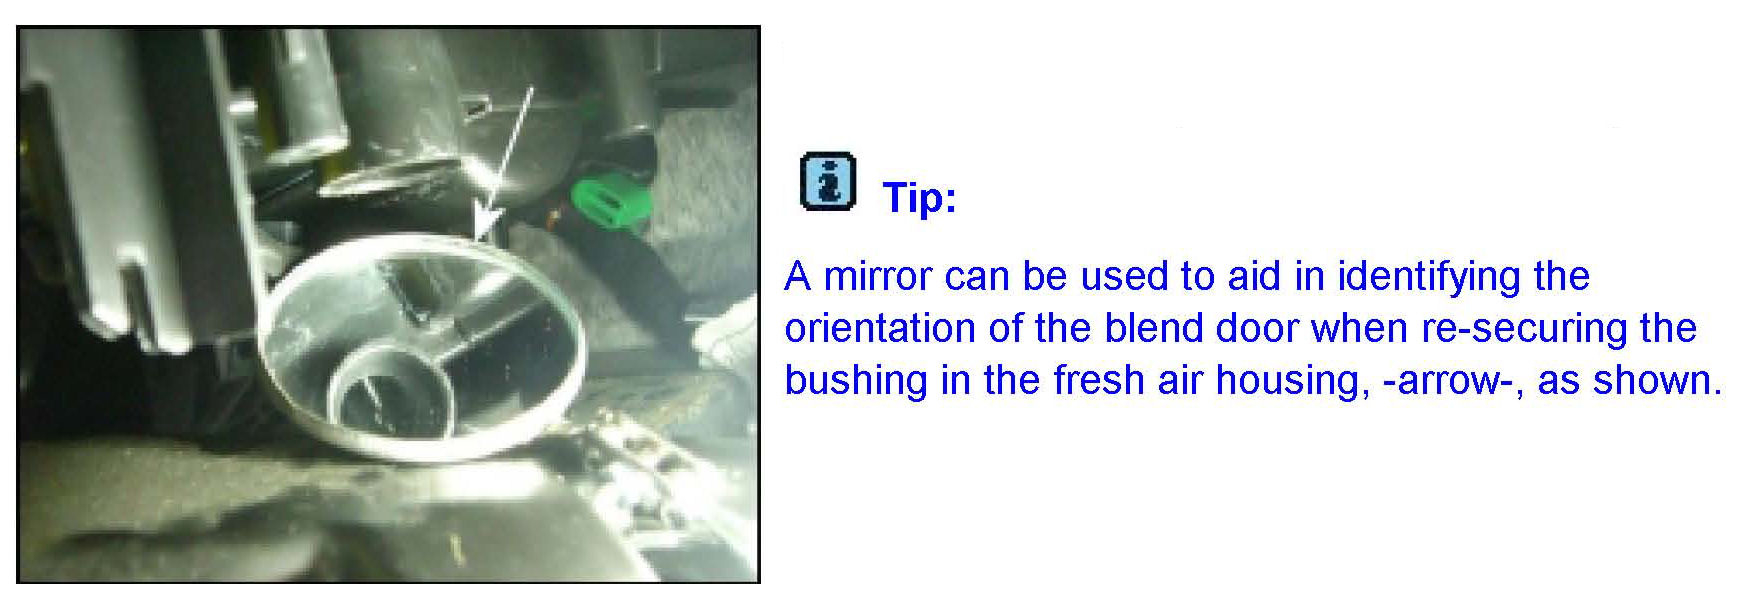
Tip:

In the past the entire fresh air housing was replaced because the bushing was not available as a separate part. The bushing is now available as a separate part. The bushing can be accessed from under the center console.

Remove the panels near the foot wells at the passenger side of the console, -arrows-, as shown.

See Repair Manual, Body-Interior, Repair Group 68 - Interior Equipment for removal procedure.
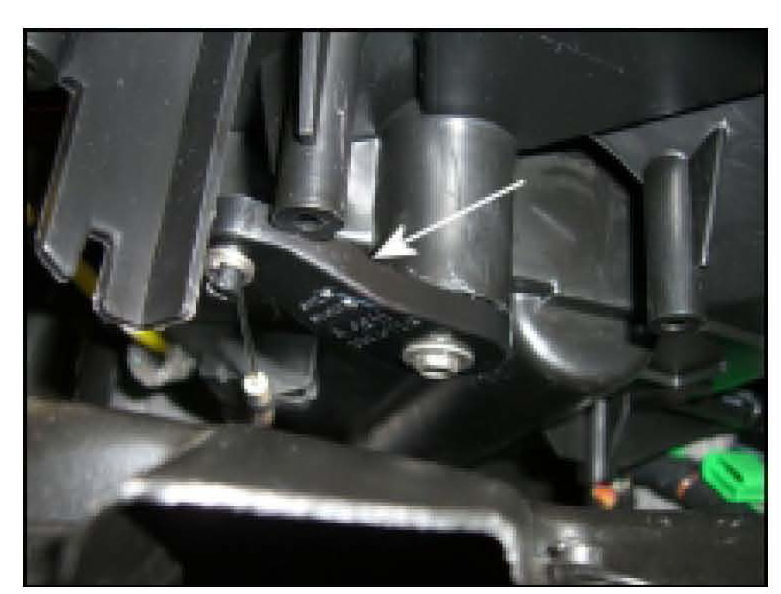
This will expose the location of the control lever, -arrow-, as shown.
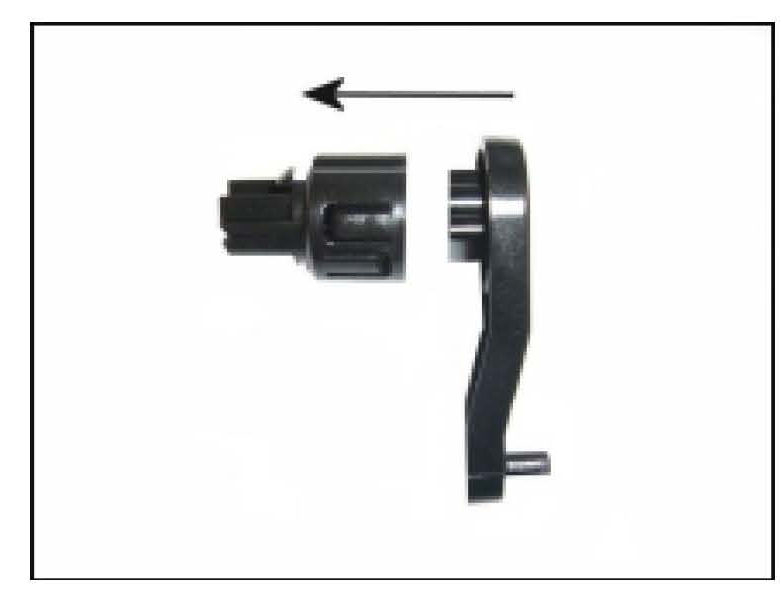
Re-bolt a new bushing onto the lever, -arrow-, as shown.

Re-insert the bushing with lever onto the blend door until it is firmly secured in the housing.

Reinstall panels.
______________________________

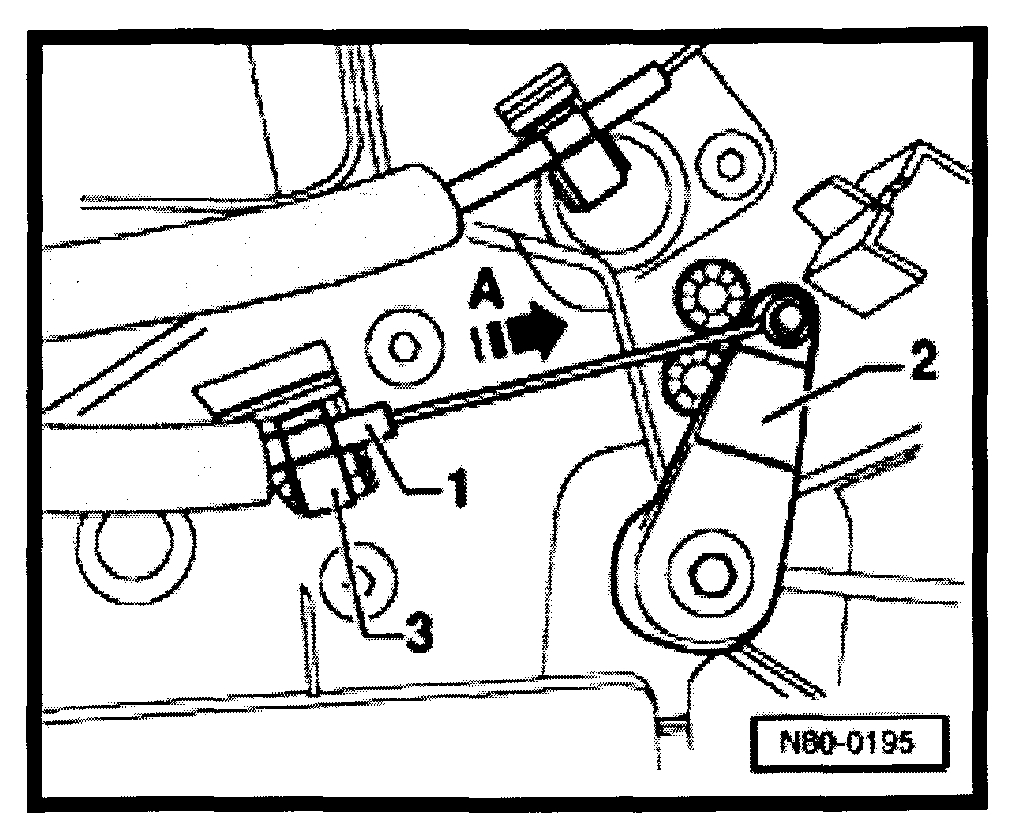
I was also able to find how to adjust the cable. Picture 7 correlates with these directions,

TEMPERATURE FLAP CABLE, INSTALLING AND ADJUSTING
Cables, Installing And Adjusting

Temperature flap cable, installing and adjusting
Prerequisites:

-Heating and ventilation controls are installed.
-Connecting duct removed.

Adjusting

-Turn temperature rotary control knob to left onto stop.
-Attach center wire of cable -1- to the temperature flap lever -2-.
-Push temperature flap lever -2- to stop - arrow A- and secure outer cable -1- with clip -3-.
-Turn temperature rotary control knob to left and right onto stops.
- When turning the rotary control knob, both end stops must be reached.

______________________

Let me know if any of this helps or if you have other questions.

Take care,
Joe
Was this
answer
helpful?
Yes
No
Saturday, November 17th, 2018 AT 8:47 PM
Tiny
D70DRIVER
  • MEMBER
  • 3 POSTS
I finally fixed it. I watched a video on how to check your water pump. It said take the upper hose(they called it a coolant return line) off the reservoir and start the car. If coolant comes out of hose the water pump is good, if not it is bad. So no coolant came out of the hose. I felt my heart sinking. For some unknown reason I followed that hose to where it connect to a "T". I disconnected it. It was a metal pipe that was attached to the firewall by two clips with a rubber hose at each end, one end on reservoir the other to the "T". The twenty inch metal pipe was packed solid, and I mean solid with what looked like metal deposits. Two hours I tried to clear that pipe with no success. I went to O'Reillys and bought a three foot section of hose, installed it and I had coolant flow. I then let vehicle run for forty five minutes with reservoir cap off while squeezing every hose several times and problem solved. The proof is in the pudding fellas, I am now a firm believer if it calls for the pink antifreeze, it is getting the pink antifreeze. Three weekends in a row I worked on this, removing the dash three different times. I spent probably $60.00 on the green antifreeze while trying to figure it out. I hope this helps someone out because I was extremely aggravated to see so many people having similar problems yet none of them ever came back and said what fixed it. Good luck and FYI the fittings on this car break very very easily. When you get mad walk away for a few and save yourself some money!
Was this
answer
helpful?
Yes
No
Wednesday, November 21st, 2018 AT 3:03 AM
Tiny
JACOBANDNICKOLAS
  • MECHANIC
  • 108,014 POSTS
HI and welcome back.

Thanks for that information. I am sure it will help someone. Also, the corrosion is common to a degree. I questioned if something was plugged when I asked if both heater core hoses were hot. As far as coolant on this vehicle, I agree with what you said. Keep it the same. The only thing I would consider is a universal G-O5 coolant that is compatible with what is in the vehicle.

Again, thanks for letting us know. And good advice to everyone is to make sure to use the manufacturer's recommend coolant, especially, GM vehicles. Never mix green traditional coolant with the factory DexCool (pink) coolant. It makes a mess.

Take care and I hope you have a good Thanksgiving.

Joe
Was this
answer
helpful?
Yes
No
Wednesday, November 21st, 2018 AT 1:14 PM

Please login or register to post a reply.

Sponsored links