Hi and thanks for using 2CarPros.com.
If you have power and the relay is working, you need to check if power is getting to the fuel pump. The security system will shut down both fuel and spark, but you have spark.
Here is a link that shows in general how to replace a pump. You need to remove the pump and check to see if there is power and ground to the pump itself. If there is, then the pump is bad.
https://www.2carpros.com/articles/how-to-replace-an-electric-fuel-pump
Also, there was a technical service bulletin (TSB) regarding driveability issues and no start conditions due to fuel pump related issues. The strainer on the fuel pumps would become blocked and required replacement. Here is the actual TSB:
_______________________________________
TECHNICAL
Subject:
Vehicle Hesitates, No Start, Lack of Power, Low Fuel Pressure (Test Fuel Pressure and Replace Fuel Pump Module Strainer)
Models:
2002-2003 Chevrolet Malibu
2002-2005 Chevrolet Cavalier
2004-2005 Chevrolet Classic
2002-2004 Oldsmobile Alero
2002-2005 Pontiac Grand Am, Sunfire
Supersede:
This bulletin is being revised to add a additional step to retest the fuel pressure after the strainer is replaced. Please discard Corporate Bulletin Number 05-06-04-026 (Section 06 - Engine).
Condition
Some customers may comment that the vehicle hesitates, does not start, and/or has lack of power.
Cause
The vehicle may have low fuel pressure caused by a restricted fuel pump strainer.
The current fuel pump has a 100 micron strainer.
Correction
Follow the service procedure below to test fuel pressure and replace the fuel strainer with a 200 micron strainer.
Caution:
^ Gasoline or gasoline vapors are highly flammable. A fire could occur if an ignition source is present. Never drain or store gasoline or diesel fuel in an open container, due to the possibility of fire or explosion. Have a dry chemical (Class B) fire extinguisher nearby.
^ Wrap a shop towel around the fuel pressure connection in order to reduce the risk of fire and personal injury. The towel will absorb any fuel leakage that occurs during the connection of the fuel pressure gage. Place the towel in an approved container when the connection of the fuel pressure gage is complete.
Note:
Clean the fuel system service cap and surrounding area to avoid possible contamination in the system.
Important:
Verify that adequate fuel is in the fuel tank before proceeding with this diagnostic.
1. Turn OFF the ignition.
2. Turn OFF all accessories.
3. Install fuel pressure gauge, J 34730-1A, or equivalent.
Important:
^ The fuel pump relay may need to be commanded ON a few times in order to obtain the highest possible fuel pressure.
^ DO NOT start the engine.
4. Command the fuel pump relay ON with a scan tool.
5. Observe the fuel pressure gage with the fuel pump commanded ON.
^ If the fuel pressure IS between 345-414 kPa (50-60 psi), fuel system pressure is not the cause. Refer to the appropriate SI Document for additional diagnostic information.
^ If the fuel pressure IS LESS THEN 345-414 kPa (50-60 psi), continue with the next step.
6. Remove the fuel pump module. Refer to Fuel Pump Module Replacement in SI. Use the appropriate SI Document depending on model and year.
7. Flush the fuel tank with hot water.
8. Pour the water out of the fuel sender assembly opening in the fuel tank. Rock the fuel tank in order to be sure that the removal of the water from the fuel tank is complete.
9. Allow the tank to dry completely before reassembly. Refer to Fuel System Cleaning for additional information.
Caution:
The pot of the sending unit may have fuel in it. Use caution not to spill fuel on yourself while servicing the strainer.
Note:
Use care not to damage the fuel module pot when removing the old strainer. Damage to the pot may make it difficult or impossible to install the new strainer and/or make the module inoperative.
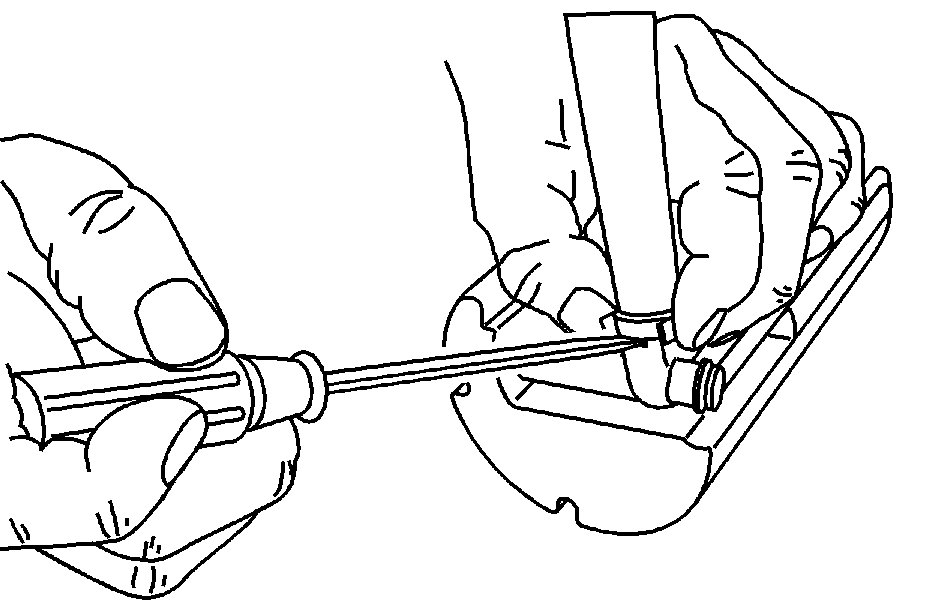
10. Insert the tip of a small screw driver between the strainer and the pot and push the screwdriver up slowly while rotating the screwdriver to pop off the strainer.
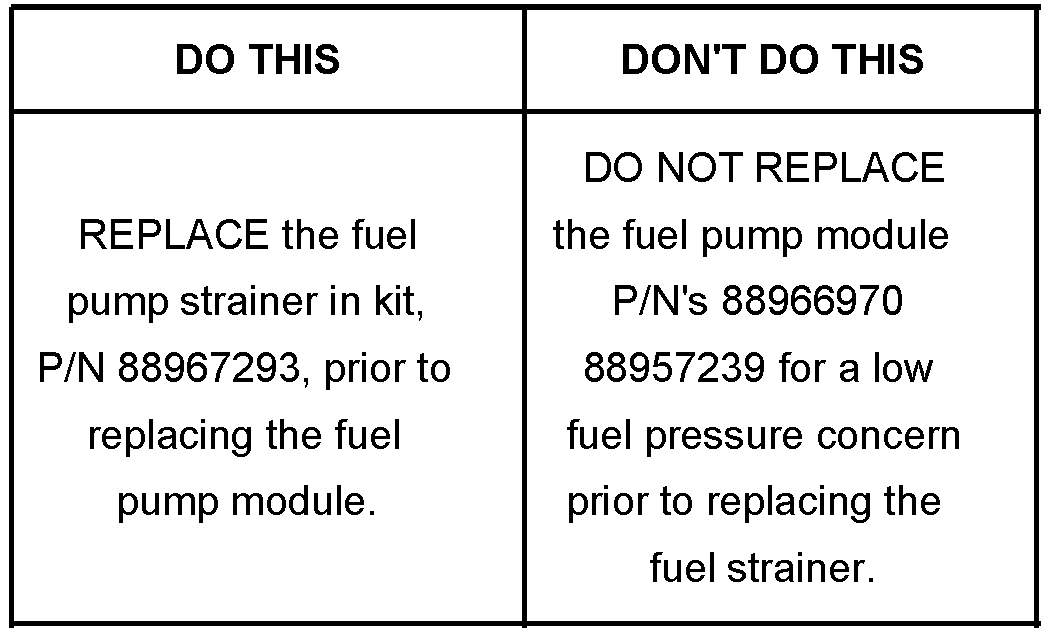
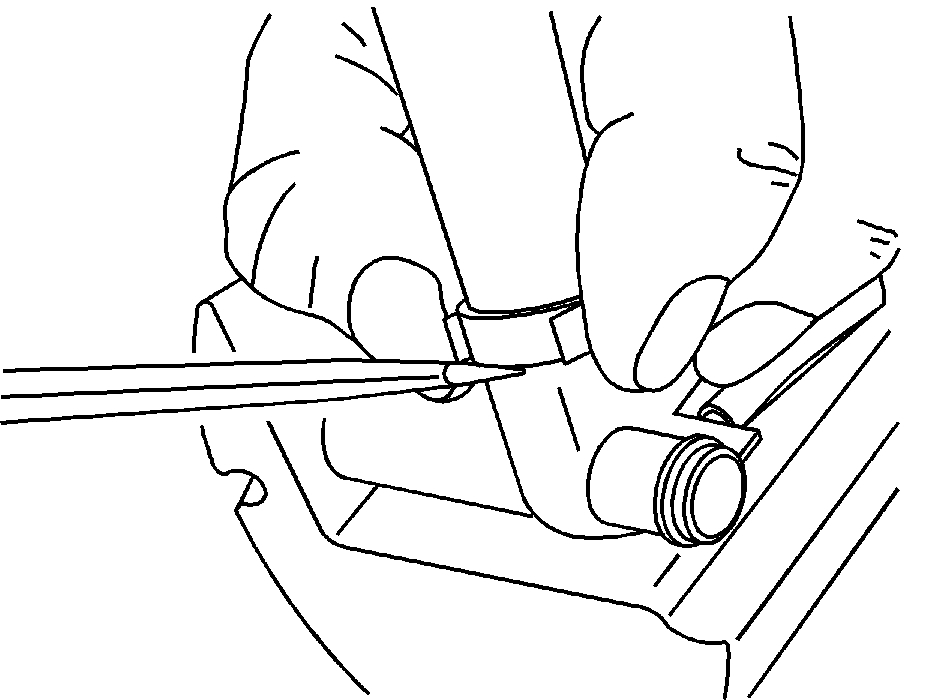
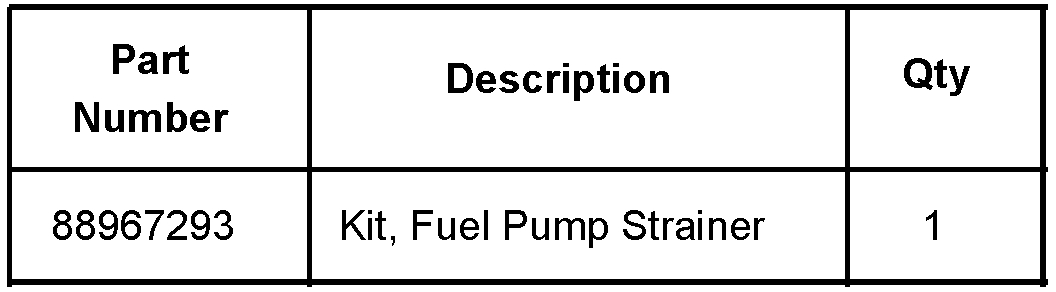
11. Install the new strainer from kit, P/N 88967293, as shown above until you hear a positive click sound.
12. Double check that the strainer is installed properly and there is no damage to the pot before reinstalling the fuel module.
Important:
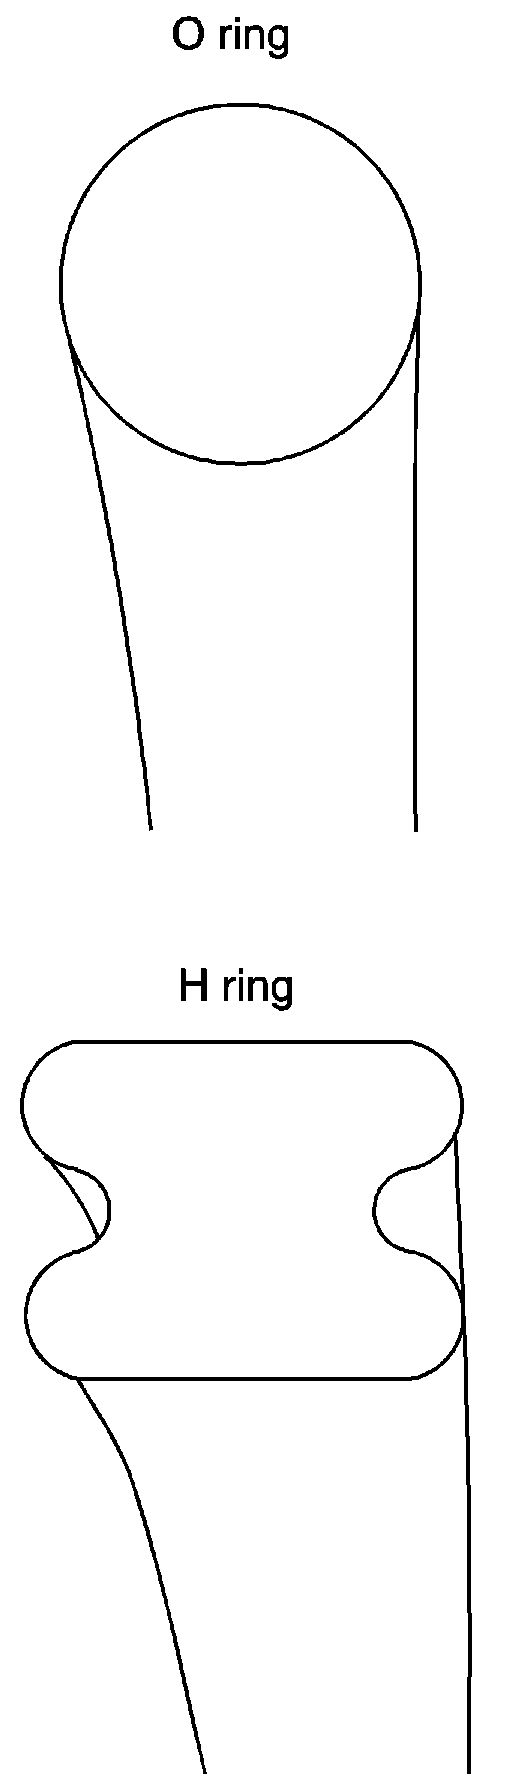
DO NOT reuse the old fuel pump module seal.
13. Remove the old fuel pump module seal from the fuel module.
Important:
The strainer kit, P/N 88967293, includes two new seals. It is critical that the same design seal be reinstalled that was removed.
14. Install the same design seal from kit, P/N 88967293, that was removed from the fuel pump module.
15. Reinstall the fuel pump module into the fuel tank. Refer to Fuel Pump Module Replacement in SI. Use the appropriate SI Document depending on model and year.
16. Retest the fuel pressure with fuel pressure gauge, J 34730-1A or equivalent, to ensure adequate fuel pressure after the strainer is installed.
Parts Information
Parts are currently available from GMSPO.
Warranty Information
For vehicles repaired under warranty, use the table.
_________________________________
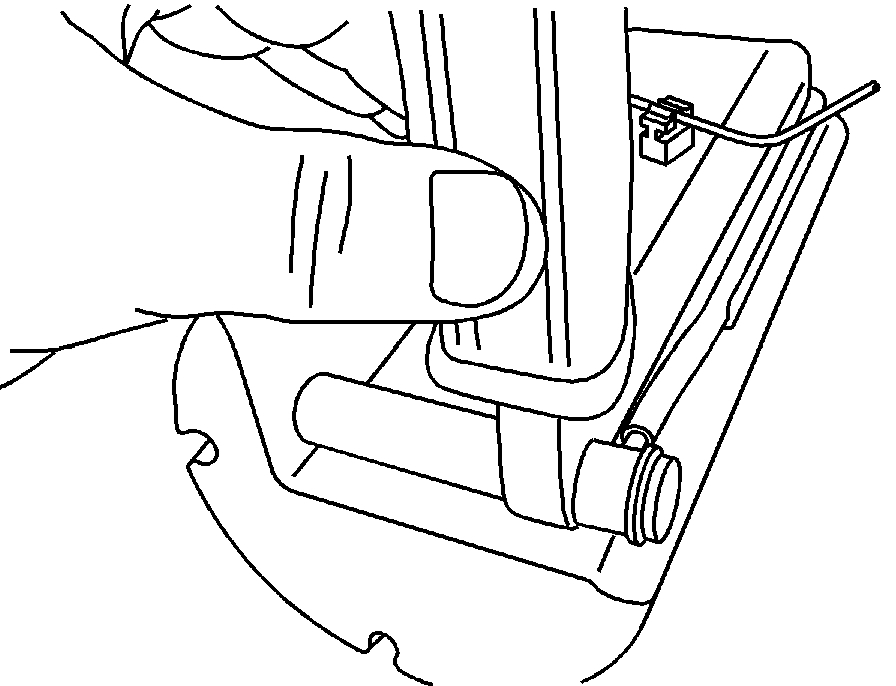
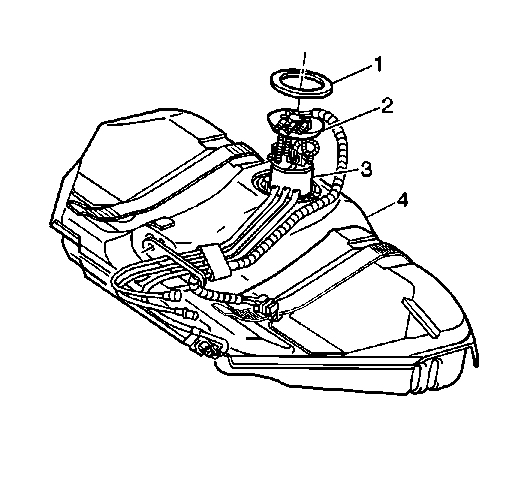
I mentioned the TSB because I wanted to be sure the pump was the issue and not a plugged strainer. The last picture is of the tank and fuel pump components being removed.
Let me know if this helps or if you have other questions.
Take care,
Joe
Images (Click to enlarge)
Oct 4, 2018 at 7:45 PM