Welcome to 2CarPros.
It sounds like the master cylinder is bad. There is a primary and a secondary plunger in it. One my be allowing the fluid to bypass. The primary (for the front brakes) must be bad.
Take a look through this link:
https://www.2carpros.com/articles/brake-pedal-goes-to-the-floor
I suspect this is the issue. Here is a link that shows in general how one is replaced:
https://www.2carpros.com/articles/how-to-replace-a-brake-master-cylinder
_______________________
Here are the directions for replacement specific to your vehicle. The attached pictures correlate with the directions.
2004 Lincoln Town Car V8-4.6L VIN W
REMOVAL AND INSTALLATION
Master Cylinder
Removal
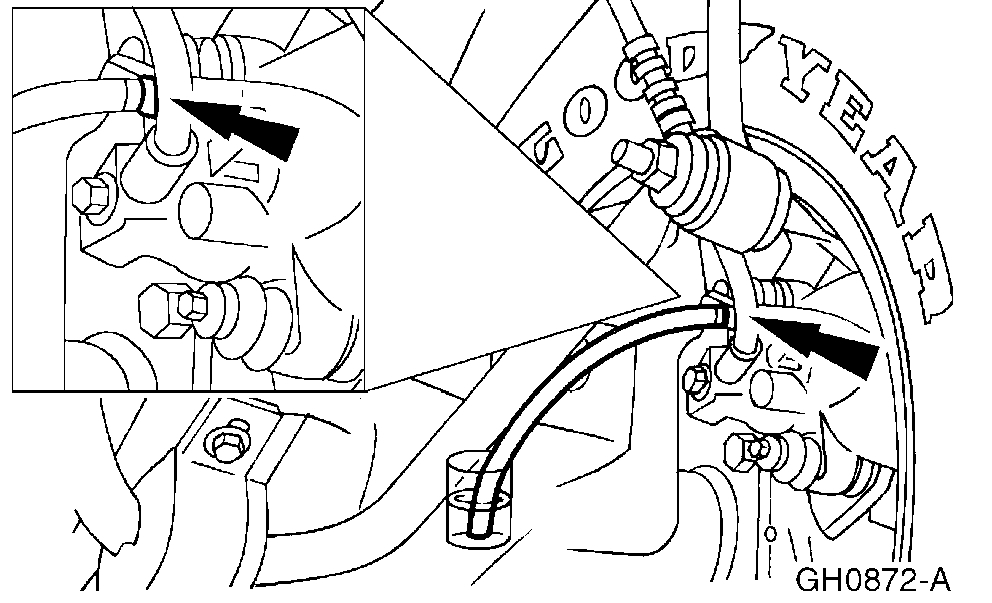
pic 1
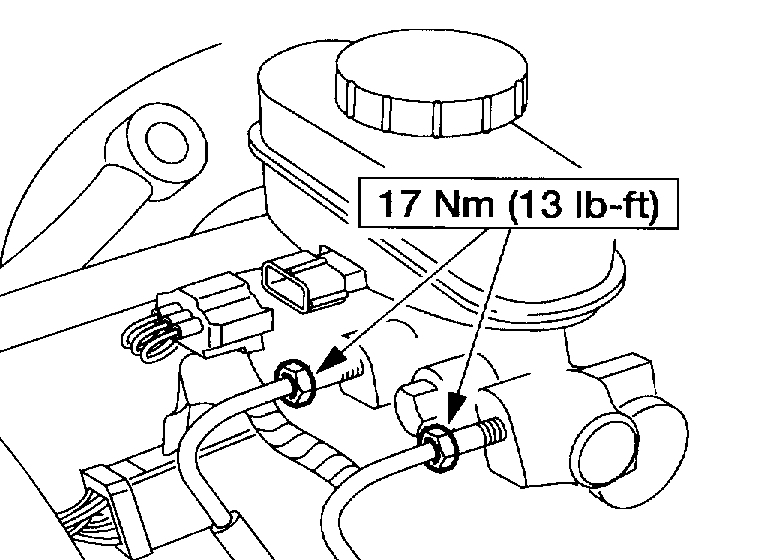
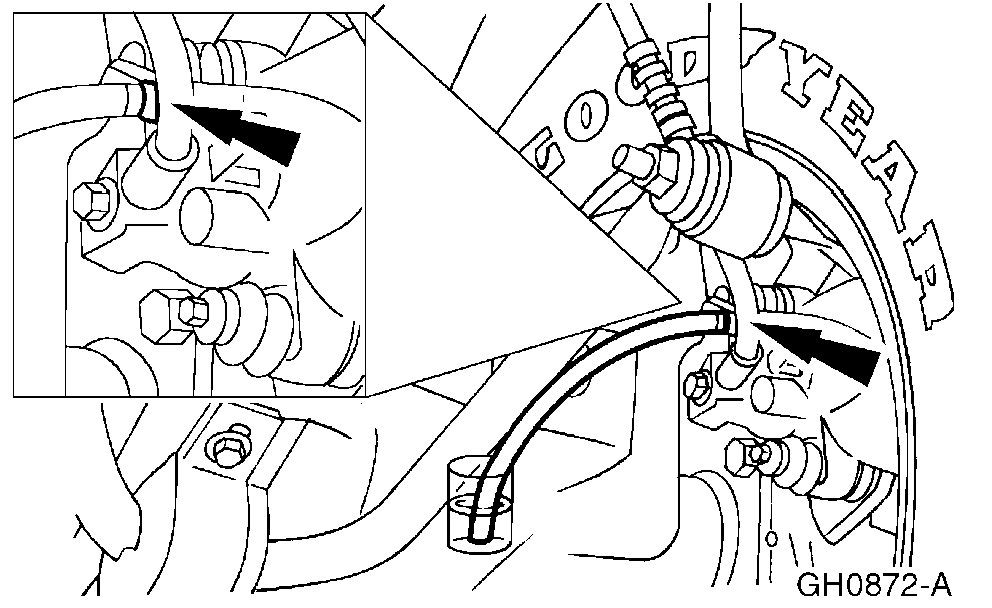
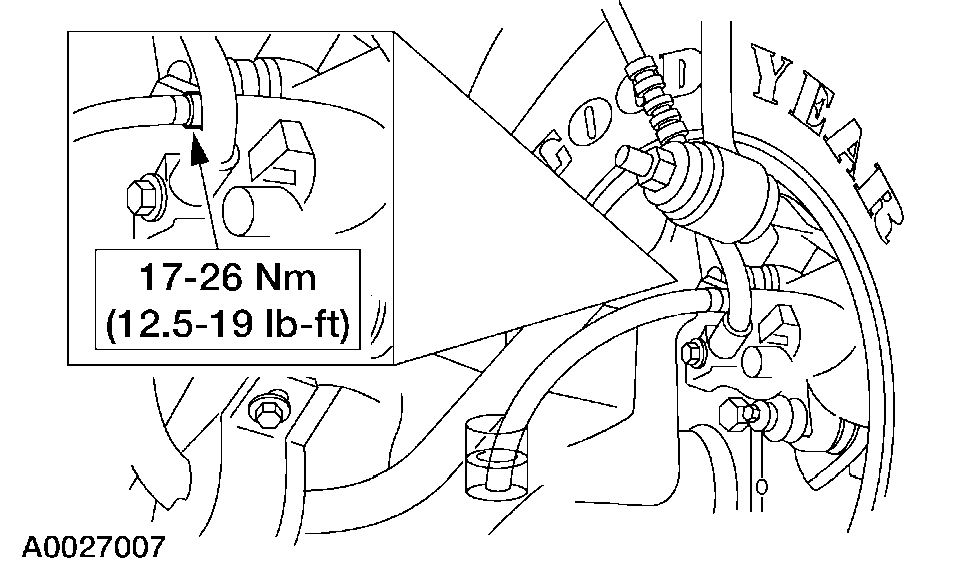
1. Disconnect the brake tubes.
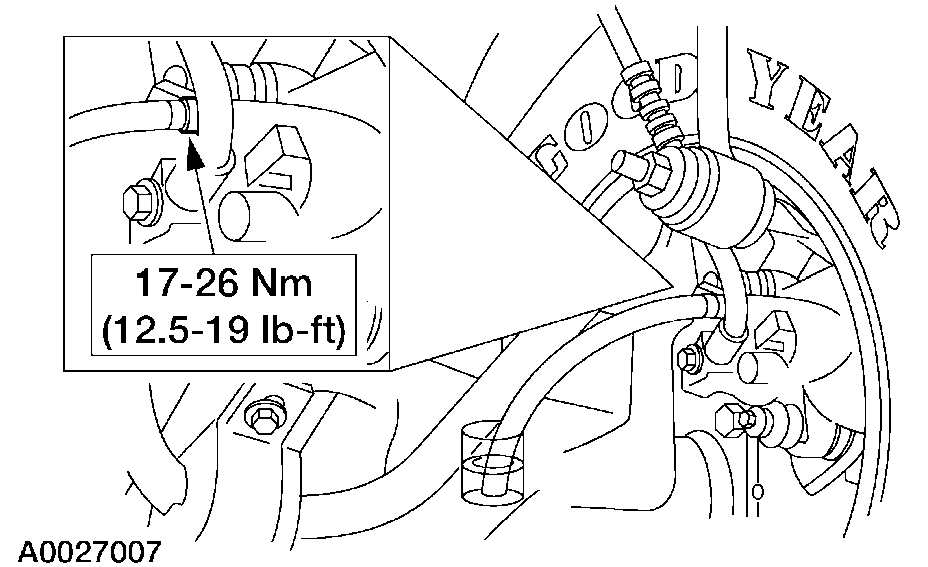
pic 2
2. Disconnect the brake master cylinder fluid level switch connector.
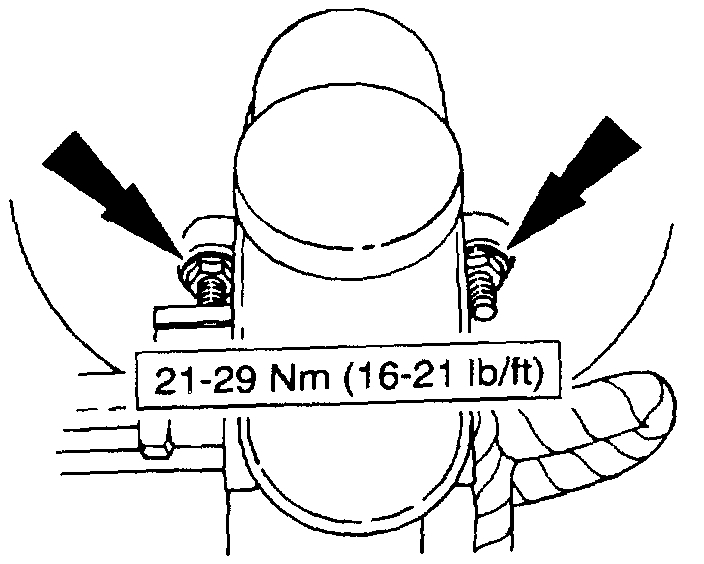
pic 3
3. Remove the brake master cylinder nuts.
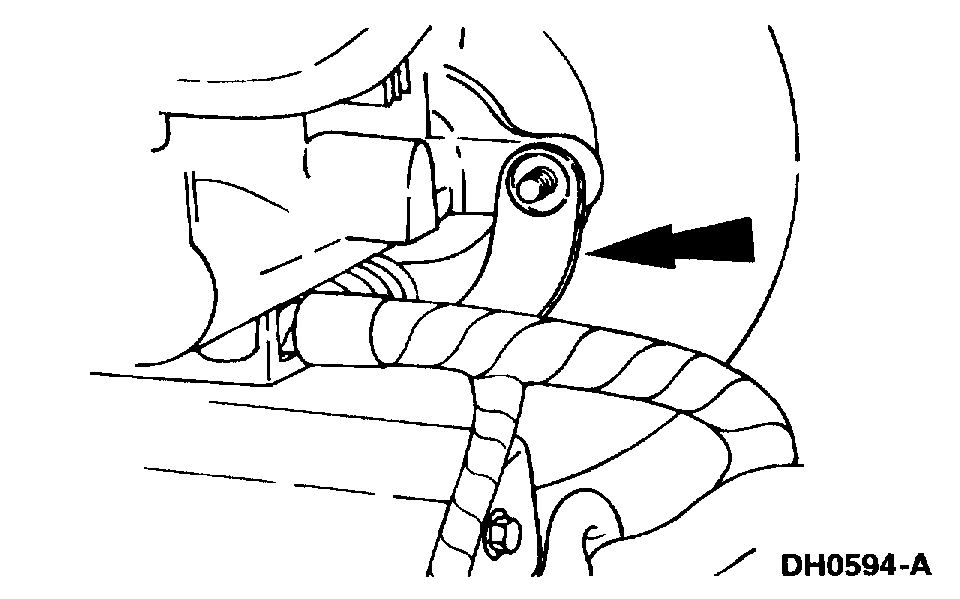
pic 4
4. Remove the wiring harness bracket and position aside.
5. Remove the brake master cylinder.
Installation
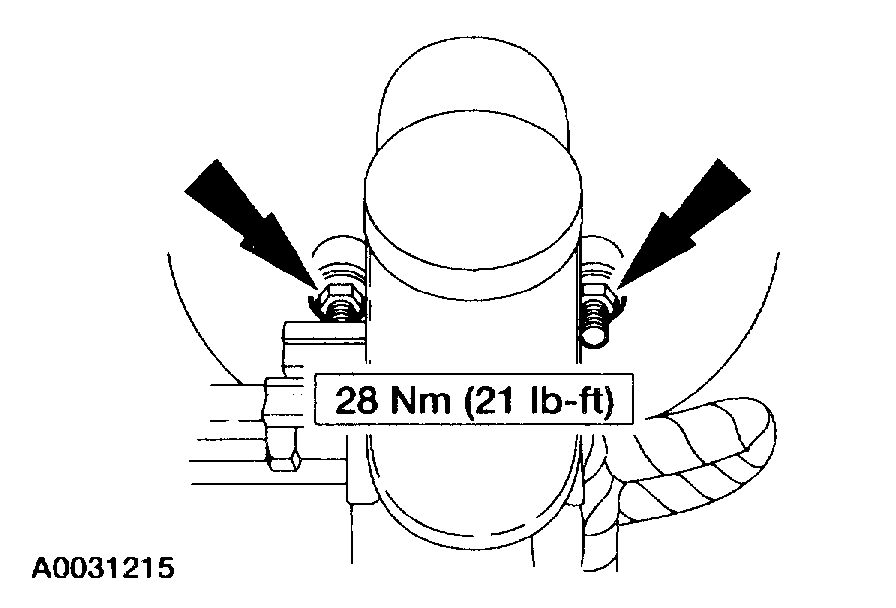
pic 5
pic 6
1. To install, reverse the removal procedure.
^ Bleed the brake system.
______________________________________
Here are the directions, both manual and pressure, for bleeding the system.
BLEEDING - SYSTEM
Brake System Bleeding
Manual
WARNING: Use of any brake fluid other than approved DOT 3 or DOT 4 will cause permanent damage to brake components and will render the brakes inoperative.
WARNING: Brake fluid contains polyglycol ethers and polyglycols. Avoid contact with eyes. Wash hands thoroughly after handling. If brake fluid contacts eyes, flush eyes with running water for 15 minutes. Get medical attention if irritation persists. If taken internally, drink water and induce vomiting. Get medical attention immediately.
CAUTION: Do not allow the brake master cylinder reservoir to run dry during the bleeding operation. Keep the brake master cylinder reservoir filled with the specified brake fluid. Never reuse the brake fluid that has been drained from the hydraulic system.
CAUTION: Brake fluid is harmful to painted and plastic surfaces. If brake fluid is spilled onto a painted or plastic surface, immediately wash it with water.
NOTE: Pressure bleeding the brake system at 345 kPa (50 psi) is preferred to manual bleeding.
NOTE: When any part of the hydraulic system has been disconnected for repair or installation of new components, air can get into the system and cause spongy brake pedal action. This requires bleeding of the hydraulic system after it has been correctly connected.
NOTE: If the hydraulic control unit (HCU) or any component upstream of the HCU are installed new, carry out the brake system bleed procedure first without the scan tool, followed by the brake system bleed procedure using the scan tool. This reduces the risk of trapping air in the HCU.
1. Connect the scan tool DCL cable adapter into the vehicle data link connector (DLC) under the dash and follow the scan tool instructions.
pic 7
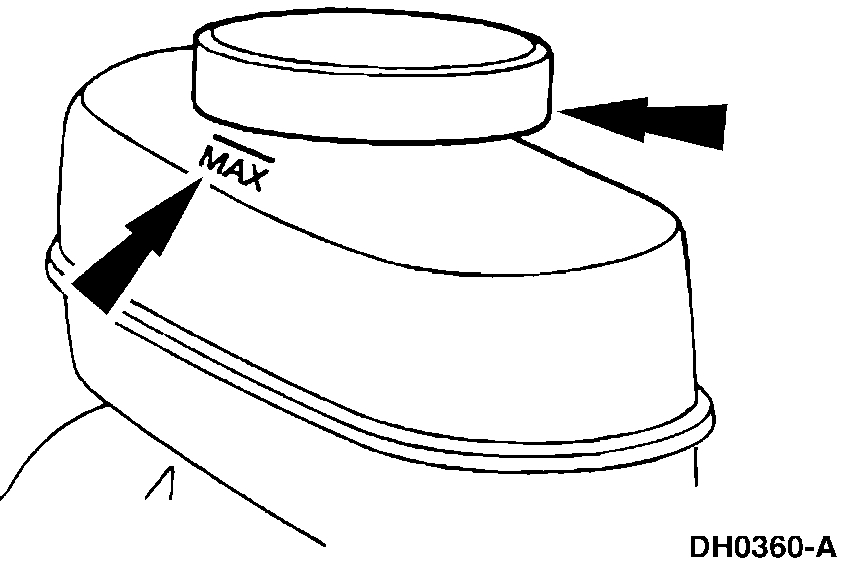
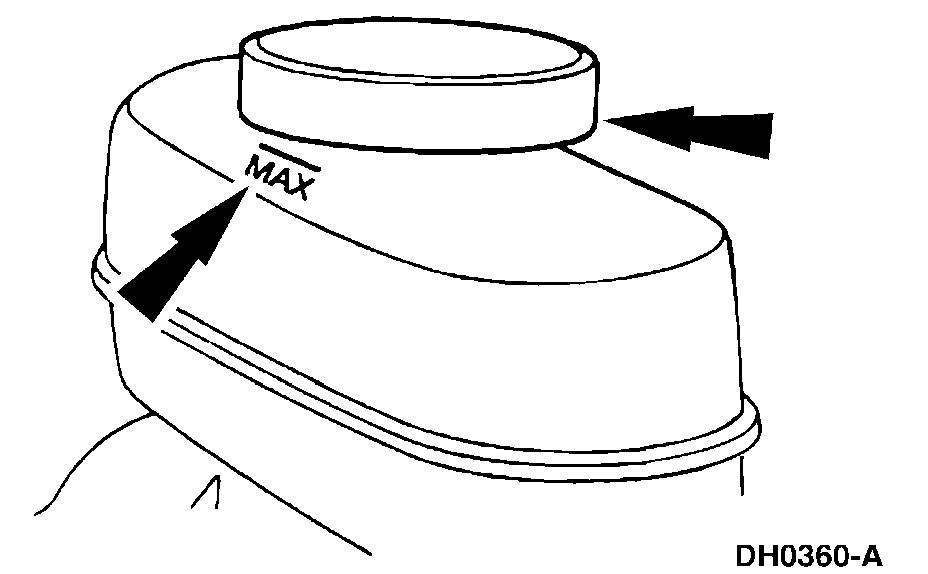
2. Clean all dirt from and remove the brake master cylinder filler cap and fill the brake master cylinder reservoir with the specified brake fluid.
3. NOTE: For ABS vehicles only, open the master cylinder bleed screw until clear, bubble-free fluid flows from the tube into the cup.
NOTE: Bleed the brake system in the order displayed on the scan tool or bleed from the longest to the shortest brake line.
pic 8
Place a box end wrench on the bleeder screw. Attach a rubber drain tube to the bleeder screw and submerge the free end of the tube in a container partially filled with clean brake fluid.
4. Have an assistant hold firm pressure on the brake pedal.
5. Loosen the bleeder screw until a stream of brake fluid comes out. While the assistant maintains pressure on the brake pedal, tighten the bleeder screw.
^ Repeat 3 times until clear, bubble-free fluid comes out.
^ Refill the brake master cylinder reservoir as necessary.
pic 9
6. Tighten the bleeder screw.
7. Repeat Steps 3, 4, 5 and 6 for the remaining bleeder screws in the system.
Pressure Bleeding
NOTE: Pressure bleed the brake system at 345 kPa (50 psi).
pic 10
1. Clean all dirt from and remove the brake master cylinder filler cap and fill the brake master cylinder reservoir with the specified brake fluid.
2. NOTE: Master cylinder pressure bleeder adapter tools are available from various manufacturers of pressure bleeding equipment. Follow the instructions of the manufacturer when installing the adapter.
Install the bleeder adapter to the brake master cylinder reservoir, and attach the bleeder tank hose to the fitting on the adapter.
^ Refill the brake master cylinder reservoir, as necessary.
3. NOTE: Bleed from the longest to the shortest brake line. Make sure the bleeder tank contains enough specified brake fluid to complete the bleeding operation.
pic 11
Place a box end wrench on the bleeder screw. Attach a rubber drain tube to the bleeder screw, and submerge the free end of the tube in a container partially filled with clean brake fluid.
4. Open the valve on the bleeder tank.
pic 12
5. Loosen the bleeder screw. Leave open until clear, bubble-free brake fluid flows. Have an assistant pump the brake pedal once every 2 seconds after the scan tool runs the HCU pump. Wait 15 seconds after clear, bubble-free fluid flows through the rubber hose. Then, tighten the bleeder screw and remove the rubber hose.
6. Continue bleeding the rear of the system repeating Step 4 and 5.
7. Close the bleeder tank valve. Remove the tank hose from the adapter, and remove the adapter.
8. Install a new reservoir cap.
++++++++++++++++++++++++++++++++++++++++++++++++++++++
Let me know if this helps or if you have other questions.
Take care,
Joe
Images (Click to enlarge)
Aug 11, 2019 at 6:35 PM