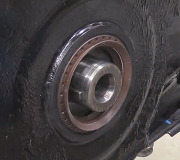
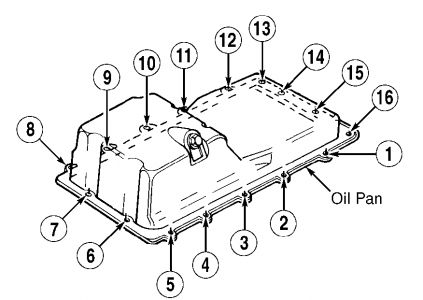
OIL PAN Removal 1. Release fuel system pressure. Disconnect fuel lines. See FUEL PRESSURE RELEASE . Remove wiper motor from firewall. 2. Drain cooling system. Remove cooling fan and shroud. Remove air intake tubing and upper radiator hose. Discharge A/C system using approved refrigerant recovery/recycling equipment. 3. Disconnect outlet refrigerant line at compressor using Spring Lock Coupling Remover (T81P- 19623-G1 or G2). Plug line openings. Remove refrigerant line-to-right coil bracket bolt. 4. Disconnect 42-pin connector and transmission harness. Remove connector from retaining bracket on vacuum booster. See Fig. 4 . Disconnect throttle valve cable from throttle body. 5. Disconnect heater outlet hose. Remove ground strap from right cylinder head. Remove upper stud, and loosen lower bolt on heater outlet hose on right cylinder head. Position hose assembly aside. 6. Remove blower motor resistor from housing on firewall. Remove right engine mount-to-lower engine bracket. Disconnect vacuum hoses from EGR valve. Remove EGR valve-to-intake manifold bolts. 7. Raise and support vehicle. Drain engine oil. Disconnect exhaust pipes from exhaust manifolds. Support exhaust pipes from crossmember using wire. 8. Disconnect EGR valve tube from right exhaust manifold. Remove EGR valve assembly. Remove engine mount through bolts. Two through bolts are on left mount and one bolt is on right mount. 9. Position floor jack under oil pan, and raise engine approximately 4". Support engine with 2 1/2" wooden block between mounts, and remove floor jack. Remove retaining bolts and oil pan. Installation 1. To install, reverse removal procedure. Apply silicone sealant on front cover and seal retainer-to- cylinder block areas before installing the oil pan gasket and oil pan. Tighten all retaining bolts to specification and in proper sequence. See Fig. 21 . See TORQUE SPECIFICATIONS . 2. When installing fuel lines, fit new fuel resistant "O" rings (Brown) on fuel lines. Lightly coat "O" rings with clean engine oil before installing. Clean fittings, and replace garter spring (if necessary). 3. Adjust all control cables and fluid levels. Refill cooling system. Evacuate and recharge A/C system. Fig. 21: Oil Pan Bolt Tightening Sequence Courtesy of FORD MOTOR CO. NOTE: If necessary, loosen transmission mount nuts and raise transmission slightly for oil pan removal. DO NOT remove mount nuts. Page 1 of 1 4.6L V8 - VIN [W] -1994 Mercury Cougar XR7 2/27/2009
Friday, February 27th, 2009 AT 1:41 PM