Hi,
If I recall, there is only one bulb on each side of the vehicle. Each bulb has two elements in it. I suspect the low beam element has gone bad. The first thing you should do is simply remove the bulb and you can check if for continuity to see if the element is bad.
_____________________________
Here are the directions for bulb replacement. The attached pics correlate with the directions.
____________________________
2002 Chevrolet Cavalier L4-2.2L VIN 4
Procedures
Vehicle Lighting and Horns Headlamp Headlamp Bulb Service and Repair Procedures
PROCEDURES
HEADLAMP ASSEMBLY OR HEADLAMP BULB REPLACEMENT
REMOVAL PROCEDURE
CAUTION: Refer to Halogen Bulb Caution in Service Precautions.
pic 1
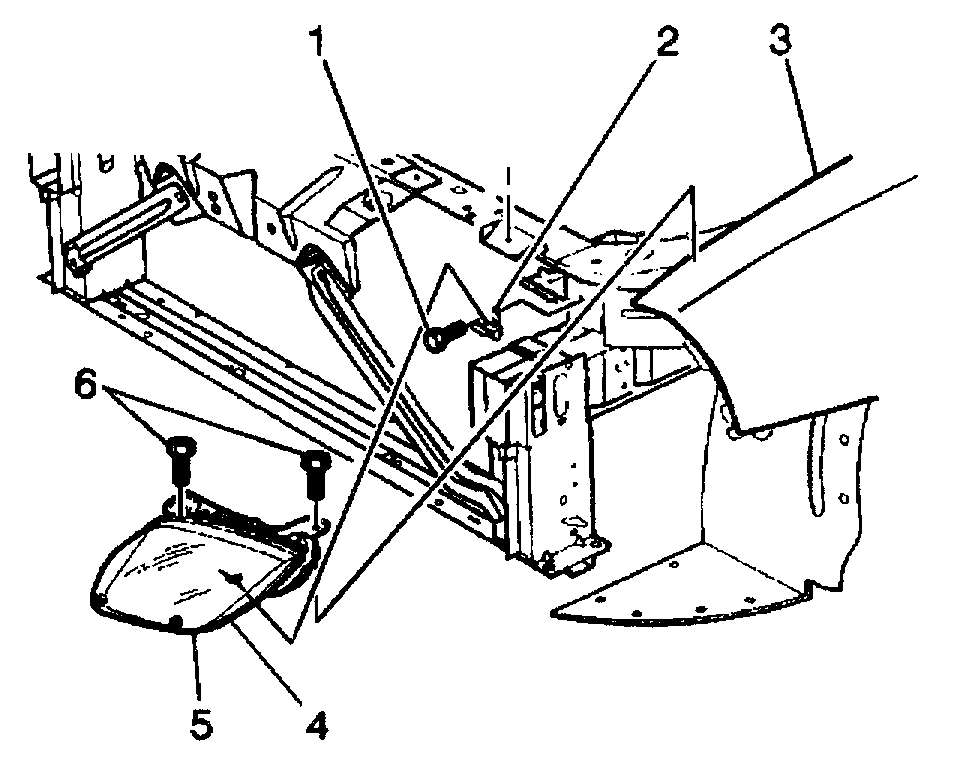
1. Remove the hood close out filler panel.
2. Remove the bolts (6) from the headlamp.
3. Remove the headlamp from the headlamp mounting panel.
4. Disconnect the electrical connector from the headlamp.
pic 2
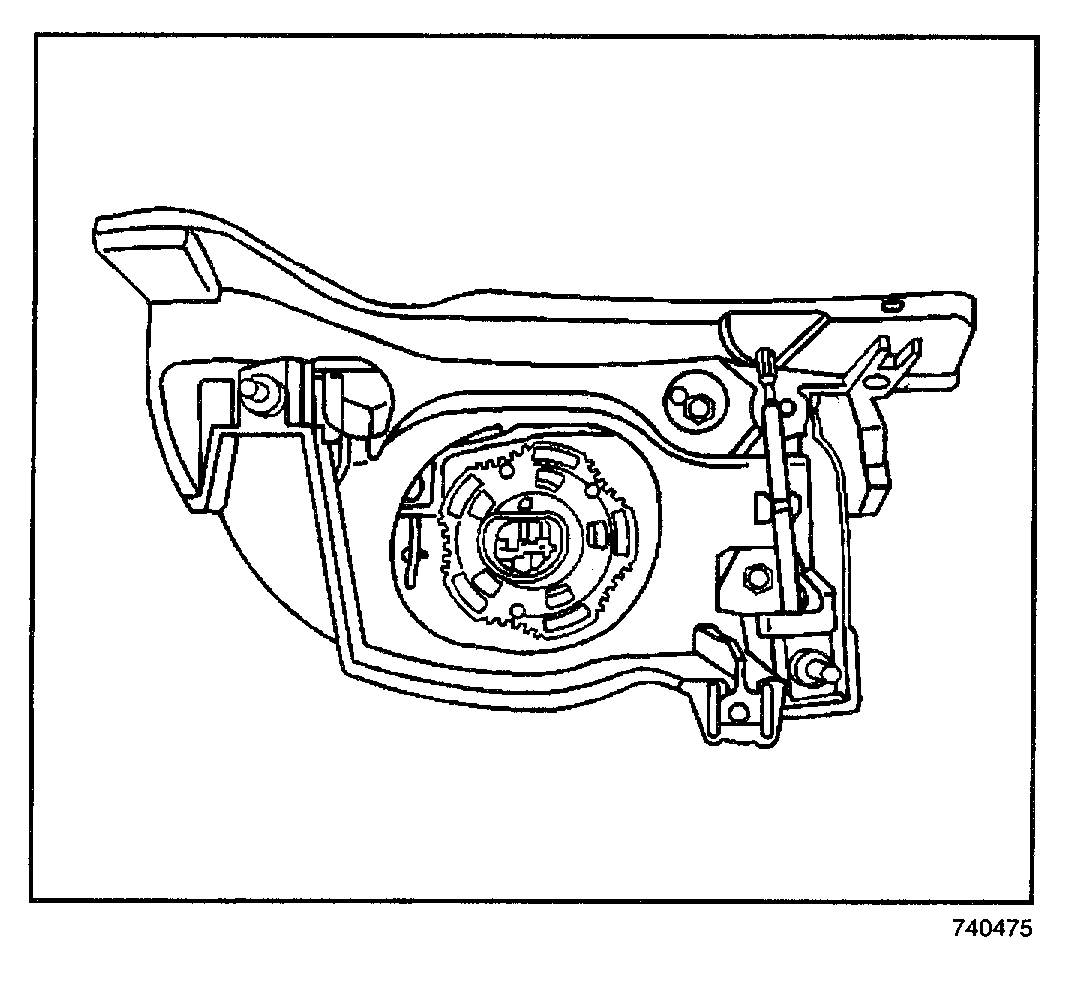
5. Remove the headlamp bulb/socket retainer ring from the headlamp.
pic 3
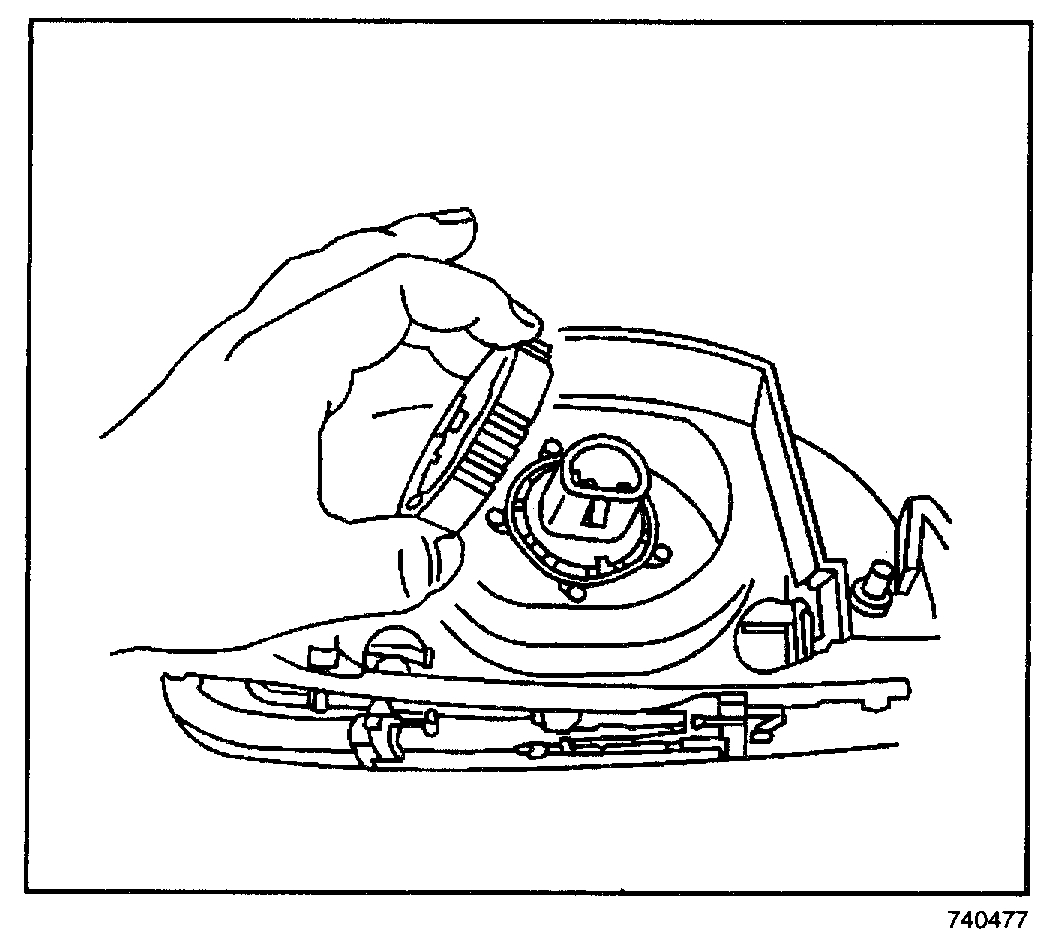
6. Remove the headlamp bulb/socket from the headlamp.
pic 4
7. Remove the bolts from the headlamp adjuster mechanism, if required.
8. Remove the headlamp adjuster mechanism, if required.
INSTALLATION PROCEDURE
pic 5
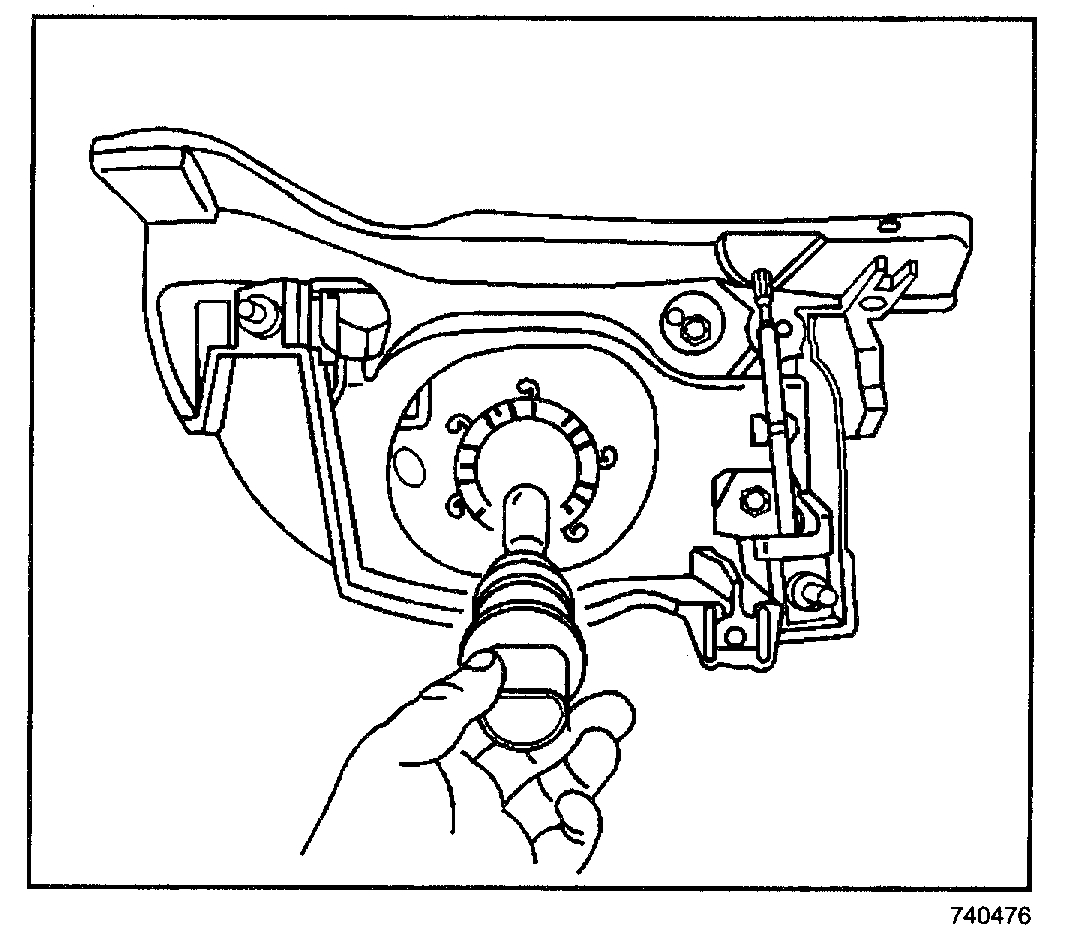
1. Install the headlamp bulb/socket to the headlamp.
pic 6
2. Install the headlamp bulb/socket retainer ring to the headlamp.
pic 7
3. Install the headlamp adjuster mechanism to the headlamp housing, if necessary.
NOTE: Refer to Fastener Notice in Service Precautions.
4. Install the bolts to the headlamp adjuster mechanism, if required.
Tighten
Tighten the headlamp adjuster mechanism bolts to 6 N.m (53 lb in).
5. Connect the electrical connector to the headlamp.
6. Position the headlamp to the headlamp mounting panel and lower mounting bracket.
7. Install the bolts (6) from the headlamp.
Tighten
Tighten the headlamp bolts (6) to 10 N.m (89 lb in).
8. Install the hood close out filler panel.
9. Check and adjust the headlamp aim as necessary. Refer to Headlamp Aiming.
Let me know if this helps.
Take care,
Joe
Images (Click to enlarge)
Jan 6, 2020 at 9:19 PM