Hi and thanks for using 2CarPros.com
If you tried a different key and it still will not turn, it sounds like the tumbler is bad which requires replacement of the ignition lock cylinder. Here are the directions for replacement. Please note, since you have to remove the steering wheel, make sure the battery is disconnected at least thirty minutes prior to starting work.
Here are the directions. The attached pictures correlate with these directions.
First, here are the directions to disable the airbag system:
DISABLING THE SIR SYSTEM
1. Turn the steering wheel so that the vehicle's wheels are pointing straight ahead.
2. Turn the ignition switch to the OFF position.
3. Remove the key from the ignition switch.
IMPORTANT: With the SIR fuse removed and the ignition switch in the ON position, the AIR BAG warning lamp illuminates. This is normal operation, and does not indicate an SIR system malfunction.
4. Remove the rear seat.
5. Remove the SIR fuse from the rear fuse block.
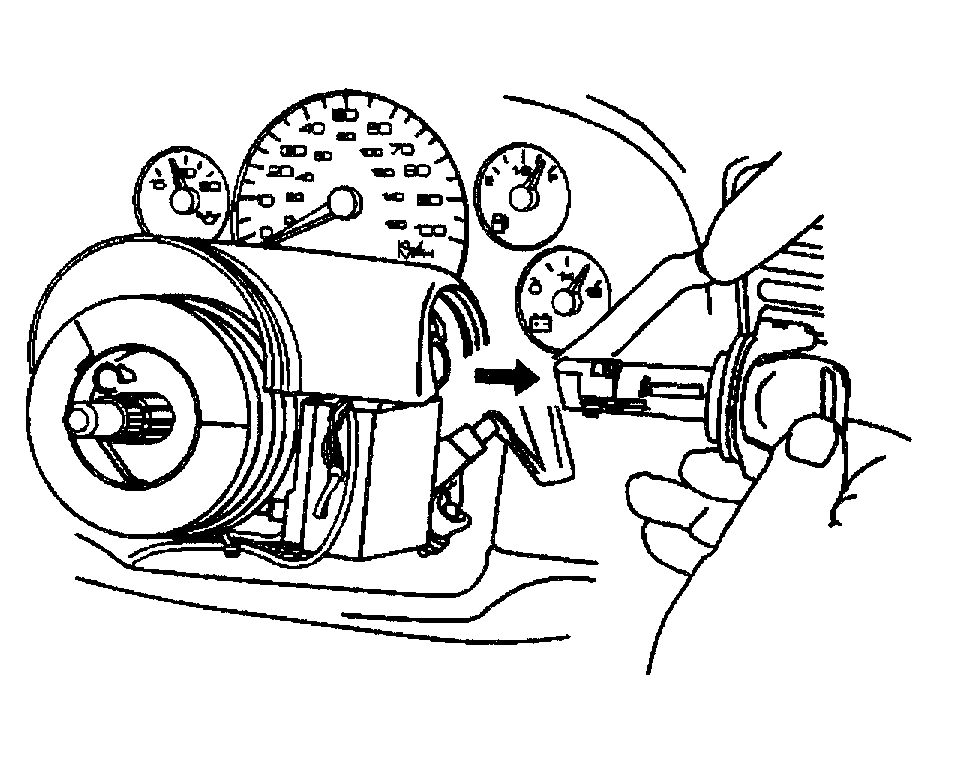
6. Remove the driver sound insulator.
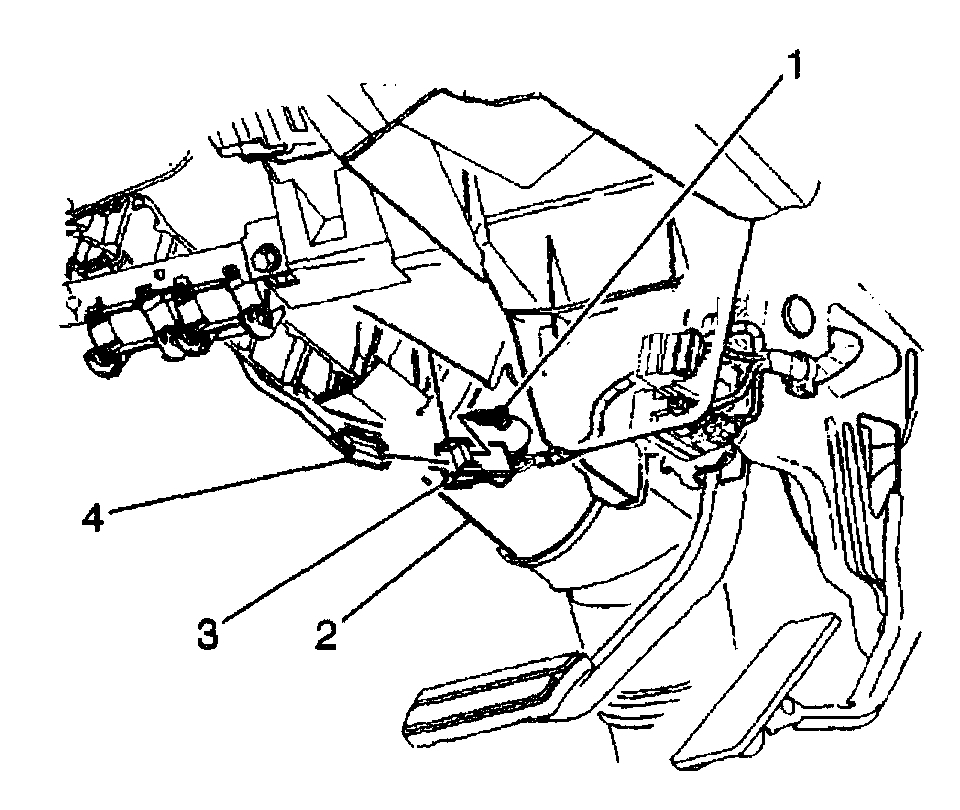
7. Remove the Connector Position Assurance (CPA) (1) from the driver yellow connector (3) located next to steering column (2).
8. Disconnect the driver frontal air bag yellow connector (4) from the vehicle harness yellow connector (3).
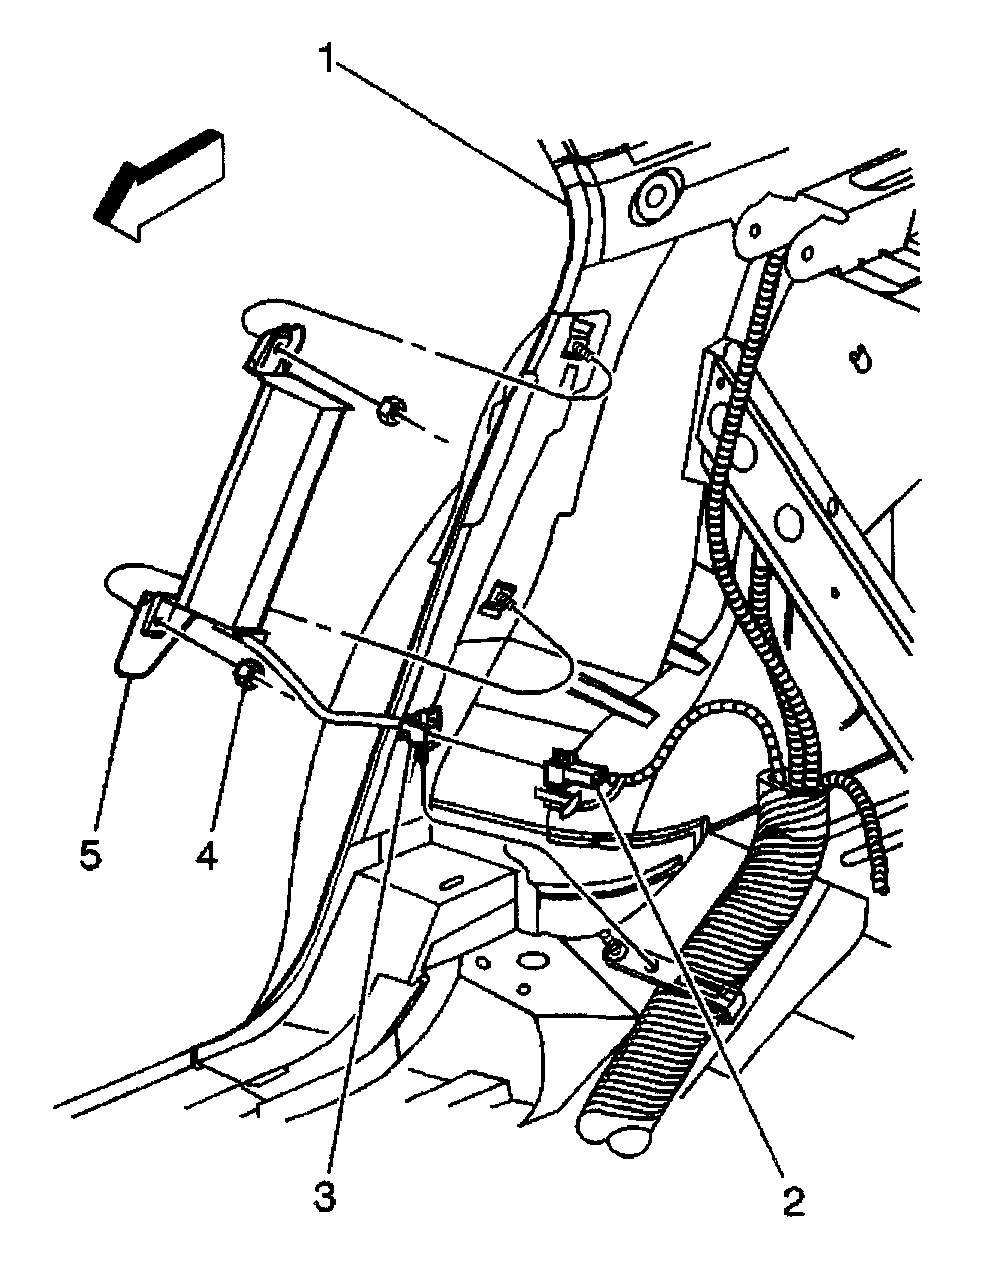
9. Remove the passenger sound insulator.
10. Remove the Connector Position Assurance (CPA) (4) from the passenger yellow connector (1) located above the passenger sound insulator.
11. Disconnect the passenger (IP) frontal air bag yellow connector (2) from the vehicle harness yellow connector (1).
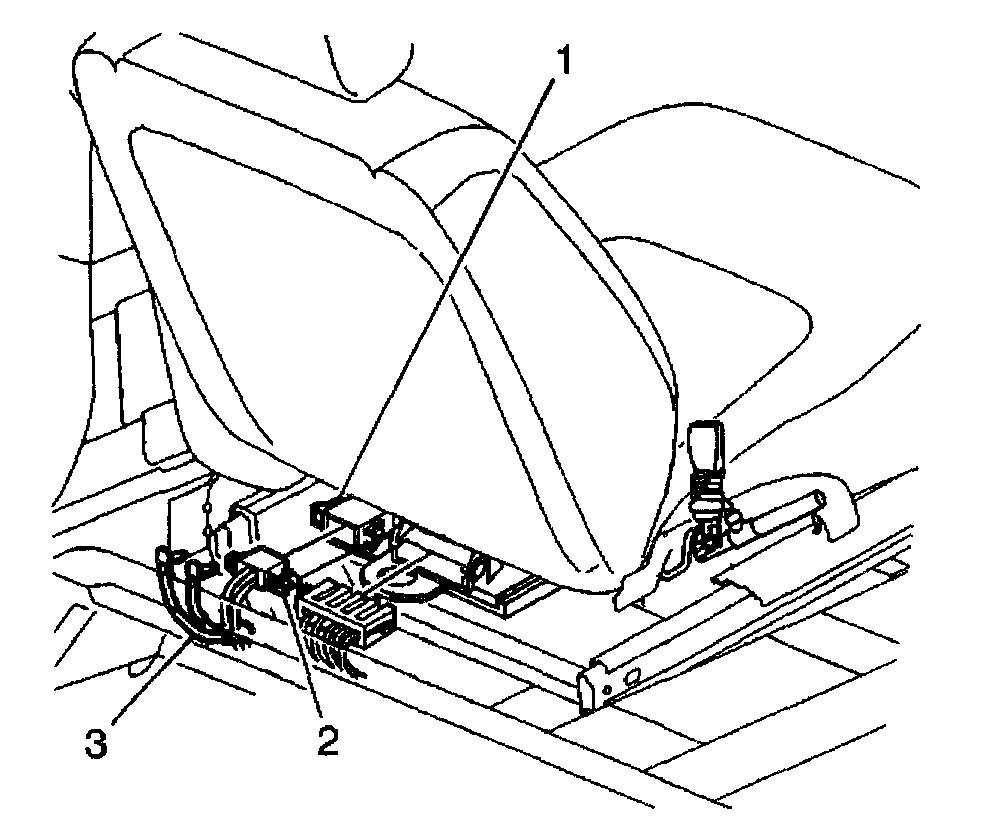
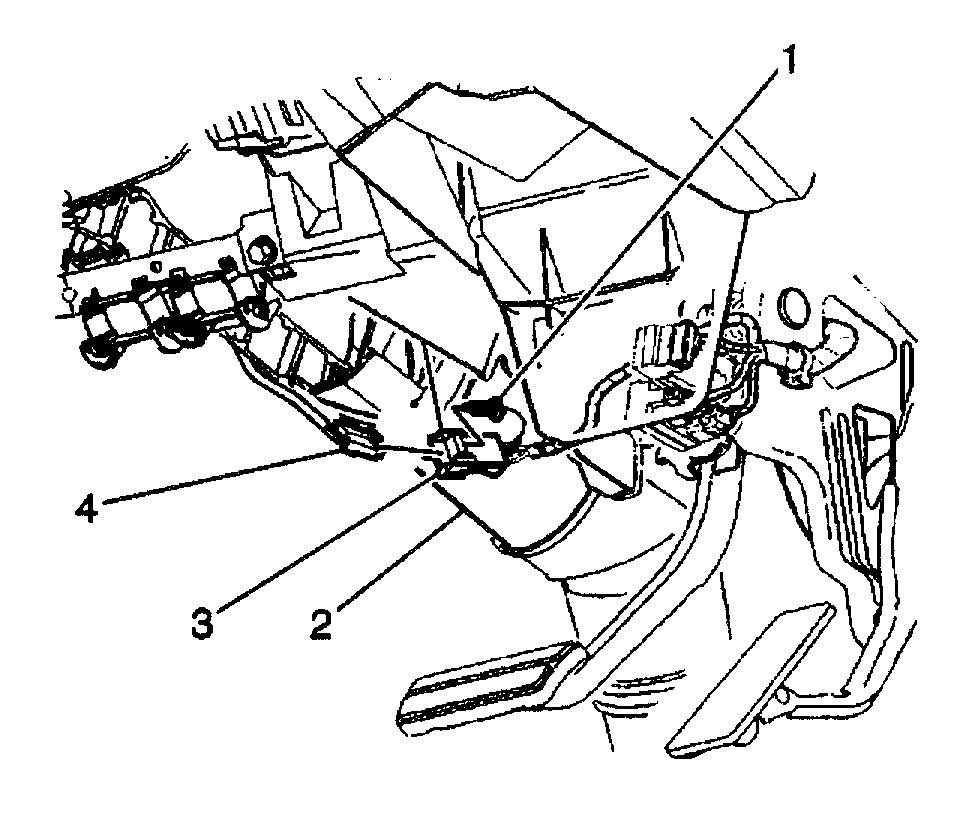
12. Remove both Connector Position Assurance (CPA) locks (3) from the driver side (seat) air bag and pretensioner yellow connector (1) located under the driver seat.
13. Disconnect the driver side air bag and pretensioner yellow connector (2) from the vehicle harness yellow connector (1).
14. Remove both Connector Position Assurance (CPA) locks (3) from the passenger side (seat) air bag and pretensioner yellow connector (1) located under the passenger seat.
15. Disconnect the passenger side air bag and pretensioner yellow connector (2) from the vehicle harness yellow connector (1).
IMPORTANT: The above procedures will disable the SIR system. It vehicle is equipped with optional Rear Air Bags (AW9) the following steps must be done, to completely disable the SIR system.
16. Remove the rear seat back.
17. Remove the Connector Position Assurance (CPA) from the passenger rear side air bag yellow connector (3).
18. Disconnect the passenger rear side air bag yellow connector (3) from the vehicle harness yellow connector (2).
19. Remove the Connector Position Assurance (CPA) from the driver rear side air bag yellow connector (3).
20. Disconnect the driver rear side air bag yellow connector (3) from the vehicle harness yellow connector (2).
Make sure to follow the enabling directions after the part is replaced. These directions follow the part replacement directions.
_______________________
Cylinder replacement
IGNITION LOCK CYLINDER
Ignition Lock Cylinder Replacement - On Vehicle
Removal Procedure
1. Disable the SIR system. See: Air Bag(s) Arming and Disarming > Procedures
2. Position the steering wheel half way between the upper and lower tilt stops (if necessary).
3. Remove the steering wheel. Refer to Steering Wheel Replacement.
4. Roll back the shift lever seal from the upper and the lower shrouds.
5. Remove the tilt wheel lever (if necessary).
6. Remove the 2 TORX screws from the lower steering column shroud.
7. Remove the lower steering column shroud.
8. Remove the one TORX screw from the upper steering column shroud.
9. Lift the upper steering column shroud to gain access to the lock cylinder access hole.
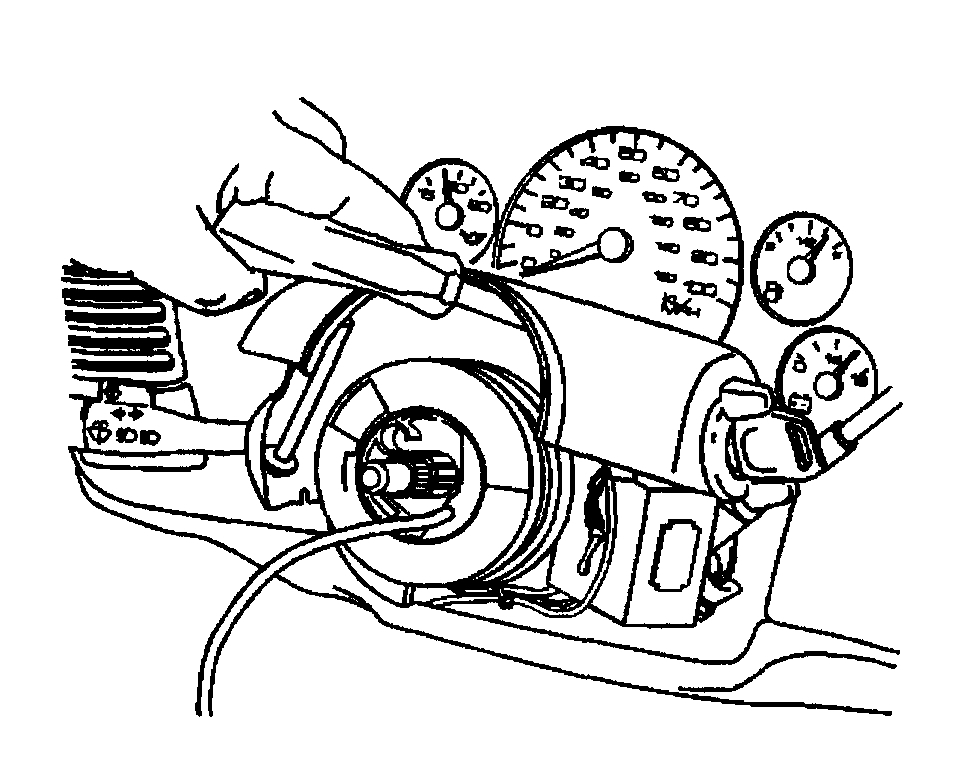
10. Turn the ignition lock cylinder to the START position.
Using the bent tip awl, push down on the ignition lock cylinder retaining pin.
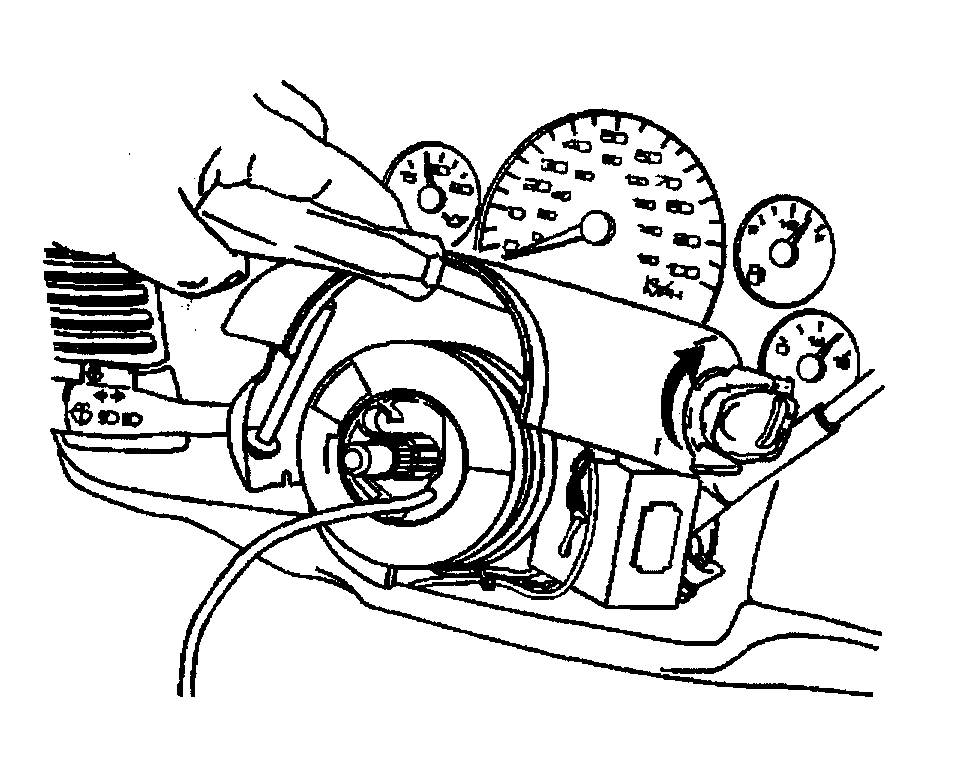
11. Release the ignition lock cylinder to the RUN position.
12. Remove the ignition lock cylinder from the lock module assembly by pulling the ignition lock cylinder away from the steering column.
Installation Procedure
1. Insert the ignition lock cylinder through the upper shroud.
2. Install the ignition lock cylinder to the lock module assembly by doing the following:
2.1. Align the positioning slot and locking tab slot on the lock module assembly to the positioning tab and locking tab on the ignition lock cylinder.
2.2. Push the ignition lock cylinder into the lock module assembly until the locking tab locks against the locking tab.
3. Install the one TORX screw to the upper shroud.
Tighten the TORX screws to 2 Nm (18 inch lbs.).
4. Install the lower shroud.
5. Install the shift lever seal to the upper and the lower shrouds.
6. Install the steering wheel. Refer to Steering Wheel Replacement
7. Enable the SIR system.
______________________________________
ENABLING THE SIR SYSTEM
IMPORTANT: If vehicle is equipped with optional Rear Air Bags (AW9) the following steps must be done, to completely enable the SIR system.
1. Remove the key from the ignition switch.
2. Connect the passenger rear side air bag yellow connector (3) to the vehicle harness yellow connector (2).
3. Install the Connector Position Assurance (CPA) to the passenger rear side air bag yellow connector (3).
4. Connect the driver rear side air bag yellow connector (3) to the vehicle harness yellow connector (2).
5. Install the Connector Position Assurance (CPA) to the driver rear side air bag yellow connector (3).
6. Install the rear seat back.
7. Connect the driver side (seat) air bag and pretensioner yellow connector (2) to the vehicle harness yellow connector (1).
8. Install both Connector Position Assurance (CPA) locks (3) to the driver side (seat) air bag and pretensioner yellow connector (1) located under the driver seat.
9. Connect the passenger side (seat) air bag and pretensioner yellow connector (2) to the vehicle harness yellow connector (1).
10. Install both Connector Position Assurance (CPA) locks (3) to the passenger side (seat) air bag and pretensioner yellow connector (1) located under the passenger seat.
11. Connect the passenger (IP) frontal air bag yellow connector (2) to the vehicle harness yellow connector (1) located above the passenger sound insulator.
12. Install the Connector Position Assurance (CPA) (4) to the passenger yellow connector (1).
13. Install the passenger sound insulator.
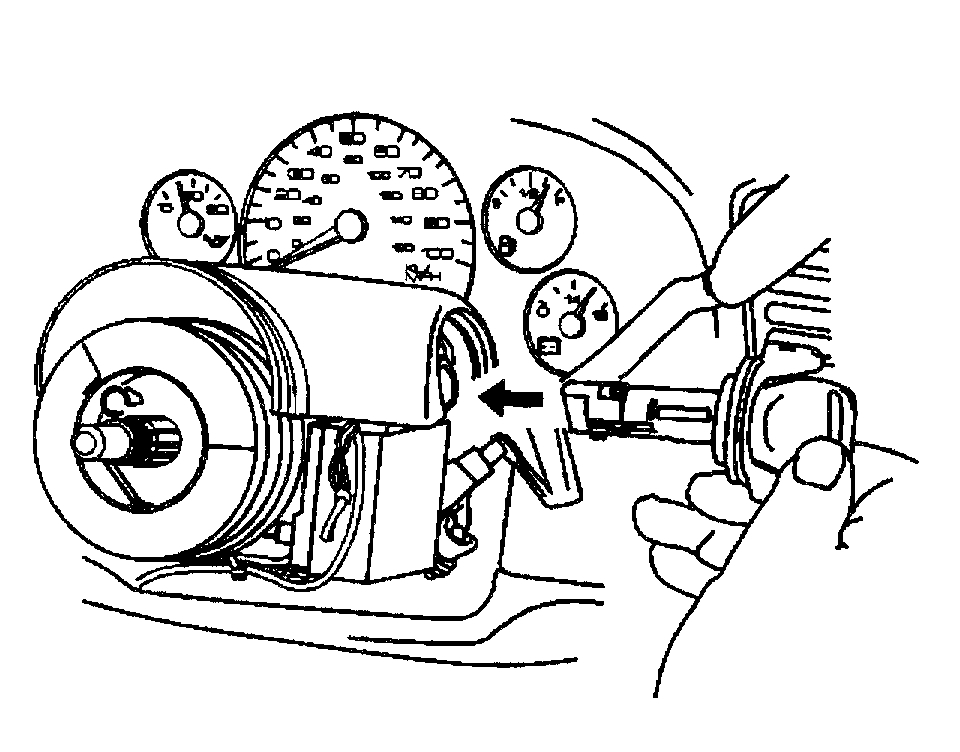
14. Connect the driver frontal air bag yellow connector (4) to the vehicle harness yellow connector (3) located next to steering column (2).
15. Install the Connector Position Assurance (CPA) (1) to the driver yellow connector (3)
16. Install the driver sound insulator.
17. Rear fuse block is located under the rear seat.
18. Install the SIR fuse to the rear fuse block.
19. Install the rear seat.
20. Staying well away from all air bags, turn the ignition switch to the ON position.
20.1.The AIR BAG warning lamp will flash 7 times.
20.2.The AIR BAG warning lamp will then turn OFF.
21. Perform the SIR Diagnostic System Check if the AIR BAG warning lamp does not operate as described. Refer to A Diagnostic System Check - SIR. See: Air Bag Systems > Initial Inspection and Diagnostic Overview > Diagnostic System Check
________________________________-
I hope this is helpful. Let me know if you have other questions.
Take care,
Joe
Images (Click to enlarge)
Nov 7, 2018 at 4:47 PM