Hi,
That is a really good question. I can tell you the original part number for the one you have is 31000AB960. When I go back a year it shows the same part number. When I go forward a year, it is different. So, anything newer than a 1994 won't work. I can tell you that 1992 and 1993 appear to be the same unit with the same part numbers.
I hope this helps. Also, since you will be removing and replacing it, here are the directions for doing it. The attached pictures correlate with the directions.
_______________________________
Removal
1994 Subaru Legacy Sedan 4WD F4-2.2L SOHC
AWD
Vehicle Transmission and Drivetrain Automatic Transmission/Transaxle Service and Repair Procedures Removal AWD
AWD
1. Open front hood and support with a stay.
2. Disconnect battery cables from battery.
3. Remove air intake duct.
Pic 1
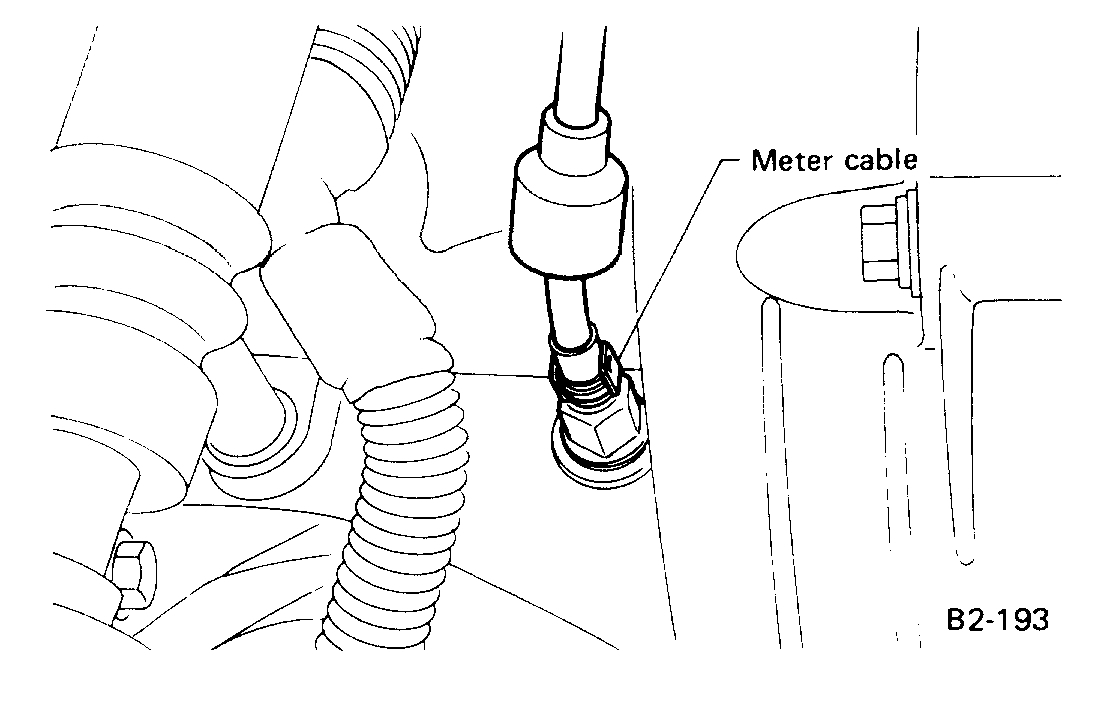
4. Remove meter cable and clip.
5. Disconnect the following:
- Oxygen Sensor connector
- Crank Angle Sensor connector
- Cam Angle Sensor connector
- Knock Sensor connector
pic 2
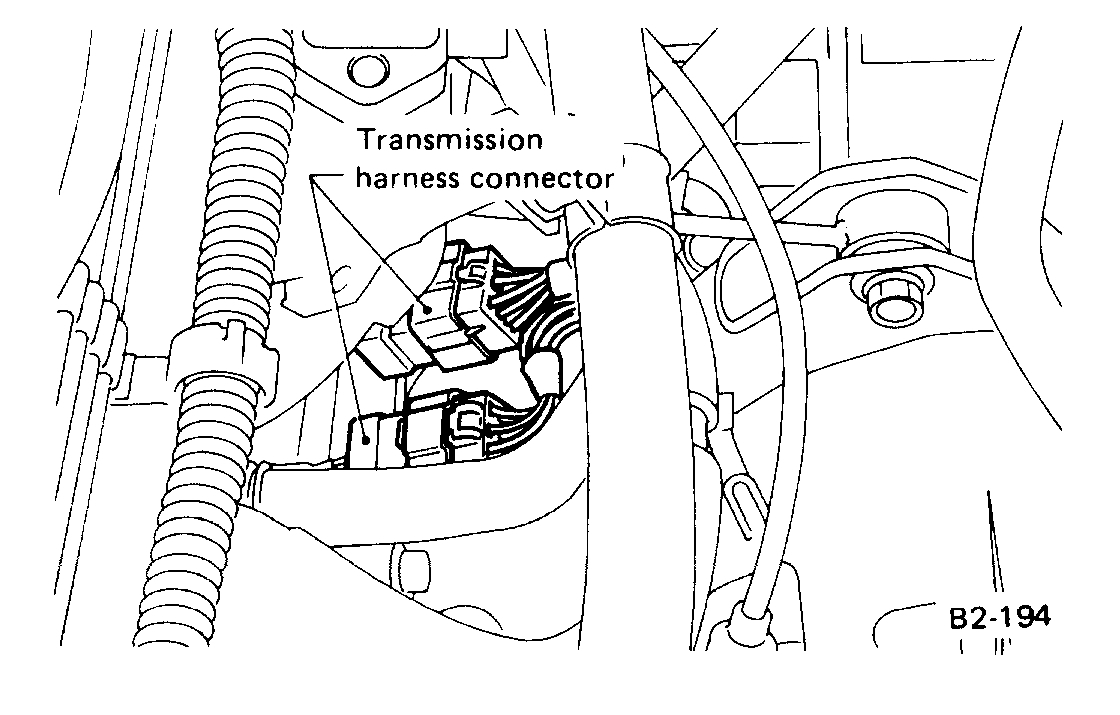
- Transmission Harness connectors
- Transmission Ground Terminal
6. Disconnect start connector and terminal and remove the starter assembly.
7. Remove pitching stopper rod.
Pic 3
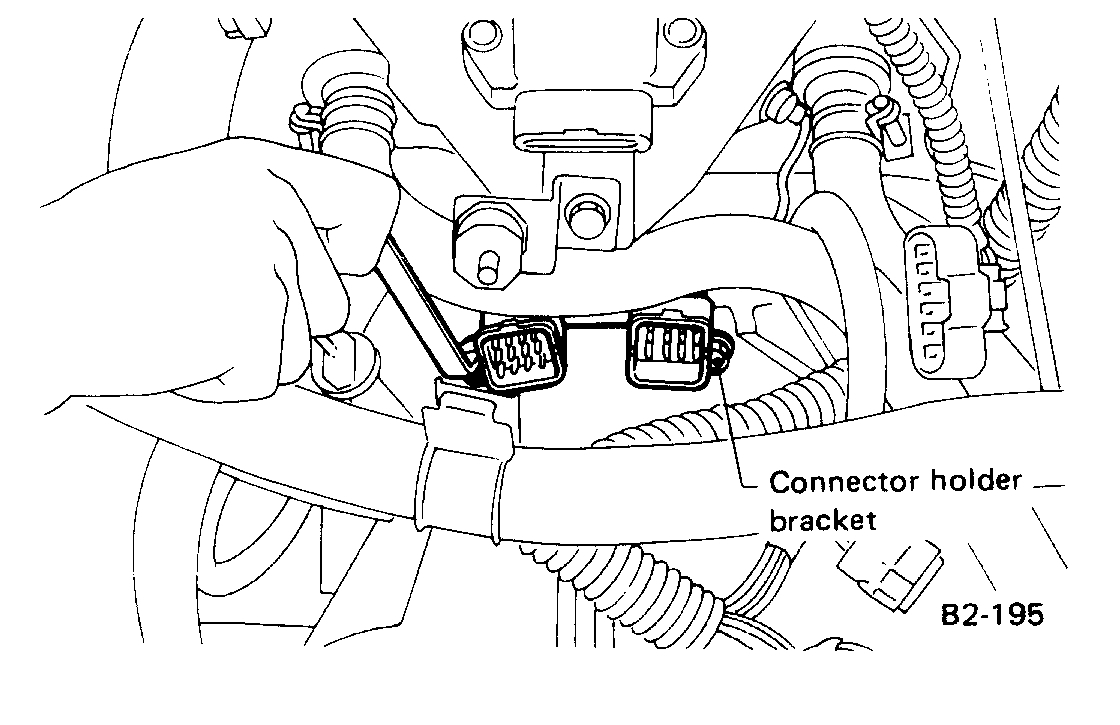
8. Remove connector holder bracket.
Pic 4
9. Remove timing hole plug and remove the four bolts which hold the torque converter to the drive plate.
Pic 5
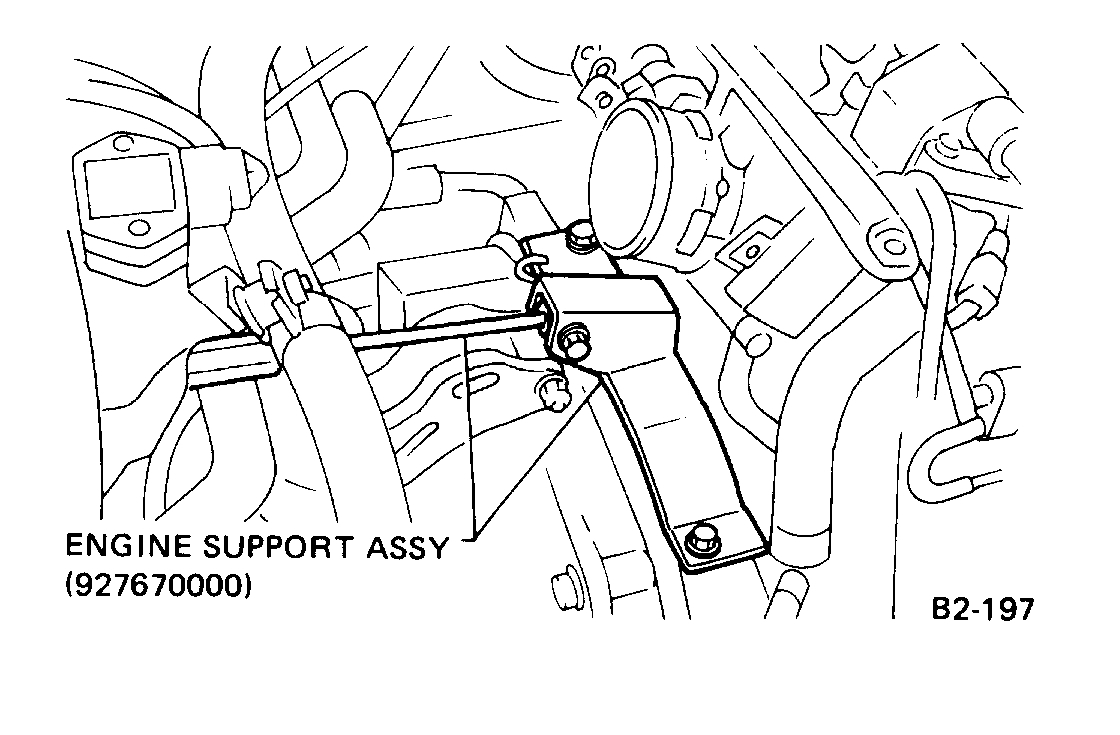
10. Set the engine support assembly (927670000).
11. Remove engine to transmission mounting nut and bolt on the upper side.
12. Raise and support car then disconnect the front exhaust pipe from the engine.
Note: Remove all nuts except one. This nut is used to temporarily hold the exhaust pipe.
13. Disconnect the front to rear exhaust pipe connection.
14. Disconnect front exhaust pipe at transmission and hanger locations.
15. Remove the nut which was used to temporarily hold the exhaust pipe in step 12 and disconnect the front exhaust pipe.
16. Disconnect the rear exhaust pipe from the muffler.
Pic 6
17. Disconnect ATF cooler hoses and ATF supply pipe, be careful not to damage the oil supply pipe O-ring.
18. Drain ATF from oil pan.
19. Remove front cover of rear differential mount.
20. Remove the four bolts which hold propeller shaft to rear differential.
21. Remove the two bolts which hold center bearing to car body.
Pic 7
22. Wrap rubber boot of center DOJ with a cloth to protect it from damage by adjacent metal parts.
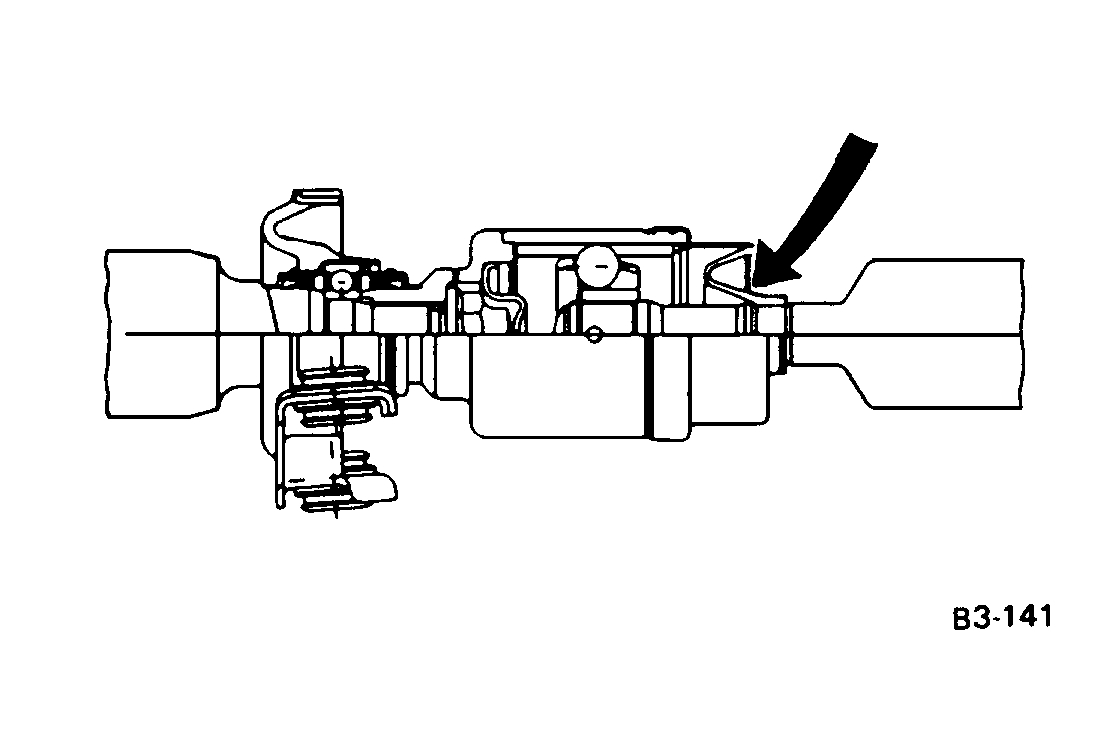
23. Set an empty oil can to catch oil flow and carefully remove propeller shaft from transmission, plug the opening in transmission after removal.
Caution: Take care not to damage oil seals and the frictional surface of sleeve yoke.
Pic 8
24. Disconnect cable from select lever.
25. Loosen nut which holds cable to bracket.
Pic 9
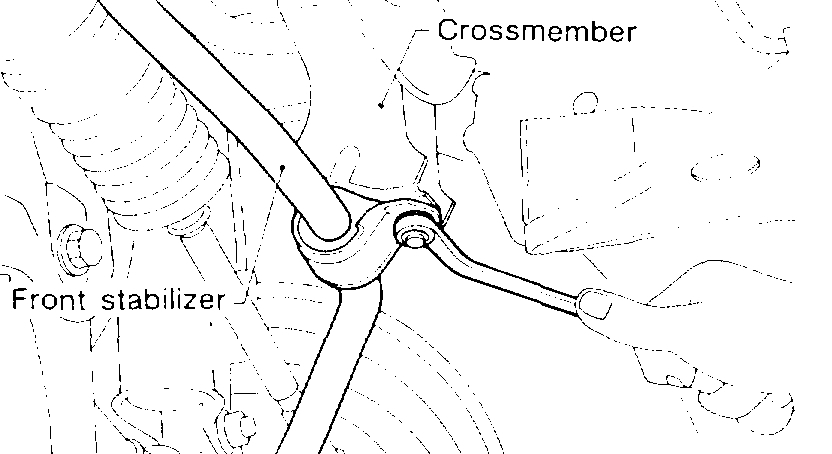
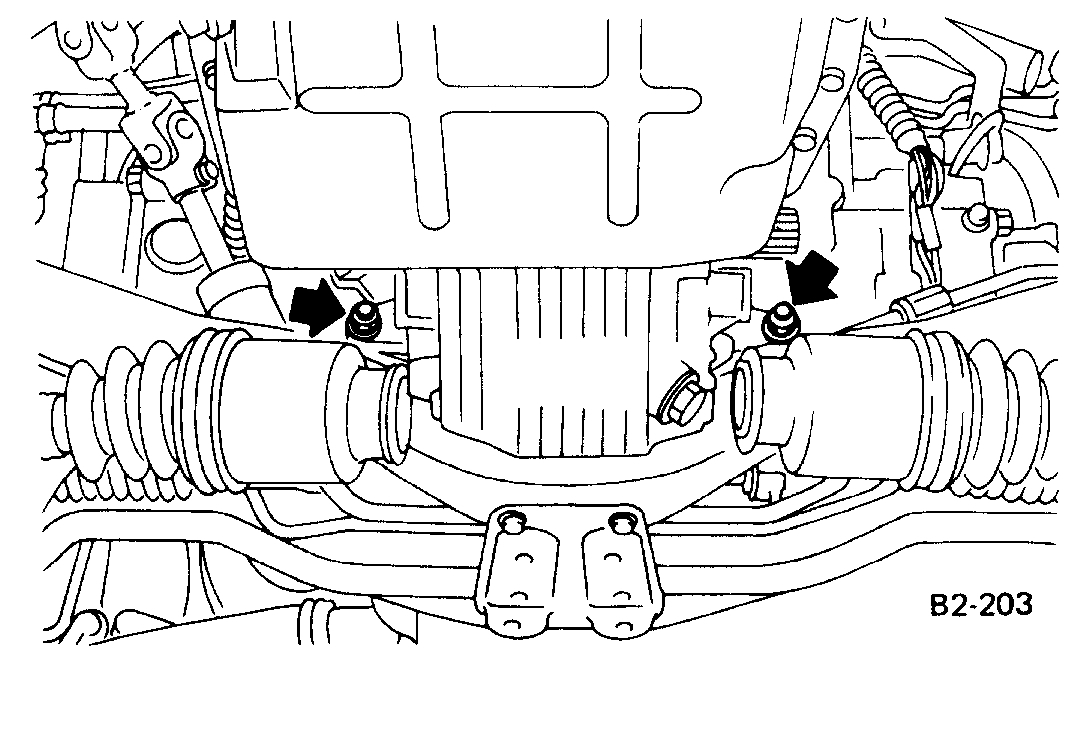
26. Remove bolts holding front stabilizer to crossmember.
Pic 10
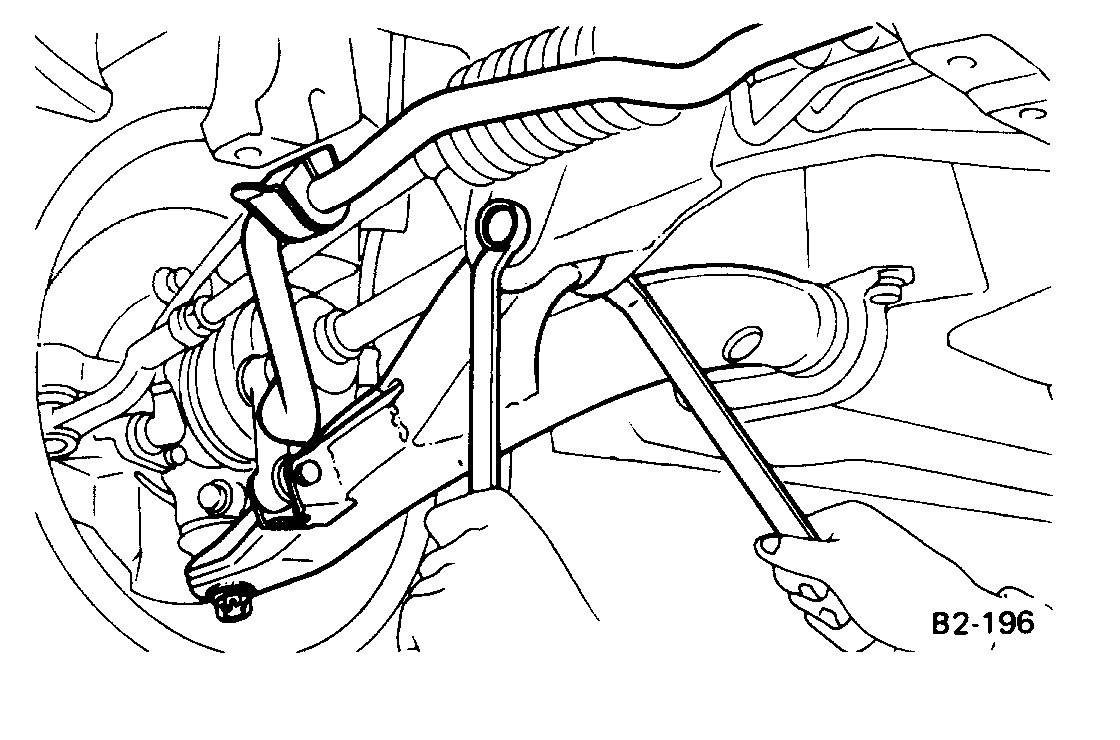
27. Remove bolt holding transverse link to crossmember on each side.
28. Lower transverse link, remove spring pin and separate axle shaft from drive shaft on each side.
Note: Be sure to remove axle shaft from drive shaft by pushing the rear of tire outward.
Pic 11
29. Remove engine to transmission mounting nuts.
Pic 12
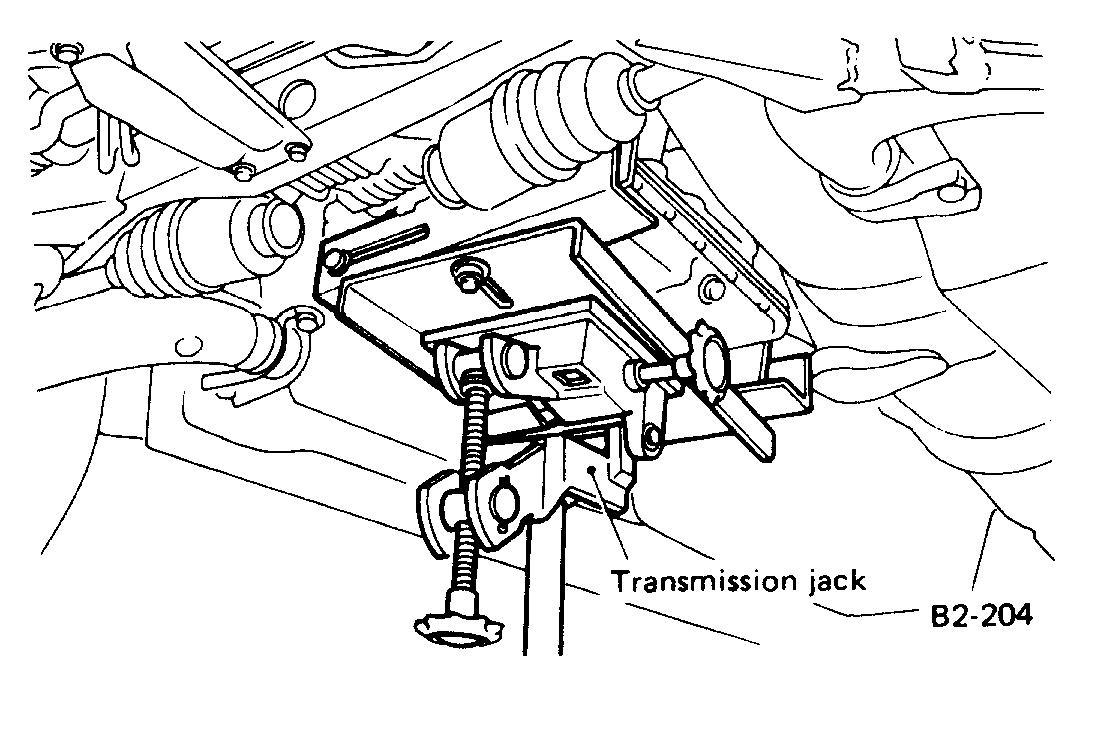
30. Place transmission jack under transmission.
Caution: Make sure you place the jack under the transmission pan, not the oil pan as the oil pan will be damaged.
Pic 13
31. Remove rear cushion rubber mounting nuts and rear crossmember.
32. Move torque converter and transmission as a unit away from the engine until it clears then remove transmission.
_________________________
Install
1994 Subaru Legacy Sedan 4WD F4-2.2L SOHC
AWD
Vehicle Transmission and Drivetrain Automatic Transmission/Transaxle Service and Repair Procedures Installation AWD
AWD
1. Install transmission to engine and temporarily tighten engine to transmission mounting nuts.
2. Install rear crossmember to rear cushion rubber, torque to 13 - 23 Nm (9 - 17 ft. Lbs).
3. Install rear crossmember to car body taking care not to damage threads. Torque to 54 - 83 Nm (40 - 61 ft. Lbs).
4. Tighten engine to transmission nuts on the lower side, torque to 46 - 54 Nm (34 - 40 ft. Lbs).
5. Remove transmission jack.
Pic 14
6. Install axle shaft to axle drive shaft and drive a new spring pin into place.
Caution: Be sure to align the two shafts at the chamfered holes and engage shaft splines.
7. Align bolt holes using a cross-head screwdriver, insert bolt into holes from the front side and temporarily install the transverse link to the front crossmember with a new lock nut.
8. Temporarily install stabilizer to the transverse link.
9. Tighten nut which holds cable to brackets and connect cable to select lever.
10. Connect ATF cooler hoses and ATF supply pipe and lower car to the floor.
10. Install propeller shaft, torque propeller shaft to rear differential to 18 - 27 Nm (13 - 20 ft. Lbs) and center bearing location to 34 - 44 Nm (25 - 33 ft. Lbs).
11. With the tires placed on the ground but the vehicle not loaded, torque the transverse link to front crossmember mounting bolt to 59 - 69 Nm (43 - 51 ft. Lbs) and the transverse link to stabilizer mounting bolt to 20 - 29 Nm (14 - 22 ft. Lbs).
12. Connect the engine and transmission and torque the bolt on the right side to 46 - 54 Nm (34 - 40 ft. Lbs).
13. Lift up the car and install the front and rear exhaust pipes using new gaskets.
14. Torque front exhaust pipe to engine to 25 - 34 Nm (18 - 25 ft. Lbs), front exhaust pipe to bracket to 25 - 34 Nm (18 - 25 ft. Lbs), and the front exhaust pipe to rear exhaust pipe to 13 - 23 Nm (9 - 17 ft. Lbs).
15. Remove the engine support assembly.
16. Align torque converter with drive plate at mounting holes.
17. Install torque converter to drive plate mounting bolts and torque to 23 - 26 Nm (17 - 20 ft. Lbs).
Note: Be careful not to drop bolts into torque converter housing.
18. Install service hole plug.
19. Install connector holder bracket.
20. Install pitching stopper, torque the bolt for body side first to 47 - 67 Nm (35 - 49 ft. Lbs) and then the one for engine to transmission side to 44 - 54 Nm (33 - 40 ft. Lbs).
21. Install the starter assembly, torque upper bolt to 46 - 54 Nm (34 - 40 ft. Lbs), torque lower nut to 30 - 36 Nm (22 - 27 ft. Lbs).
22. Connect the following harness connectors:
- Transmission ground terminal
- Transmission harness connectors
- Knock sensor connector
- Cam angle sensor connector
- Crank angle sensor connector
- Oxygen sensor connector
23. Connect meter cable.
24. Fill ATF through the fluid level gauge hole. Capacity is 8.8 US qts (7.3 Imp qts).
25. Connect battery cables to battery.
26. Check ATF level with engine idling. If lower than specified, stop engine and add ATF then re-check.
____________________
I hope this helps. Let me know if you have other questions.
Take care,
Joe
Images (Click to make bigger)
Friday, December 18th, 2020 AT 8:00 PM