The rotor should be very close to pointing directly at cylinder 1 on the cap. Get it as close as possible and then you will need to turn it for adjusting ignition timing.
Here are the directions for installing the distributor. See if it helps. The attached pics correlate with the directions.
__________________
1993 Dodge Stealth V6-2972cc 3.0L SOHC
Distributor Assembly Replacement
Vehicle Powertrain Management Ignition System Distributor Service and Repair Procedures Distributor Assembly Replacement
DISTRIBUTOR ASSEMBLY REPLACEMENT
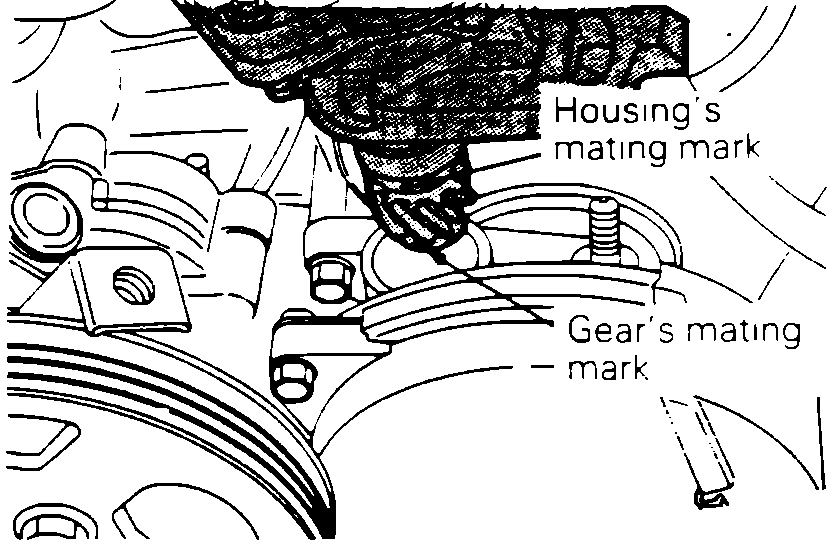
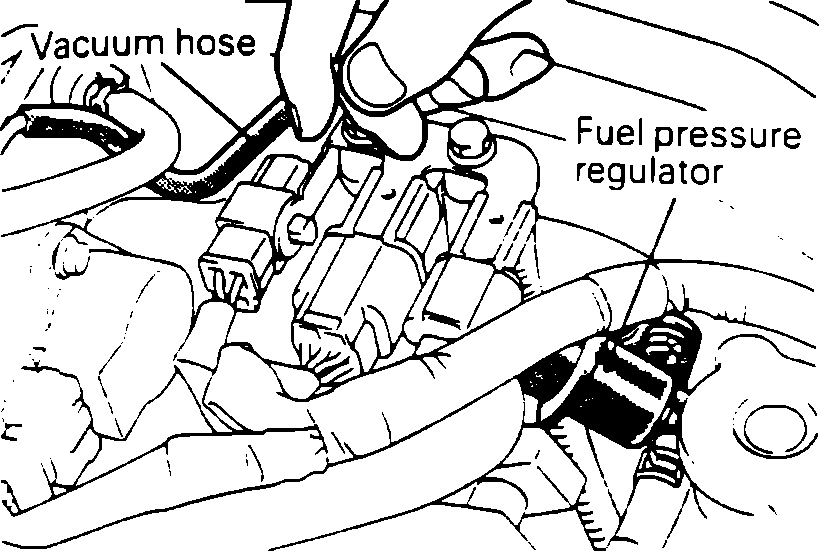
Distributor Alignment
pic 1
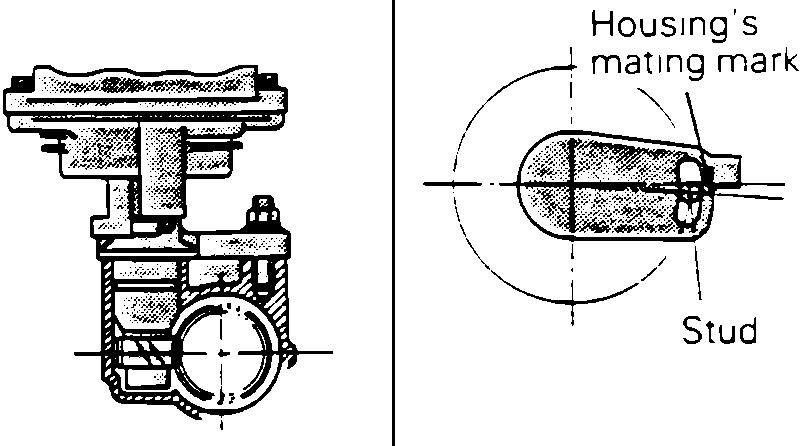
Distributor Alignment
pic 2
1. Turn the engine so that the piston of the number one cylinder is at top dead center of the compression stroke.
CAUTION: Care should be taken to insure that the number four cylinder is not used by mistake.
2. Align the distributor housing and gear mating marks.
3. Install the distributor into the engine while aligning the distributor's installation flange with the center of the distributor installation stud.
_________________________________
The ignition timing should be set. Take a look through these directions and let me know if it helps. To adjust timing, slowly turn the distributor in the direction needed to achieve the proper timing. You will need the idle to be around 700 rpm's to do this. The last set of directions explain how to set idle speed.
_________________________________
Ignition Timing
Vehicle Powertrain Management Emission Control Systems Adjustments Ignition Timing
IGNITION TIMING
ADJUSTMENT CONDITIONS:
Coolant temperature at 176°F-205°F.
All accessories turned OFF.
Transmission in N (Neutral).
Parking Brake, ON.
PROCEDURE:
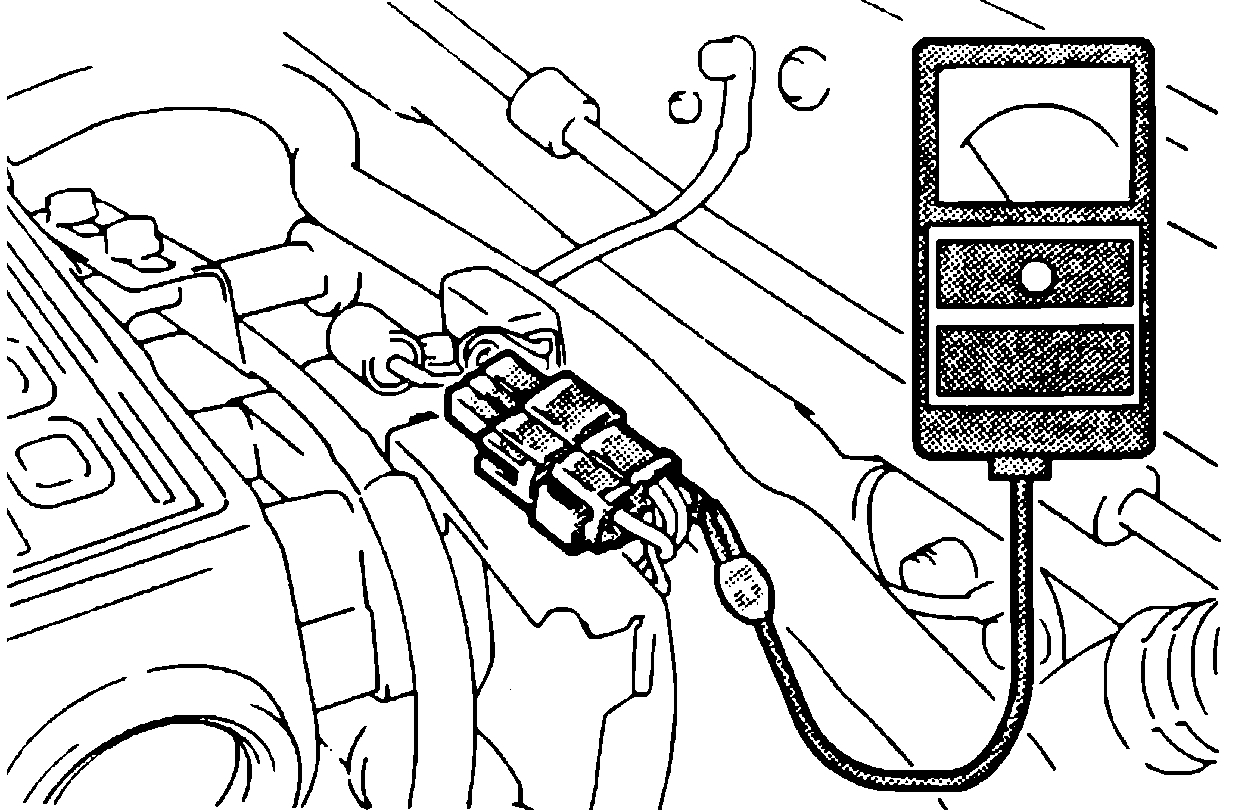
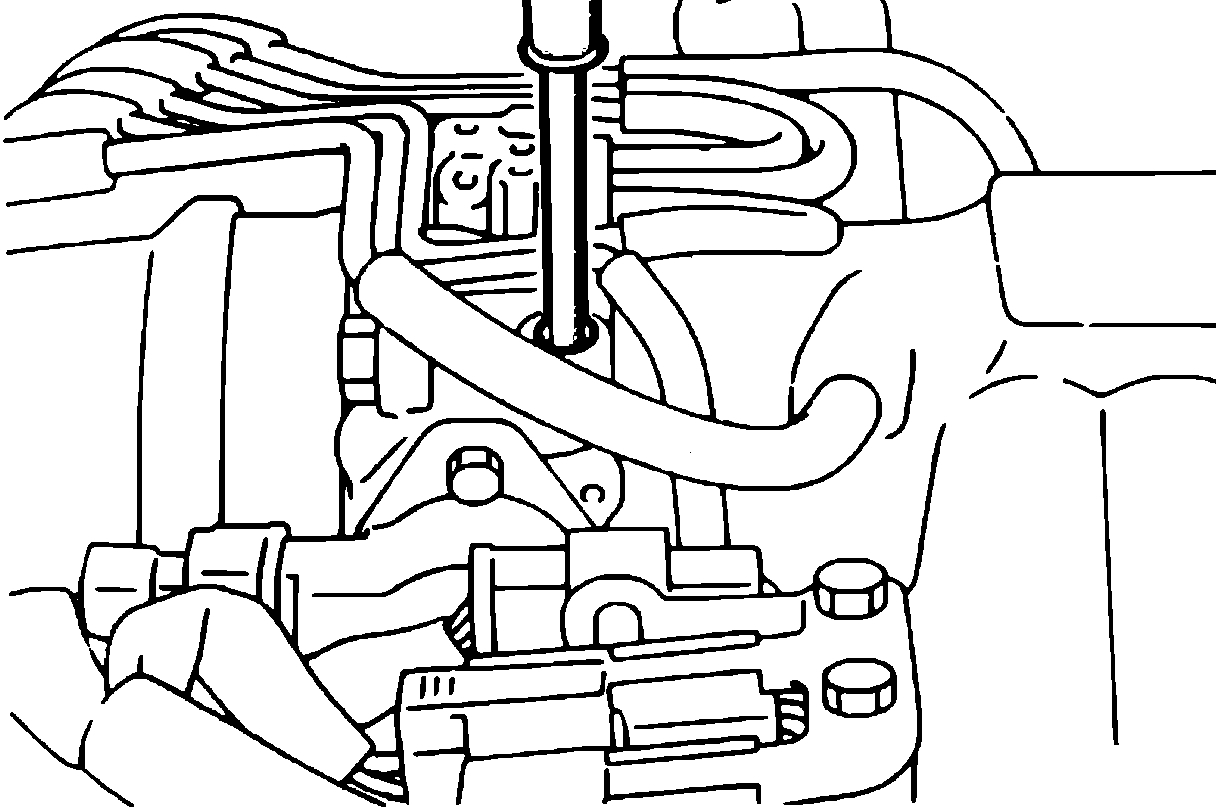
Tachometer Hookup
pic 3
1. Install a paper clip into the tachometer check connector.
2. Connect a tachometer to the clip.
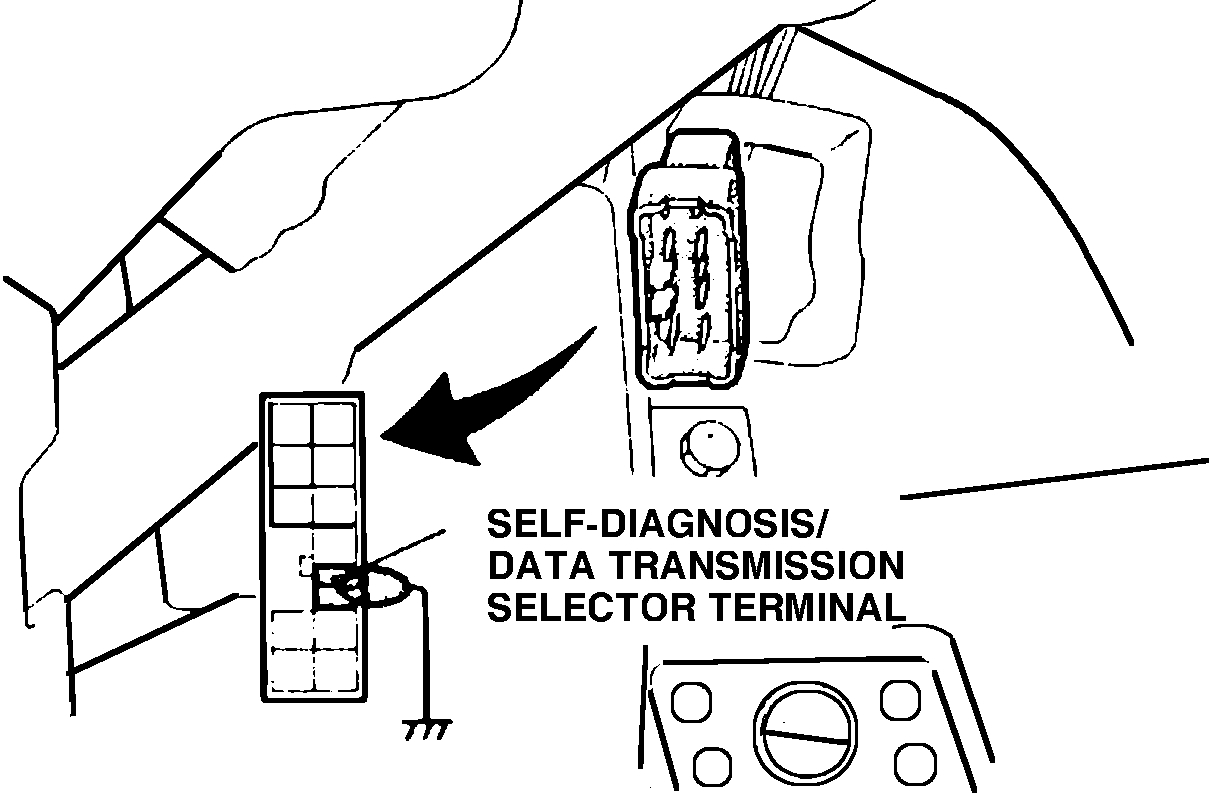
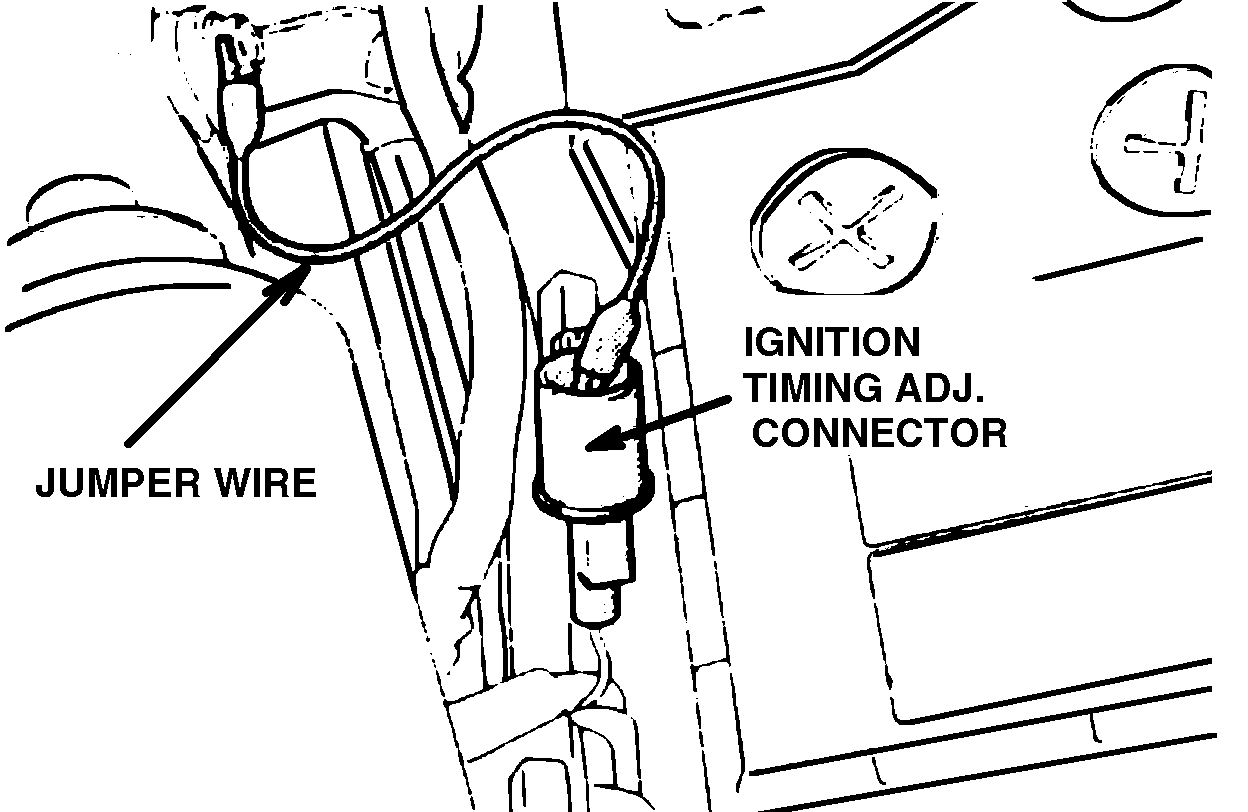
Ignition Timing Adjustment Connector
pic 4
3. With the engine OFF, ground the ignition timing adjustment terminal with a jumper lead.
4. Start the engine and allow it to run at curb idle speed.
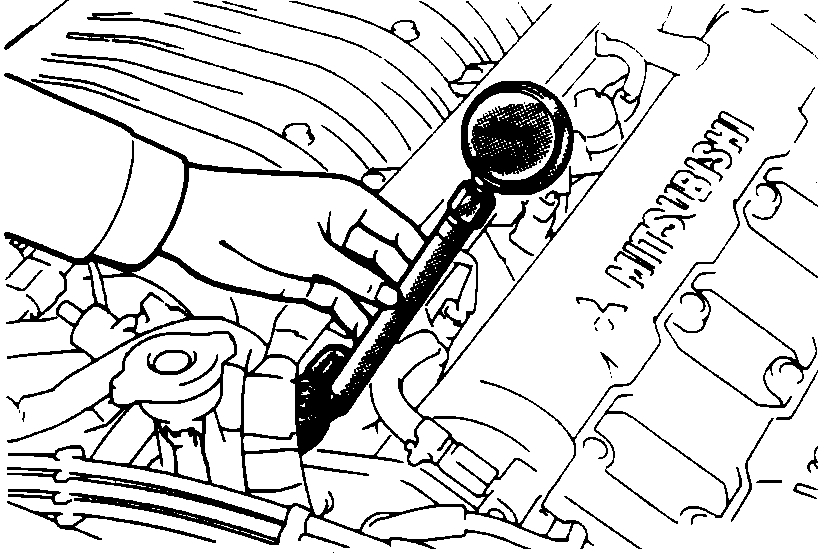
5. Connect a timing light to the #1 spark plug wire and check the timing.
Basic Ignition Timing
5° ±2° BTDC.
6. If necessary loosen the distributor mounting nut and adjust timing by rotating the distributor.
7. Stop the engine.
8. Disconnect the ignition timing jumper wire and RE-START the engine.
9. Recheck the timing.
Actual Ignition Timing
15° BTDC.
NOTE: Actual ignition timing may vary slightly under the direction of the MPI controller. If necessary re-check Basic Ignition Timing. If it is still correct no further action is required.
__________________________________
Idle speed adjustment The remaining pics correlate with these directions.
1993 Dodge Stealth V6-2972cc 3.0L SOHC
Base Idle Speed Adjustment
Vehicle Powertrain Management Fuel Delivery and Air Induction Idle Speed Adjustments Base Idle Speed Adjustment
BASE IDLE SPEED ADJUSTMENT
IDLE SPEED INSPECTION
NOTE:
a. Adjustment of the idle speed is usually unnecessary. Idle speed on fuel injected vehicles is controlled by the MPI Control Module through the Idle Speed Control Servo.
b. NEW FOR 1991: On Canadian model vehicles, the head lights, tail lights remain lit even after the headlight switch has been turned off. This is caused by the Daytime Running Light circuit, and does not indicate a problem.
Before starting the Inspection or Adjustment Procedures, be sure:
- Engine coolant temperature has reached 80-95~C (176-205~F)
- Lights, engine cooling fan, and electrical accessories are OFF
- Transaxle is in NEUTRAL or PARK
- Steering wheel is at a center position (power steering equipped vehicles)
- Parking brake is applied.
- Verify the ignition timing is set to 15~ BTDC @ 700 +/- 100 RPM.
CAUTION: Improper setting of the throttle valve opening will increase exhaust gas temperatures at deceleration, which will greatly reduce the life of the Catalytic Converter. Also, fuel consumption and engine braking will be affected.
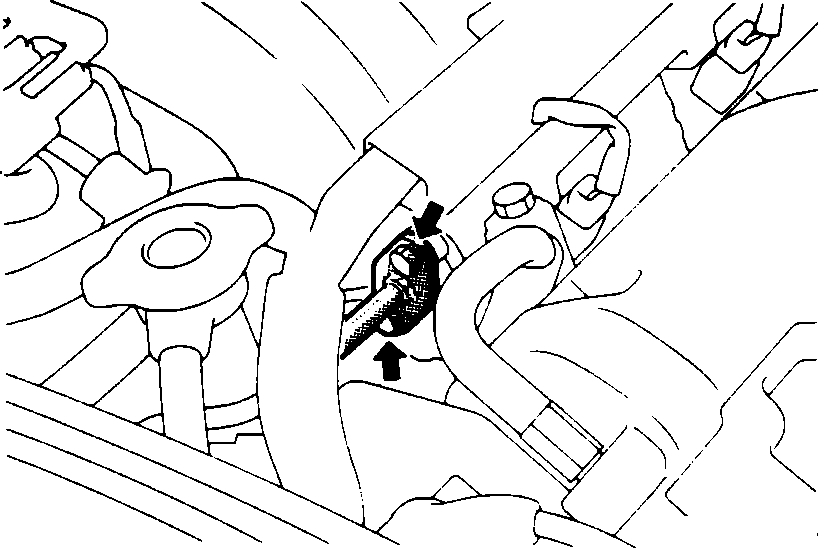
Tachometer Connection Using A Paper Clip
pic 5
1. Insert a paper clip into the 3-pin connector from the harness side of the connector. Do NOT disconnect the connector.
2. Connect a primary-voltage-detecting tachometer to the paper clip.
NOTE: The tachometer should indicate 1/3 of the actual engine speed. Multiply the tachometer reading by 3 for the actual engine speed.
Self-Diagnostic Connector Grounded (under dash drivers side)
pic 6
3. Using a jumper wire, ground the # 10 terminal of the Self-Diagnosis connector.
Ignition Timing Adjustment Terminal Grounded
pic 7
4. Using a second jumper wire, ground the Ignition Timing Adjustment Terminal, located in the engine compartment.
5. Start and run the engine for more than 5 seconds at 2,000 to 3,000 rpm.
6. Reduce the engine rpm to idle and check the Basic Idle Speed. 5~ +/- 2~ BTDC @ 700 +/- 50 RPM
If the idle speed is within specifications, proceed to step # 7.
NOTE: If the idle speed does not meet specifications, check the following before adjusting the Basic Idle Speed.
a. If the engine is stalling or the idle speed is below specifications, check for deposits stuck to the back of the throttle valve.
If so, refer to REPLACEMENT AND REPAIR PROCEDURES/THROTTLE VALVE.
b. If the engine idle speed is higher than specifications and the speed adjusting screw is fully closed. Then, check for indications that the Fixed Idle Speed Adjusting Screw has been altered. If so, proceed to FIXED SPEED ADJUSTMENT SCREW procedures.
c. If there is no indication, it is possible that there is leakage resulting from the deterioration of the Fast Idle Air Valve (FIAV). The throttle body will need to be replaced.
Adjusting The Idle Speed
pic 8
If none of the above conditions apply, then turn the speed adjusting screw until the engine is running at 700 +/- 50 RPM.
7. Turn OFF the engine.
8. Disconnect the grounding jumper wire from the diagnosis connector.
9. Disconnect the grounding wire form the Ignition Timing Adjustment Terminal and reinstall the waterproof connector.
10. Start the engine and let it idle for about 10 minutes. Verify that the engine idle is smooth and has returned to the Curb Idle Speed. 700 +/- 100 RPM
11. Disconnect and remove the tachometer.
_________________________________
Let me know if this helps.
Joe
Images (Click to enlarge)
Jan 17, 2020 at 11:42 PM