Hi,
If you can't turn it at all, first, try a spare key. If that doesn't work, then the key tumbler needs removed to see if something has broken or the tumbler has just failed.
Here are directions for removal. Please keep in mind, a new unit will need programmed to in order for the anti theft system to recognize it.
_________________________________________
2002 Pontiac Grand AM L4-2.2L VIN F
Ignition Switch Lock Cylinder - Dash Mounted
Vehicle Starting and Charging Sensors and Switches - Starting and Charging Ignition Switch Ignition Switch Lock Cylinder Service and Repair Removal and Replacement Ignition Switch Lock Cylinder - Dash Mounted
IGNITION SWITCH LOCK CYLINDER - DASH MOUNTED
REMOVAL PROCEDURE
IMPORTANT: Perform the BCM theft deterrent relearn procedure whenever you replace the ignition switch lock cylinder. For more information refer to Accessories and Optional Equipment/Antitheft and Alarm Systems/Service and Repair/ See: Antitheft and Alarm Systems > Procedures
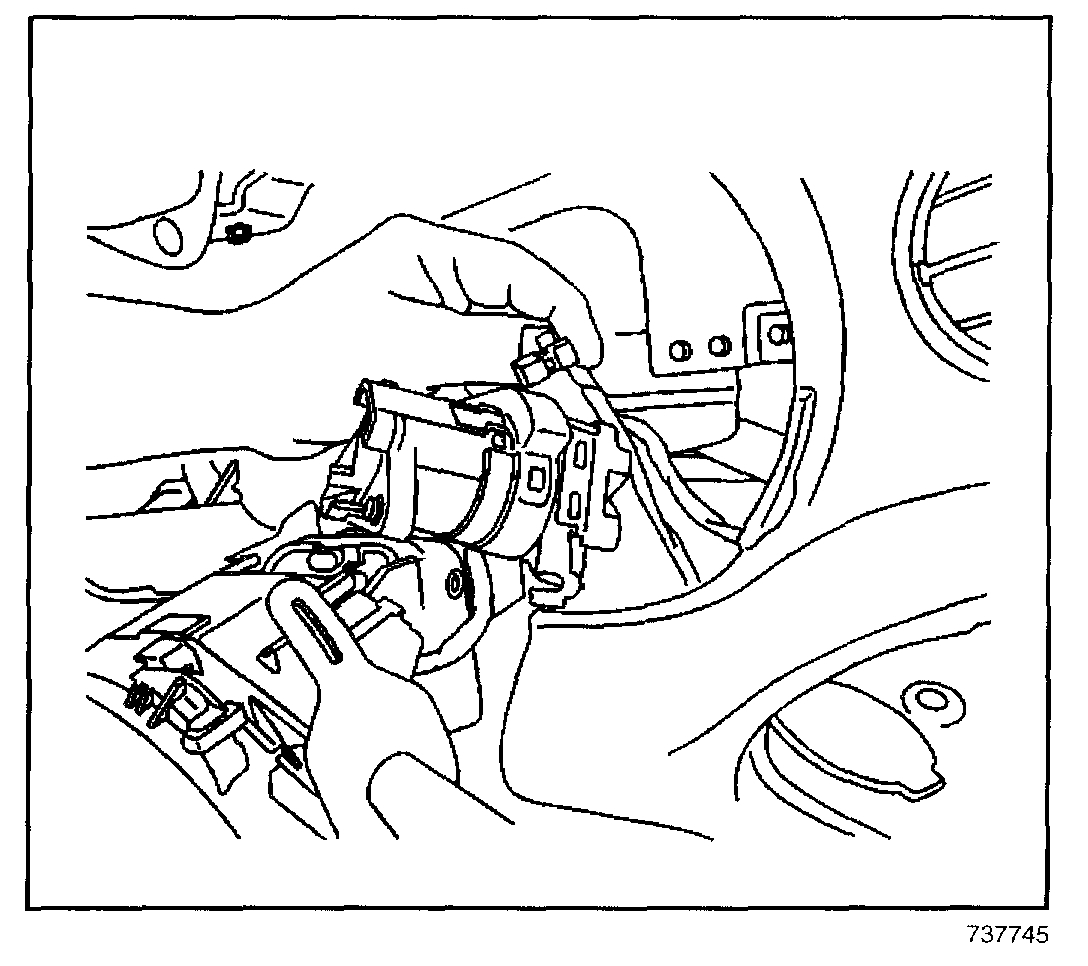
pic 1
1. Disconnect negative battery cable.
2. Remove Instrument Panel (IP) accessory trim plate.
3. Insert the key and turn the ignition switch lock cylinder to the ON position.
4. If the cylinder does not rotate or is seized, follow the procedure in the ignition switch replacement.
5. Using a small curved tool, depress and hold the retaining tab on the ignition switch lock cylinder.
6. Using the key as an aid, pull to remove the lock cylinder from the switch.
7. Remove the key from the lock cylinder.
INSTALLATION PROCEDURE
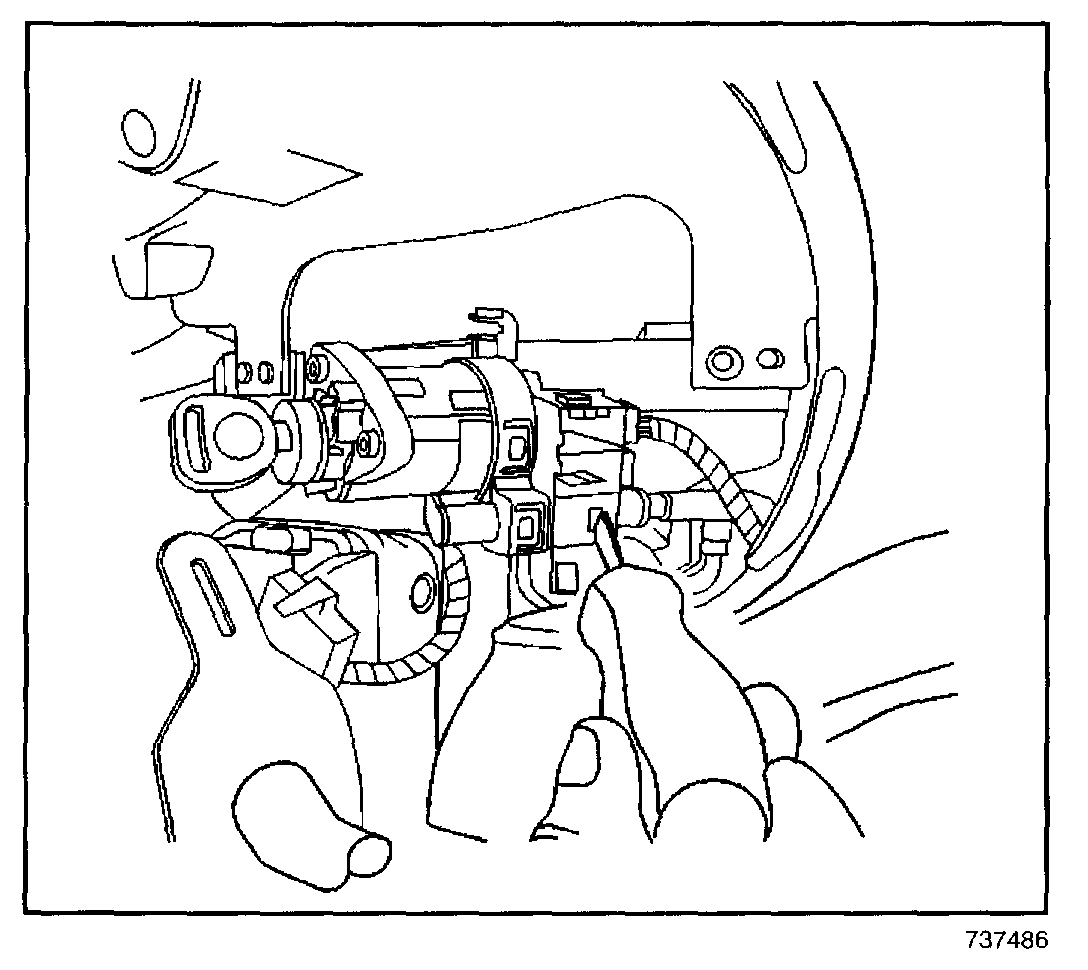
pic 2
1. Code the ignition switch lock cylinder, if necessary. Refer to Key and Lock Cylinder Coding
2. Insert the key and turn the lock cylinder to the ON position.
3. Align the lock cylinder to the ignition switch, then press the cylinder into place.
4. Turn the key to the OFF position and remove the key.
5. Install the IP accessory trim plate.
6. Connect the negative battery cable.
7. If a new lock cylinder was installed, perform the BCM theft deterrent relearn procedure. Accessories and Optional Equipment/Antitheft and Alarm Systems/Service and Repair/ See: Antitheft and Alarm Systems > Procedures
__________________________________
Since your lock is stuck and can't be turned, you may need to follow these directions.
2002 Pontiac Grand AM L4-2.2L VIN F
Ignition Switch - Dash Mounted
Vehicle Starting and Charging Sensors and Switches - Starting and Charging Ignition Switch Service and Repair Removal and Replacement Ignition Switch - Dash Mounted
IGNITION SWITCH - DASH MOUNTED
IGNITION SWITCH REPLACEMENT
REMOVAL PROCEDURE
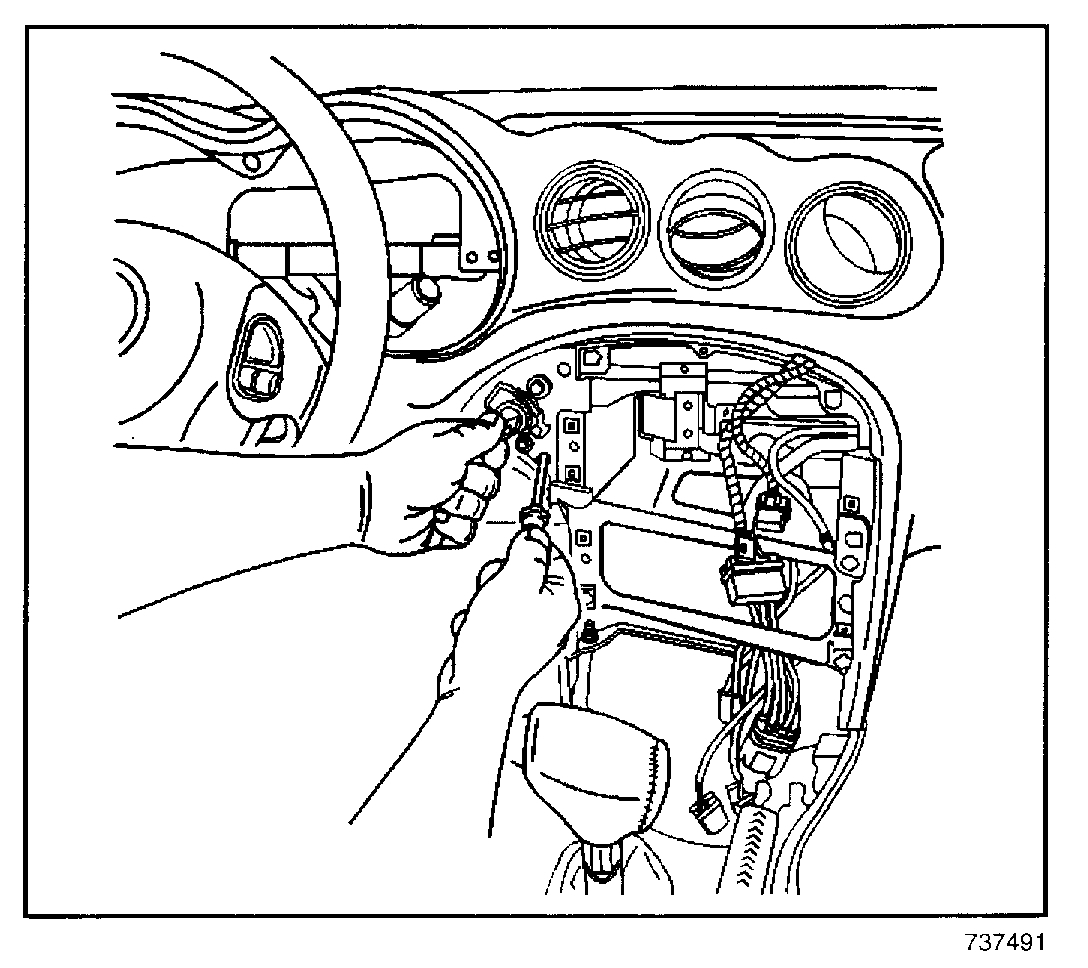
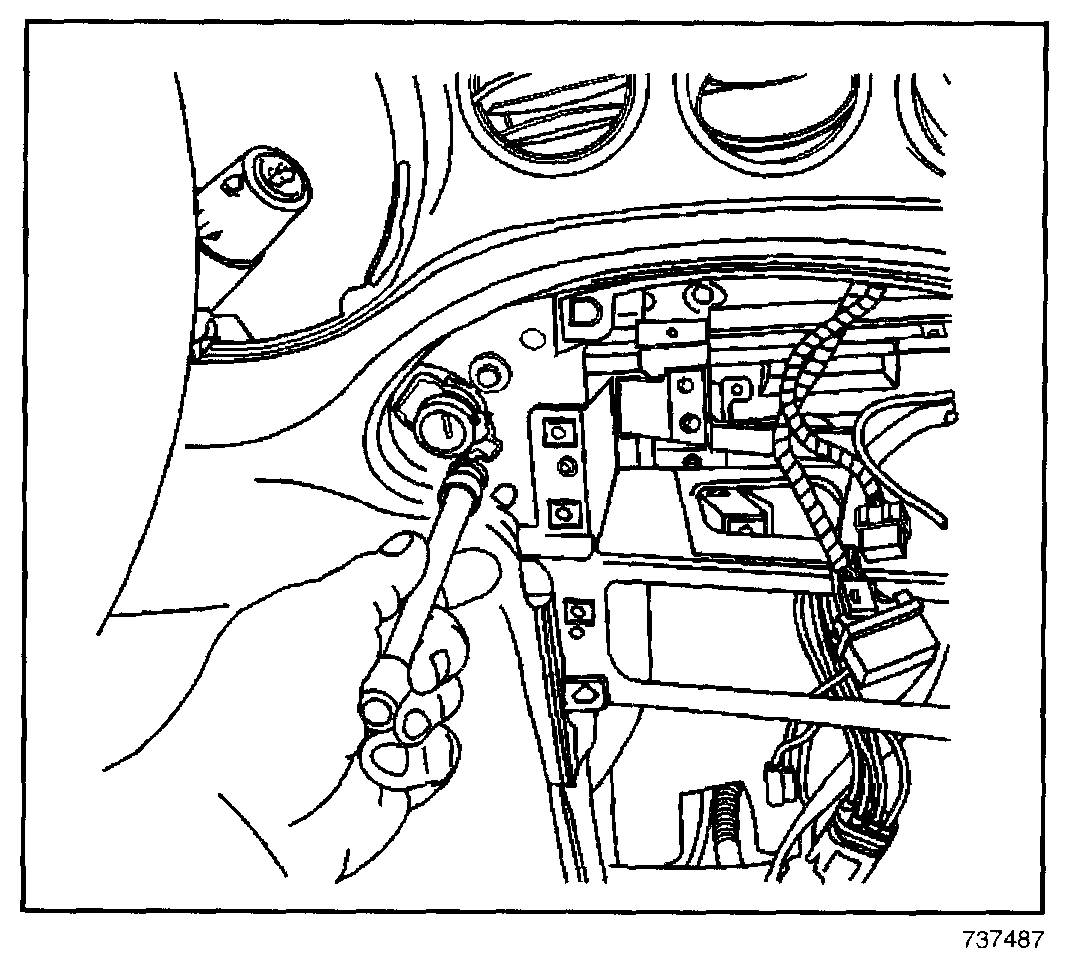
pic 3
1. Disconnect the negative battery cable.
2. Remove the instrument panel (I/P) accessory trim plate.
3. Remove the I/P cluster.
4. Remove the bolts from ignition switch.
pic 4
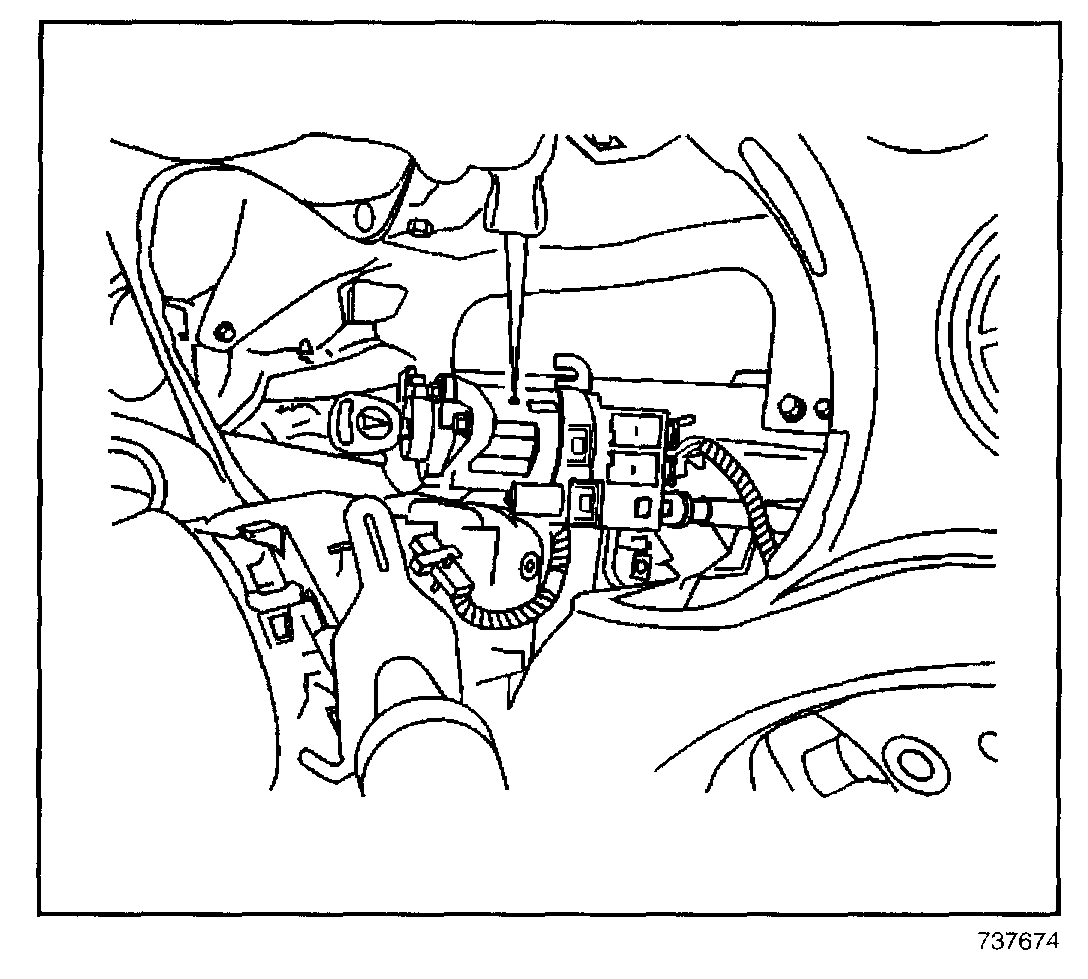
5. Reposition the ignition switch for ease of removal.
6. Insert the key and turn the ignition switch lock cylinder to the ON position.
pic 5
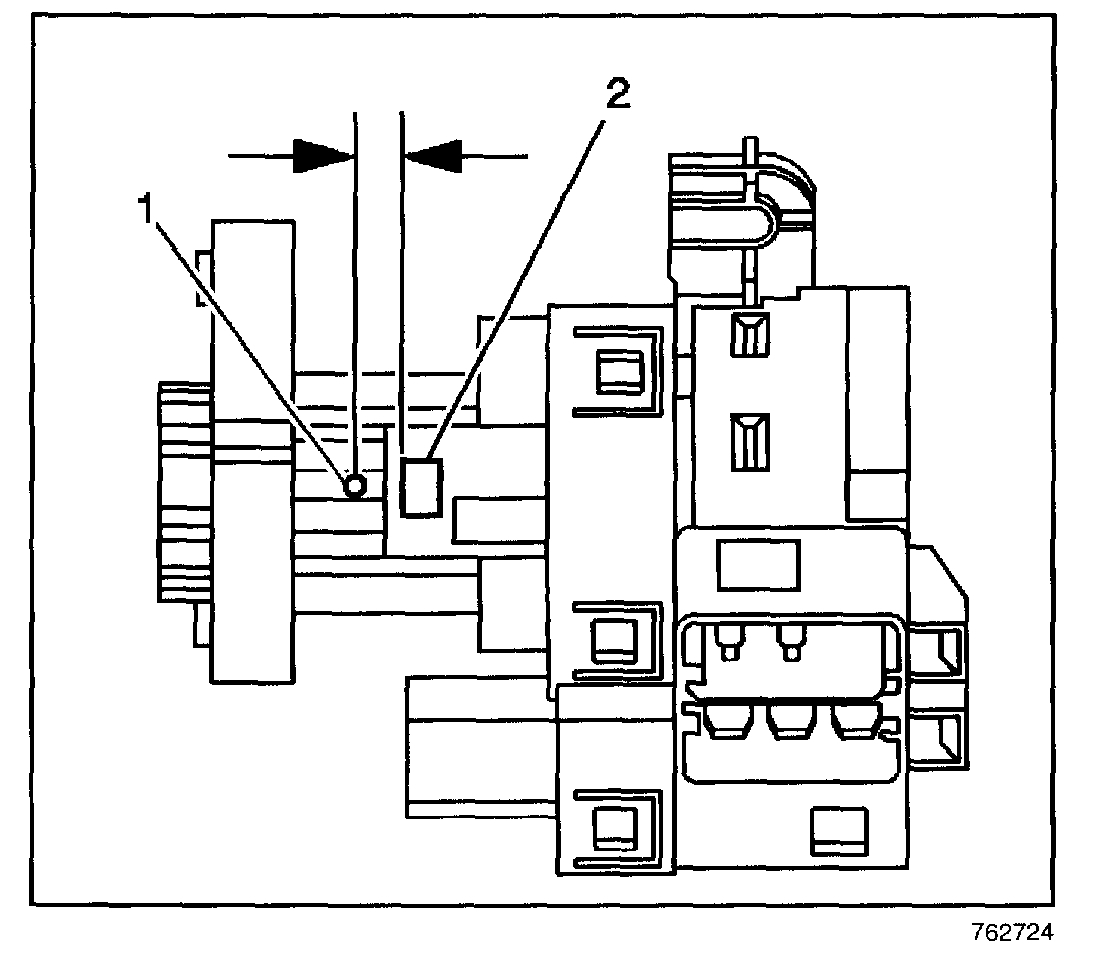
7. If the lock cylinder does not rotate or is seized, perform the following procedure:
7.1. Protect the immediate work area with suitable material such as clean shop towels or a clean fender cover.
7.2. Locate the surface for the ignition switch lock cylinder release button (2) on the plastic ignition switch housing and center punch a location (1) on the rib 9.5 mm (3/8 in) rearward, toward the key entry end, from the cylinder release button.
7.3. Carefully drill a pilot hole through the plastic housing with an 1/8-inch drill bit.
7.4. Carefully drill a larger hole at the pilot location, and slightly into the ignition switch lock cylinder surface to break the release button retaining spring using a 9/32-inch drill bit.
7.5. Remove portions of the broken spring from the hole using a small suitable tool.
7.6. Grasp the ignition switch lock cylinder and remove the cylinder from the switch housing.
7.7. Remove any plastic flashing from the drilling operation, and using compressed air blow out the ignition switch assembly.
7.8. Follow the procedures when cylinder coding is required. Refer to key and Lock Cylinder Coding
pic 6
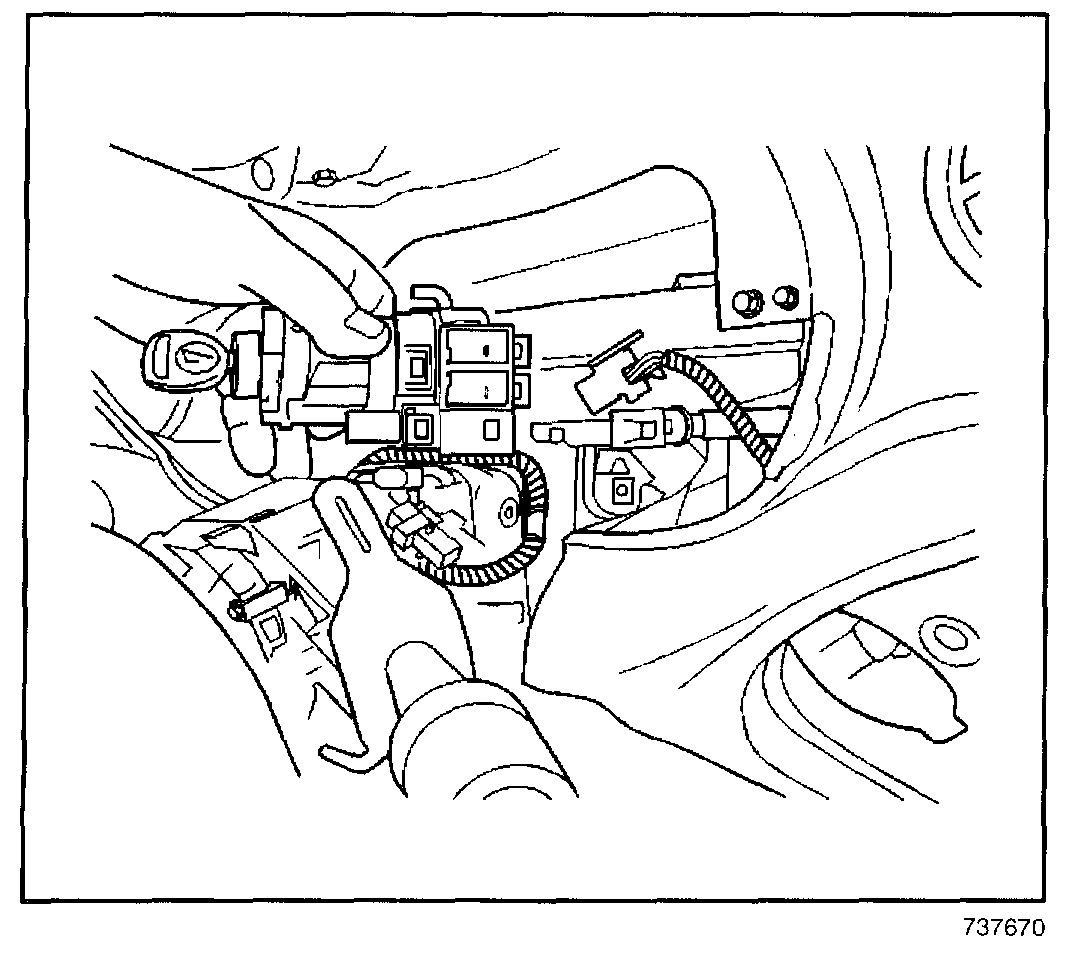
8. Depress the transaxle park/lock cable retainer to release, then pull to remove the park/lock cable from the ignition switch.
9. Remove the ignition switch lock cylinder from the ignition switch, by depressing the retaining tab and pulling the cylinder out with the key.
IMPORTANT: Remove the ignition switch lock cylinder before you remove the pass lock electrical connector.
pic 7
10. Disconnect the pass lock electrical connector from the ignition switch.
pic 8
11. Disconnect the electrical connectors from the ignition switch.
12. Remove the ignition switch through the I/P cluster opening.
INSTALLATION PROCEDURE
pic 9
1. Position the ignition switch into position through the I/P cluster opening.
2. Connect the electrical connectors to the ignition switch.
pic 10
3. Connect the pass lock electrical connector to the ignition switch.
pic 11
4. Connect the park/lock cable to the ignition switch.
pic 12
5. Insert the key and turn the ignition switch lock cylinder to the ON position.
6. Align and press ignition switch lock cylinder into place.
7. If the lock cylinder does not rotate or is seized, perform the following procedure:
7.1. Install the new ignition switch lock cylinder as required by rotating both the cylinder and the ignition switch to the ON position.
7.2. Push the lock cylinder into the ignition switch housing until fully seated.
7.3. You may need to slightly depress the release button as the cylinder passes by the 9/32-inch hole previously drilled in the ignition switch housing.
8. Remove the key from the lock cylinder.
9. Position the ignition switch to the I/P.
NOTE: Refer to Fastener Notice in Service Precautions.
10. Install the bolts to the ignition switch.
Tighten
Tighten the bolts to 6 Nm (53 lb in).
11. Install the I/P cluster.
12. Install the I/P accessory trim plate.
13. Connect the negative battery cable.
Important: You must perform the BCM theft deterrent relearn procedure after replacement of the ignition switch Lock Cylinder. Refer to Password Learn Procedures in Body Control System. See: Body Control Module > Service and Repair
________________________________________
Here is the relearn procedure.
________________________________________
2002 Pontiac Grand AM L4-2.2L VIN F
Programming/Learn Procedures - PASSLock Sensor
Vehicle Starting and Charging Sensors and Switches - Starting and Charging Ignition Switch Service and Repair Removal and Replacement Programming/Learn Procedures - PASSLock Sensor
PROGRAMMING/LEARN PROCEDURES - PASSLOCK SENSOR
Important: Due to component variability, the vehicle theft deterrent system (VTD) must have the learn procedure performed regardless, if the vehicle starts on the first ignition cycle after a VTD repair.
Conditions
Use this procedure after replacing the Passlock Sensor. Accessories and Optional Equipment/Antitheft and Alarm Systems/Service and Repair/ See: Antitheft and Alarm Systems > Procedures
TOOLS REQUIRED
None.
1. Turn ON the ignition, with the engine OFF.
2. Attempt to start the engine, then release the key to ON (vehicle will not start, or start and stall).
3. Observe the SECURITY telltale, after approximately 10 minutes the telltale will turn OFF.
4. Turn OFF the ignition, and wait 5 seconds (the vehicle is now ready to relearn the Passlock Sensor Data Code and/or passwords on the next ignition switch transition from OFF to CRANK).
IMPORTANT: The vehicle learns the Passlock Sensor Data Code and/or password on the next ignition switch transition from OFF to CRANK. You must turn the ignition OFF before attempting to start the vehicle.
6. Start the engine (the vehicle has now learned the Passlock Sensor Data Code and/or password).
7. With a scan tool, clear any DTCs if needed (history DTCs will self clear after 100 ignition cycles).
________________________________________
I hope this helps. Let me know if you have other questions or need help.
Take care,
Joe
Images (Click to enlarge)
Jan 25, 2020 at 9:44 PM