Welcome to 2CarPros.
There is a clip which prevents the plug from coming out. Are you depressing it when trying to remove it?
There two different transmission you may have. I am going to provide the directions for removing the cover for both. The pictures attached correlate with the directions.
____________________________
CONTROL VALVE BODY COVER REPLACEMENT
Control Valve Body Cover Replacement
Removal Procedure
1. Disconnect the negative battery cable. Refer to Battery Negative Cable Disconnection and Connection See: Negative > Removal and Replacement > Battery Negative Cable Disconnection and Connection.
Picture 1
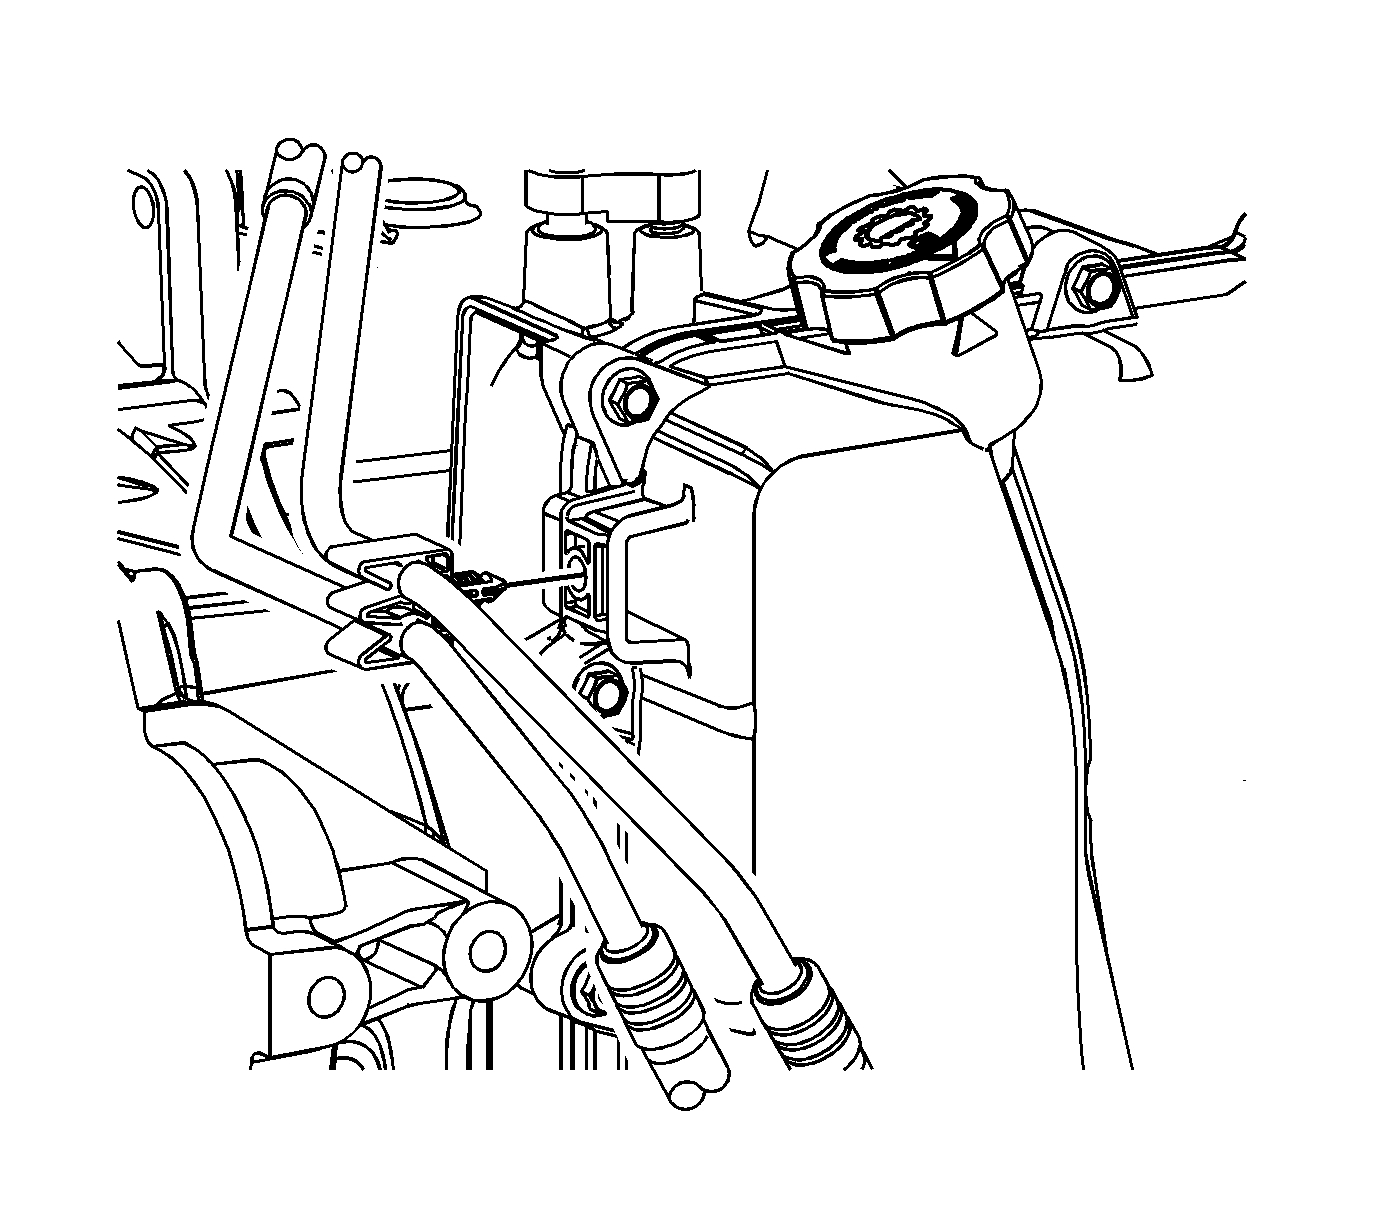
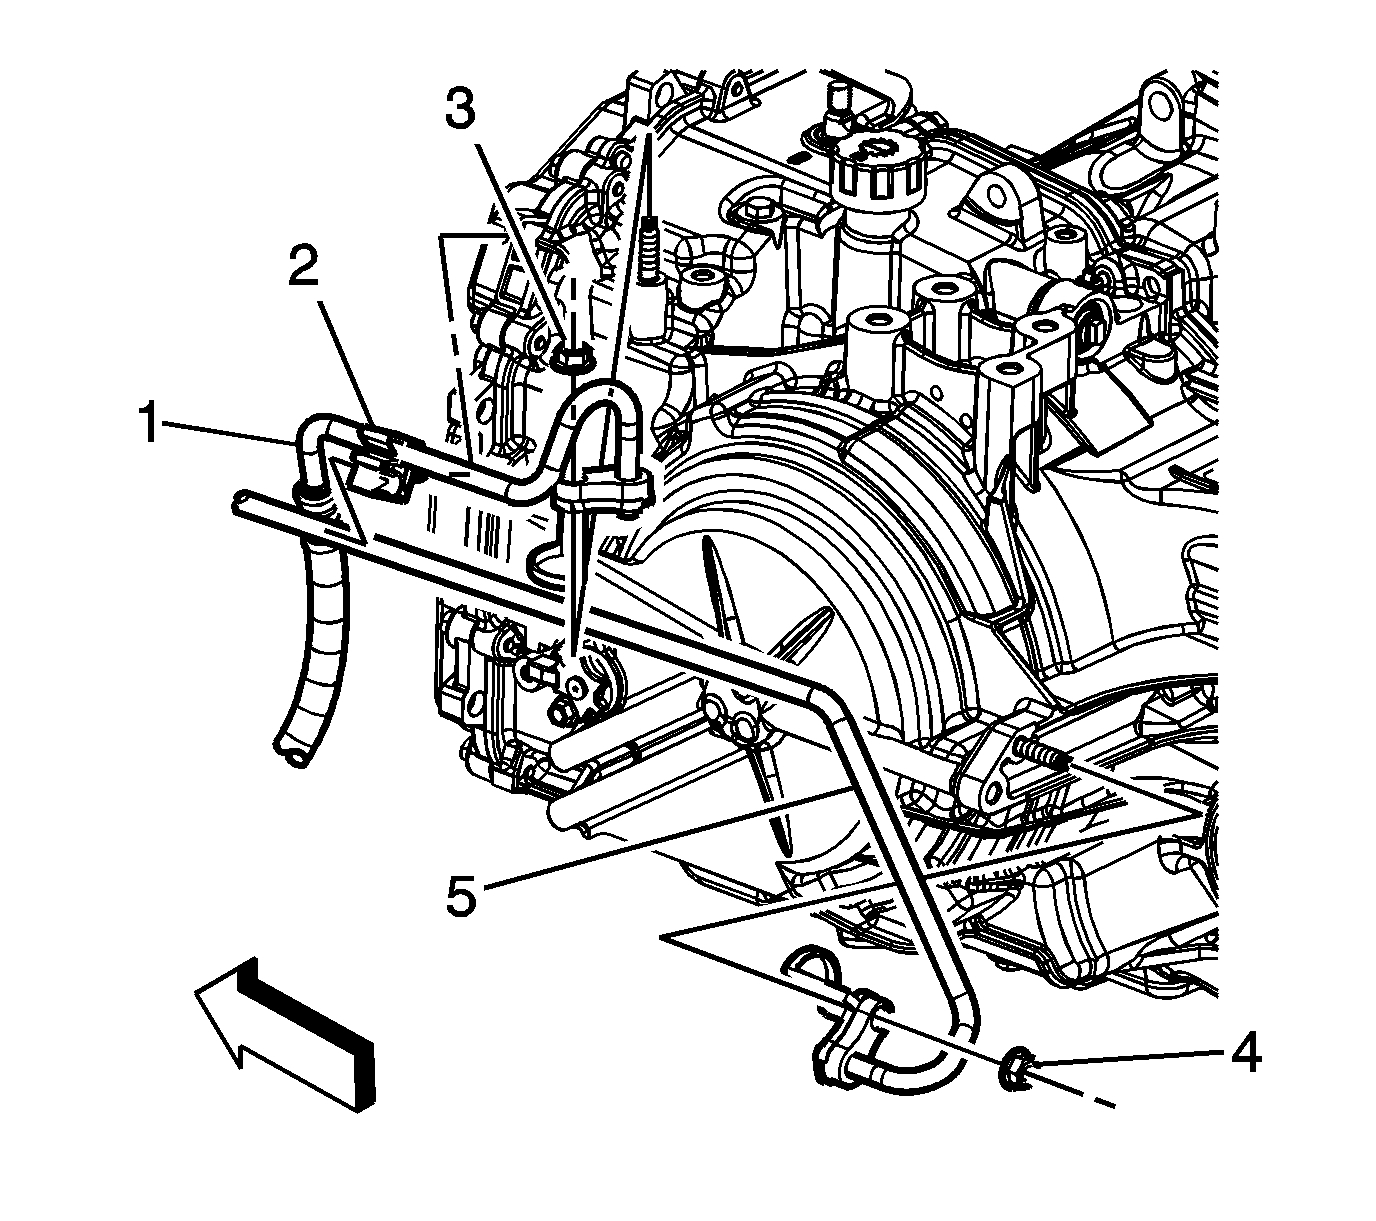
2. Remove the oil cooler inlet and outlet hoses from the retainer on the control valve body cover, if equipped.
3. Raise and support the vehicle. Refer to Lifting and Jacking the Vehicle See: Vehicle Lifting > Procedures > Lifting and Jacking the Vehicle.
4. Drain the transmission. Refer to Transmission Fluid Drain and Fill See: Fluid - A/T > Removal and Replacement > Transmission Fluid Drain and Fill.
Pic 2
5. Remove the wire harness retainer (2) from the control valve body cover stud, if equipped.
6. Disconnect the control valve body transmission control module (TCM) electrical connector (1).
Picture 3
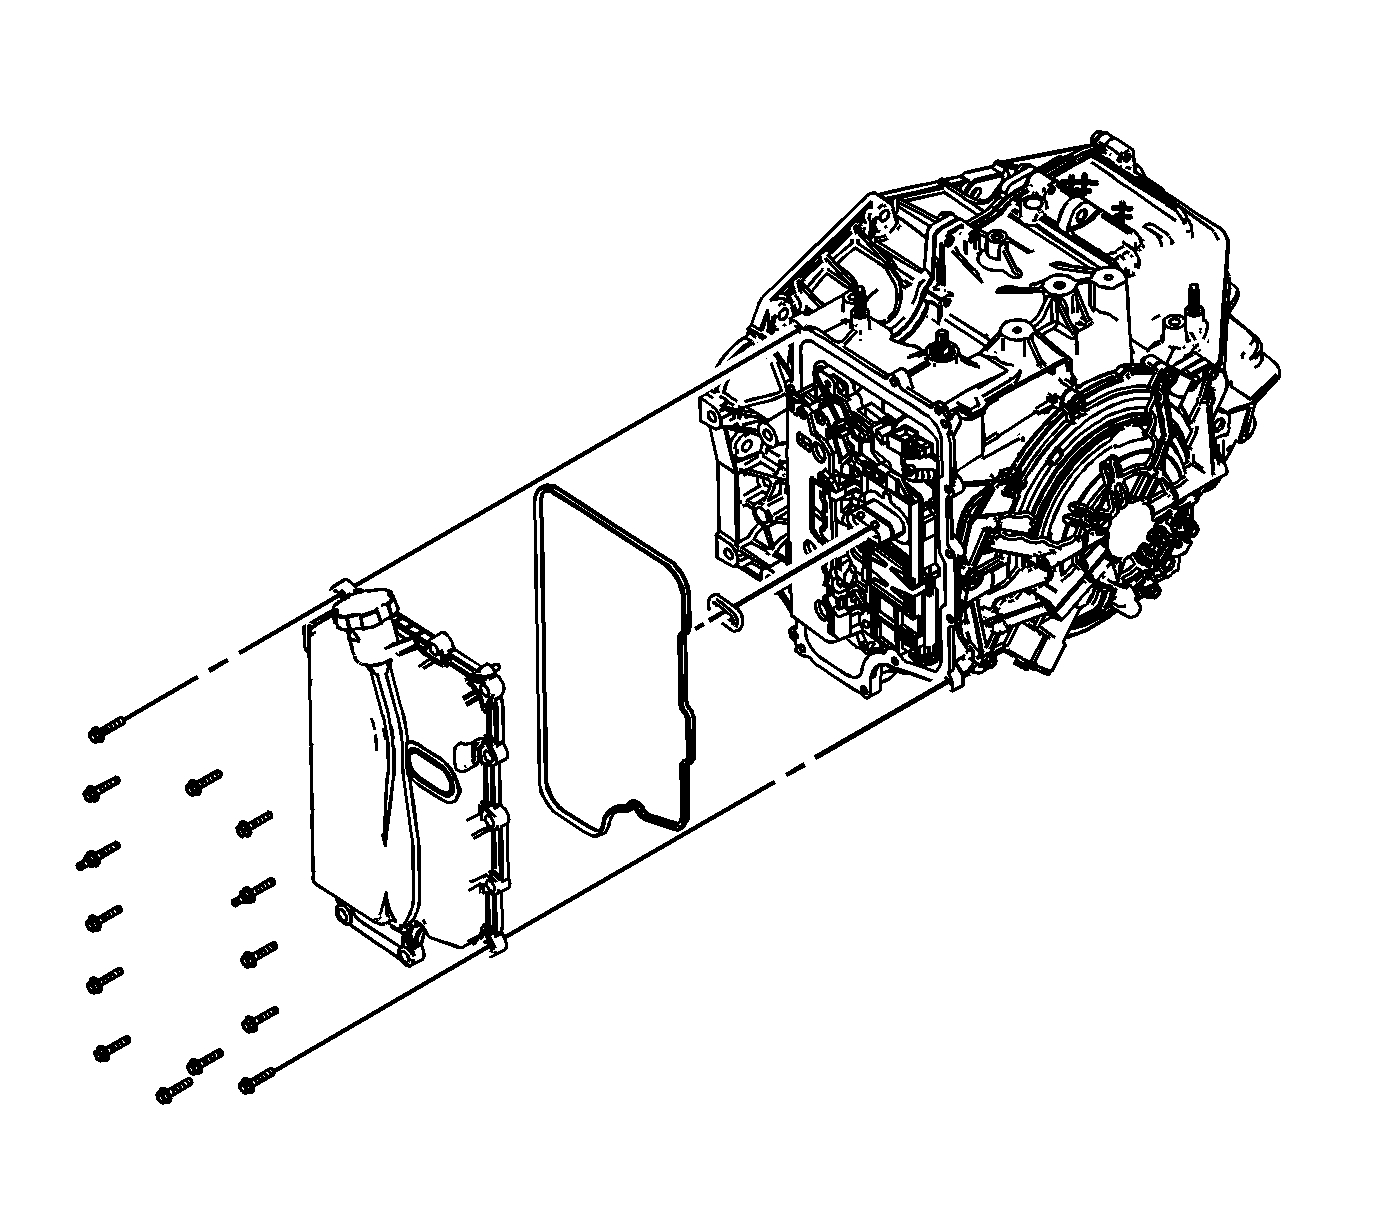
7. Remove the 2 control valve body cover studs M6 x 30.
8. Remove the 12 control valve body cover bolts M6 x 30.
9. Support the transmission with a transmission jack.
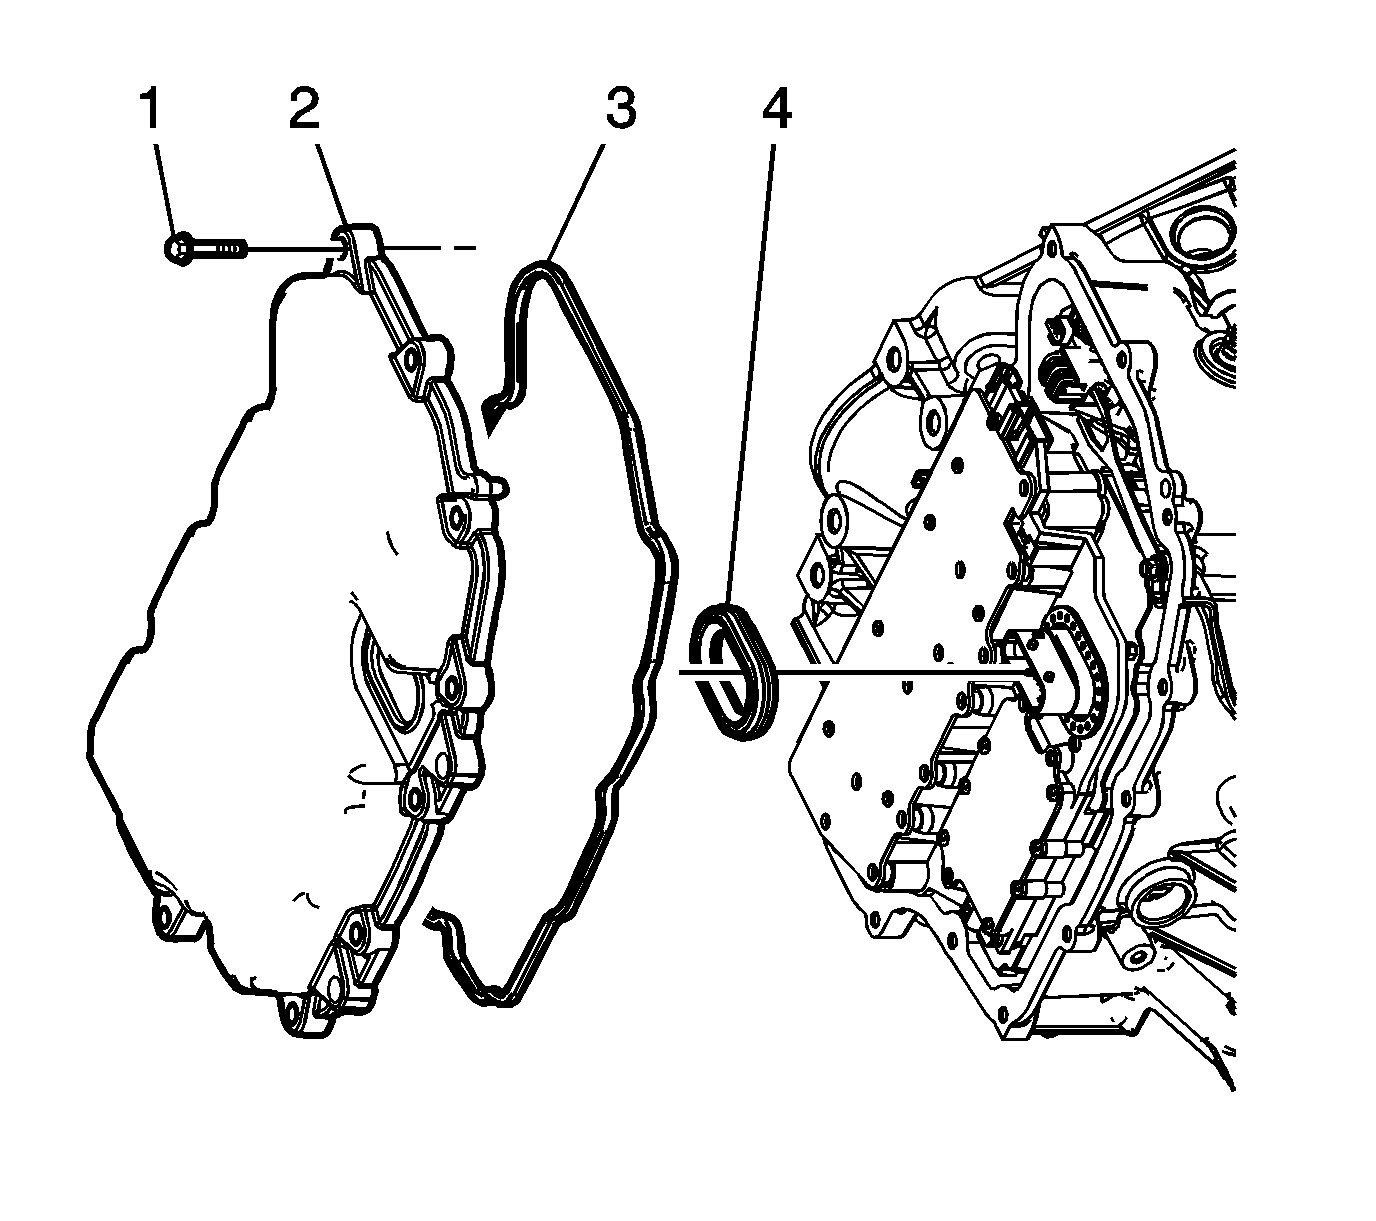
10. Remove the control valve body cover.
11. Remove the control valve body cover gasket.
Caution:
Support the control solenoid valve assembly around the connector when removing the seal. Excessive pulling force can damage the internal electrical connections.
12. Remove the control valve body cover wiring connector hole seal.
13. Remove all traces of the old gasket material. Clean the transmission case and control valve body cover gasket surfaces.
Installation Procedure
Picture 4
Note: The holes in the control valve body cover wiring connector hole seal must face toward the control solenoid valve assembly. If the holes face toward the valve body cover, there is a potential for a leak around the seal.
1. Install the control valve body cover wiring connector hole seal.
2. Install the control valve body cover gasket to the control valve body cover.
3. Install the control valve body cover.
Caution: Refer to Fastener Caution See: Vehicle > Technician Safety Information > Fastener Caution.
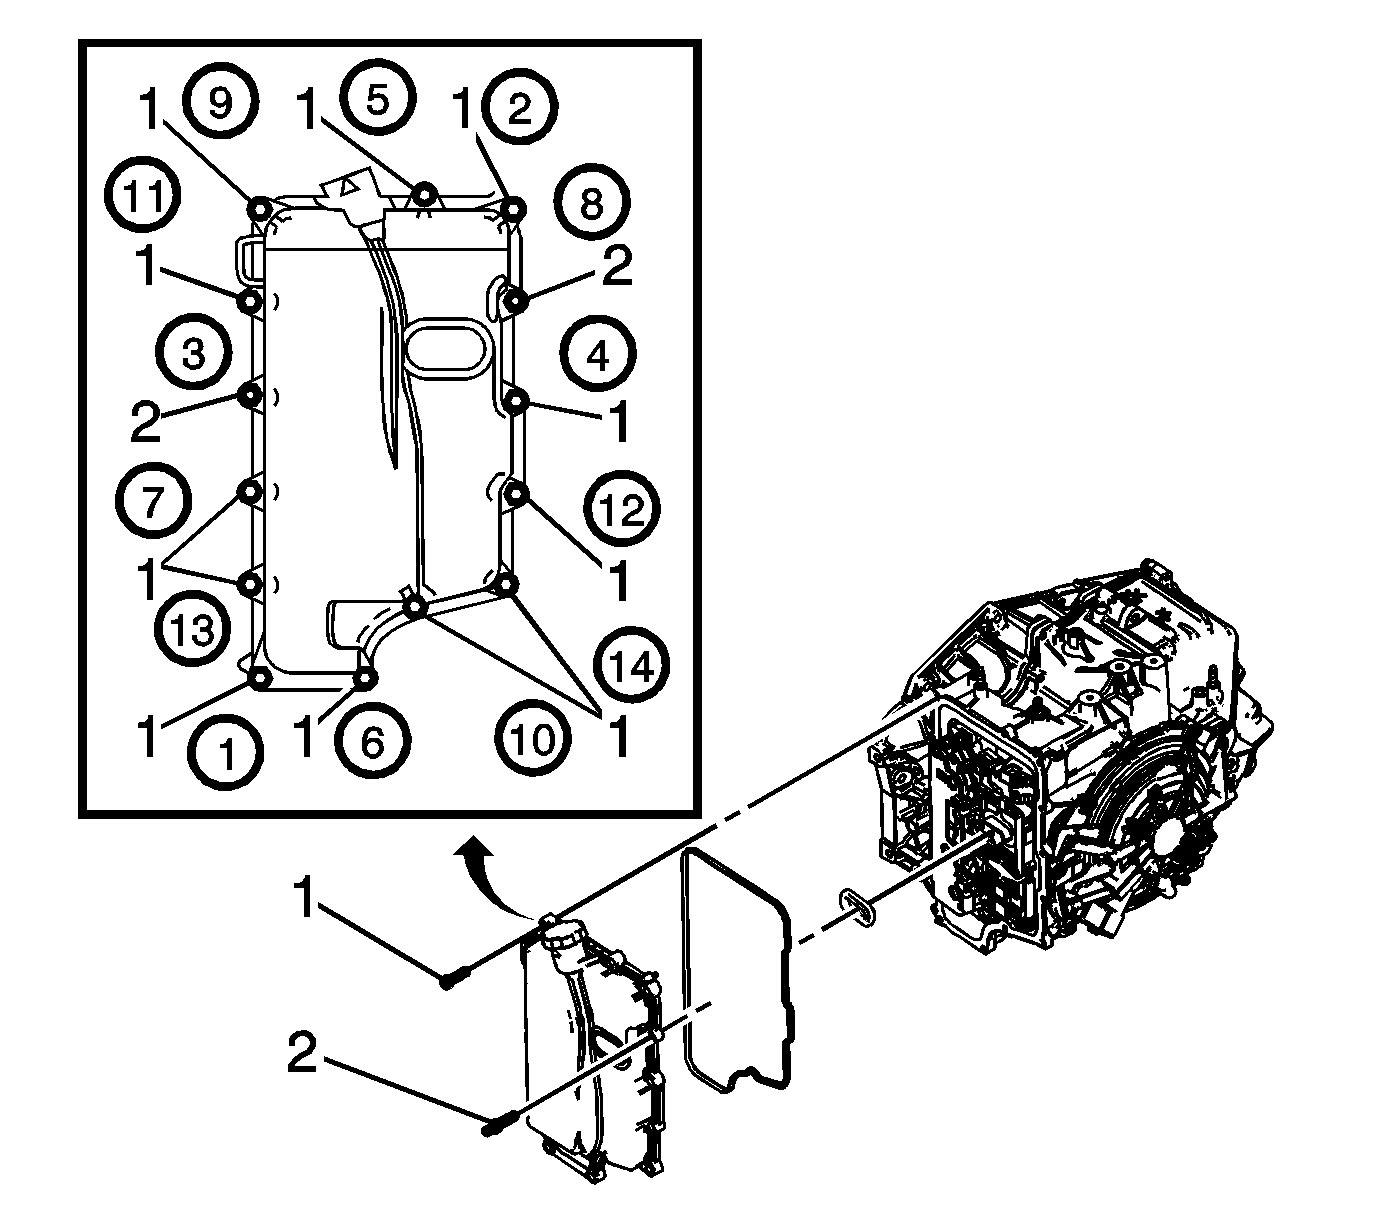
Note: Install all control valve body cover bolts and studs by hand then torque all bolts and studs in sequence.
4. Install the 12 control valve body cover bolts (1) M6 x 30 and tighten in sequence to 12 Nm (106 lb in).
5. Install the 2 control valve body cover studs (2) M6 x 30 and tighten in sequence to 12 Nm (106 lb in).
Picture 5
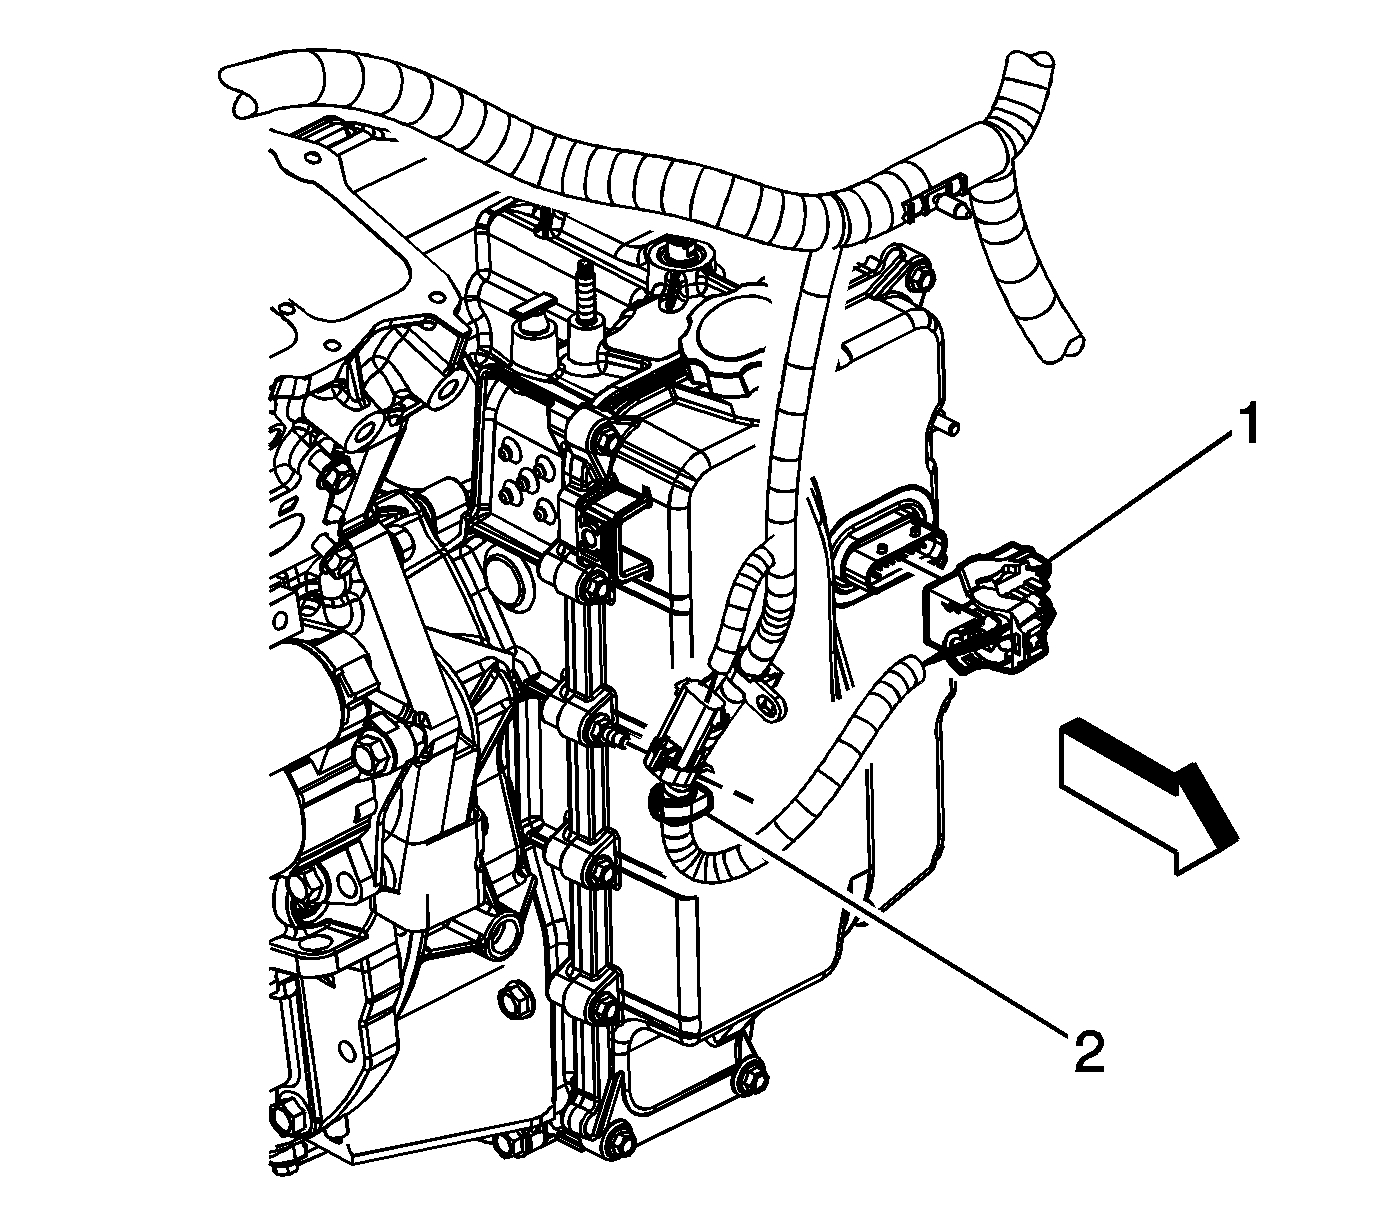
6. Connect the control valve body TCM electrical connector (1).
7. Install the wire harness retainer (2) to the control valve body cover stud. Tighten the nut to 12 Nm (106 lb in).
8. Lower the vehicle.
Picture 6
9. Install the oil cooler inlet and outlet hoses to the retainer on the control valve body cover, if equipped.
10. Connect the negative battery cable. Refer to Battery Negative Cable Disconnection and Connection See: Negative > Removal and Replacement > Battery Negative Cable Disconnection and Connection.
11. Fill the transmission. Refer to Transmission Fluid Drain and Fill See: Fluid - A/T > Removal and Replacement > Transmission Fluid Drain and Fill.
12. Check for leaks.
___________________________________
Control Valve Body Cover Replacement
Removal Procedure
1. Remove the battery tray. Refer to Battery Tray Replacement See: Battery Tray > Removal and Replacement > Battery Tray Replacement.
Picture 7
2. Remove the oil cooler inlet (1) and outlet (2) hoses from the retainer (2) on the control valve body cover.
3. Raise and support the vehicle. Refer to Lifting and Jacking the Vehicle See: Vehicle Lifting > Procedures > Lifting and Jacking the Vehicle.
4. Remove the front transmission mount. Refer to Transmission Front Mount Replacement See: Transmission Mount, A/T > Removal and Replacement > Transmission Front Mount Replacement.
5. Drain the transmission. Refer to Transmission Fluid Drain and Fill See: Fluid - A/T > Removal and Replacement > Transmission Fluid Drain and Fill.
Picture 8
6. Disconnect the control valve body transmission control module (TCM) electrical connector (1), then the wiring harness from the cover.
Picture 9
7. Remove the control valve body cover bolts (1).
8. Support the transmission with a transmission jack.
9. Using the transmission jack raise the transmission to gain clearance for removal of the control valve body cover.
10. Remove the control valve body cover.
11. Remove the control valve body cover gasket.
Caution:
Support the control solenoid valve assembly around the connector when removing the seal. Excessive pulling force can damage the internal electrical connections.
12. Remove the control valve body cover wiring connector hole seal.
13. Remove all traces of the old gasket material. Clean the transmission case and control valve body cover gasket surfaces.
Installation Procedure
Picture 10
1. Install the control valve body cover wiring connector hole seal (4).
2. Install the control valve body cover gasket (3) to the control valve body cover.
3. Install the control valve body cover (2).
4. Lower the transmission and remove the transmission jack.
5. Hand start the control valve body cover bolts (1).
Picture 11
Caution:
Refer to Fastener Caution See: Vehicle > Technician Safety Information > Fastener Caution.
Note:
Install all control valve body cover bolts and studs by hand then torque all bolts and studs in sequence.
6. Install the control valve body cover bolts. Tighten the bolts in sequence to 12 Nm (106 lb in).
Picture 12
7. Connect the control valve body TCM electrical connector (1), then clip the wiring harness to the cover.
8. Install the front transmission mount. Refer to Transmission Front Mount Replacement See: Transmission Mount, A/T > Removal and Replacement > Transmission Front Mount Replacement.
9. Lower the vehicle.
Picture 13
10. Install the oil cooler inlet (1) and outlet (5) hoses to the retainer (2) on the control valve body cover.
11. Fill the transmission. Refer to Transmission Fluid Drain and Fill See: Fluid - A/T > Removal and Replacement > Transmission Fluid Drain and Fill.
12. Install the battery tray. Refer to Battery Tray Replacement See: Battery Tray > Removal and Replacement > Battery Tray Replacement.
13. Check for leaks.
________________________________
Let me know if this helps.
Take care,
Joe
Images (Click to make bigger)
Tuesday, April 9th, 2019 AT 8:19 PM