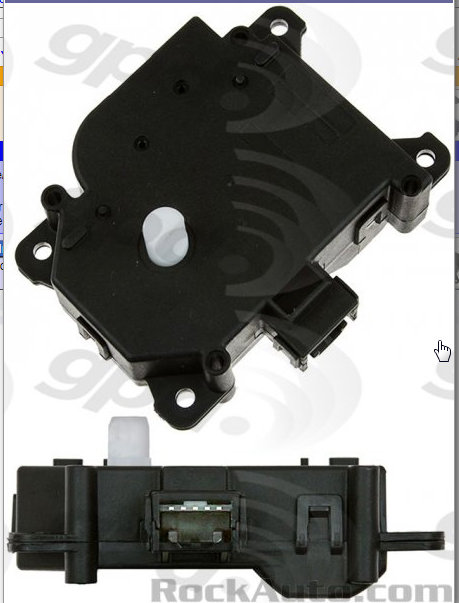
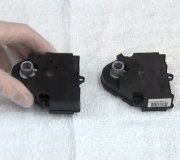
How to remove blend door assembly front passenger

Tiny
VA2019
  • MEMBER
  • 2011 TOYOTA SIENNA
  • 6 CYL
  • 2WD
  • AUTOMATIC
  • 200,000 MILES
Trying to replace a blend door actuator. Have the lower glove box door off and have removed three screws from the assembly which holds the two actuators (recirculation and hot/cold). The assembly is loose, but something is still holding it in place. Is there a clip or another screw? I'm trying not to break anything.
Saturday, December 14th, 2019 AT 11:11 AM

13 Replies

Tiny
KASEKENNY
  • MECHANIC
  • 18,907 POSTS
No. It is just a plastic gear on the inside. A lot of times these strip and will hold on to the door and feel like it doesn't want to come out but if you have the screws out then it should come out. There are four holes for screws but they normally only have 3 so I would just check to make sure there isn't another one and then just start wiggling it and it should come out.
Was this
answer
helpful?
Yes
No
Saturday, December 14th, 2019 AT 7:27 PM
Tiny
VA2019
  • MEMBER
  • 4 POSTS
Thank you, KASEKENNY1! You were right. Got it out and got the actuator replaced. Any advice for getting the assembly back in? 1) There is not much space to work with and it seems to be binding on something right before the gear shaft seats. 2) Should the various levers on the car that the actuators link to be in certain positions when the assembly is replaced or will they automatically get aligned once it is in and powered up? I'm sure they got moved as I was wiggling the assembly out, so not sure what position they were in originally. I did turn off the HVAC and I don't believe the defrost was on. Thanks again.
Was this
answer
helpful?
Yes
No
-1
Sunday, December 15th, 2019 AT 9:26 AM
Tiny
KASEKENNY
  • MECHANIC
  • 18,907 POSTS
Okay. You can do this a couple ways. If you have a scan tool to calibrate the actuator then just put it in and calibrate it. If you don't which most do not, plug the actuator in before installing it and set the temperature to full cold or full hot. This will but the actuator in this position and then you can manually move the door to the same position and then install the actuator. If you are not sure which position the door needs to be in, start the engine and manually move the door so that the air coming out is matching the setting.

https://www.2carpros.com/articles/replace-blend-door-motor
Was this
answer
helpful?
Yes
No
+1
Sunday, December 15th, 2019 AT 4:20 PM
Tiny
VA2019
  • MEMBER
  • 4 POSTS
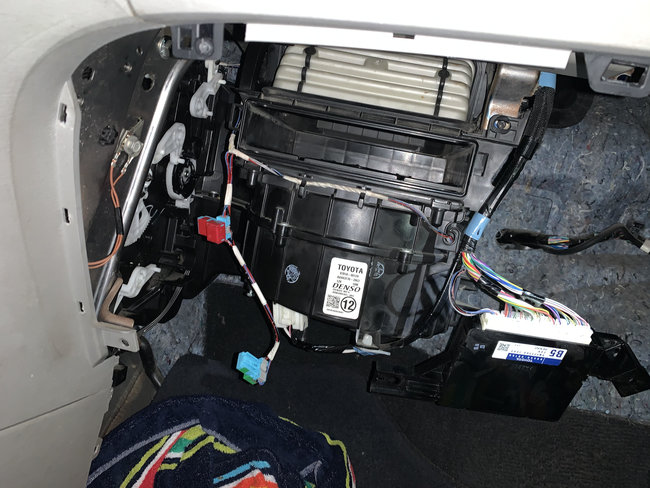
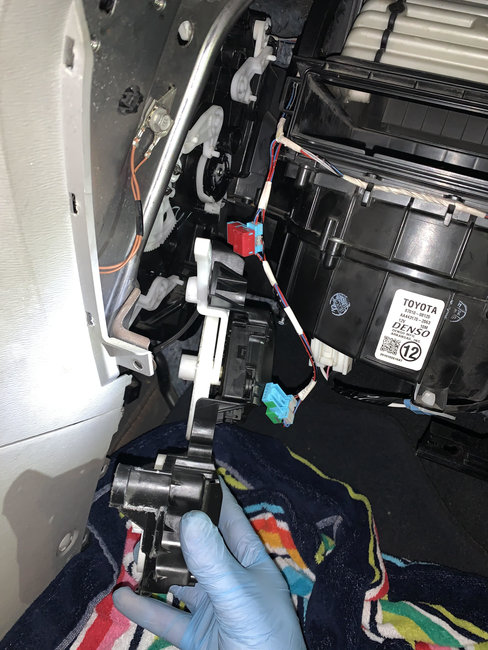
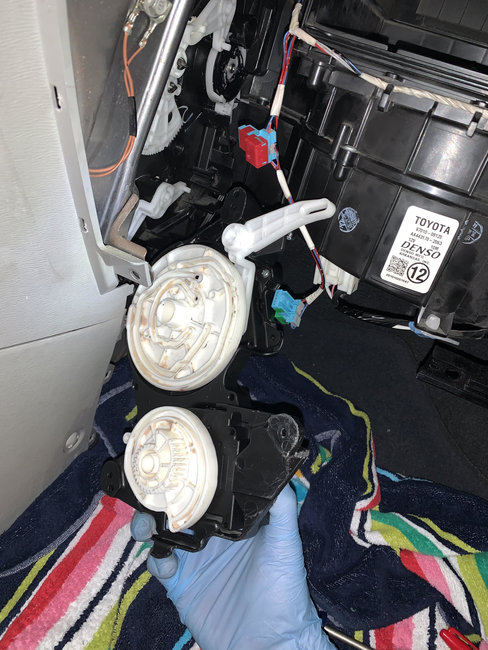
Thanks KASEKENNY1. I've got the doors mapped and the actuators set. The issue is that I still can't get the assembly containing the two actuators seated. The blower assembly makes things really tight and the assembly is binding on something such that the actuator wheel shaft will not seat. It seems painfully close. Is this even possible without major disassembly of the dash etc? I set about removing lower assembly of the blower, but it has unreachable screws in the back against the engine firewall. Is there some sort of trick to putting the actuators assemble back in so it doesn't bind? I've attached some pictures.
Was this
answer
helpful?
Yes
No
+1
Thursday, December 19th, 2019 AT 8:40 PM
Tiny
KASEKENNY
  • MECHANIC
  • 18,907 POSTS
I normally take the blower motor out but then again I have never done one on a Sienna, other Toyota's but not this one.

Unfortunately they don't design these with us in mind to make repairs on them. Sorry I don't have a secret tip on this one.
Was this
answer
helpful?
Yes
No
+1
Friday, December 20th, 2019 AT 6:48 PM
Tiny
VA2019
  • MEMBER
  • 4 POSTS
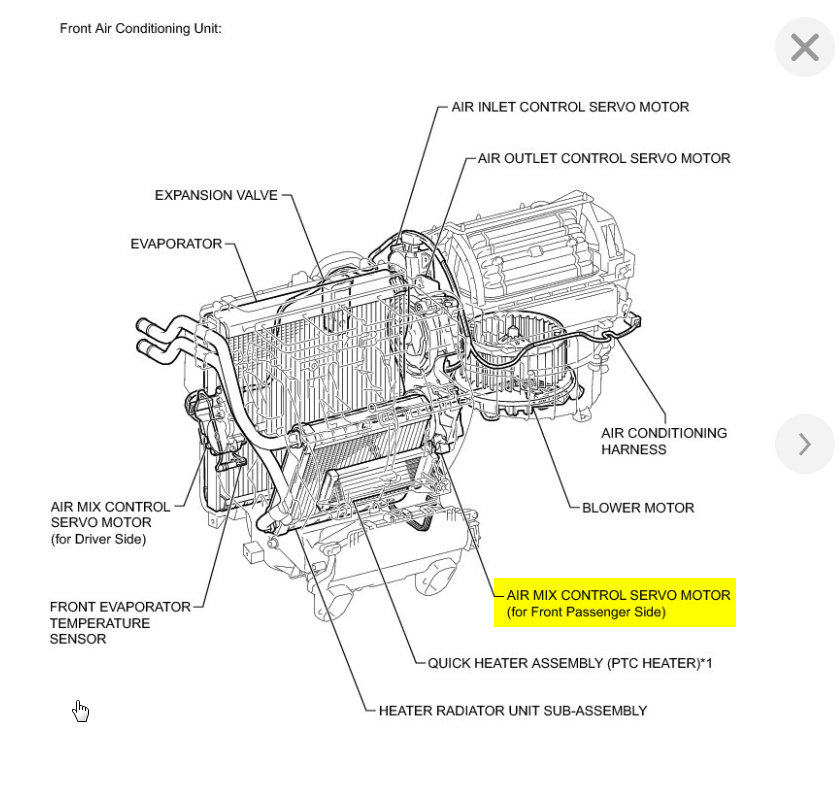
Thanks KASEKENNY1. I got it back together and everything is working as it should. I took the top wheel off the assembly and seated it first, then put in the assembly, seating the shaft from the top actuator into the wheel. This approach had two advantages. First, it gave me the extra space I needed to get the assembly in the right position. Second, it let me easily get the wheel aligned with the levers so they were seated and could be tested to avoid a misalignment that would likely result in something breaking when the actuator turned under power. So it turns out, it is possible to replace these actuators without a total disassembly of the dashboard (way beyond my at-home repair comfort level) or a huge bill from the dealer. $37 part from RockAuto and a bit of my time spread over a few days. With what I know now, I think I could do this start to finish in a few hours. Let me try to summarize for anyone else trying to do this.

1. With car on, set temperature to Max Cold, Recirculate to the On position, and the Mode setting to face vents (no feet or defrost). This step and step 2 will make it easier to remove and re-install the actuator assembly.
2. Press the defrost button. This is a dedicated button that is separate from and overrides the Mode setting.
3. Turn the car off and disconnect the battery - this will keep the actuators from moving further and is recommended for safety with the airbag system.
4. Remove the lower glove box door, the trim panel behind it, and the trim panel on the lower left of the passenger foot well. The glove box comes out by just pinching the sides inward and disconnecting the damper on the right side (simple, you can find videos online)
5. Remove the foot vent duct (no screws, just some clips).
6. Unclip the two harness plugs to the top and lower actuators.
7. Remove the three screws that attach the actuators assembly. The top screw is accessible through the recirculation assembly provided you have set the recirculation to On which rotates the recirculation door back toward the engine and out of the way.
8. Remove the assembly. Push it away from mount (same direction the screws came out) to unseat the two shafts then wiggle it out. There is no real trick other than trial and error. The gears and levers are pliable plastic so unless you really force something, you are unlikely to break anything. I ended up just jiggling it vigorously until it came loose enough to remove.
9. With the actuators assembly out, it is a simple process to replace either or both actuators. They are attached with a few screws and plastic clips.
10. Reattach the harness wires to the still removed assembly. Reconnect the battery and turn the car back on. Confirm the system is still at the settings from steps one and two. This will ensure that the new actuator rotates to the correct position for reassembly.
11. Turn off car. Disconnect the battery. Disconnect the harness clips again.
11. Set the levers under the dash manually as follows working from the bottom up.
* The bottom lever is gravity set, meaning it always falls to a given position and you don't need to fuss with it.
* The next lever, a geared semi-circle should be set toward the passenger cabin.
* The next lever is a black wheel with a two black nubs. It only turns a quarter turn or so in either direction. Push the top nub toward the engine to turn the the wheel clockwise until it stops.
* The next lever is for the feet vent door. Push it toward the engine to close the feet vent door. You can visually confirm the door is closed -- it is located where the foot vent duct was removed.
* The top front and top back actuators can be left in their gravity settings.
12. Remove the white plastic wheel from the top actuator. Its just a clip on the shaft that releases it.
13. Seat the wheel in the shaft hole. This is a little tricky and will take some trial and error and perhaps a bit of study of the grooves. When you have it in correctly, you will feel it snap in and be able to rotate it toward the engine (clockwise) almost a full turn and see the levers move. If it isn't in correctly, it will turn only a little and bind. If this happens, check all the lever settings are in the positions from step 11 and try again. Remember, the wheel has to be in the correct position for the semicircle shaft of the actuator to seat -- I used a sharpie to mark the alignment when it clicked in so I could rotate test, but still come back to the correct starting position.
14. While keeping a bit of pressure to the whee so it doesn't unseat from the levers, slide the actuator back into position. This is another tricky part because if the wheel moves too much, it will no longer be connected properly to the lever arms which will likely cause something to break when the actuator turns under power. I had someone else with small hands hold the wheel in so I could use two hands to get the assembly back in. This takes some patience and a bit of maneuvering and wiggling, but the shaft should seat in the wheel and the arm for top front lever should also seat and connect.
15. Secure the actuators assembly with the three mounting screws removed in step 7.
16. Reattach the harness plugs and reconnect the battery.
17. Turn on the car and observe the actuators assembly and lever arms. Check that everything is working as expected by changing the temperature to Max Hot and Max Cold (bottom actuator) and cycling the Mode settings (top actuator). Mine all worked under power, but I was ready to turn the car off if I heard things binding.
18. Replace foot vent duck, trim pieces, and glove box.

Hope this helps.
Was this
answer
helpful?
Yes
No
+10
Sunday, December 22nd, 2019 AT 8:26 PM
Tiny
KASEKENNY
  • MECHANIC
  • 18,907 POSTS
Wow. Great info. Thanks so much for taking the time to update that. I am sure others will benefit from that. Hope you come back to use 2CarPros in the future. Thanks
Was this
answer
helpful?
Yes
No
+3
Monday, December 23rd, 2019 AT 7:25 PM
Tiny
VA2022
  • MEMBER
  • 2 POSTS
VA2019 - I have the same problem on my Toyota Highlander 2012 but a little worse. My semi-circle gear shaft broke off so the blend door for heat won't close.

I got the assembly loose, but I am super struggling on how to get it off because of the tightness of the blower motor.

I live in Aldie, VA and would gladly commute to your location and pay you for your expertise. Do you happen to live in VA?
Was this
answer
helpful?
Yes
No
Wednesday, May 18th, 2022 AT 8:52 PM
Tiny
VA2022
  • MEMBER
  • 2 POSTS
Va2019 I have the same problem on a '12 highlander. If you happen to be in VA I would happily drive to your location from Aldie and compensate you for your time than keep struggling. I just can't get the actuator assembly off due to the space limitations imposed by the blower motor.
Was this
answer
helpful?
Yes
No
Wednesday, May 18th, 2022 AT 8:57 PM
Tiny
MN2013
  • MEMBER
  • 2 POSTS
VA2019 - Is your 18-step process from Sunday, December 22ND, 2019 for a 3rd Gen Sienna (2013) or for a different model? I have the same issue on my passenger side. Thanks!
Was this
answer
helpful?
Yes
No
Monday, November 27th, 2023 AT 9:49 AM
Tiny
KEN L
  • MASTER CERTIFIED MECHANIC
  • 42,895 POSTS
What problem are you having? Can you upload an image or a short video of the issue so we can walk you through the repair?
Was this
answer
helpful?
Yes
No
Thursday, November 30th, 2023 AT 10:49 AM
Tiny
MN2013
  • MEMBER
  • 2 POSTS
Thanks Ken L. The issue was the same as VA2019 listed where the passenger side of my 2013 Sienna van wouldn't heat, it would only blow cold air. I used all the tips I found online and was able to replace the passenger side blend door actuator and now it works as normal.
Was this
answer
helpful?
Yes
No
Friday, December 1st, 2023 AT 1:40 PM
Tiny
KEN L
  • MASTER CERTIFIED MECHANIC
  • 42,895 POSTS
Thanks for letting us know, we are here to help, please use 2CarPros anytime.
Was this
answer
helpful?
Yes
No
Saturday, December 2nd, 2023 AT 10:29 AM

Please login or register to post a reply.

Sponsored links