Hi and thanks for using 2CarPros.
There are several thing that can cause this, but since it works most often when giving it gas, that leads me to believe the coolant is low. Do me a favor. Read through this link and see if anything helps.
https://www.2carpros.com/articles/car-heater-not-working
If the coolant is full, you may also have an air pocket in the cooling system restricting coolant from flowing.
Next, start the engine and turn the heat on. Allow the engine to reach operating temperature and then feel both heater core hoses under the hood. They run from the engine to the firewall. Both should be hot. If one is hot and the other not, suspect the heater core is plugged and not allowing coolant to flow.
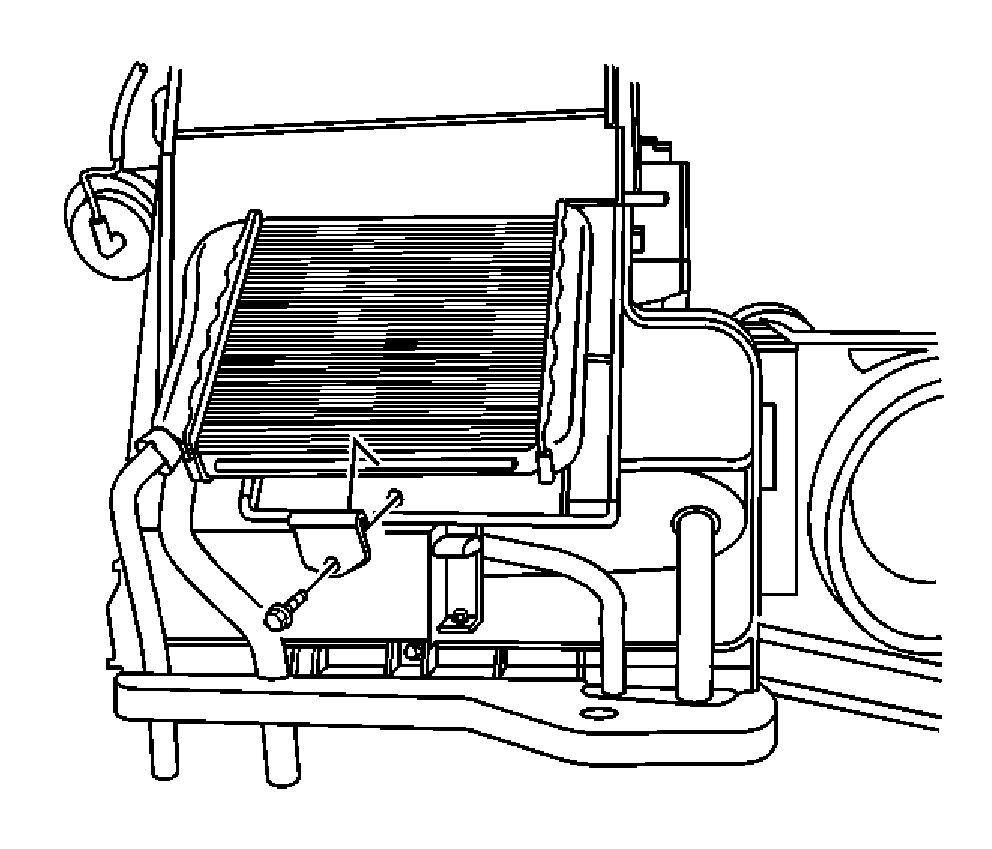
If both are hot, suspect a bad blend air door actuator. I will provide directions for replacing both. I will start with the heater core. The first picture correlates with these directions.
___________________________________________
HEATER CORE REPLACEMENT
HEATER CORE REPLACEMENT
REMOVAL PROCEDURE
1. Remove the HVAC module assembly. See: Housing Assembly HVAC > Procedures > HVAC Module Assembly Replacement
2. Turn the HVAC module assembly over.
3. Remove the heater core case cover.
4. Remove the heater core bracket and screw.
5. Remove the heater core.
INSTALLATION PROCEDURE
1. Install the heater core to the HVAC module assembly.
2. Install the heater core bracket and screw.
NOTICE: Use the correct fastener in the correct location. Replacement fasteners must be the correct part number for that application. Fasteners requiring replacement or fasteners requiring the use of thread locking compound or sealant are identified in the service procedure. Do not use paints, lubricants, or corrosion inhibitors on fasteners or fastener joint surfaces unless specified. These coatings affect fastener torque and joint clamping force and may damage the fastener. Use the correct tightening sequence and specifications when installing fasteners in order to avoid damage to parts and systems.
Tighten
Tighten the bracket screw to 1 Nm (9 lb. in).
3. Install the heater core case cover.
4. Install the heater core case cover screws.
Tighten
Tighten the cover screws to 1 Nm (9 lb. in).
5. Install the HVAC module assembly. See: Housing Assembly HVAC > Procedures > HVAC Module Assembly Replacement
_____________________________________________________
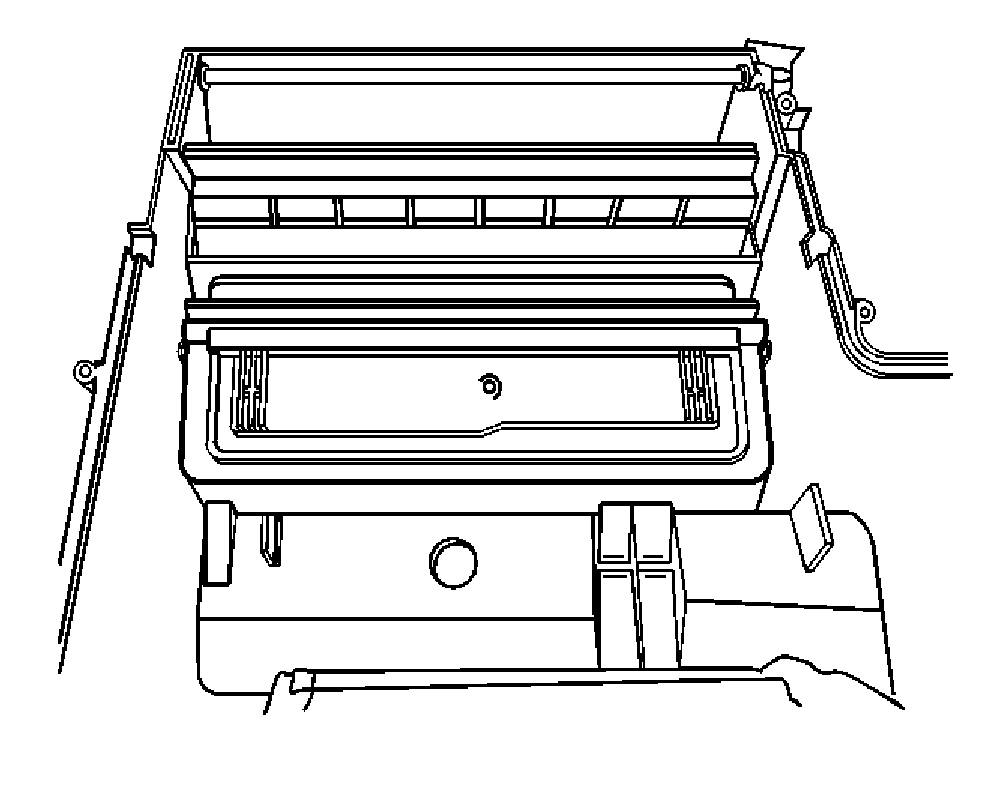
Here are the directions for replacing the blend air door actuator. It is responsible for adjusting air temp that enters the vehicle. The last picture correlate with these directions.
____________________________________________________
AIR TEMPERATURE DOOR REPLACEMENT
AIR TEMPERATURE DOOR REPLACEMENT
REMOVAL PROCEDURE
1. Remove the evaporator core.
2. Unclip the link end of the temperature door shaft.
3. Remove the temperature door from the module. Complete the following steps:
3.1. Slide the door to the right.
3.2. Pull down on the door in order to remove the link end of the door.
INSTALLATION PROCEDURE
1. Install the temperature door to the module. Complete the following steps:
1.1. Insert the link end of the door into the module.
1.2. Push up on the door into the module in order to seat the door.
2. Clip the link end of the temperature door shaft.
3. Install the evaporator core.
______________________________________________
I have to be honest, it truly sounds like either trapped air in the system or low coolant. Check those things first.
Let me know if this helps or if you have other questions.
Joe
Images (Click to enlarge)
Jan 11, 2019 at 8:20 PM