Hi and thanks for using 2CarPros.
The factory core would have been aluminum, so I suggest staying with that.
Here is a link that shows how one is replaced:
https://www.2carpros.com/articles/replace-heater-core
Here are the directions for replacement specific to your vehicle. The attached pictures correlate with these directions.
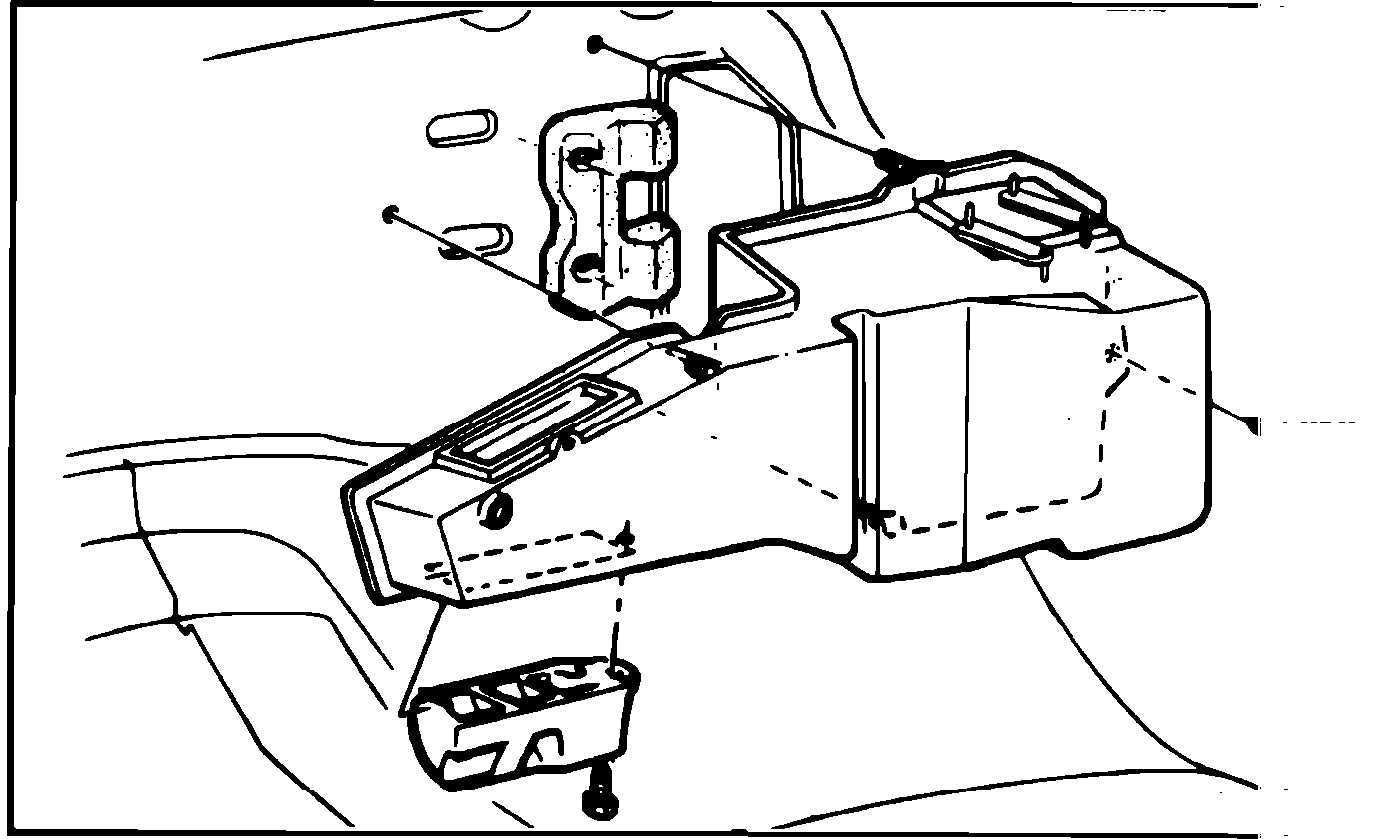
Fig. 23 Heater distributor assembly. C, K, R & V models less A/C
Pic 1
C, K, R & V MODELS
Less A/C
1. Disconnect battery ground cable, then drain cooling system.
2. Disconnect heater hoses at core, then plug core tubes to prevent coolant spillage.
3. Working from engine compartment, remove distributor duct stud attaching nuts.
4. Remove glove box and door assembly.
5. Disconnect air-defrost and temperature door cables.
6. Remove floor outlet, then the defroster duct to heater distributor duct attaching screw.
7. Remove heater distributor to dash panel attaching screws, Fig. 23.
8. Pull distributor rearward, then disconnect all harnesses that will interfere with distributor removal.
9. Remove heater distributor from vehicle.
10. Remove heater core retaining straps, then the heater core.
11. Reverse procedure to install.
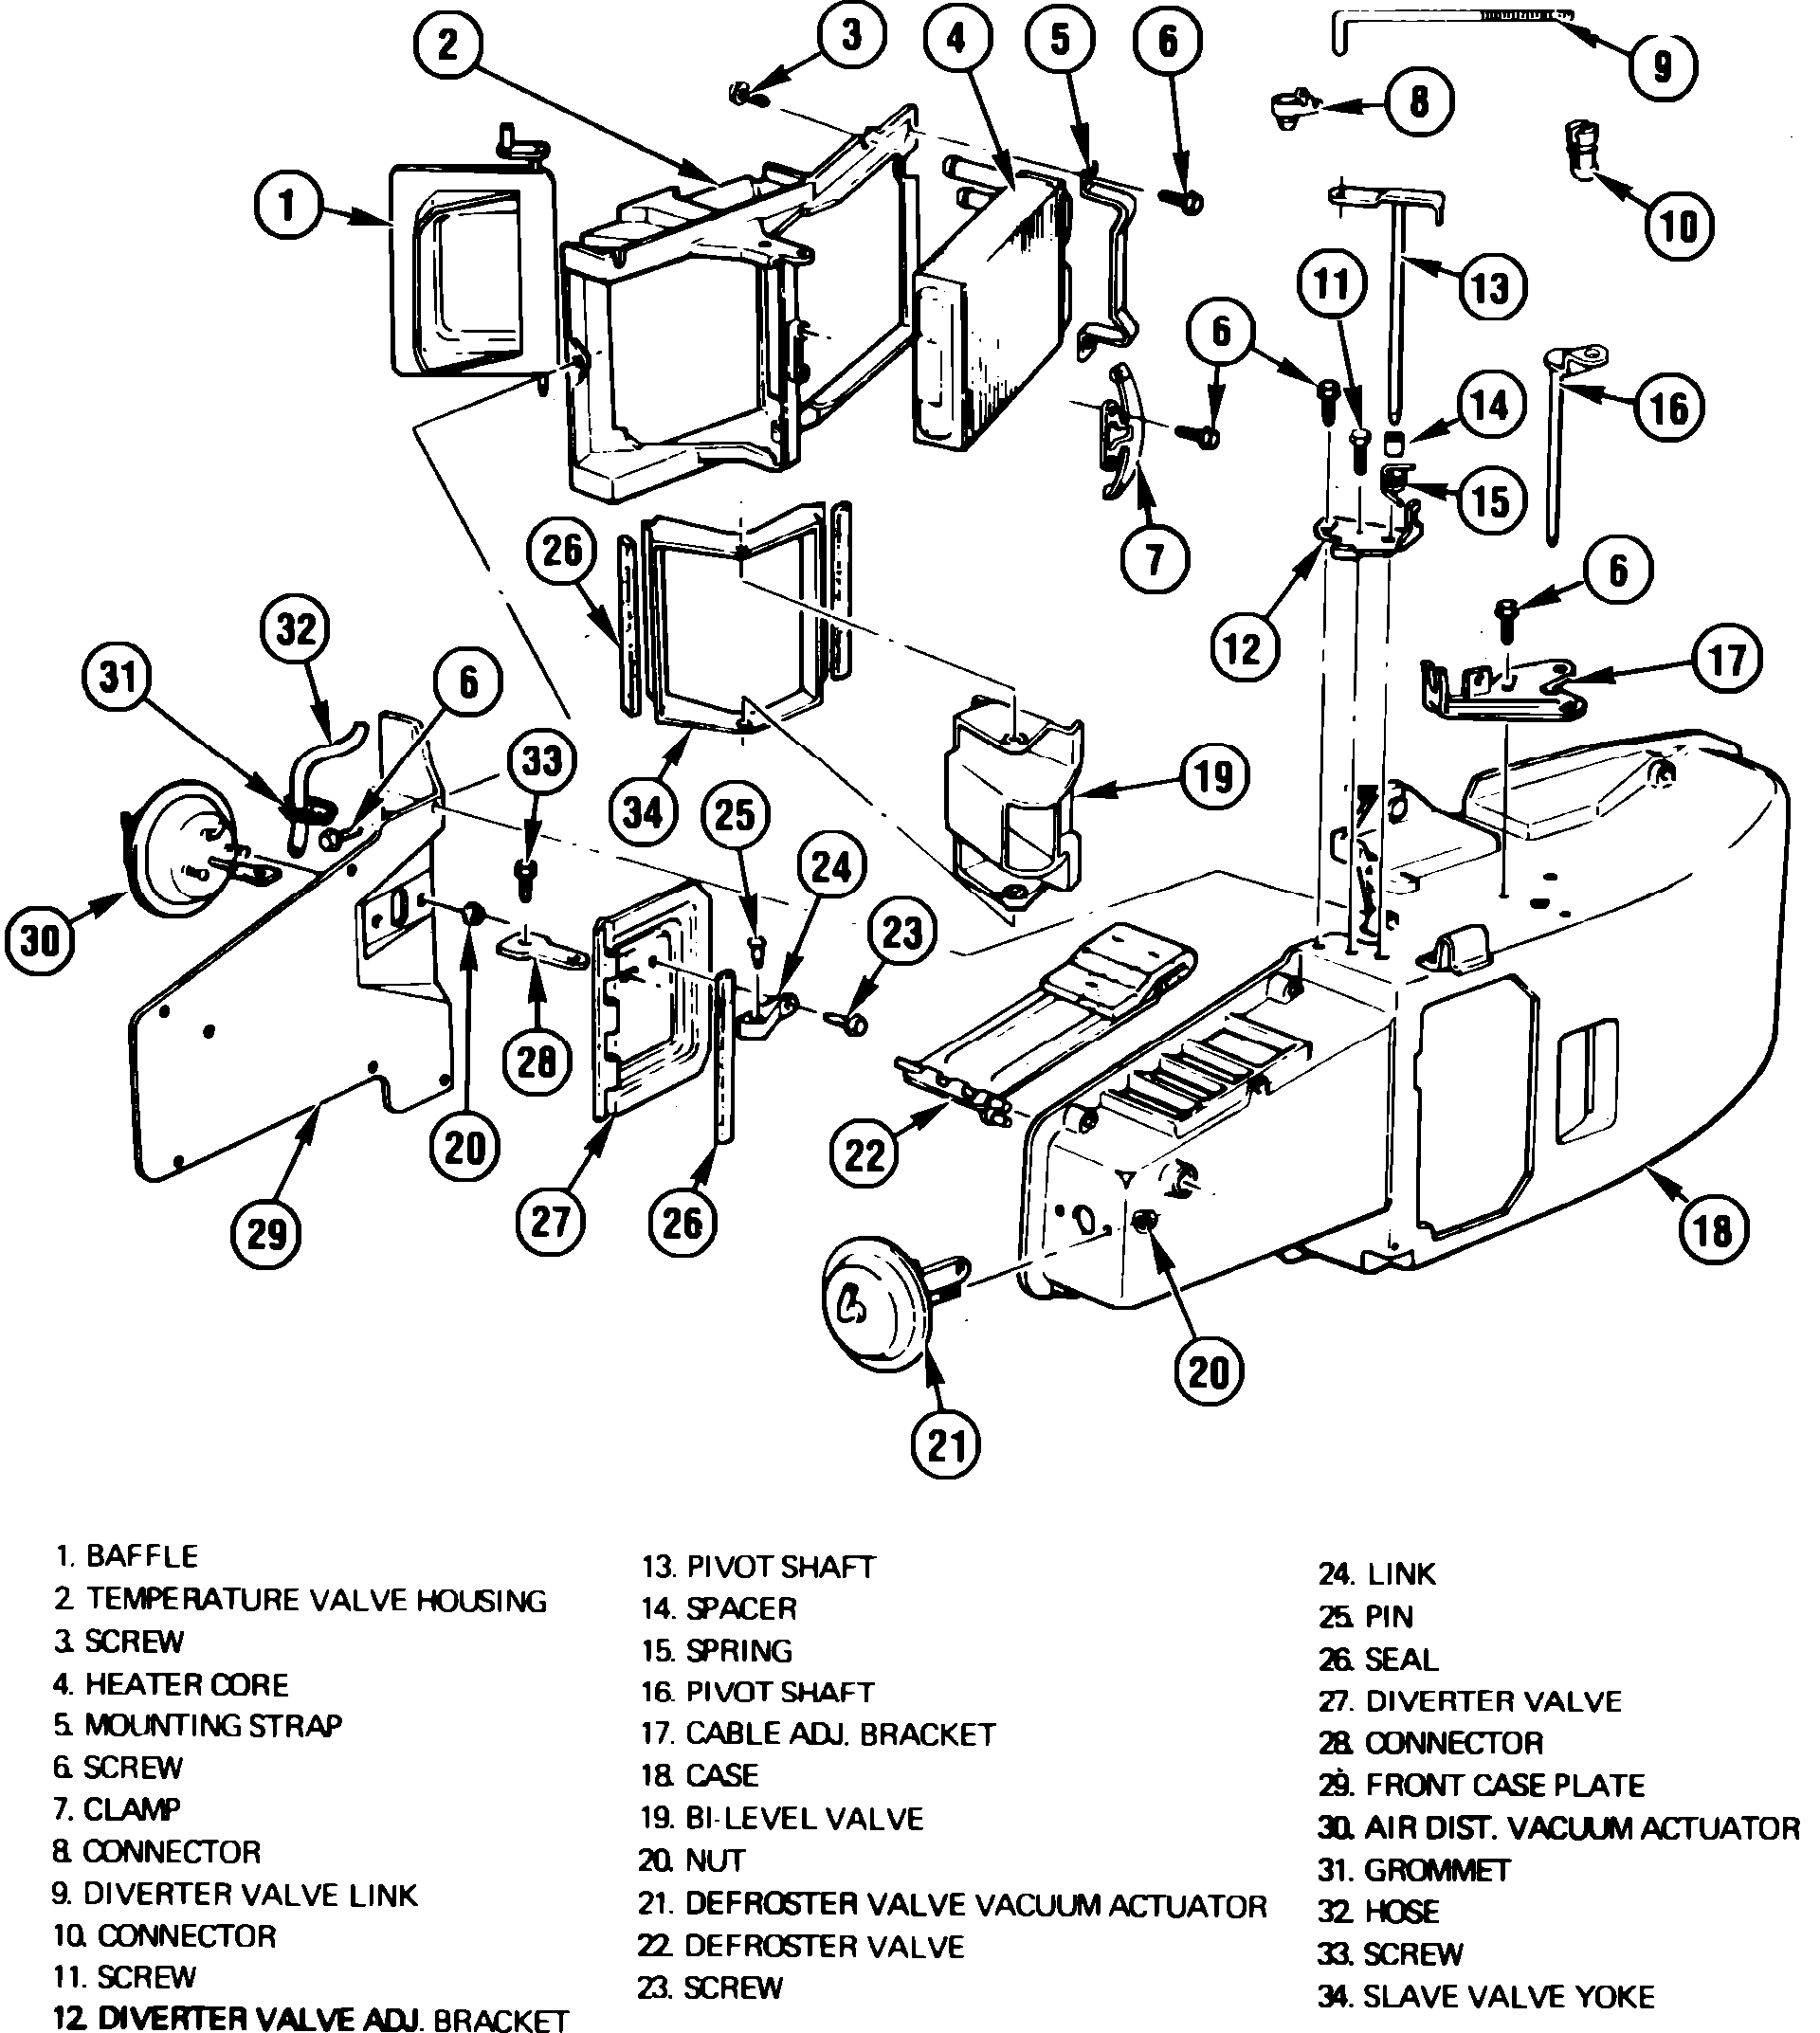
Fig. 24 A/C & heater assembly. C, K, R & V models
Picture 2
With A/C
1. Disconnect battery ground cable, then drain cooling system.
2. Disconnect heater hoses at core and plug core tubes.
3. Remove glove box assembly.
4. Remove screws at center duct to selector duct/instrument panel. Remove center upper and lower ducts.
5. Disconnect bowden cable at temperature door.
6. Remove nuts at selector duct studs (projecting through firewall). Remove selector duct to firewall screw.
7. Draw selector duct assembly rearward so core tubes clear firewall. Lower assembly sufficiently to remove vacuum lines and harness connections.
8. Remove selector duct assembly. Disconnect core mounting straps and remove core, Fig. 24.
9. Reverse procedure to install.
Let me know if this helps or if you have other questions.
Take care,
Joe
Images (Click to enlarge)
Feb 24, 2019 at 5:37 PM