Hi and thanks for using 2CarPros.com.
Here are the directions for removing the assembly. I also added bulb replacement as well as headlight and fog light aiming procedures. All attached pictures correlate with these directions.
______________________________
Removal
1. Disconnect the negative (-) battery terminal.
2. Remove the front bumper.
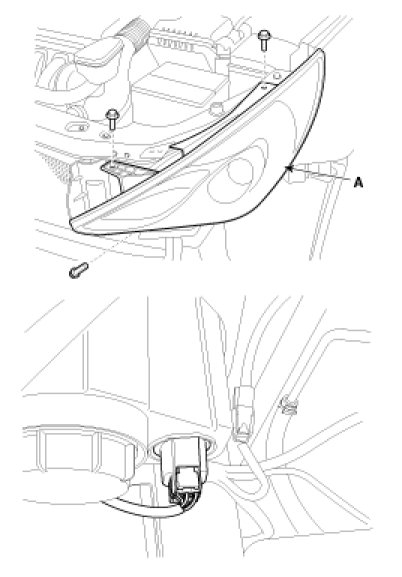
3. Loosening the head lamp mounting bolts (3EA) and disconnect the head lamp connector.
Then, remove the head lamp assembly (A).
NOTE:
- Take care not to scratch the head lamp lens or fender.
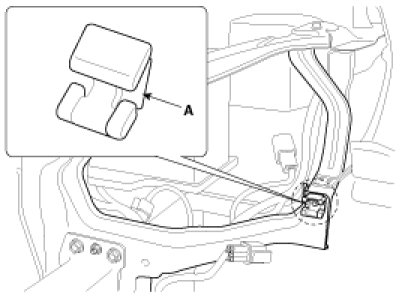
NOTE:
Take care that holding clip (A) is not to be damaged.
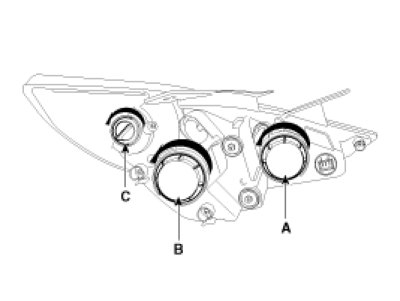
4. Remove the dust caps from the head lamp assembly after turning in the counter clock-wise direction.
A : Head Lamp (High) Cap
B : Head Lamp (Low) Cap
C : Turn Signal Lamp
Installation
1. Install the head lamp assembly after connecting the connector.
2. Install the front bumper.
3. Connect the negative (-) battery terminal.
Head Lamp Aiming Instructions
The head lamps should be aimed with the proper beam-setting equipment, and in accordance with the equipment manufacturer's instructions.
NOTE:
If there are any regulations pertinent to the aiming of head lamps in the area where the vehicle is to be used, adjust so as to meet those requirements.
Alternately turn the adjusting gear to adjust the head lamp aiming. If beam-setting equipment is not available, proceed as follows:
1. Inflate the tires to the specified pressure and remove any loads from the vehicle except the driver, spare tire, and tools.
2. The vehicle should be placed on a flat floor.
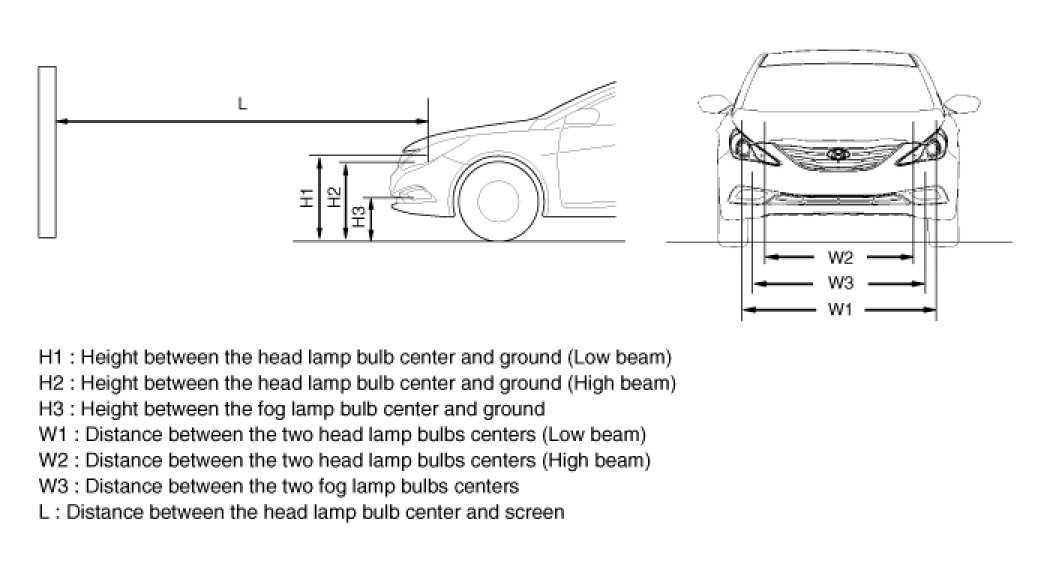
3. Draw vertical lines (Vertical lines passing through respective head lamp centers) and a horizontal line (Horizontal line passing through center of head lamps) on the screen.
4. With the head lamp and battery in normal condition, aim the head lamps so the brightest portion falls on the horizontal and vertical lines.
A : Vertical
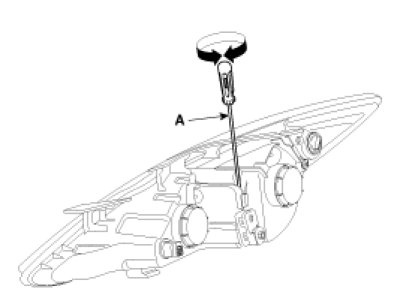
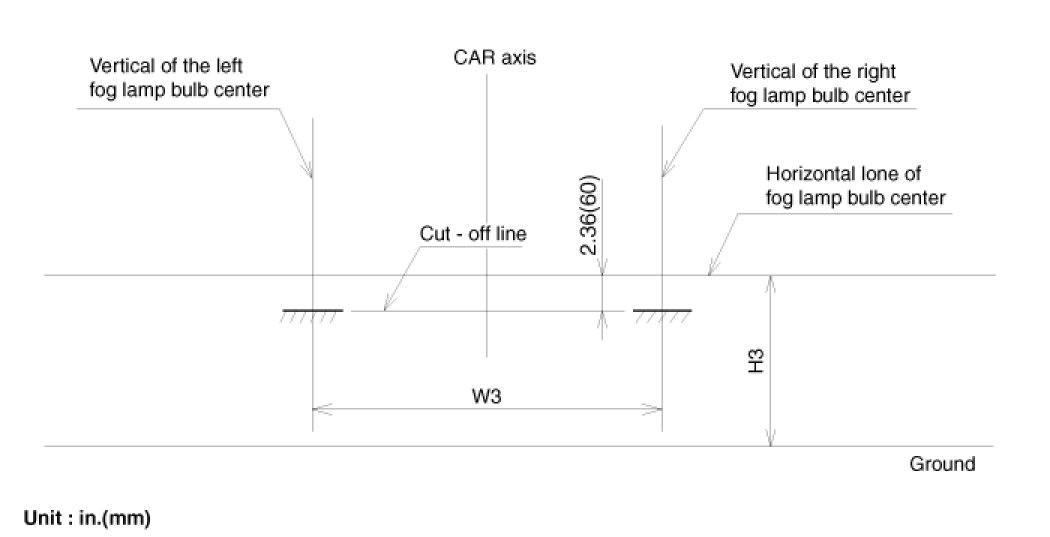
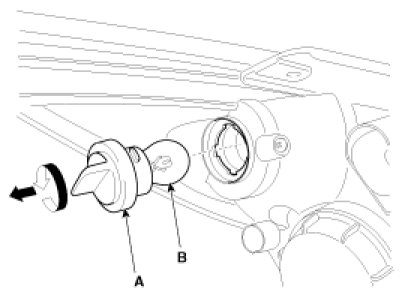
Front Fog Lamp Aiming
The front fog lamps should be aimed as the same manner of the head lamps aiming.
With the front fog lamps and battery normal condition, aim the front fog lamps by turning the adjusting screw (A) with a driver.
Head Lamp And Fog Lamp Aiming Point
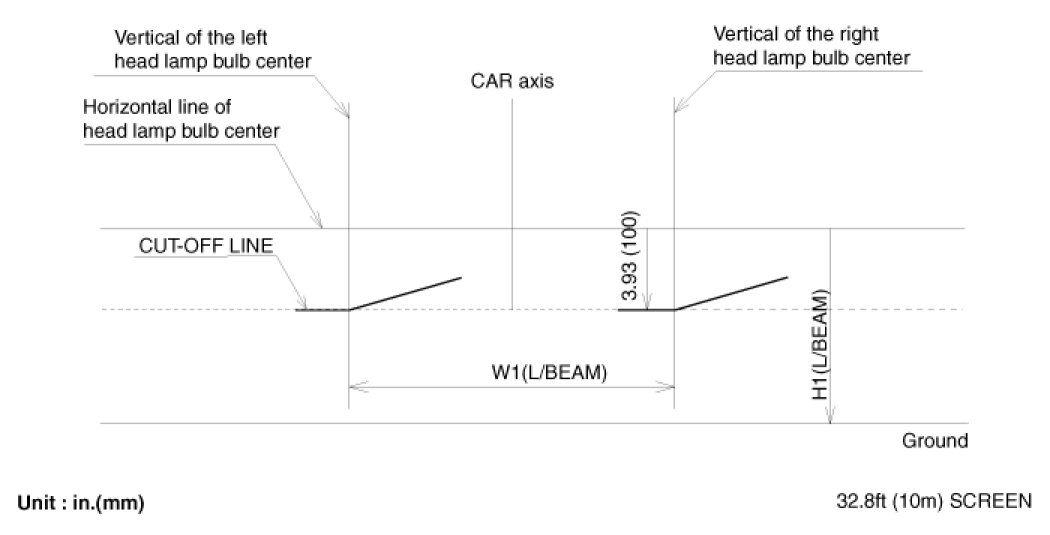
1. Head Lamp (Low beam)
A. Turn the low beam on without driver aboard.
B. The cut-off line should be projected in the cut-off line shown in the picture.
C. When aiming the low beam, vertical aiming should be adjusted after adjusting the horizontal aiming.
D. If head lamp leveling device is equipped, adjust the head lamp leveling device switch with 0 positions.
2. Turn the front fog lamp on without the driver aboard.
Replacement
Head Lamp (Low) bulb
1. Turn the head lamp switch off.
2. Disconnect the power connector from the lamp.
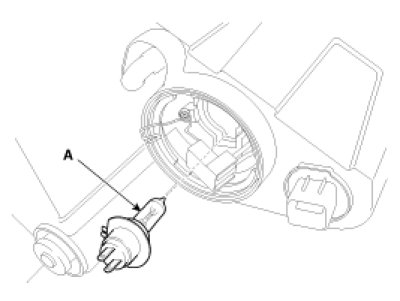
3. Remove the head lamp (Low) cap.
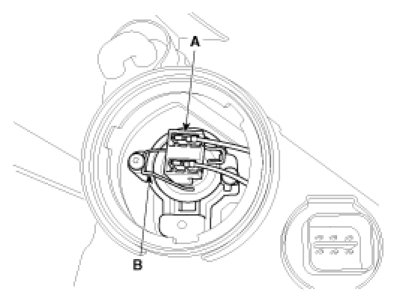
4. Disconnect the connector.
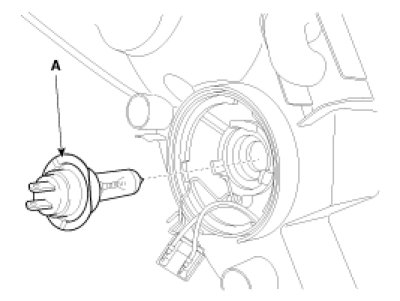
5. Remove the bulb (A) after releasing the fixing clip.
6. Installation is the reverse of removal.
Head lamp(High) bulb
1. Turn the head lamp power off.
2. Disconnect the power connector from the lamp.
3. Remove the head lamp (High) cap.
4. Remove the fixing clip (B) and connector (A) from the head lamp (High) bulb.
5. Remove the head lamp (High) bulb (A).
6. Installation is the reverse of removal.
Turn Signal Lamp
1. Turn the head lamp power off.
2. Remove the socket and turn signal bulb after removing the cover on the front side of the wheel guard.
NOTE:
- There is cover on the front side of wheel guard to make easy to replace the turn signal lamp.
3. Remove the turn signal lamp through the wheel guard cover hole.
4. Installation is the reverse of removal.
_________________________________________
I hope this helps. Let me know if you have other questions.
Take care,
Joe
Images (Click to enlarge)
Aug 29, 2018 at 6:27 PM