REMOVAL PROCEDURE
CAUTION: Refer to Battery Disconnect Caution in Cautions and Notices. See: Battery Service Precautions
1. Disconnect the battery negative cable.
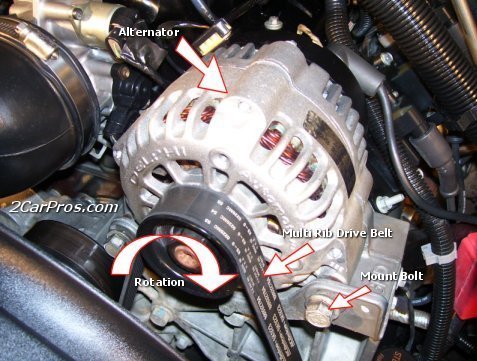
2. Remove the drive belt.
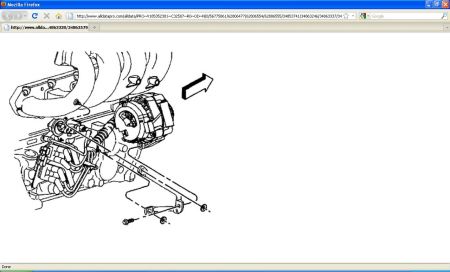
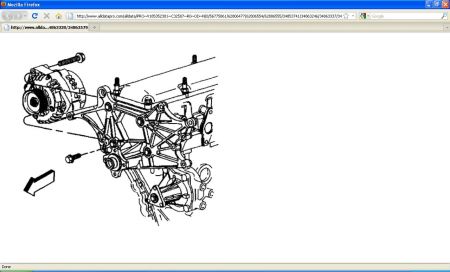
3. Working through the wheel well, remove the generator rear brace from the engine.
o Remove the generator brace to the engine block bolt.
o Remove the generator brace to the intake manifold nut.
o Remove the generator brace to the engine stud nut.
o Disconnect the generator electrical connector.
o Remove the generator output (BAT) terminal nut and wire.
4. Remove the generator mounting bolts.
5. Remove the generator from the vehicle.
INSTALLATION PROCEDURE
1. Install the generator to the vehicle. Notice: Refer to Fastener Notice in Cautions and Notices.
2. Install the generator attaching bolts.
Tighten
2.1. Tighten the rear generator bolt to 50 N.m (37 lb ft) .
2.2. Tighten the front generator bolt to 25 N.m (18 lb ft) .
3. Install the generator output (BAT) terminal feed wire and retaining nut to the generator.
Tighten
Tighten the generator output (BAT) terminal nut to 17 N.m (12 lb ft) .
4. Connect the electrical connector to the generator.
5. Install the generator rear brace to the engine, working through the wheel well.
6. Install the generator rear brace to the engine block bolt.
7. Install the generator rear brace to the intake manifold stud nut.
8. Install the generator rear brace to the engine stud nut.
Tighten
8.1. Tighten the generator rear brace to the engine block bolt to 25 N.m (18 lb ft) .
8.2. Tighten the generator rear brace to the intake manifold stud to 25 N.m (18 lb ft) .
8.3. Tighten the generator brace to the engine stud to 50 N.m (37 lb ft) .
9. Install the drive belt.
10. Connect the battery negative cable.
Drive Belt Replacement
REMOVAL PROCEDURE
NOTICE: Allowing the drive belt tensioner to snap into the free position may result in damage to the tensioner.
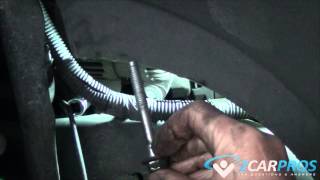
1. From under the vehicle, install a 3/8 inch drive wrench on the drive belt tensioner arm.
2. Rotate the arm counter clockwise.
3. Remove the drive belt.
4. Slowly release the tension.
There you go.
Friday, October 15th, 2010 AT 12:31 PM