Hi,
The original GM part number is 19369905 which indicates a (S module). Now, as far as the TDD, TDA, or TDF identification, the only way to confirm is by removing the original pump. One of the three acronyms will be stamped on the module assembly.
I don't know if you need them, but here are the directions for pump replacement and tank removal. All attached pictures correlate with the directions.
__________________________________
2001 Chevy Truck K 2500 Suburban 4WD V8-8.1L VIN G
Fuel Tank Pump Module Replacement
Vehicle Power-train Management Fuel Delivery and Air Induction Fuel Tank Service and Repair Removal and Replacement Fuel Tank Pump Module Replacement
FUEL TANK PUMP MODULE REPLACEMENT
REMOVAL PROCEDURE
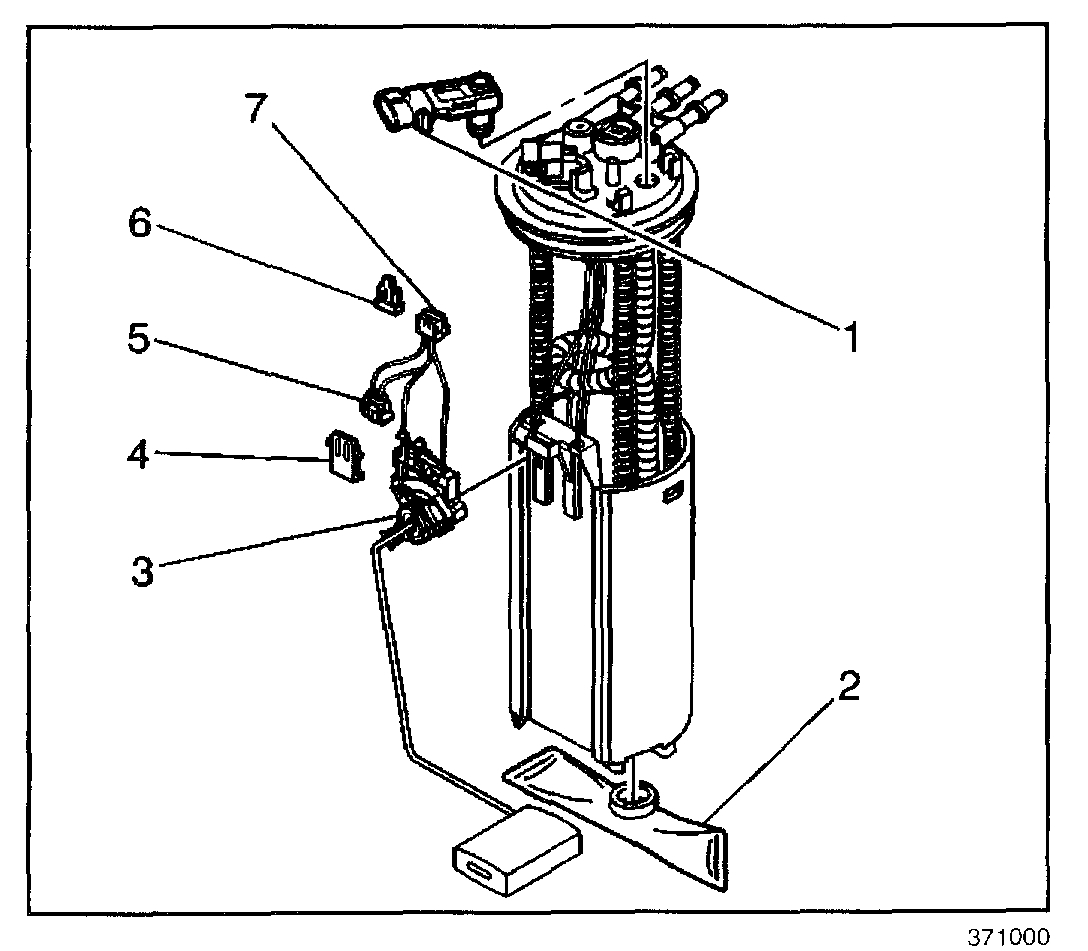
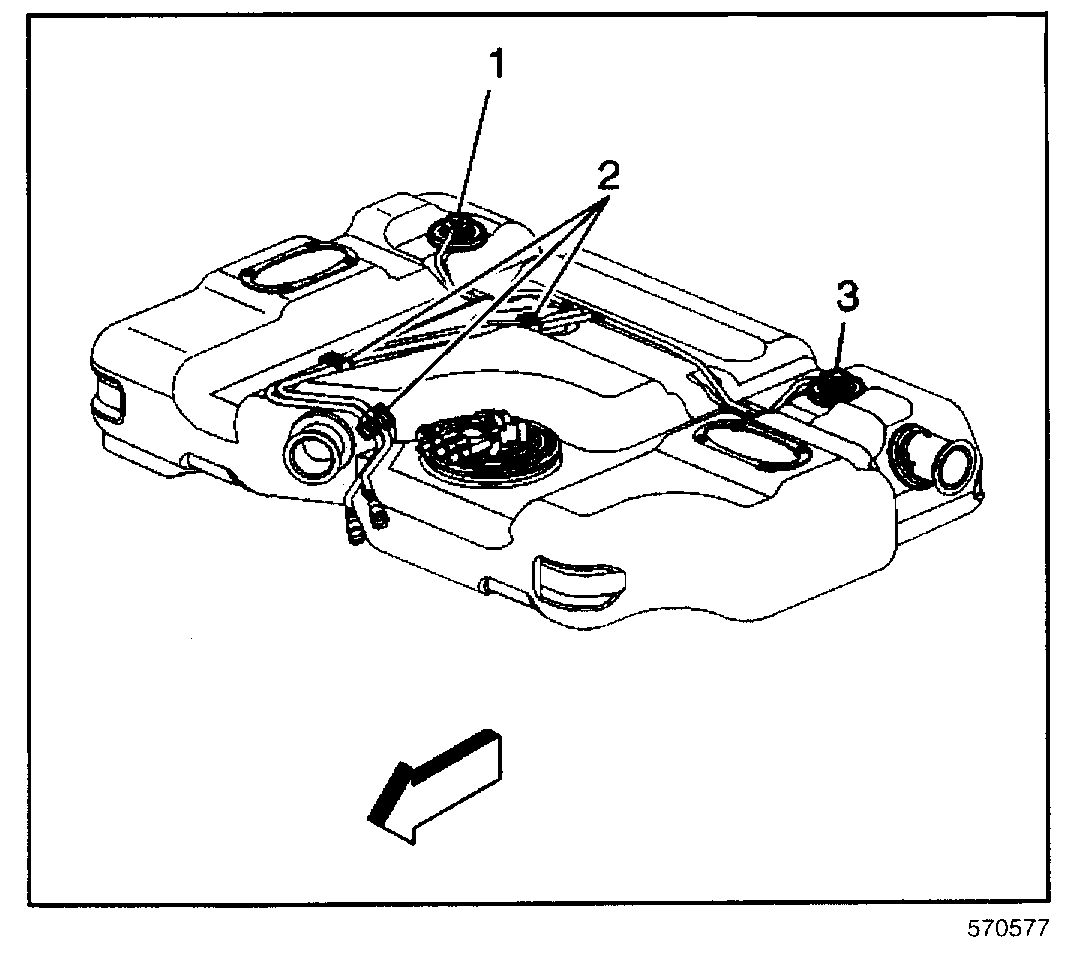
pic 1
1. Remove the fuel sender assembly.
2. Note the position of the fuel strainer (2) on the fuel sender.
3. Support the fuel sender assembly with one hand and grasp the strainer (2) with the other hand.
4. Pull the strainer off the fuel sender. Discard the strainer after inspection.
5. Inspect the strainer.
6. If the fuel pump strainer is contaminated, clean the fuel tank. Refer to Fuel System Cleaning.
7. Disconnect the fuel pump electrical connector (5).
8. Remove the fuel level sensor (3).
9. Remove the fuel pressure sensor (1).
INSTALLATION PROCEDURE
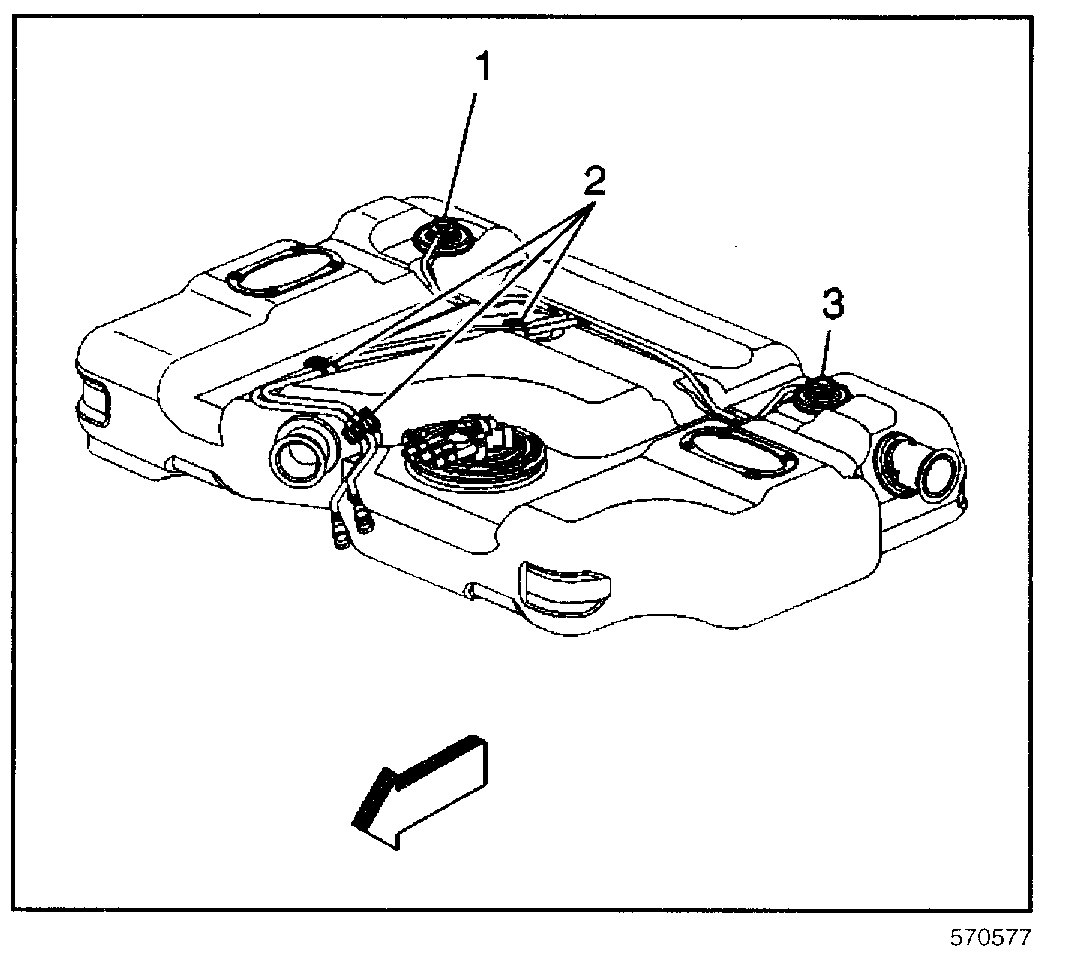
pic 2
1. Install the fuel pressure sensor (1).
2. Install the fuel level sensor (3).
IMPORTANT: Always install a new fuel strainer when replacing the fuel tank fuel pump module.
3. Install a new fuel strainer (2) in the same position as noted during disassembly. Push the strainer on the bottom of the fuel sender until the strainer is fully seated.
4. Install the fuel sender assembly.
__________________________
2001 Chevy Truck K 2500 Suburban 4WD V8-8.1L VIN G
Fuel Tank Replacement (Rear Tank)
Vehicle Power-train Management Fuel Delivery and Air Induction Fuel Tank Service and Repair Removal and Replacement Fuel Tank Replacement Fuel Tank Replacement (Rear Tank)
FUEL TANK REPLACEMENT (REAR TANK)
REMOVAL PROCEDURE
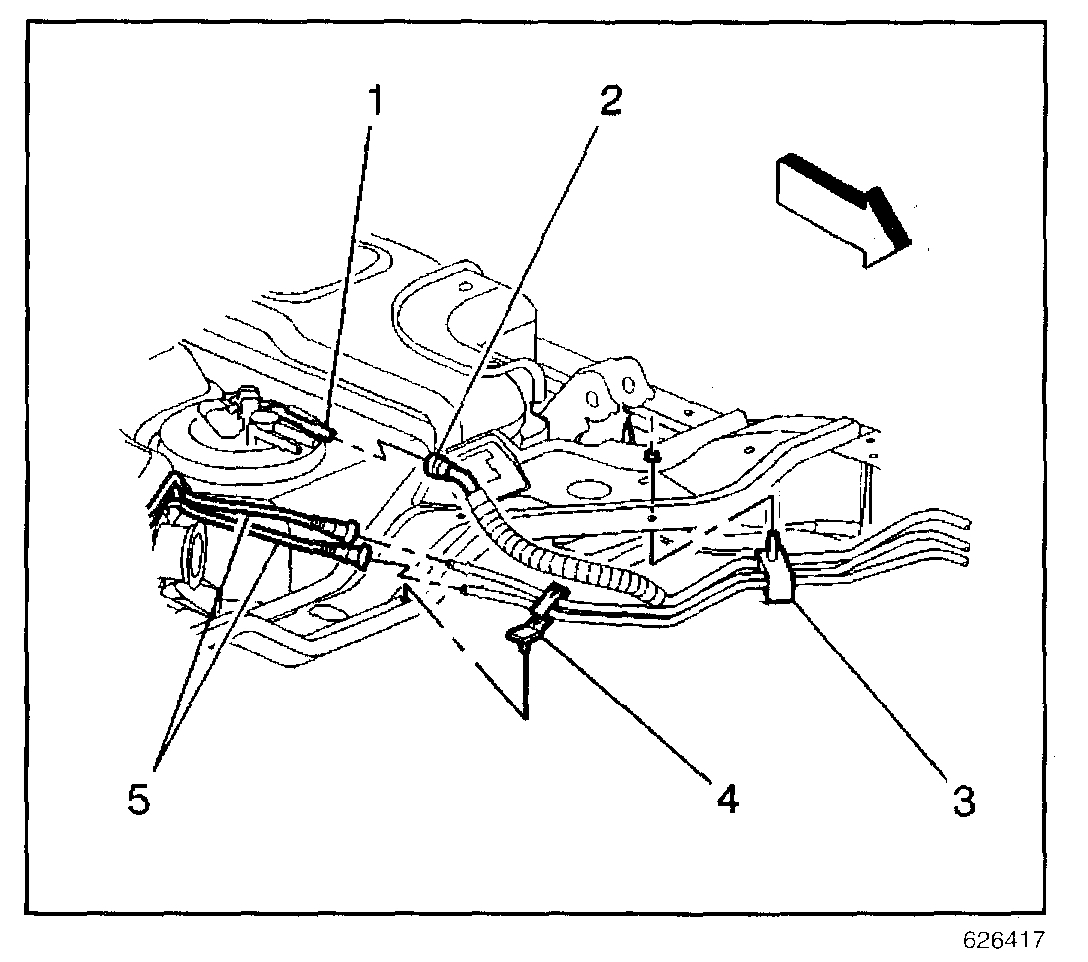
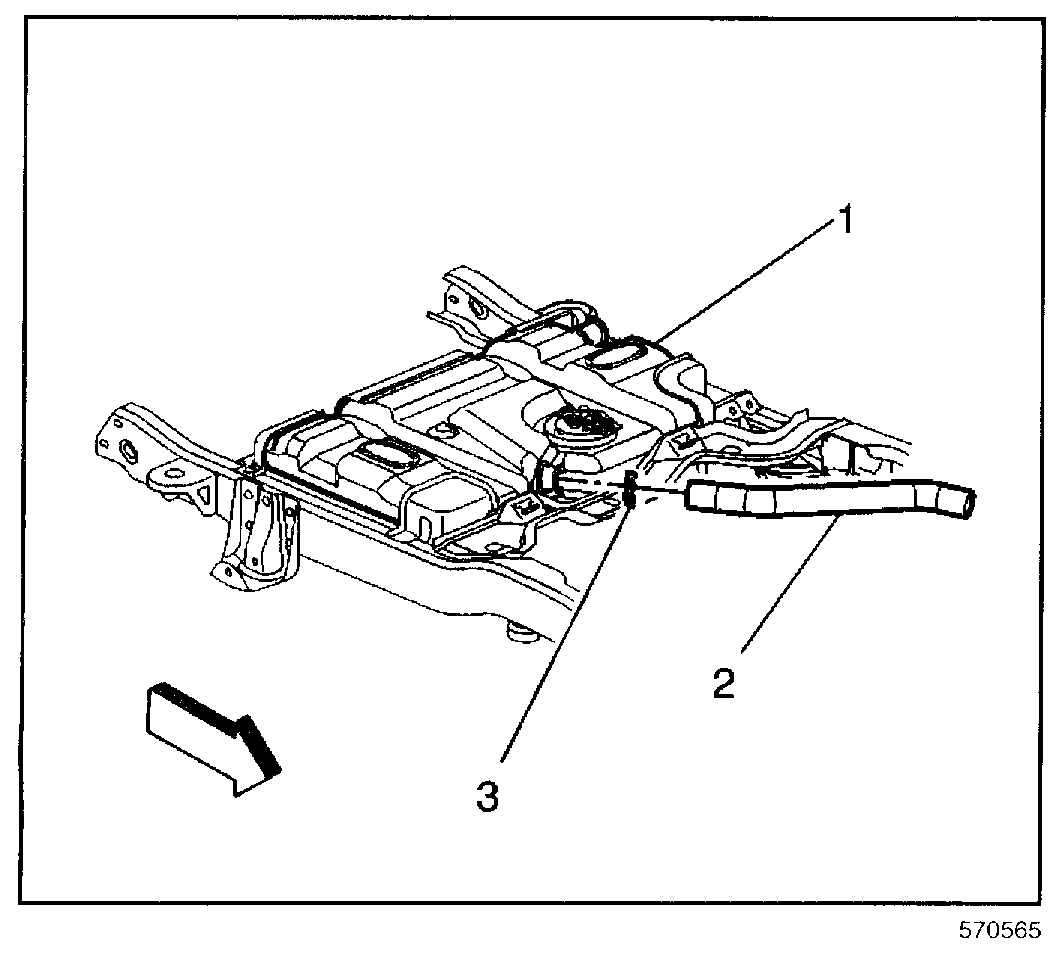
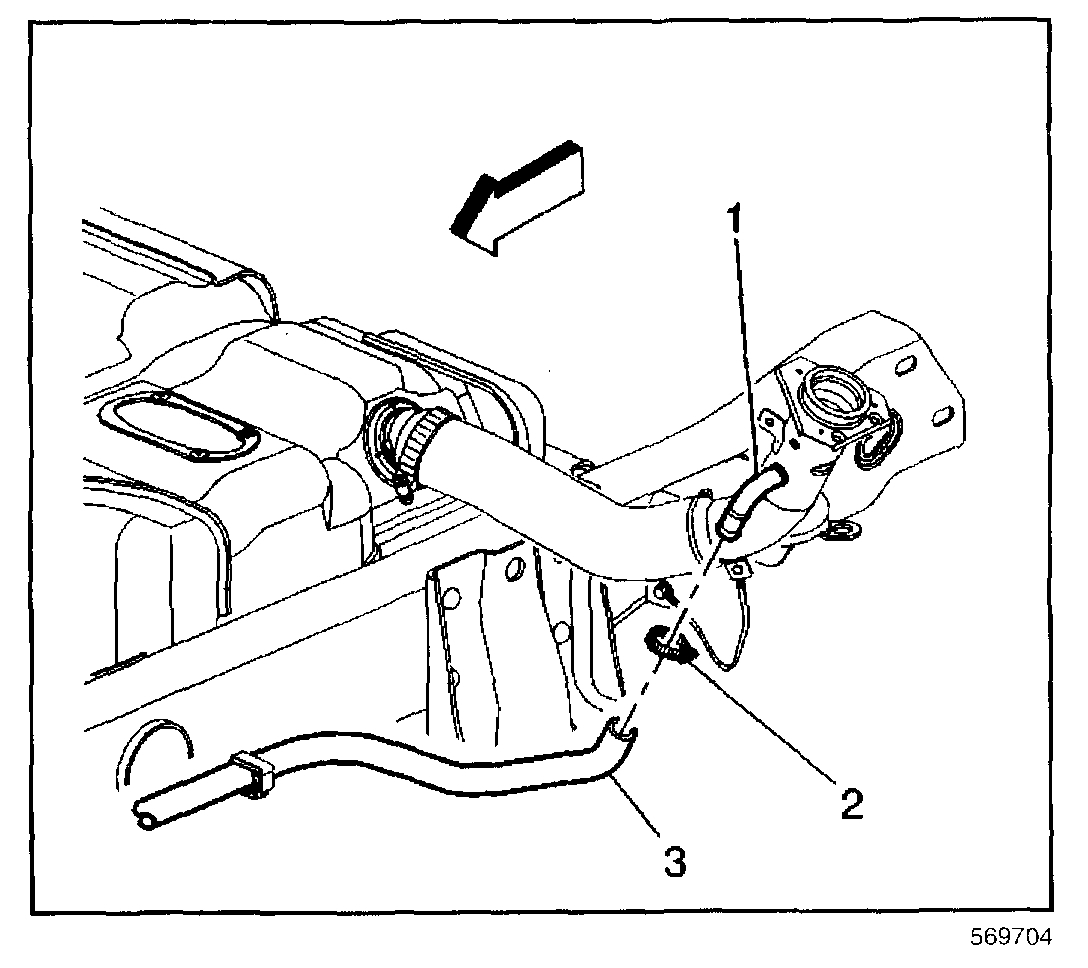
pic 3
1. Relieve the fuel system pressure. Refer to the Fuel Pressure Relief Procedure.
2. Lower and remove the under chassis mounted spare tire.
3. Raise the vehicle. Refer to Lifting and Jacking the Vehicle .
4. Remove the rear cross-member that holds the spare tire.
5. Drain the fuel tank. Refer to Fuel Tank Draining Procedure (Cab/Chassis) or Fuel Tank Draining Procedure (Utility Front Tank) or Fuel Tank Draining Procedure (Utility Rear Tank).
6. Disconnect the rear chassis fuel pipe (2) at the fuel sender (1).
7. Disconnect the fuel sender electrical connectors.
8. Disconnect the evaporative emission (EVAP) pipes at the rear tank EVAP pipes (5).
9. Cap the fuel and EVAP pipes in order to prevent possible fuel system contamination.
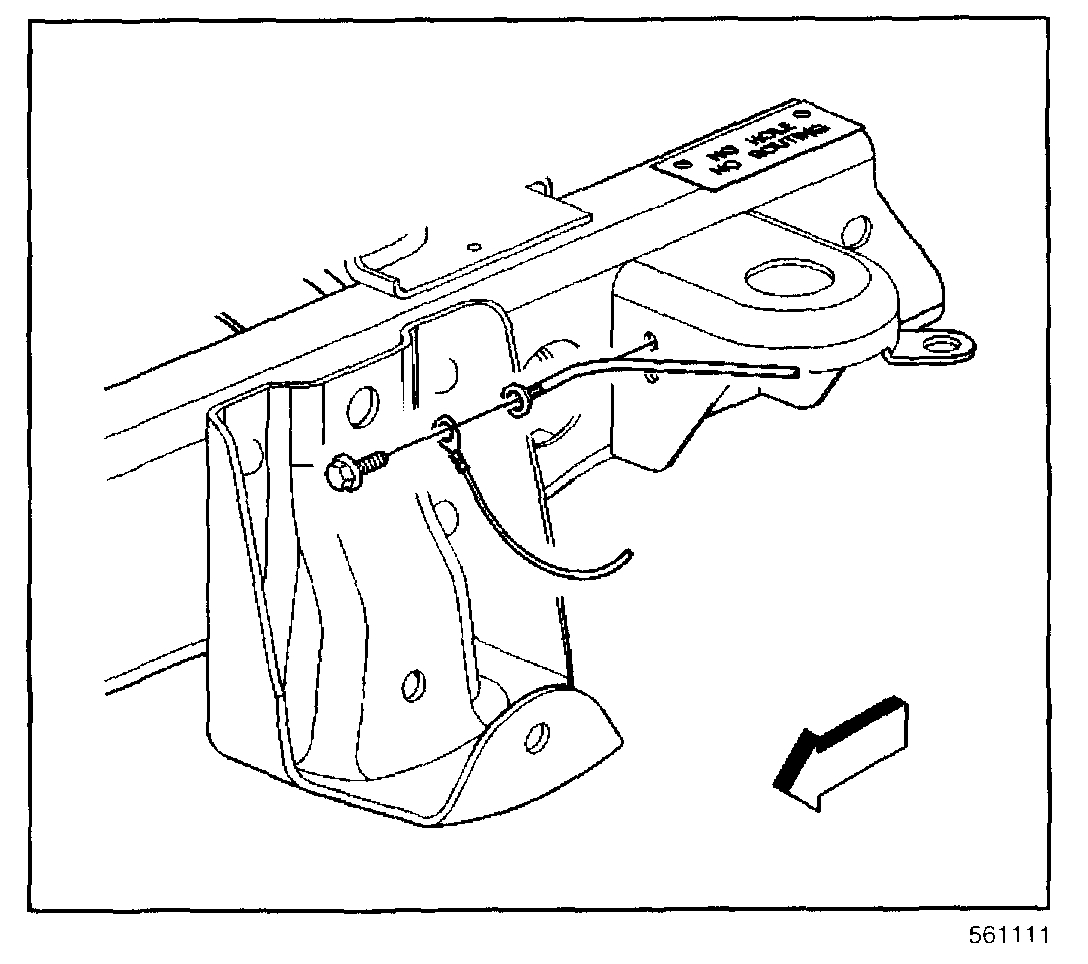
pic 4
10. Disconnect the fuel fill pipe ground strap.
pic 5
11. Loosen the rear tank to front tank fuel till hose clamp (3).
12. Disconnect the fuel till hose (2) from the rear fuel tank.
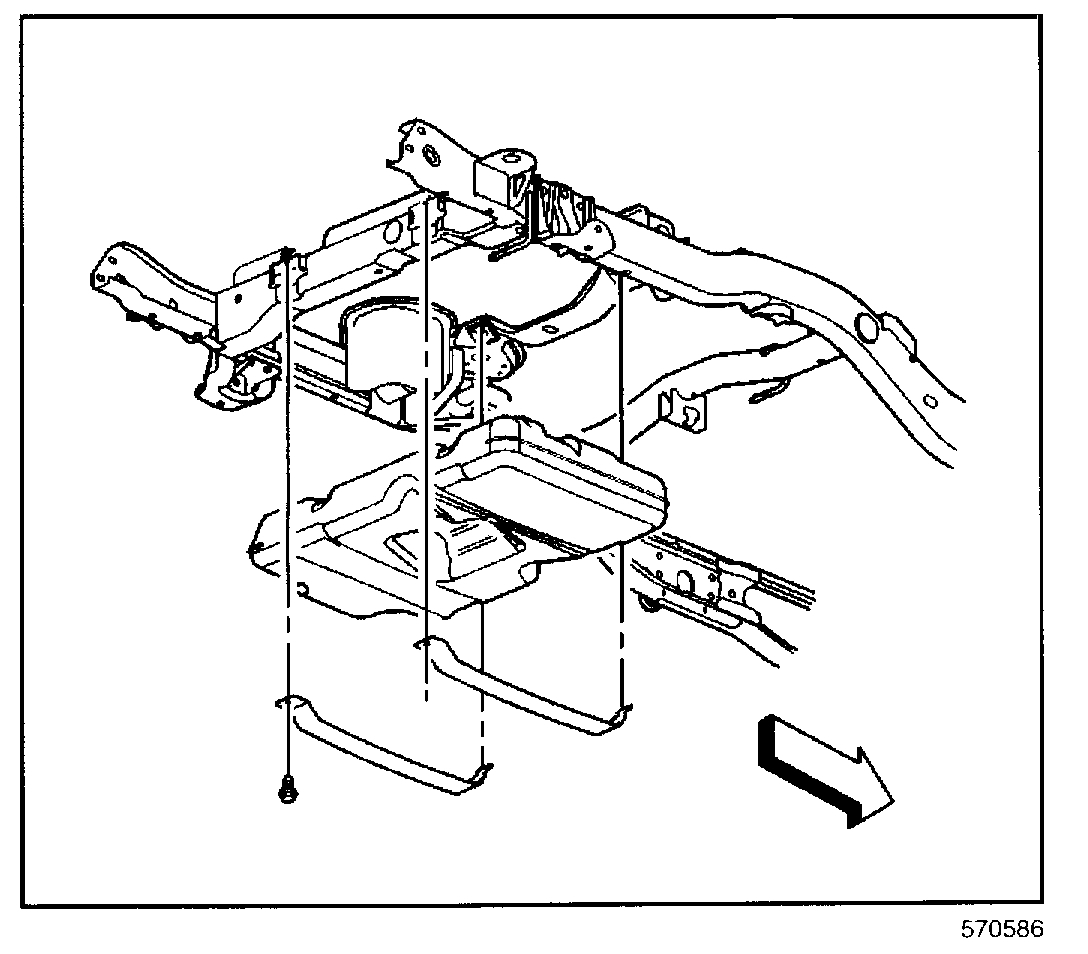
pic 6
13. With the aid of an assistant, support the fuel tank.
NOTE: Refer to Damage to Fuel Tank Straps Notice in Service Precautions.
14. Remove the fuel tank strap bolts.
15. Remove the fuel tank straps.
16. Remove the fuel tank.
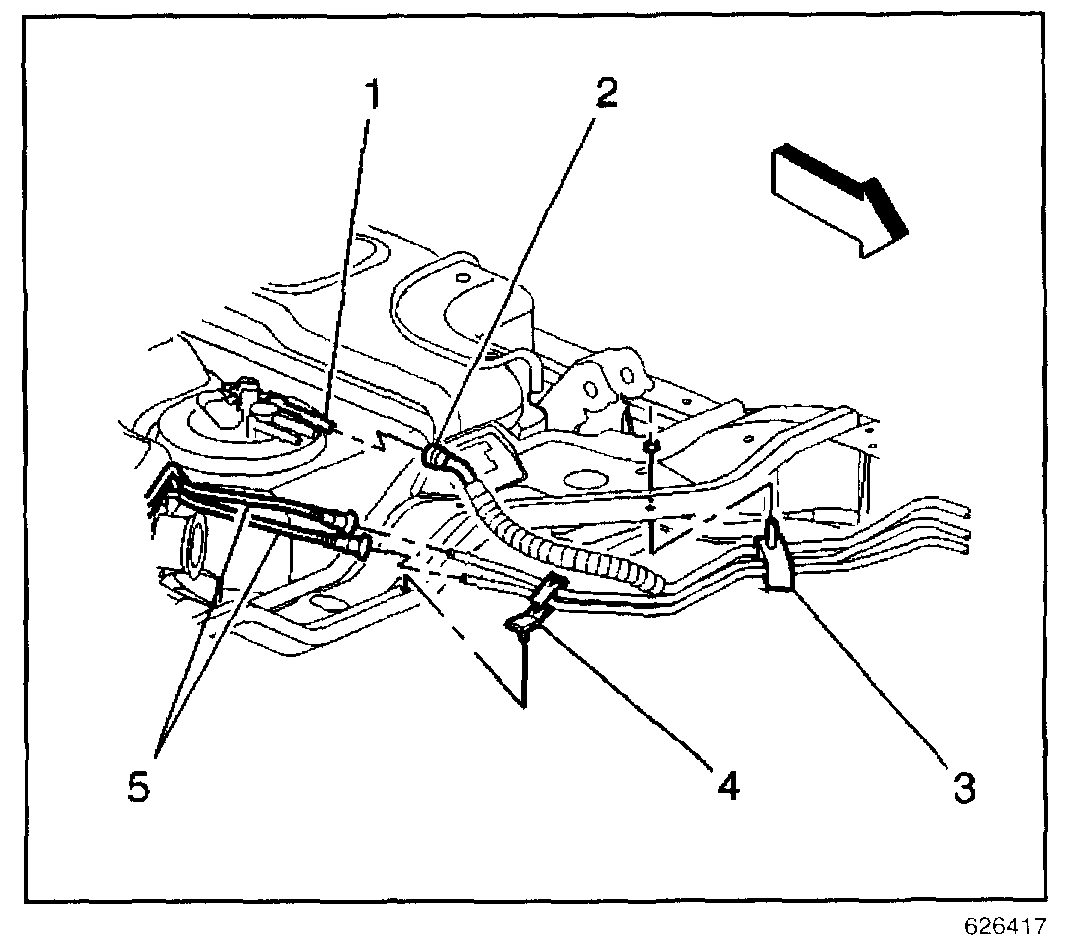
pic 7
17. Place the fuel tank in a suitable work area.
18. Remove the EVAP pipes from the fuel tank roll over valves (1, 3) and the retaining clips (2).
19. Remove the fuel sender assembly from the fuel tank.
20. Remove the fuel fill hose from the fuel tank.
INSTALLATION PROCEDURE
pic 8
1. Connect the EVAP pipe to the fuel tank roll over valves (1,3) and the retaining clips (2).
2. Install the fuel sender assembly to the fuel tank.
NOTE: Refer to Fastener Notice in Service Precautions.
3. Install the fuel fill hose to the fuel tank.
Tighten
Tighten the hose clamp to 2.5 N.m (22 lb in)
pic 9
4. Install the fuel tank.
5. Install the fuel tank straps.
6. Install the fuel tank strap bolts.
Tighten
Tighten the bolts to 40 N.m (30 lb ft).
pic 10
7. Connect the fuel fill hose (2) to the rear fuel tank.
Tighten
Tighten the fuel fill hose clamp (3) to 2.5 N.m (22 lb in)
pic 11
8. Connect the fuel till pipe ground strap.
Tighten
Tighten the fuel till pipe ground strap bolt to 9 N.m (80 lb in).
pic 12
9. Connect the vent hose (3) to the vent pipe (1).
Tighten
Tighten the vent hose clamp (2) to 2.5 N.m (22 lb in)
pic 13
10. Remove the caps from the fuel and EVAP pipes.
11. Connect the EVAP pipes at the rear fuel tank EVAP pipes (5).
12. Connect the fuel sender electrical connectors.
13. Connect the rear chassis fuel pipe (2) to the fuel sender (1).
14. Install the rear cross-member that holds the spare tire.
15. Lower the vehicle.
16. Install and raise into position the under chassis mounted spare tire.
17. Refill the fuel tank.
18. Install the fuel filler cap.
19. Connect the negative battery cable.
20. Inspect for leaks using the following procedure:
20.1.Turn ON the ignition, with the engine OFF, for 2 seconds.
20.2.Turn OFF the ignition for 10 seconds.
20.3.Turn ON the ignition, with the engine OFF.
20.4 Inspect for fuel leaks.
21. Install the engine sight shield.
____________________
Let me know if this helps.
Joe
Images (Click to enlarge)
Feb 9, 2020 at 9:11 PM