Welcome to 2CarPros.
Honestly, the only thing you can do is remove it with the door closed,. The hardest part are two screws near the door frame.
I'm sorry, but I don't have a video for this vehicle, but here are the directions. It can be done, it's just a lot more difficult with the door closed. The attached pics correlate with the directions.
_________________________________________
2006 Saturn ION L4-2.2L VIN F
Trim Panel Replacement - Side Front Door
Vehicle Body and Frame Doors, Hood and Trunk Doors Front Door Front Door Panel Service and Repair Removal and Replacement Trim Panel Replacement - Side Front Door
TRIM PANEL REPLACEMENT - SIDE FRONT DOOR
Trim Panel Replacement - Side Front Door
Removal Procedure
1. Remove the upper trim panel. Refer to Trim Panel Replacement - Upper Extension (See: Front Door Panel > Removal and Replacement) .
2. Remove the manual window regulator handle, if equipped. Refer to Window Regulator Handle Replacement - Door (See: Window Handle > Removal and Replacement > Window Regulator Handle Replacement - Door) .
3. Remove the power door lock switch, if equipped.
4. Remove the pull cup assembly. Refer to Armrest Pull Cup Replacement (See: Arm Rest > Removal and Replacement) .
pic 1
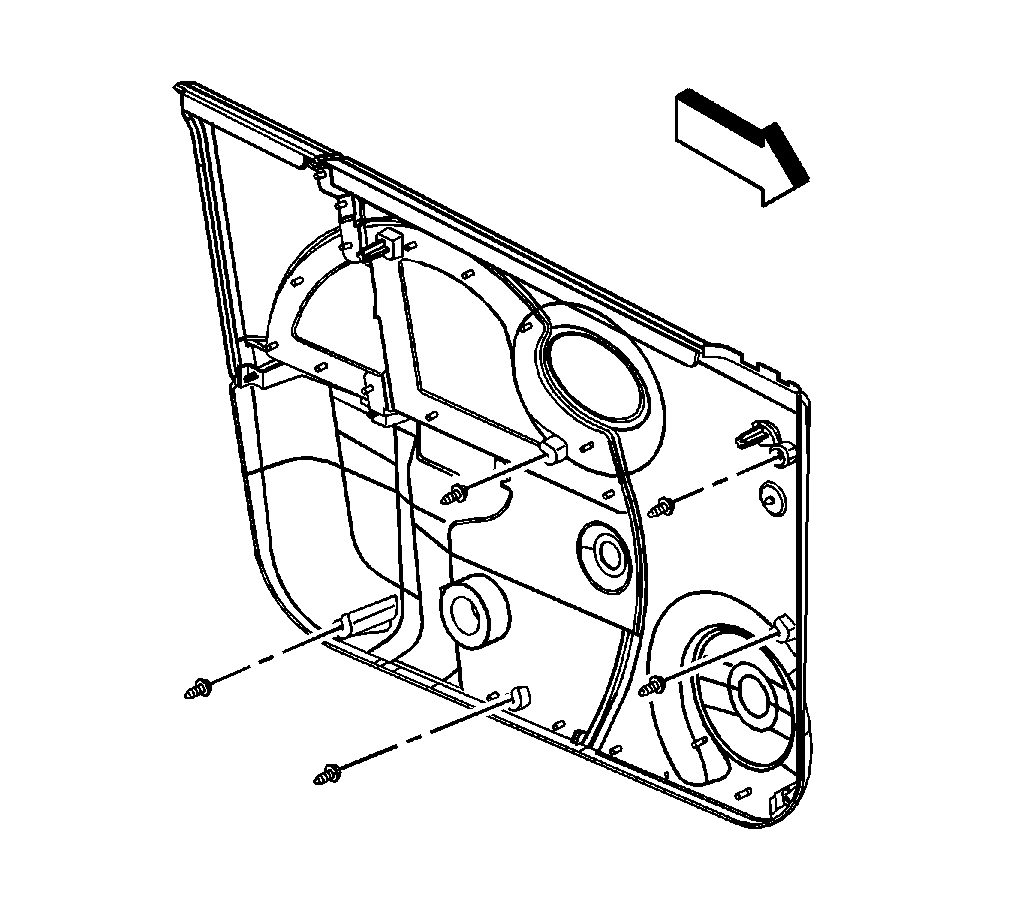
5. Remove the door trim push-in retainers.
6. Remove the screw from the trim panel.
pic 2
7. Pull the bottom of the door trim out to disengage the clips.
8. Lift up on the door trim panel to disengage the inner belt molding from the door flange.
9. Remove the door trim panel.
Installation Procedure
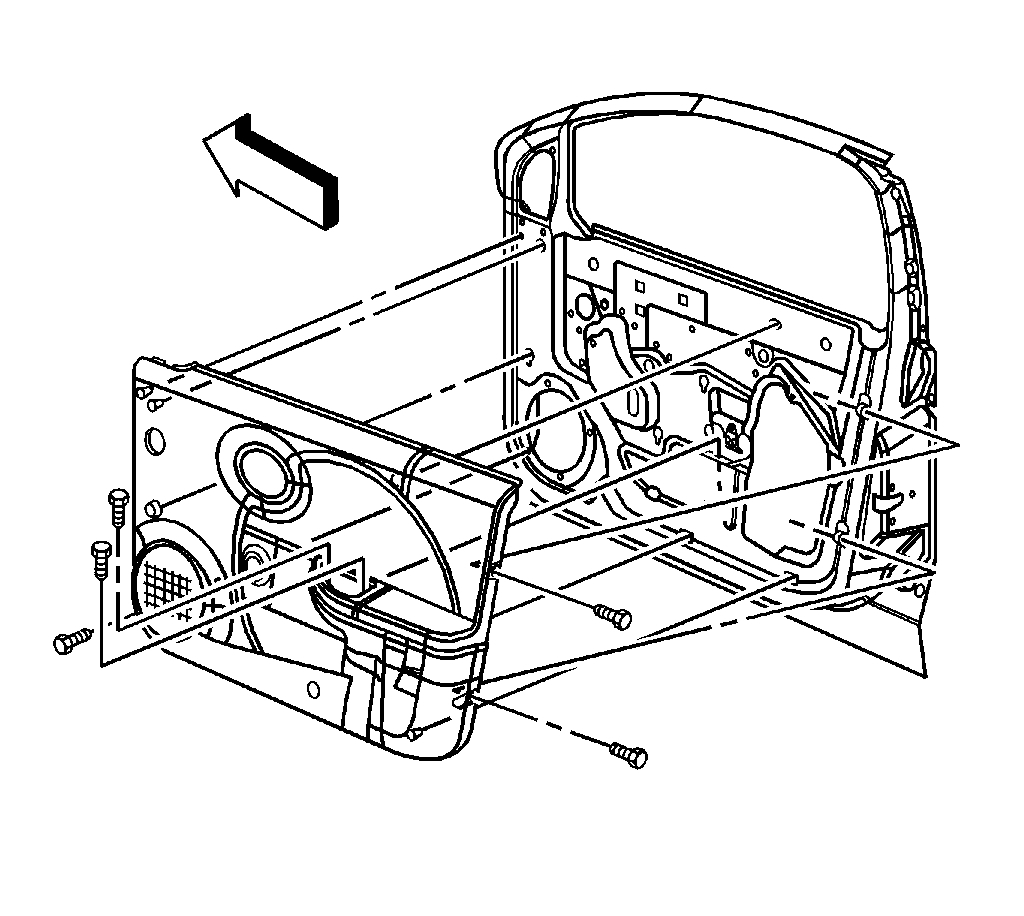
pic 3
1. Position the trim panel to the front door.
2. Engage the inner belt molding over the door flange and press down.
3. Align the trim panel retainers and press until the retainers are fully seated.
pic 4
Notice: Refer to Fastener Notice in Cautions and Notices.
4. Install the screw to the door trim panel.
Tighten the screw to 2.5 N.m (23 lb in).
5. Install the push-in retainers to the door trim panel.
6. Install the pull cup. Refer to Armrest Pull Cup Replacement (See: Arm Rest > Removal and Replacement) .
7. Install the power door lock switch.
8. Install the window regulator handle to the door. Refer to Window Regulator Handle Replacement - Door (See: Window Handle > Removal and Replacement > Window Regulator Handle Replacement - Door) .
9. Install the upper trim panel. Refer to Trim Panel Replacement - Upper Extension (See: Front Door Panel > Removal and Replacement) .
Let me know if this helps.
Take care,
Joe
Images (Click to enlarge)
Oct 18, 2019 at 8:31 PM