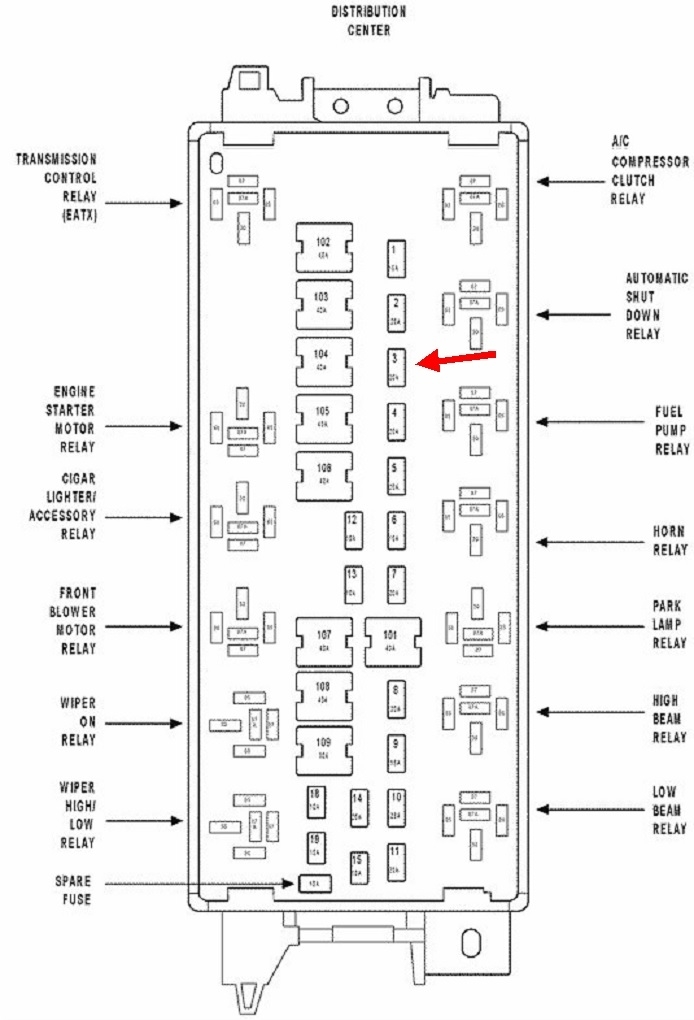
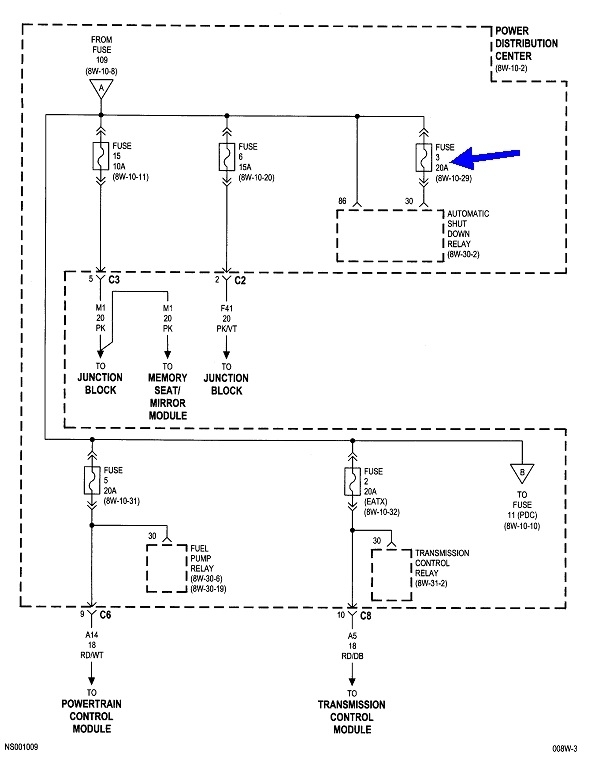
Dandy. That's the fuse I was expecting it to be. It does feed the automatic shutdown, (ASD) relay. That relay sends current to the ignition coils, injectors, alternator field, oxygen sensor heaters, and the fuel pump or pump relay. The Engine Computer turns that relay off to stop the engine.
It's always possible to run into an intermittently-shorted ignition coil or injector, but those are extremely rare. By far more problems are caused by a wire grounding to the body sheet metal, or a harness to one of the oxygen sensors fell down onto hot exhaust parts, then the insulation melted and the wire shorted to the exhaust pipe.
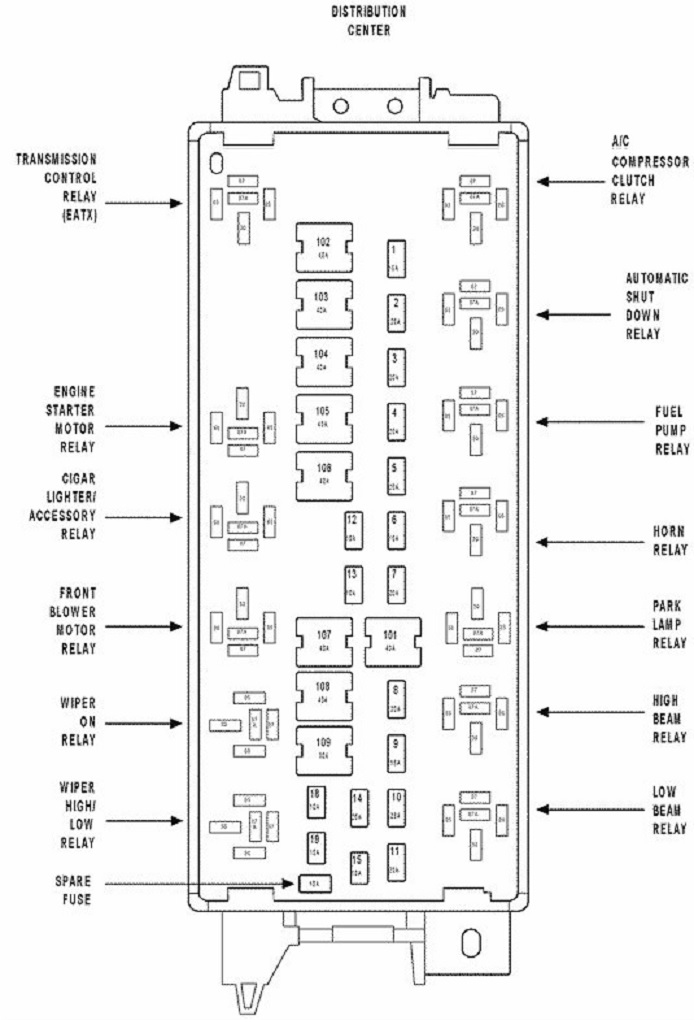
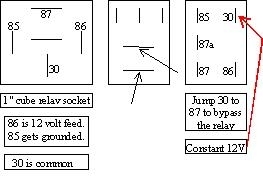
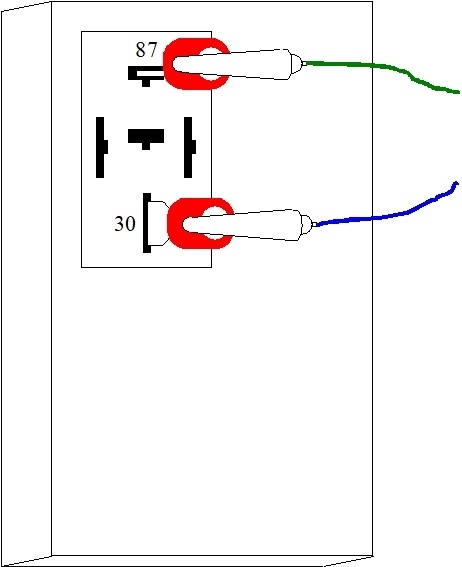
My trick for finding this short normally involves replacing the blowing fuse with a 12-volt light bulb, but for this circuit, it is much faster and more effective to use the bulb to bypass the ASD relay. This will let you poke around without even having to turn the ignition switch on. The first diagram shows the fuse and part of the ASD relay. The second drawing shows different styles of relays. We're using the first one, the one-inch "cube" relay. It's terminals 30 and 87 we're going to use.
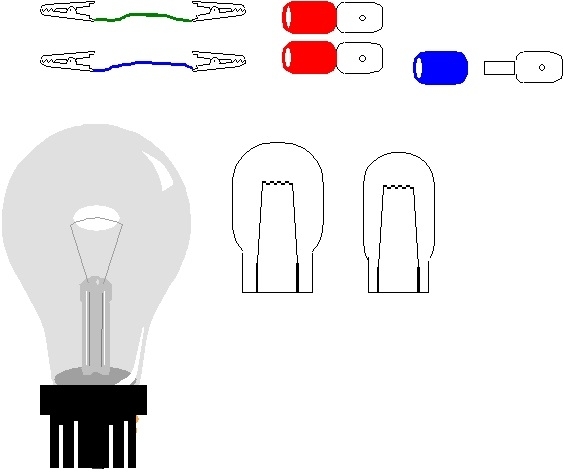
The items needed are shown in the third drawing. The easiest way to connect the bulb is with a pair pf clip leads and a pair of generic, universal spade-type terminals. You can find a dozen clip leads for about three dollars at Harbor Freight Tools. These are available in different sizes. Stick with the smallest ones to insure the alligator clip will fit inside the terminal.
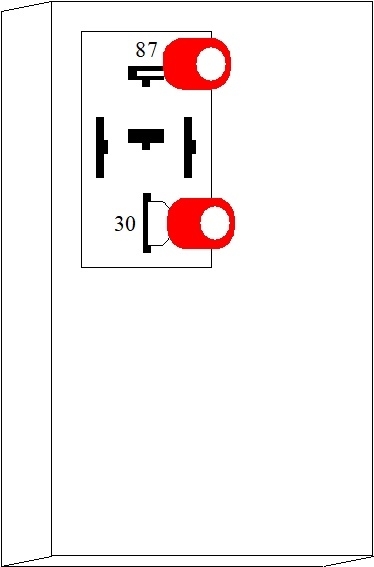
To buy the terminals, you'll end up buying a box of typically 50 or more. Instead, any electronic hobbyist will have many of these lying around. The spade end should be no fatter than the terminals on the relay. It's common for the wire end to be too small in diameter for the alligator clip to fit in. The blue terminal has the insulating barrel removed by twisting it off. Now just stick the terminals in that way, and clip the alligator clips to them. The fourth drawing shows the terminals inserted in terminals 30 and 87. In the fifth drawing, a clip lead has been connected to each terminal.
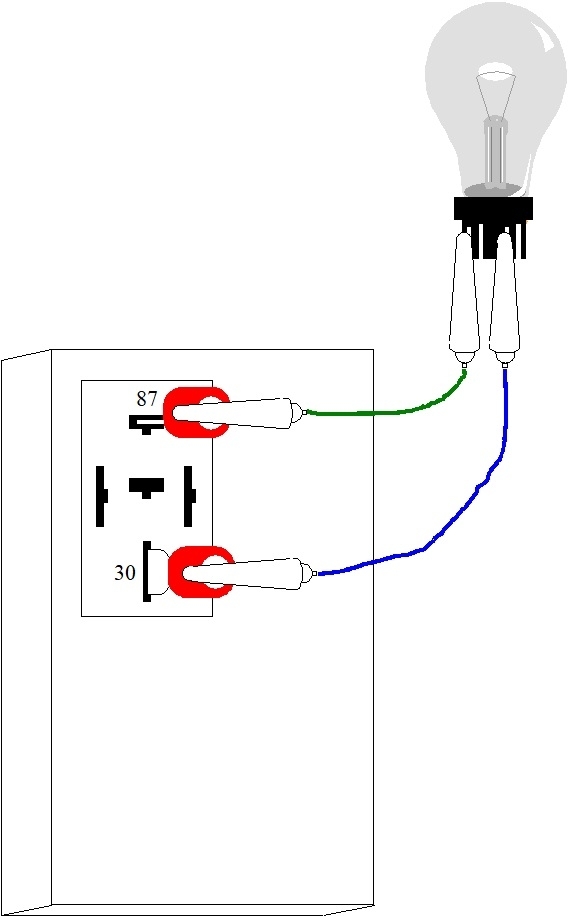
Finally, in the sixth drawing, the bulb is connected. In this type of circuit, it is powered up now, and if the short is present, the bulb will be full brightness. Bulbs get real hot and will melt plastic and carpeting, so be careful where you set it. The bulb could also be dim or off. If it's dim, the short is not present right now. Some current is flowing through things on the circuit that normally have current flow when this relay turns on. If the bulb is off, no current is flowing because everything on the circuit is switched off. In either of those last two cases, the bulb will flash full brightness if you do something to make the intermittent short occur. Tap around the vehicle with a rubber hammer, and move wire harnesses around to see what make the short show up.
A final word about the test bulbs. Because they limit current flow, even when the short is located and removed, items on that circuit will not operate. Most of the 12 volts in the circuit will be "dropped" across the bulb, leaving very little left for the rest of the circuit. Fan and seat motors will be totally dead until the relay is reinstalled. In low-current lighting circuits such as for tail lights, you might see a dim glow in some of the bulbs. They too will be normal full brightness once the test bulb is no longer in the circuit.
In the case of this ASD circuit, a common 3157 brake light bulb shown will only allow one amp of current to pass. That's not enough, so the engine will not run. As an alternative, if you want to try to drive the van with the bulb inserted to protect the wiring, use a common 9004 head lamp bulb instead. The low-beam filament will pass up to five amps, and the high-beam filament will pass close to six amps. That should be enough to get the engine running, although probably not very well.
The advantage with this test bulb is it will allow the circuit to be powered up without running the engine or even turning on the ignition switch, and when the short occurs, the bulb's resistance will protect the wires from too much current, so you won't be wasting fuses. If the bulb is full brightness, the short is occurring right now. The goal now is to be gentle and move things around to see what makes that short go away. When it does, the bulb will get dim or go out.
If the bulb is already dim, carefully move things around to see what makes the short occur. When it does, the bulb will become full brightness. Some people tear in and violently shove things around until the short is gone, but then they have no idea what they did to cause it to go away. You want to move slowly and carefully so when the bulb's brightness changes, you'll knw exactly where you're working, thus making the location of that short easier to narrow down.
I mentioned the wiring harnesses to the oxygen sensors already. Also try rocking the van forward and rearward while it's in "park". That will cause the engine to rock forward and backward as though you were accelerating and coasting. That will cause the large wiring harness between the engine and body to slide back and forth a little. If that affects the short, look for wires with insulation rubbed through, especially on the inner fender by the Engine Computer, along with paint rubbed off the sheet metal under that harness.
Images (Click to make bigger)
Tuesday, January 19th, 2021 AT 8:58 PM