Hi:
Sorry about that. I'm not sure why I jumped to the front.
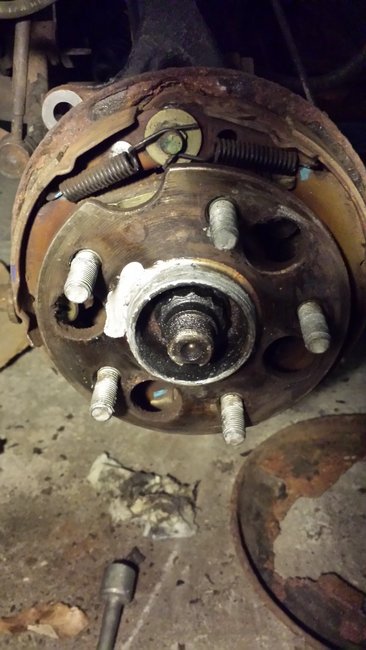
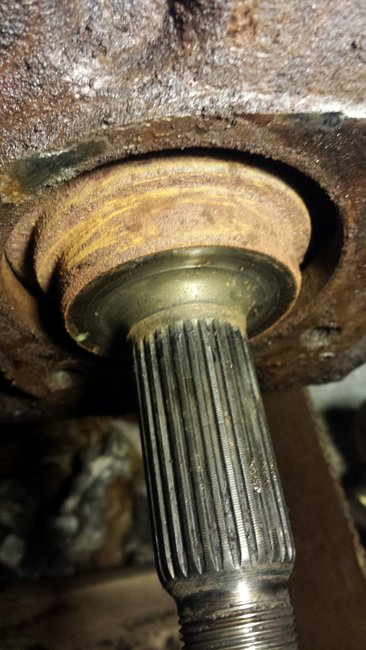
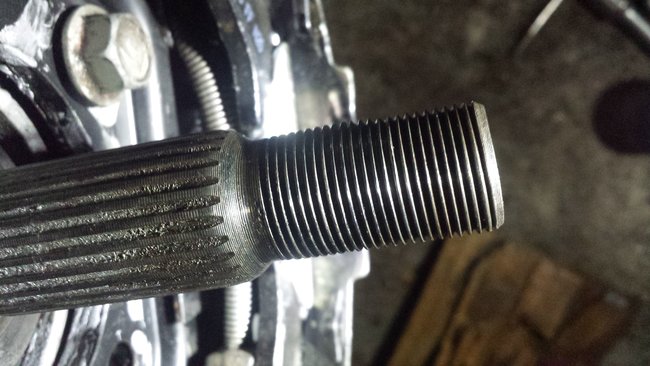
Anyway, yes the hub needs to be removed because it is actually mounted with the same bolts that hold the hub on. See pic 1.
________________
Take a look through these directions and let me know if they help.
_______________
2004 Toyota Truck Highlander 4WD V6-3.3L (3MZ-FE)
Rear Axle Hub & Bearing Assy LH Replacement
Vehicle Steering and Suspension Wheels and Tires Wheel Bearing Service and Repair Procedures Rear Axle Hub & Bearing Assy LH Replacement
REAR AXLE HUB & BEARING ASSY LH REPLACEMENT
REAR AXLE HUB & BEARING ASSY LH (4WD)
REPLACEMENT
HINT:
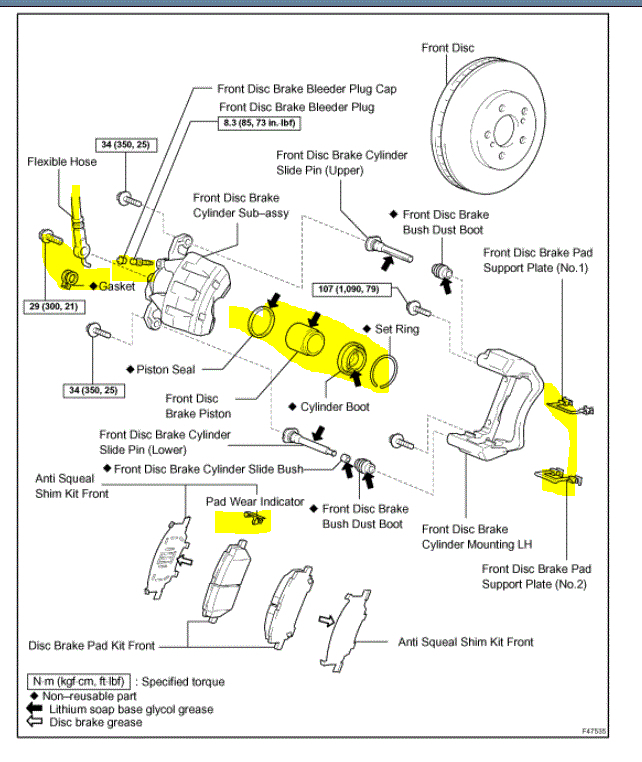
COMPONENTS:
1. REMOVE REAR WHEEL
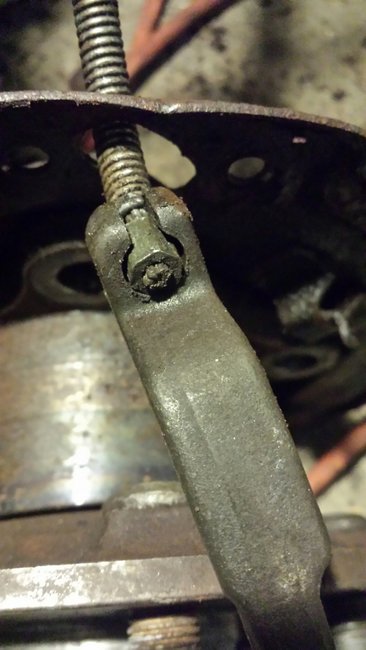
2. SEPARATE SPEED SENSOR REAR LH
pic 2
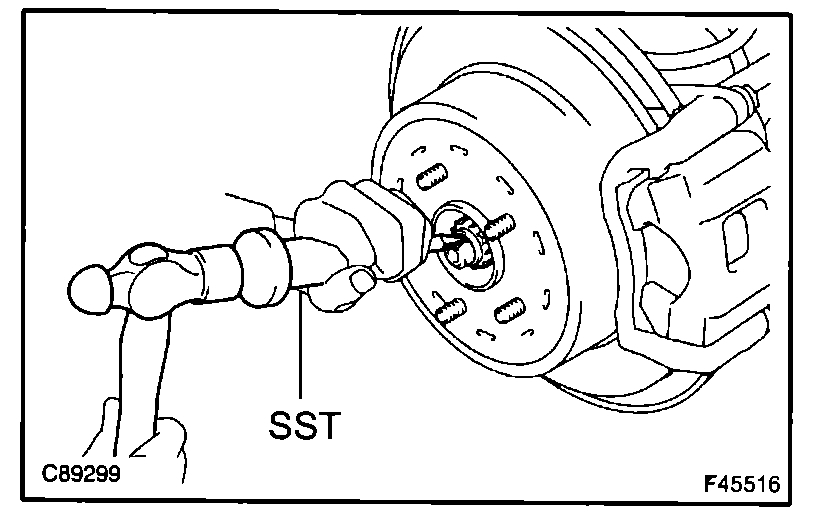
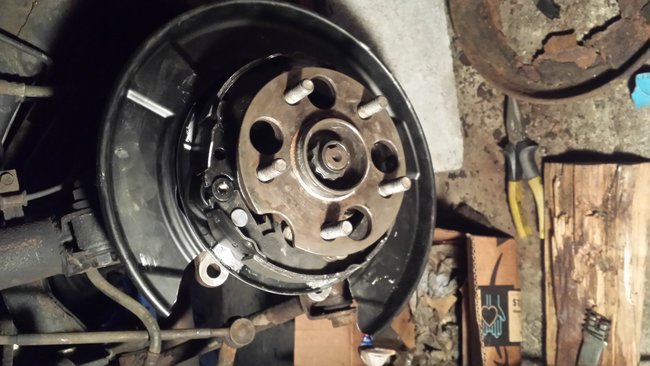
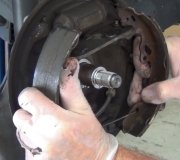
3. REMOVE REAR AXLE SHAFT LH NUT
(a)Using SST and a hammer, unstake the staked part of the axle hub LH nut. SST 09930-00010
NOTICE: Loosen the staked part of the nut completely, otherwise the screw of the drive shaft may be damaged.
(b)While applying the brakes, remove the lock axle hub LH nut.
Pic 3
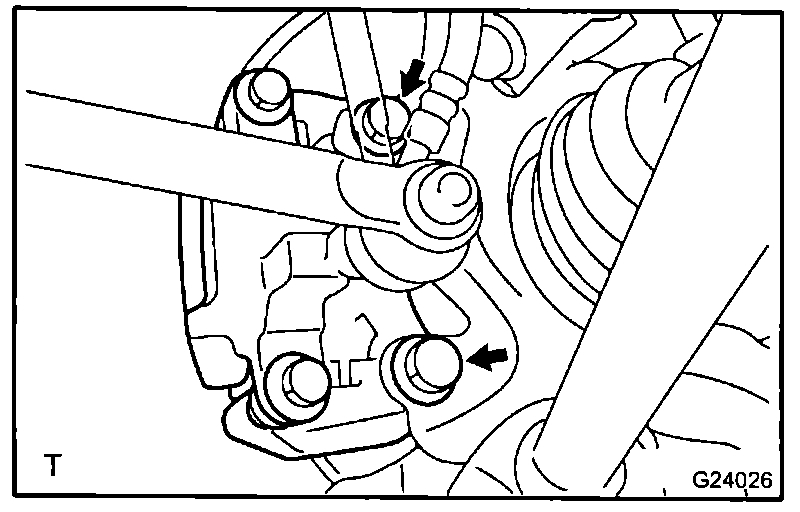
4. SEPARATE REAR DISC BRAKE CALIPER ASSY LH
(a)Remove the bolt, and separate the flexible hose from the shock absorber.
(b)Remove the 2 bolts and separate rear disc brake caliper assy.
NOTICE: Use a string or other device to keep the brake caliper from hanging down.
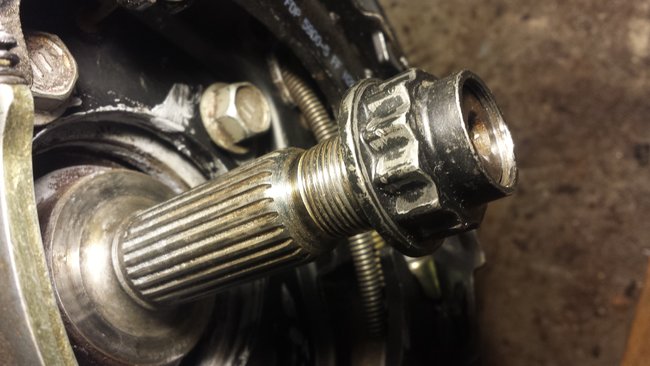
5. REMOVE REAR DISC
pic 4
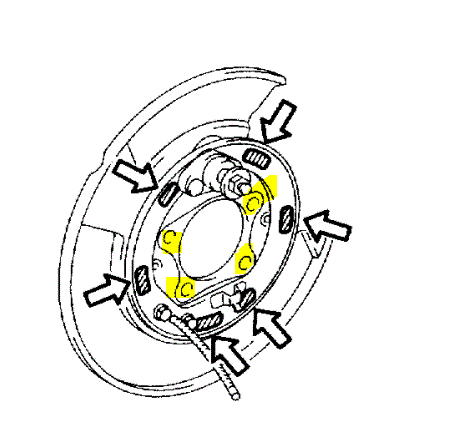
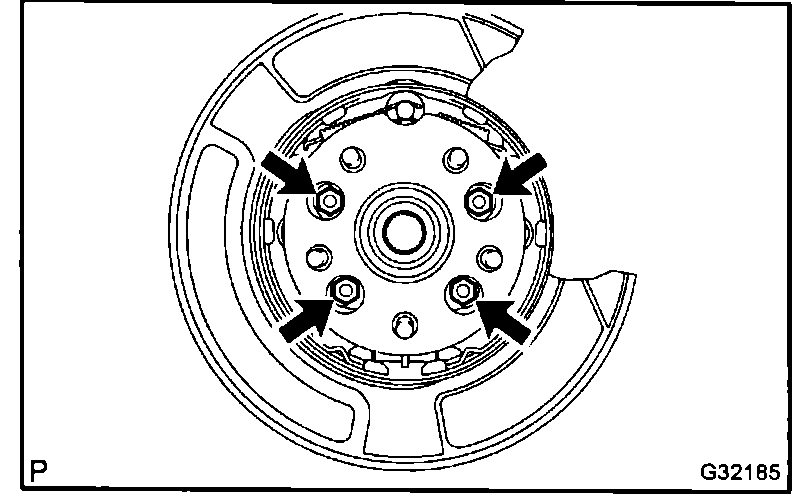
6. REMOVE REAR AXLE HUB & BEARING ASSY LH
(a)Remove the 4 bolts and the rear axle hub & bearing assy LH.
Pic 5
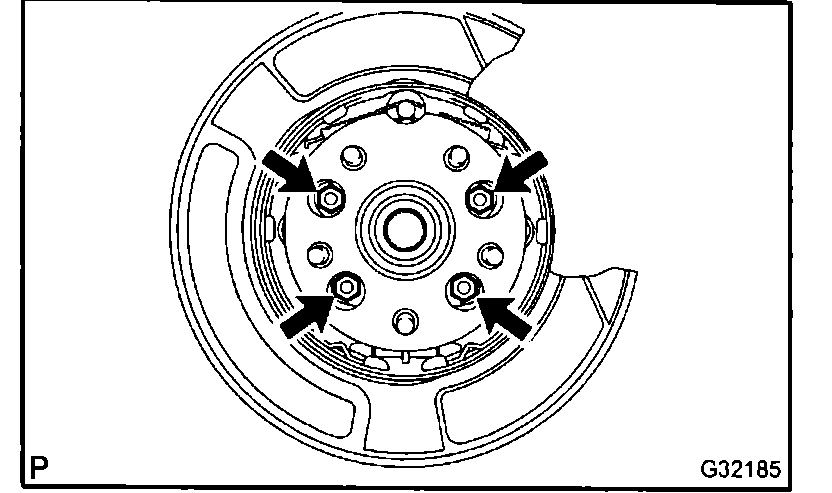
7. INSTALL REAR AXLE HUB & BEARING ASSY LH
(a)Install the rear axle hub & bearing assy LH with the 4 bolts. Torque: 75 Nm (765 kgf cm, 55 ft. Lbf)
8. INSTALL REAR DISC
pic 6
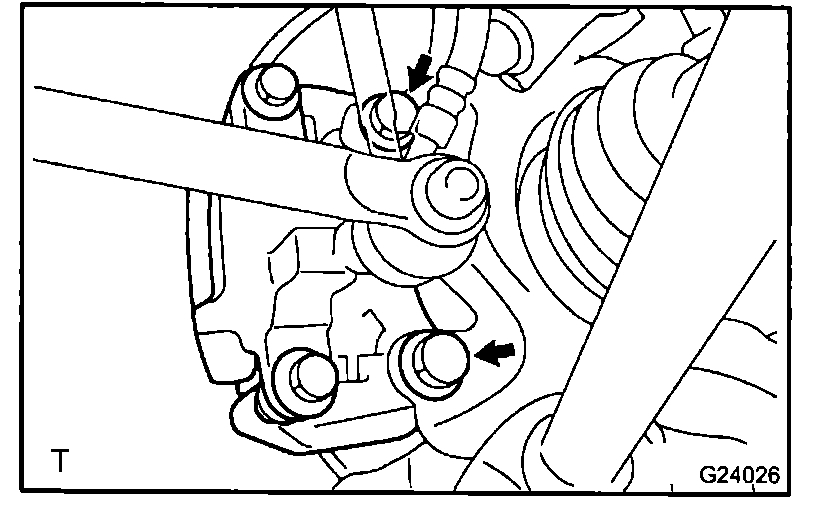
9. INSTALL REAR DISC BRAKE CALIPER ASSY LH
(a)Install the rear disc brake caliper assy LH with the 2 bolts. Torque: 78 Nm (800 kgf cm, 58 ft. Lbf)
(b)Install the flexible hose with the bolt to the shock absorber.
Torque: 19 Nm (192 kgf cm, 14 ft lbf)
10. INSTALL REAR AXLE SHAFT LH NUT
(a)Install a new axle shaft LH nut.
Torque: 294 Nm, (3,000 kgf cm, 217 ft. Lbf)
11. REMOVE REAR DISC BRAKE CALIPER ASSY LH
12. REMOVE REAR DISC
13. INSPECT BEARING BACKLASH
14. INSPECT AXLE HUB DEVIATION
15. INSTALL REAR DISC
16. INSTALL REAR DISC BRAKE CALIPER ASSY LH
pic 7
17. INSTALL REAR AXLE SHAFT LH NUT
(a)Install a new axle shaft LH nut. Torque: 294 Nm, (3,000 kgf cm, 217 ft. Lbf)
(b)Using a chisel and a hammer, stake the axle shaft LH nut.
18. INSTALL SPEED SENSOR REAR LH
19. INSTALL REAR WHEEL
20. CHECK ABS SPEED SENSOR SIGNAL
___________________________________________
Let me know if this helps.
Take care,
Joe7
Images (Click to make bigger)
Tuesday, December 29th, 2020 AT 11:08 PM