Good morning,
I would not drive it that distance at all. It could very well cause more damage and end up leaving you stranded on the road.
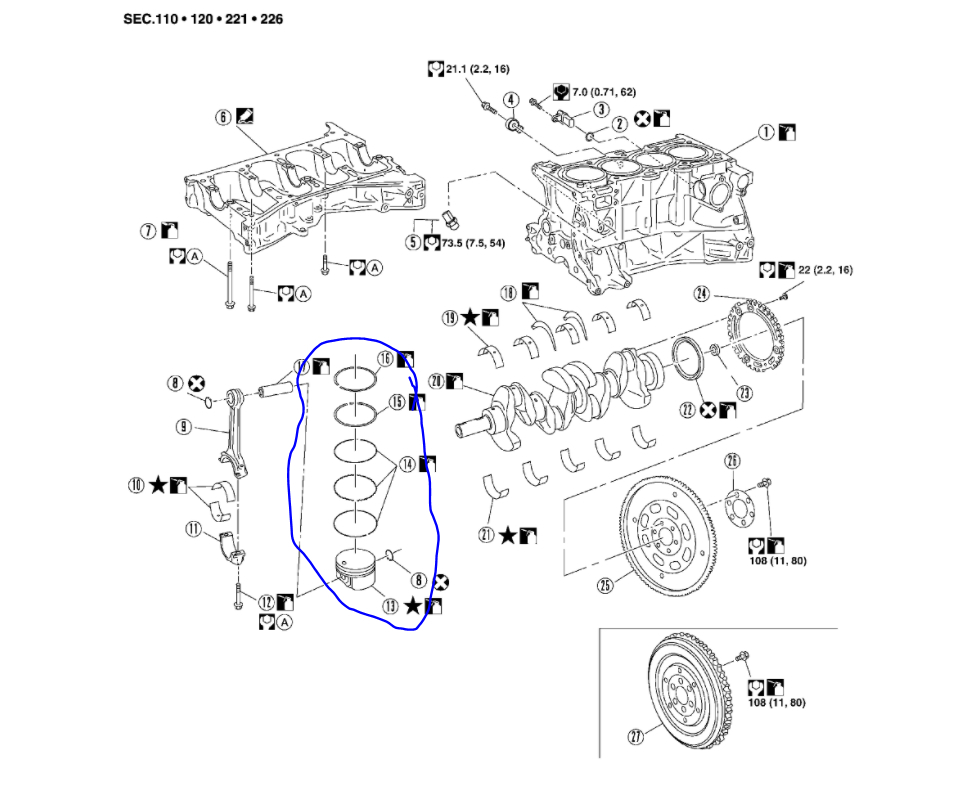
I attached a picture for you of the breakdown of the piston below.
Roy
CAUTION:
Apply new engine oil to parts marked in illustration before installation.
DISASSEMBLY
1. Remove the engine and transaxle as an assembly from the vehicle, and separate the transaxle from the engine. Refer to See: Engine > Removal and Replacement.
2. Mount the engine on a suitable engine stand.
3. Drain any remaining engine oil and coolant from the engine.
4. Remove the following components and associated parts.
- Exhaust manifold and three way catalyst assembly. Refer to See: Catalytic Converter > Removal and Replacement.
- Intake manifold collector. Refer to See: Intake Manifold > Removal and Replacement > Intake Manifold.
- Intake manifold and fuel tube assembly. Refer to See: Intake Manifold > Removal and Replacement > Intake Manifold.
- Ignition coils. Refer to See: Ignition Coil > Removal and Replacement > Removal and Installation.
- Rocker cover. Refer to See: Valve Cover > Removal and Replacement > Removal and Installation.
- Front cover, timing chain, and balancer unit. Refer to See: Timing Chain > Removal and Replacement.
- Cylinder head. Refer to See: Cylinder Head Assembly > Removal and Replacement.
5. Remove the knock sensor.
CAUTION:
Carefully handle the sensor and do not drop the sensor.
6. Remove crankshaft position sensor (POS).
CAUTION:
- Avoid impacts such as a dropping.
- Do not disassemble.
- Keep it away from metal particles.
- Do not place sensor close to magnetic materials.
ImageOpen In New TabZoom/Print
7. Remove the flywheel (M/T models) or drive plate (CVT models).
Hold the crankshaft with a stopper plate and use a suitable tool to remove the bolts.
CAUTION:
- Be careful not to damage the flywheel contact surface for the clutch disc.
NOTE:
- The flywheel two-block construction allows movement in response to transmission side pressure, or when twisted in its rotational direction, therefore, some amount of noise is normal.
ImageOpen In New TabZoom/Print
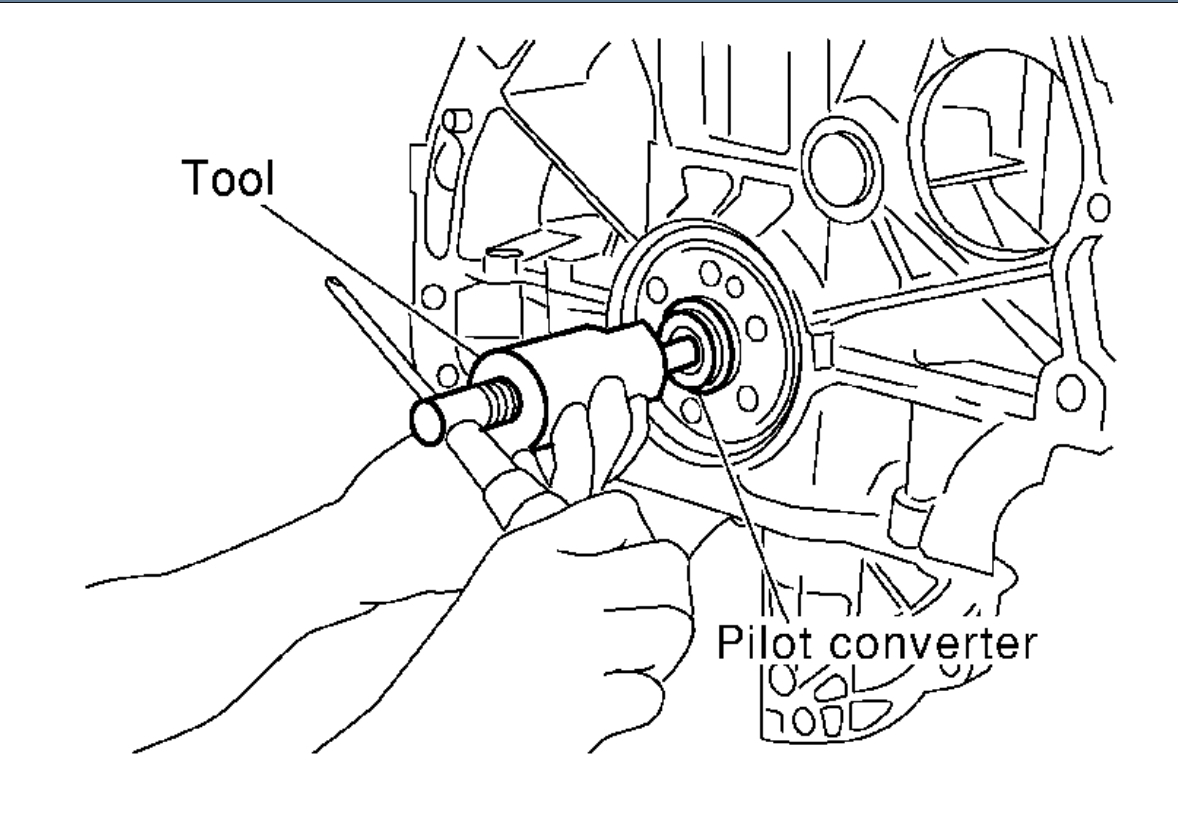
8. Remove pilot converter using Tool (CVT models).
Tool Number : ST16610001 (J-23907)
imageOpen In New TabZoom/Print
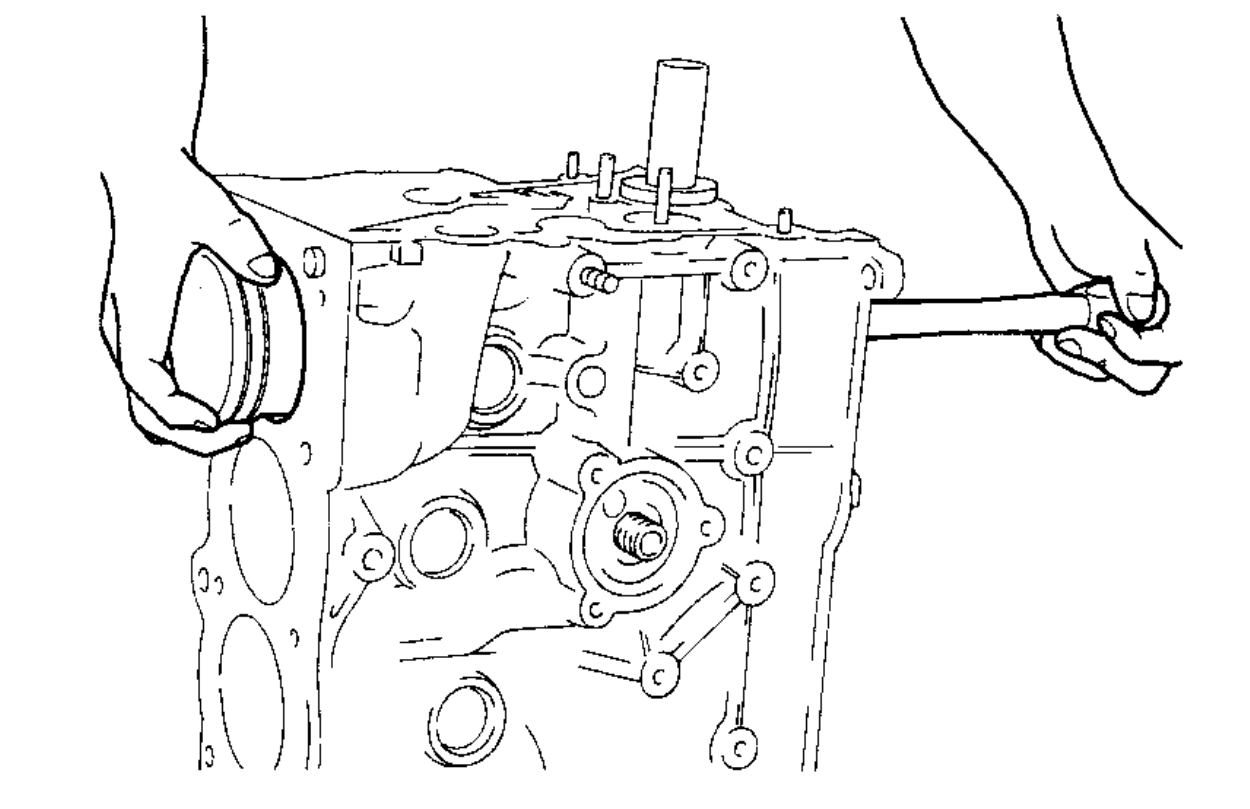
9. Remove the piston and connecting rod assemblies.
A. Position the crankshaft and corresponding connecting rod, to be removed, to the bottom dead center stroke.
B. Remove the connecting rod cap. Number the cap so it can be assembled in the same position.
C. Using a hammer handle or similar tool, push the piston and connecting rod assembly out of the top of the cylinder block. Number the piston and rod so it can be assembled in the same position.
- Before removing the piston and connecting rod assembly, check the connecting rod side clearance. Refer to See: Cylinder Block Assembly > Overhaul > Inspection.
10. Remove the connecting rod bearings. If reusing, number them so they can be assembled in the same position and direction.
CAUTION:
- When removing them, note the installation position. Keep them in the correct order.
ImageOpen In New TabZoom/Print
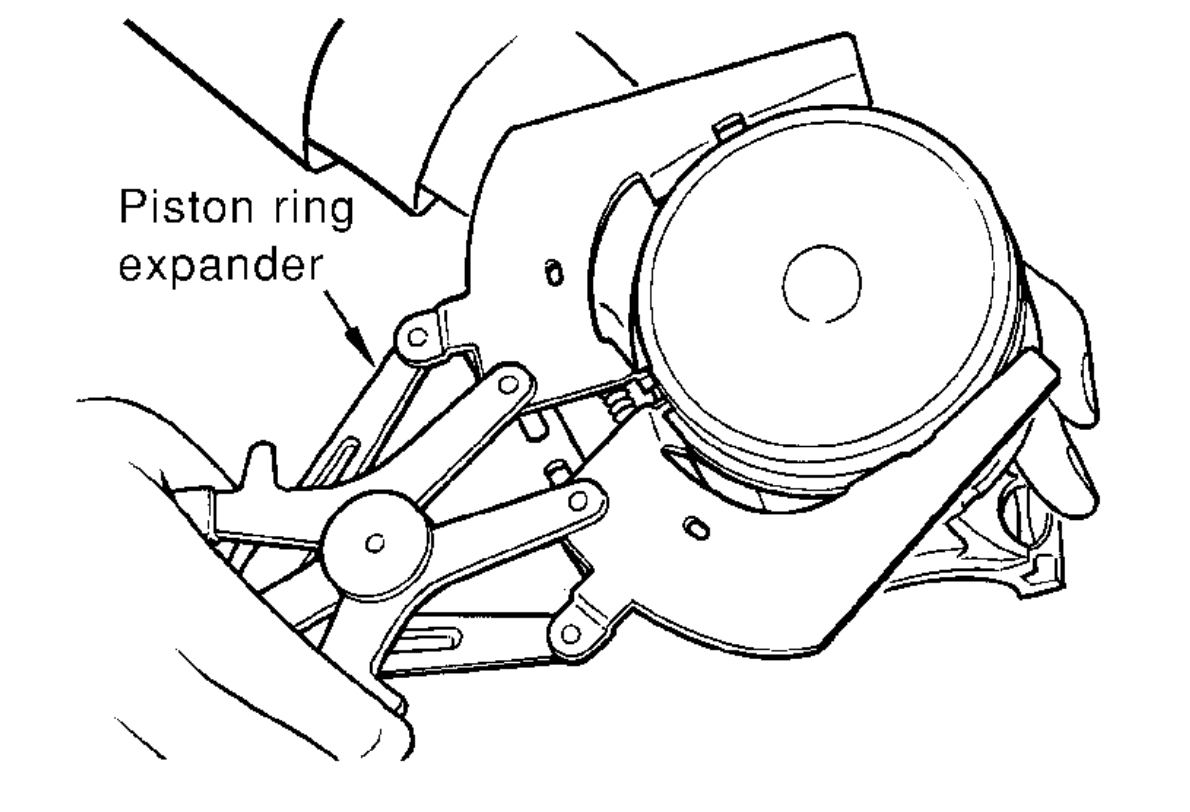
11. Remove the piston rings from the piston.
- Use a piston ring expander.
- Before removing the piston rings, check the piston ring side clearance. Refer to See: Cylinder Block Assembly > Overhaul > Inspection.
CAUTION:
- When removing the piston rings, be careful not to damage the piston.
- Be careful not to damage piston rings by expanding them excessively, if reusing them.
ImageOpen In New TabZoom/Print
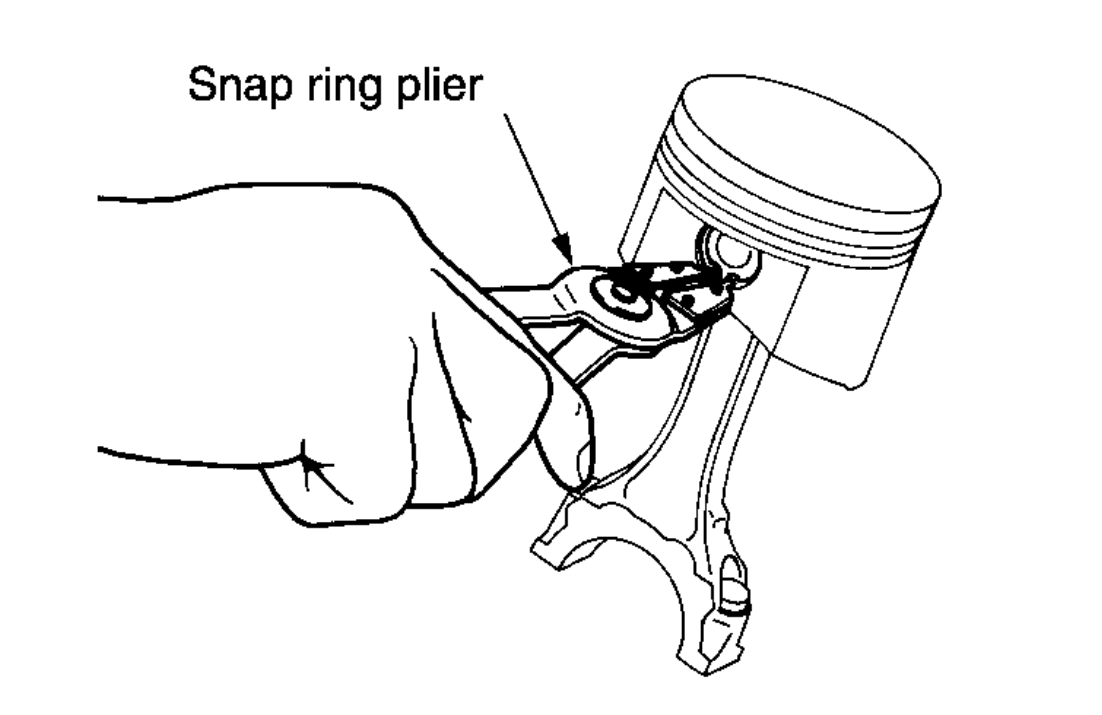
12. Remove the piston from the connecting rod as follows.
A. Using a snap ring pliers, remove the two snap rings.
ImageOpen In New TabZoom/Print
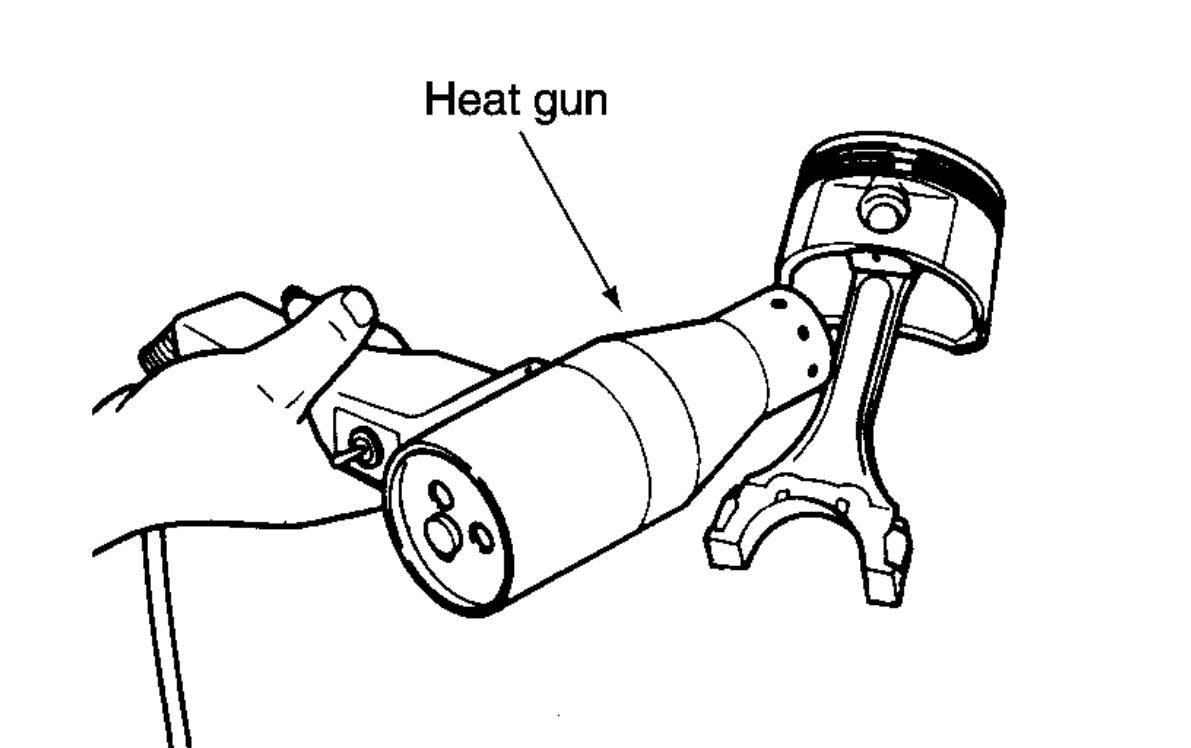
b. Heat the piston to 60 - 70 C (140 - 158 F) with a heat gun, or equivalent.
ImageOpen In New TabZoom/Print
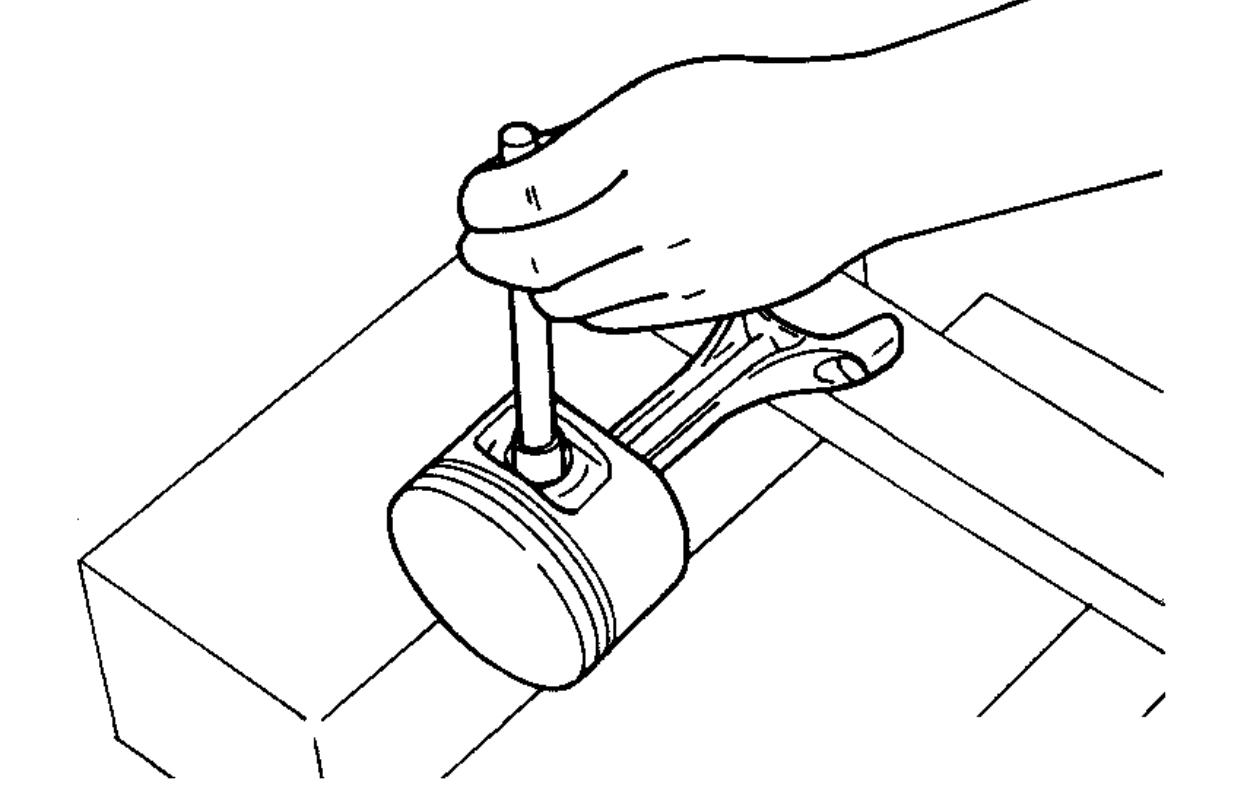
c. Push out piston pin with a punch of an outer diameter of approximately 19 mm (0.75 in).
Images (Click to make bigger)
Friday, March 19th, 2021 AT 2:15 AM